
Eat-In Kitchen Ideas: 12 Cozy Layouts You’ll Absolutely Adore
An eat-in kitchen combines cooking and dining in a single room by dedicating part of the floor plan to a table, bench, banquette, or island with seating. The arrangement eliminates the walk between kitchen and dining room, keeps the cook connected to family and guests during meals, and frees the formal dining room for other uses or allows homes without a separate dining room to serve meals comfortably.
Fitting a dining area into a working kitchen requires balancing counter space, appliance clearance, and traffic flow with enough room for chairs, benches, or stools. A 10-by-12-foot kitchen can accommodate a 36-by-48-inch table for four when the table sits against a wall or in a corner nook, while a 12-by-14-foot kitchen supports a centered 48-by-60-inch table with chairs on all sides.
Browse The Designers Company for more kitchen layout, lighting, and design ideas that pair eat-in dining solutions with cabinet, countertop, and flooring selections.
1. Wall-Mounted Folding Table

A wall-mounted drop-leaf table folds flat against the wall when not in use and drops open to create a 24-by-36-inch or 30-by-48-inch dining surface for two to four people. Prepac’s Wall Mounted Floating Desk and IKEA’s NORBERG and NORBO models both serve as eat-in kitchen tables that occupy zero floor space when folded. Mount the table at standard dining height (30 inches above the floor) on a wall stud or with heavy-duty wall anchors rated for the table’s load capacity.
A folding table suits kitchens under 80 square feet where a permanent table blocks the cooking workflow. Fold the table down for meals, fold it up for cooking, and reclaim the floor for standing, cleaning, or moving between the refrigerator and the stove. Pair the table with two stackable chairs from CB2’s Lucinda collection or IKEA’s TEODORES line that store in a closet or hang on wall hooks when the table is folded.
Mount a floating shelf 12 inches above the folded table position to hold napkins, salt and pepper, and a small plant, turning the folded table wall into a decorative vignette rather than a blank panel. The shelf doubles as a serving ledge when the table drops open, keeping condiments within reach during meals.
2. Compact Bistro Table
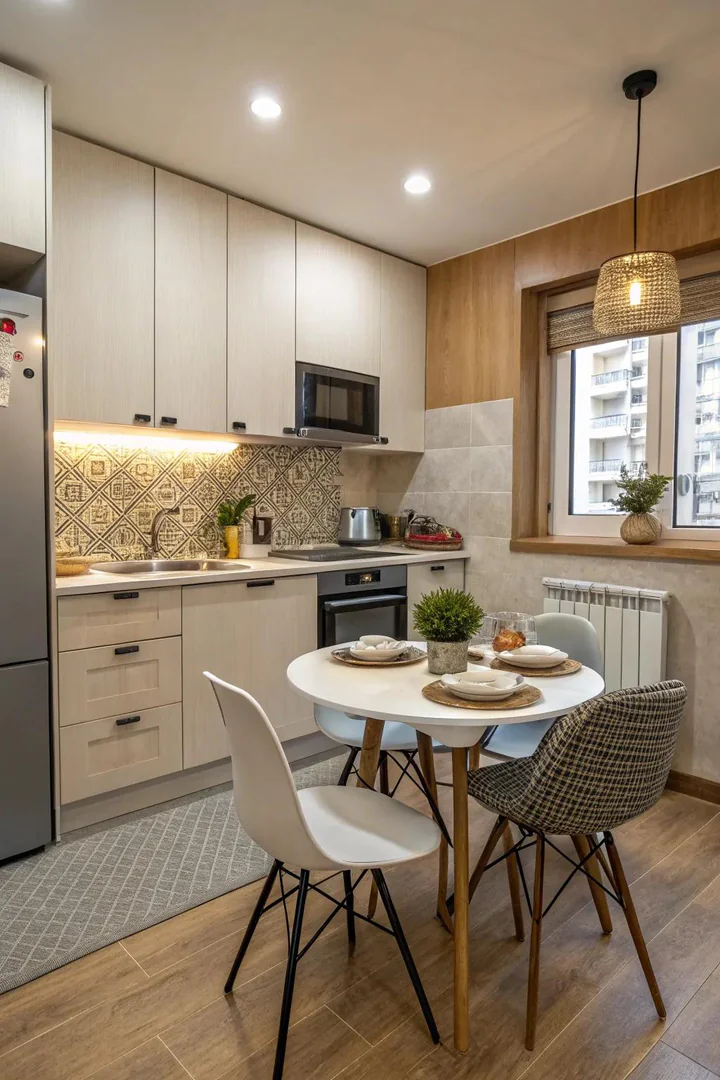
A 30-inch round bistro table and two café chairs fit into a 3-by-3-foot floor area beside the end of a counter run or against a window wall. Marble-top bistro tables from West Elm, World Market, and Restoration Hardware bring Parisian café style to a compact kitchen, while butcher-block-top versions from Pottery Barn suit farmhouse and cottage aesthetics.
Round tables work better than square or rectangular tables in tight eat-in kitchens because the curved edge eliminates sharp corners that catch hips and elbows in narrow walkways. A pedestal base, rather than four legs, allows chairs to tuck fully under the table when not in use, further reducing the footprint. Choose chairs with a seat height of 18 inches to match the 30-inch table height, and select armless styles that slide completely beneath the tabletop.
Position the bistro table near the kitchen’s natural light source, a window or a glass door, so the small dining area feels open and bright. A pendant light hung 30 inches above the table surface defines the eating zone and separates it visually from the adjacent cooking area without a physical divider.
3. Open-Concept Kitchen-Dining Flow
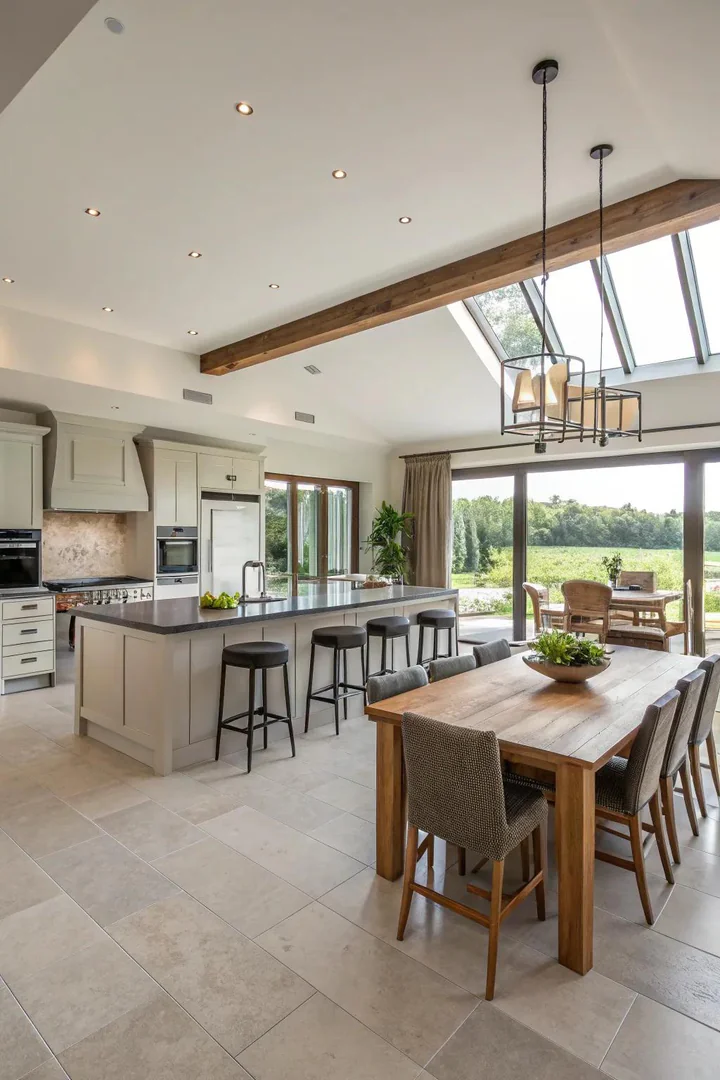
An open floor plan that merges the kitchen, dining area, and living room into a single continuous space creates the largest possible eat-in kitchen by removing the wall between the cooking zone and the dining zone. The kitchen island or peninsula serves as the visual divider between cooking and eating, with bar stools on the dining side and the sink or cooktop on the kitchen side.
A 10-foot-long island with a 12-inch countertop overhang seats four 26-inch counter-height stools along the dining side. Place the dining table beyond the island, 36 inches from the stool backs, to create two separate eating options: casual bar-stool meals at the island and sit-down dinners at the table. The layered seating arrangement handles everything from a solo breakfast to a dinner party for eight.
Open-concept kitchens need a consistent flooring material, a shared color palette, and coordinated lighting fixtures across the cooking and dining zones to read as one unified room. Run the same luxury vinyl plank or hardwood floor from the kitchen through the dining area, and repeat the pendant light style above both the island and the table to tie the zones together visually.
4. Statement Pendant Lighting
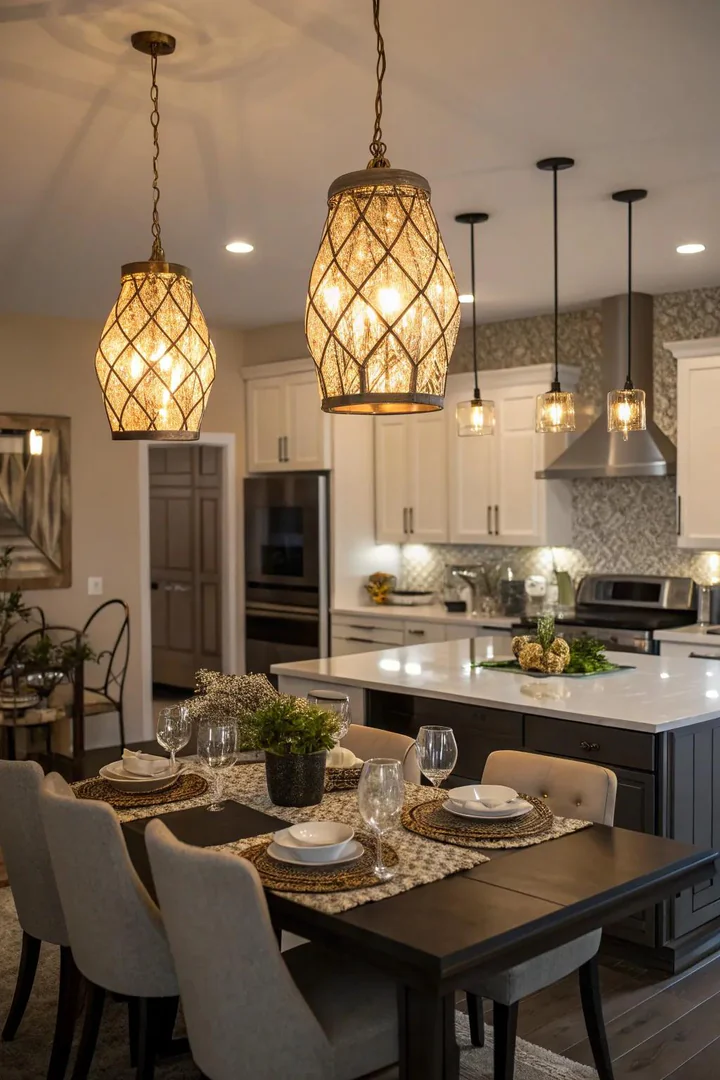
A pendant light centered above the eat-in table marks the dining zone as a distinct space within the kitchen and provides the focused downlight needed for comfortable eating. A single oversized pendant, 18 to 24 inches in diameter, suits tables up to 48 inches wide, while a pair of smaller pendants spaced 24 inches apart works above longer rectangular tables or islands.
Hang the pendant 30 to 36 inches above the table surface so the light pool covers the entire tabletop without glare in the diners’ eyes. A woven rattan drum shade from IKEA’s SINNERLIG line, a handblown glass globe from West Elm, or a spun-metal dome from Rejuvenation each deliver a different design personality while performing the same task: anchoring the dining zone with a warm, focused pool of light.
Connect the pendant to a dimmer switch so the light level drops from bright task lighting during meal prep to a soft ambient glow during dinner. Lutron’s Caseta wireless dimmer installs in 15 minutes and controls the pendant from a wall switch, a handheld remote, or a smartphone app, giving the eat-in kitchen adjustable mood lighting without rewiring.
5. Color-Accented Dining Zone
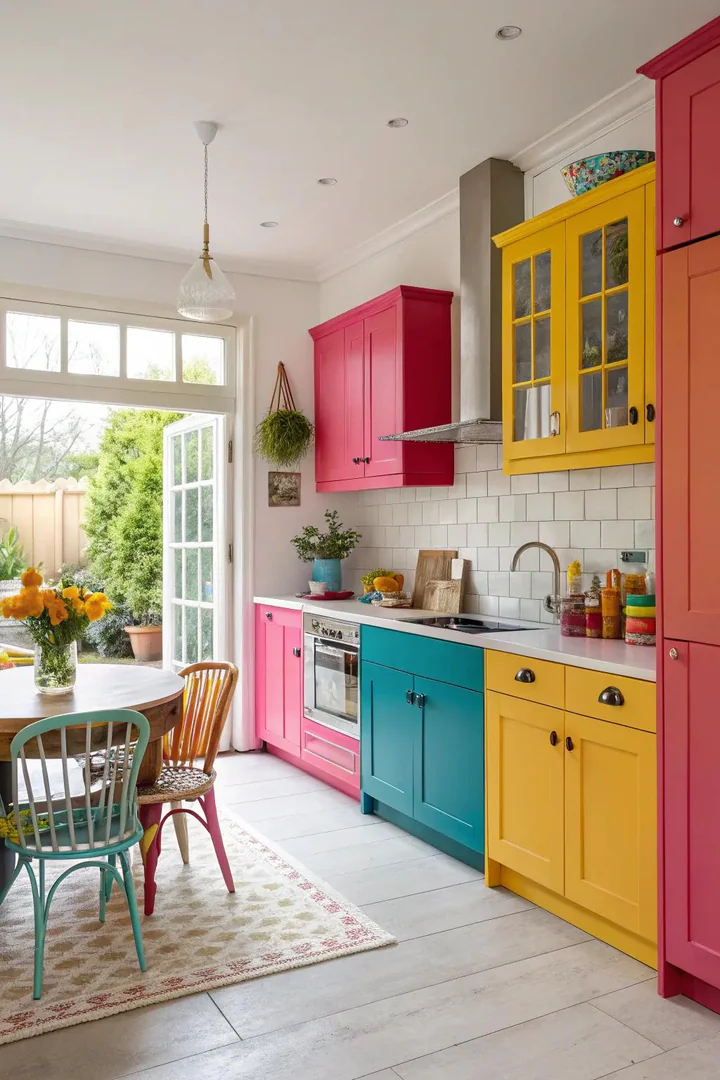
Painting the dining chairs, the nook wall, or the table legs in a bold accent color separates the eating area from the neutral-toned cooking zone without a physical wall or partition. A set of four wooden Windsor chairs painted in Benjamin Moore’s Caliente (AF-290), Farrow and Ball’s Stiffkey Blue (No. 281), or Sherwin-Williams’ Tricorn Black (SW 6258) pops against white or light gray kitchen cabinetry and announces the dining zone on sight.
Limit the accent color to one or two elements: colored chairs with a neutral table, or a painted accent wall behind a natural-wood bench. Spreading the bold color across too many surfaces dilutes the contrast and makes the eat-in area blend back into the kitchen rather than standing apart. Pull the accent color into one small kitchen element, a tea kettle, a set of canisters, or a runner on the counter, to create a color thread that connects the two zones.
Patterned seat cushions in a fabric that incorporates the accent color tie the chairs to the broader kitchen palette. Washable cushion covers from Etsy sellers and Target’s Threshold line handle the spills and crumbs that eat-in kitchen seating collects more than formal dining chairs.
6. Eclectic Mixed Seating
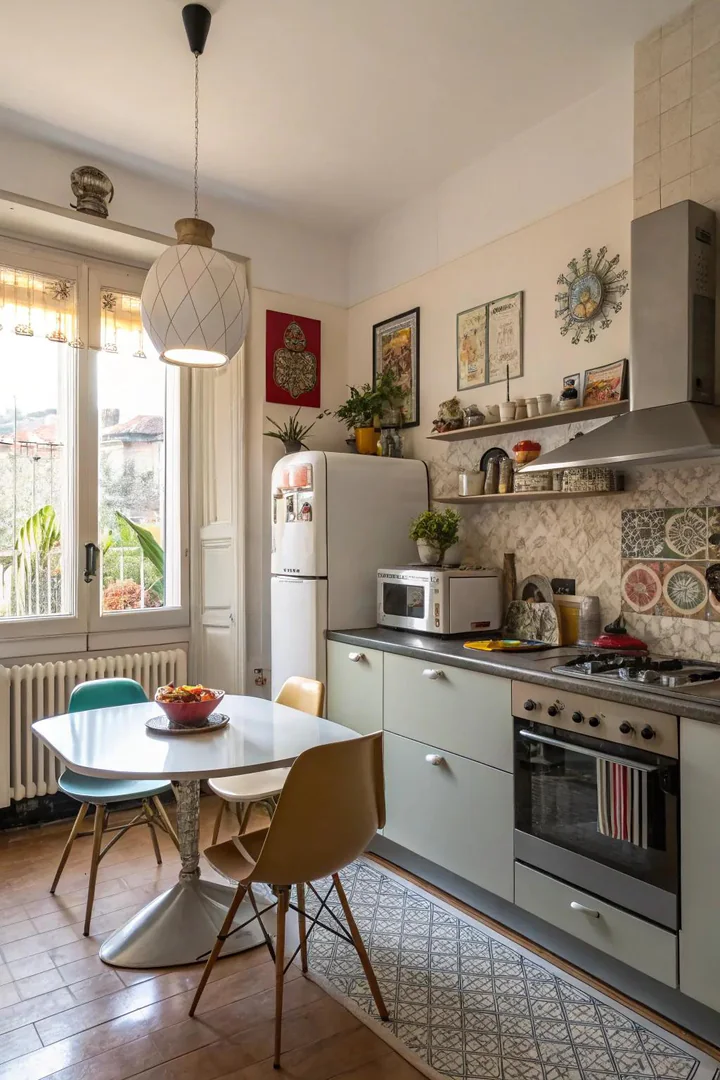
Mixing two or three different chair styles around the same table creates a collected, lived-in look that suits eclectic, bohemian, and vintage-inspired kitchens. Pair a wooden Windsor chair with a bent-wire Bertoia side chair and a painted Tolix metal stool, then unify the group by keeping all seats within 1 inch of the same seat height (17 to 18 inches for a standard 30-inch table).
Thrift stores, estate sales, and Facebook Marketplace supply individual vintage chairs for $10 to $40 each, making a mismatched set far cheaper than buying four matching dining chairs at retail. Sand and repaint found chairs in a shared accent color to create a set that looks intentionally curated rather than randomly assembled. A consistent seat-cushion fabric across all chairs also ties the eclectic group into a family.
Mixed seating works at round tables and oval tables better than at rectangular tables because the continuous curve distributes different chair shapes evenly around the perimeter. At a rectangular table, place the two most similar chairs on the long sides facing each other and the two most distinctive chairs at the heads for visual balance.
7. Gallery Wall Above the Table
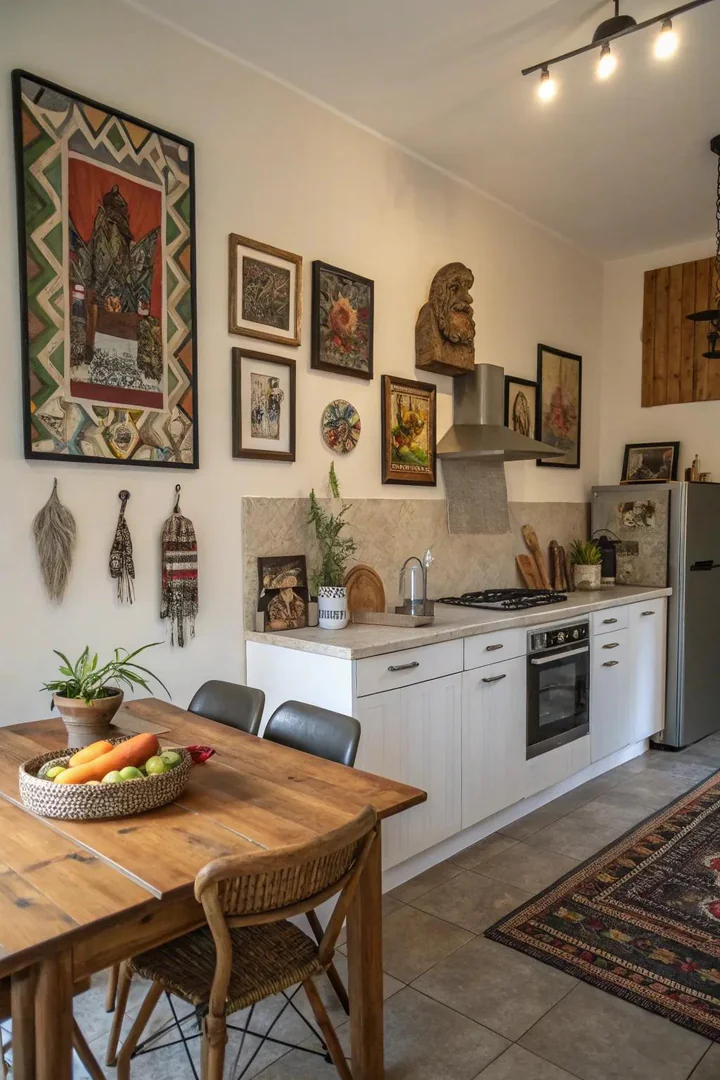
A gallery wall of framed prints, photographs, or small canvases on the wall directly behind the eat-in table transforms a blank kitchen wall into a focal point that gives the dining zone its own identity. Hang the lowest frame 6 to 8 inches above the top of the chair backs or banquette cushions to prevent heads from bumping the frames during meals.
Food photography prints, vintage recipe cards, botanical illustrations, and typographic kitchen quotes from Minted, Juniper Print Shop, and Society6 all suit eat-in kitchen walls. Keep the frame finish consistent, all black, all natural oak, or all brass, to unify the collection regardless of the print styles. A 3-by-3 grid of 8-by-10-inch frames creates a structured gallery, while a salon-style cluster of mixed sizes reads as more casual and collected.
Battery-operated LED picture lights from Cocoweb or plug-in art lights from IKEA’s TIVED line add warm directional light to the gallery wall and double as ambient dining-zone lighting. The art light draws the eye toward the wall display and away from the adjacent cooking clutter, reinforcing the sense that the eat-in area is a separate, finished space within the working kitchen.
8. Layered Rugs and Seat Cushions
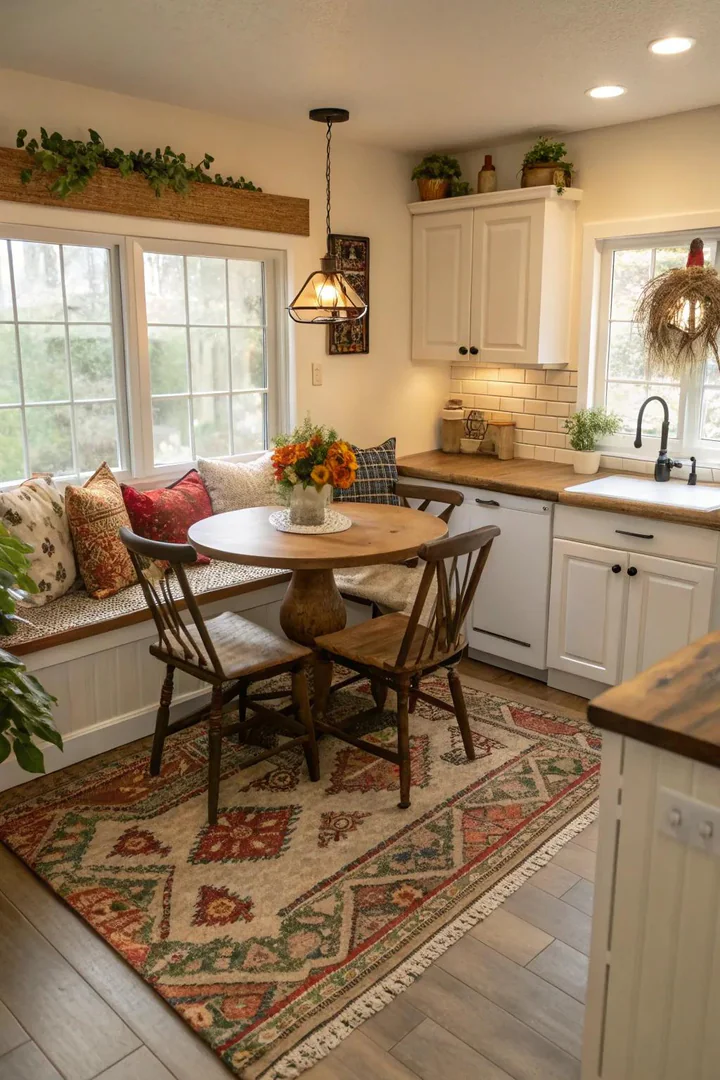
Placing a flat-weave or low-pile area rug under the eat-in table defines the dining zone on the floor plane and adds warmth underfoot that bare tile or hardwood lacks. Choose a rug large enough for all chair legs to remain on the rug when pulled out for sitting, typically a 5-by-7-foot or 6-by-9-foot rug for a 4-seat table. Ruggable and Dash and Albert both offer machine-washable flat-weave rugs designed for kitchen and dining use that handle food spills and foot traffic without staining.
Seat cushions on wooden or metal chairs add comfort for longer meals and introduce pattern, color, or texture that hard-surface chairs lack. Tie-on cushions with a 2-inch foam core from Pier 1, Target’s Threshold collection, or custom cushions from Etsy sellers stay in place during meals and remove for washing. Match the cushion fabric to the rug’s dominant color for a coordinated dining zone that reads as designed rather than afterthought.
Avoid high-pile shag rugs and light-colored natural fiber rugs like jute or sisal under an eat-in table, as crumbs embed in the deep pile and liquid spills stain natural fibers permanently. A flat-weave cotton or polypropylene rug in a medium-tone pattern hides minor spills between cleanings and vacuums easily with a standard upright vacuum.
9. Island Bar Seating
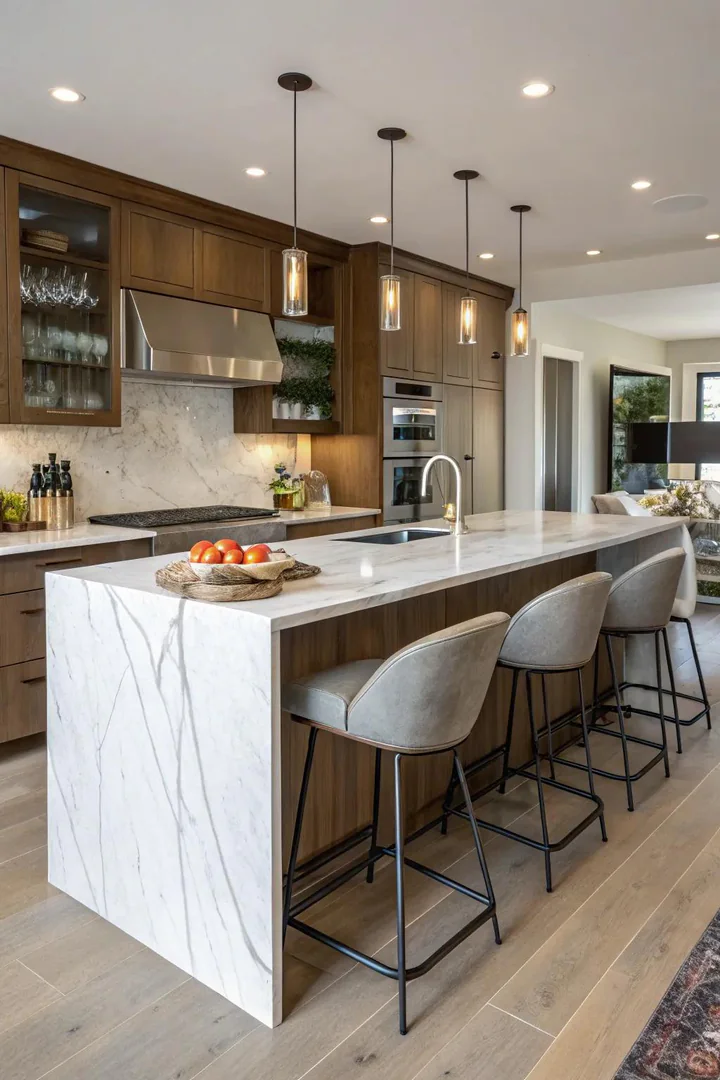
Adding a 12-to-15-inch countertop overhang to one side of the kitchen island creates a bar-height or counter-height eating ledge that seats two to four people without a separate table. Counter-height stools (24 inches for a 36-inch counter) or bar-height stools (30 inches for a 42-inch raised bar) tuck under the overhang when not in use, keeping the floor clear for cooking workflow.
A waterfall-edge island, where the countertop material continues down the side panel to the floor, creates a clean, uninterrupted surface that serves as both the eating bar and the island’s finished end. Quartz materials like Caesarstone’s Statuario Nuvo and Cambria’s Brittanicca deliver the dramatic veining of marble in a non-porous surface that resists the coffee rings and breakfast-plate scratches an eat-in counter collects daily.
Homeowners planning a basement kitchen build-out can use island bar seating as the primary eat-in solution when floor space is too limited for a freestanding table. Three stools at a 6-foot island provide casual dining for a family of three without dedicating a separate corner of the basement to a table and chairs.
10. Mix-and-Match Table and Bench
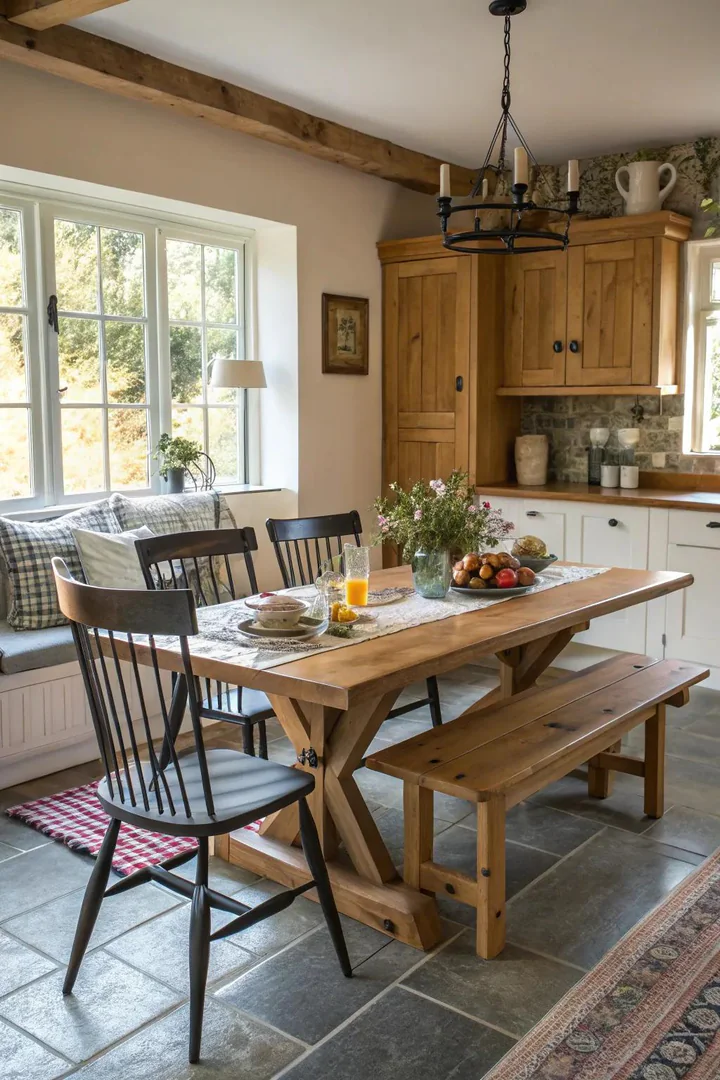
Pairing a bench on one side of the table with individual chairs on the other combines the space efficiency of bench seating with the comfort and formality of backed chairs. A 48-inch wooden bench seats two adults or three children in the footprint that two chairs would occupy, and the bench slides completely under the table when not in use, freeing the floor for kitchen traffic.
Farmhouse-style benches from Pottery Barn’s Benchwright collection, West Elm’s Emmerson line, and IKEA’s SKOGSTA series match their respective table collections for a coordinated look. A bench in the same wood species and finish as the table creates a matched set, while a bench in a contrasting material, a metal Tolix bench or a reclaimed-pine plank bench beside a white-painted table, adds visual interest and an eclectic collected feel.
Push the bench side against the wall in a narrow kitchen so diners slide onto the bench from the ends rather than pulling chairs outward into the walkway. The wall-backed bench requires zero clearance behind it, saving 18 to 24 inches of floor space compared to chairs on both sides of the table.
11. Corner Banquette Nook
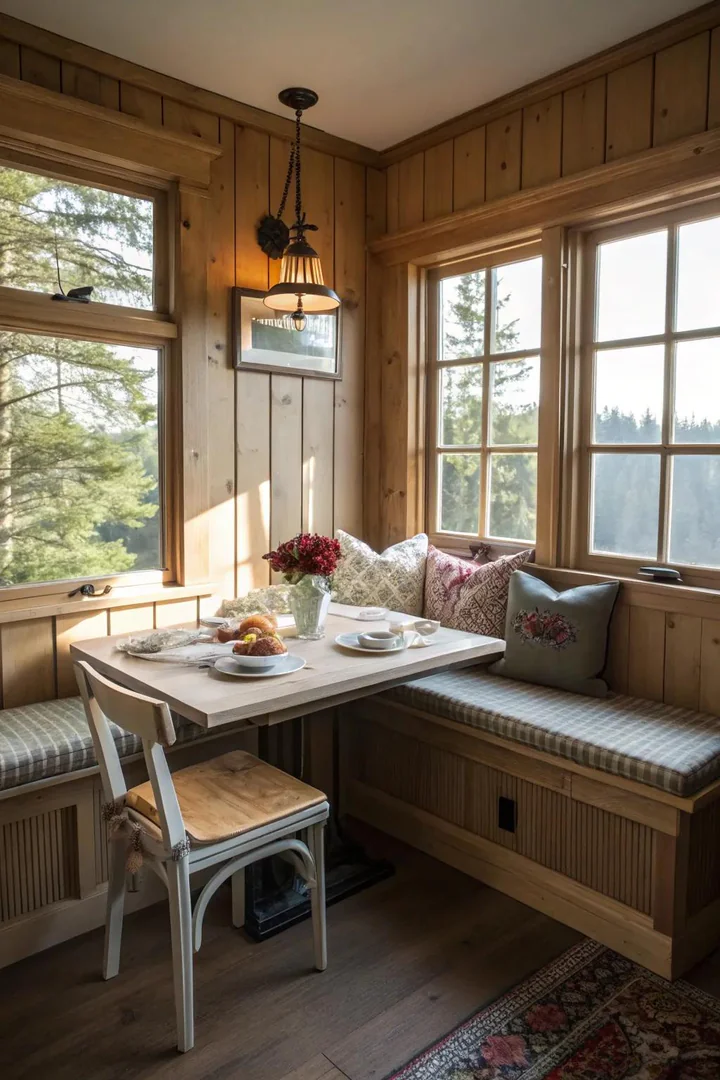
A built-in L-shaped banquette in the corner of the kitchen provides fixed seating for four to six people in a footprint that a table-and-chairs arrangement would need twice the space to match. Build the banquette frame from 3/4-inch plywood, 18 inches deep and 18 inches high, with a hinged seat lid that opens to reveal storage compartments for table linens, board games, and kitchen overflow items.
Top the plywood bench with a 3-to-4-inch-thick foam cushion wrapped in a durable, stain-resistant fabric. Sunbrella’s indoor-outdoor canvas, Crypton’s performance upholstery, and Revolution Performance Fabrics all resist food stains, liquid spills, and daily abrasion while cleaning with a damp cloth and mild soap. Choose a fabric color that contrasts the wall behind the banquette to make the seating zone stand out as a distinct area within the kitchen.
Pair the banquette with a pedestal table that slides into the L-shaped corner without table legs blocking knee room. A round 42-inch pedestal table seats four at the banquette (two on each arm of the L) with room for one or two additional chairs on the open side. Homeowners designing a kitchen wall sconce arrangement can mount a pair of sconces on the wall above the banquette to provide warm, dedicated dining light without a pendant that might hang too low in a tight corner.
12. Light-Filled Window Dining
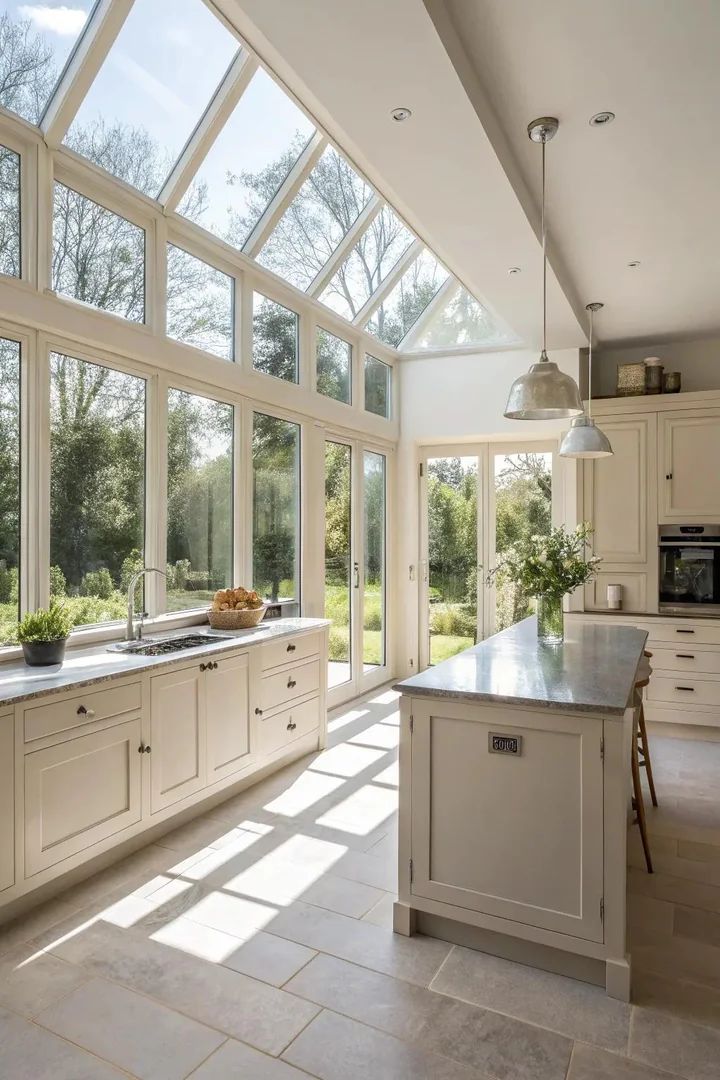
Positioning the eat-in table directly beside the kitchen’s largest window puts the dining zone in the brightest natural light the room offers. Morning light from an east-facing window warms the breakfast table, while afternoon light from a west-facing window extends the usable daylight for late lunch and early dinner. The window view, whether a garden, a street, or a tree canopy, gives diners something to look at beyond the kitchen countertops and appliances.
A narrow 24-by-48-inch table placed parallel to the window wall serves two people side by side or four people with chairs at the short ends. White or light-toned furniture reflects the incoming light rather than absorbing it, and sheer linen curtains from Pottery Barn or IKEA’s LILL panels filter harsh midday glare without blocking the view or darkening the room.
Add a window sill herb garden in matching terra-cotta pots, basil, rosemary, mint, and thyme, to connect the dining zone to the cooking zone and provide fresh herbs within arm’s reach of both the table and the stove. Readers exploring housewarming gift ideas for the kitchen often pair a window-side herb planter with a small cutting board and a chef’s knife as a practical gift set for new homeowners setting up their first eat-in kitchen.
How to Design an Eat-In Kitchen Layout
1. Measure the Available Floor Space
Measure the kitchen’s total floor area, then subtract the space occupied by base cabinets (24 inches deep), open appliance doors (refrigerator doors swing 24 to 30 inches, oven doors drop 20 inches), and a 36-inch-wide walking path between the cooking zone and the dining area. The remaining space determines whether the eat-in solution is a full table, a compact bistro set, a banquette nook, or island bar stools. A 4-by-6-foot open area fits a 36-by-48-inch table for four. A 3-by-3-foot area fits a 30-inch bistro table for two.
2. Choose the Seating Format
Match the seating type to the room’s dimensions and the household’s daily eating pattern. Island bar stools suit quick breakfasts and casual meals where diners face the cook. A banquette nook works for families who eat together daily and need built-in storage. A freestanding table with chairs provides the most flexible arrangement for dinner parties and homework sessions. A wall-mounted folding table suits the smallest kitchens where permanent dining furniture blocks the workflow.
3. Select Furniture That Fits the Scale
Choose table and chair dimensions that leave at least 36 inches between the table edge and the nearest counter, appliance, or wall. Each seated diner needs 24 inches of table width. A table for four needs a minimum surface of 36 by 48 inches. Round tables save corner space and fit more chairs per square foot. Pedestal bases allow chairs to tuck fully under the table when not in use.
4. Add Dedicated Dining-Zone Lighting
Hang a pendant light or install a flush-mount fixture centered above the table to visually define the dining area within the kitchen. A pendant at 30 to 36 inches above the table provides focused eating light without competing with the kitchen’s recessed cans or under-cabinet strips. Connect the pendant to its own switch, and ideally a dimmer, so the dining zone operates independently of the cooking zone’s lighting circuit.
Eat-In Kitchen Seating Comparison
| Seating Type | Min. Floor Space | Seats | Storage | Cost Range | Best For |
|---|---|---|---|---|---|
| Wall-Mounted Folding Table | 0 sq ft (folds flat) | 2 – 4 | None | $50 – $200 | Tiny kitchens, studios |
| Bistro Table + 2 Chairs | 9 sq ft | 2 | None | $150 – $500 | Small kitchens, couples |
| Banquette Nook | 16 – 24 sq ft | 4 – 6 | Under-seat bins | $500 – $2,500 (built-in) | Families, daily dining |
| Island Bar Stools | 0 (uses island) | 2 – 4 | Island cabinets | $100 – $300 per stool | Open-concept, casual meals |
| Freestanding Table + Chairs | 24 – 35 sq ft | 4 – 6 | None | $300 – $1,500 | Medium-large kitchens |
| Bench + Table Combo | 18 – 28 sq ft | 4 – 6 | Optional bench storage | $250 – $1,000 | Narrow kitchens, families |
Frequently Asked Questions
What is the minimum kitchen size for an eat-in area?
A kitchen as small as 8 by 8 feet (64 square feet) can include an eat-in solution when a wall-mounted folding table or a 30-inch bistro table replaces a traditional dining set. A banquette nook needs at least 4 by 6 feet of dedicated floor space beyond the cooking zone. A full table-and-four-chairs setup requires a kitchen of at least 10 by 12 feet to maintain the 36-inch clearance between the table and the nearest counter or appliance.
How far should the eat-in table be from kitchen counters?
Maintain a minimum of 36 inches between the table edge and the nearest counter face, appliance front, or cabinet door swing. 42 to 48 inches provides a more comfortable clearance that allows a person to walk between the table and the counter while someone else is seated. Kitchens where the table sits against a wall need clearance on only one or two sides rather than all four, freeing more floor space for the cooking zone.
Should eat-in kitchen chairs match the kitchen cabinets?
Matching the chair finish to the cabinet color creates a unified, coordinated look that suits traditional and transitional kitchens. Contrasting the chairs against the cabinets, black metal chairs with white cabinets, or natural wood chairs with painted gray cabinets, adds visual interest and defines the dining zone as its own area. Both approaches work, and the choice depends on whether the homeowner wants the dining area to blend in or stand out.
What lighting works best above an eat-in kitchen table?
A pendant light hung 30 to 36 inches above the table surface delivers the most focused and flattering dining light. Choose a warm-white LED bulb (2700K to 3000K) inside the pendant for a golden glow that flatters food and skin tones. Pair the pendant with a dimmer switch so the light adjusts from bright task lighting for homework and meal prep to a low ambient glow for dinner. A pendant also marks the eating zone visually, helping the eye distinguish the dining area from the adjacent cooking area.
Can I use an island as the only eat-in dining surface?
An island with a 12-to-15-inch countertop overhang and two to four bar stools serves as the sole eat-in dining surface in open-concept kitchens where a separate table would crowd the floor plan. The overhang provides knee clearance for comfortable seated eating, and the stools tuck under the overhang when not in use. For families who want a more formal sit-down dinner, add a small drop-leaf table to a nearby wall as a secondary dining option for occasions when the island bar feels too casual.
Conclusion
An eat-in kitchen keeps cooking and dining in the same room, shortening the distance between stove and table and making weeknight meals, weekend brunches, and casual entertaining easier to manage. The 12 ideas above range from zero-footprint folding tables to full banquette nooks with built-in storage, covering every kitchen size and eating style.
Start by measuring the available floor space, choose the seating format that fits, and hang a pendant light above the eating area to mark the dining zone as a distinct, intentional part of the kitchen. A small rug, a set of seat cushions, or a gallery wall on the adjacent surface completes the dining zone and gives the eat-in area its own personality within the working kitchen.

