
Kitchen Storage Ideas: 25 Clever Solutions to Maximize Your Space
Kitchen storage ideas turn wasted space inside cabinets, on walls, under sinks, and above appliances into organized zones that hold more without expanding the footprint. The average American kitchen contains 30 to 40 linear feet of cabinetry, but the National Kitchen & Bath Association reports that most households leave 30% to 40% of their cabinet volume unused because of poor internal organization. Below are 25 storage upgrades organized by zone (under sink, pantry, drawers, walls, corners, and overflow), followed by a step-by-step pantry organization guide, a comparison table, and FAQs on cost, rental compatibility, and maintenance.
1. Under-Sink Cabinet Organizer with Pull-Out Trays
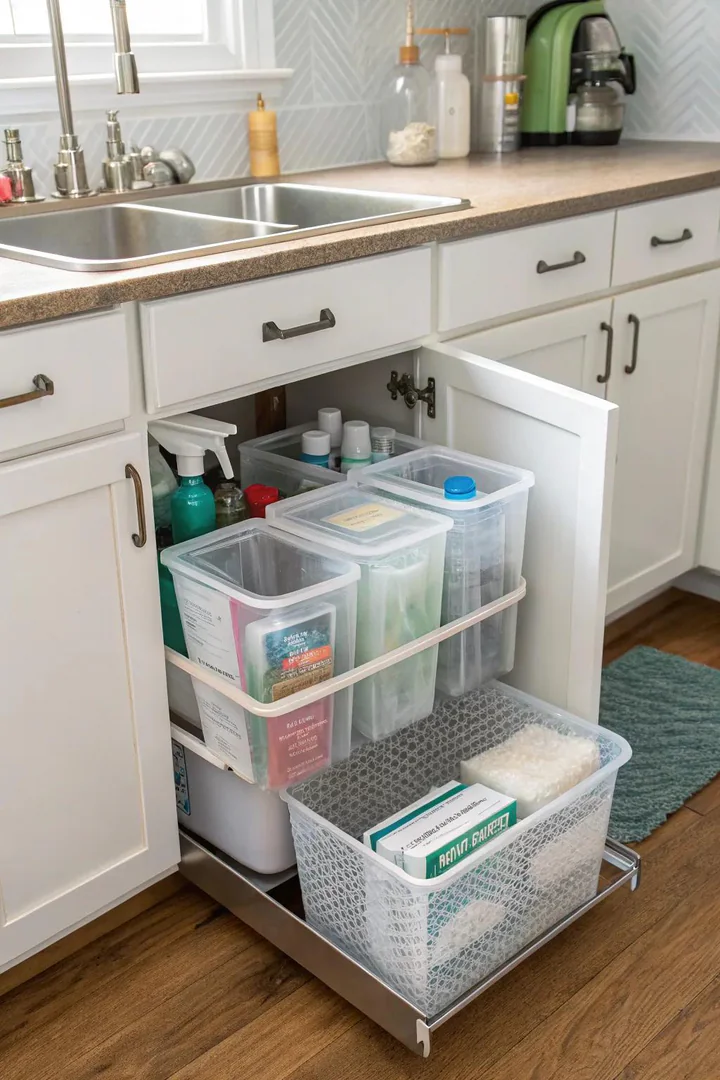
A two-tier expandable under-sink shelf from SimpleHouseware ($20) or Rev-A-Shelf 5786-33CR ($85 for a chrome pull-out unit) transforms the awkward space around the sink drain pipe into usable storage for cleaning supplies, sponges, dish soap, and trash bags. The U-shaped or notched shelf wraps around the pipe and p-trap, reclaiming 4 to 6 inches of vertical space that a standard flat shelf wastes. A pull-out tray version brings items at the back of the cabinet to the front with one motion.
Line the cabinet floor with a waterproof shelf liner or a WeatherTech Under Sink Mat ($40) to protect the particleboard from drips and leaks. Store a small LED motion-sensor light ($8 from Energizer) inside the cabinet to illuminate the dark interior when the door opens. Group cleaning products in a portable caddy that lifts out for cleaning day, keeping sprays and brushes accessible without cluttering the cabinet floor.
2. Pull-Out Pantry Shelves on Full-Extension Slides
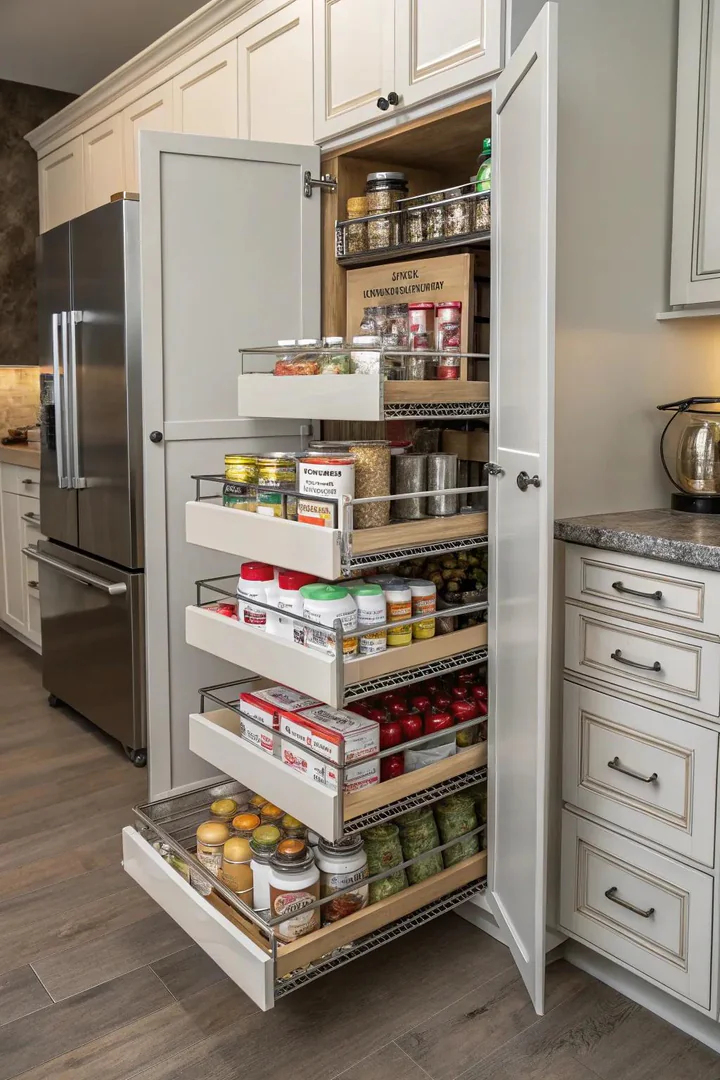
A pull-out pantry shelf kit from Rev-A-Shelf 5373 ($120 for a tall pantry unit) or Slide-A-Shelf SAS-STD-L ($80 per shelf) converts a deep pantry cabinet with fixed shelves into a glide-out system where every item rolls to the front opening. Full-extension ball-bearing slides rated at 100 pounds let a loaded shelf (canned goods, cereal boxes, pasta jars) slide completely out of the cabinet without tipping. Three pull-out shelves in a 24-inch-deep, 84-inch-tall pantry cabinet bring 100% of the pantry contents within arm’s reach.
Measure the cabinet interior before ordering: subtract 1 inch from the total width (1/2 inch per slide) and confirm the depth from the back wall to the inside edge of the face frame. Tall pantry cabinets (80 to 96 inches) with four or five pull-out shelves replace a walk-in pantry’s functionality in a fraction of the floor space. Mount the heaviest items (canned goods, bottles) on the lower shelves to keep the center of gravity low and prevent the upper shelves from tilting when extended.
3. Stackable Wire Shelf Risers for Upper Cabinets
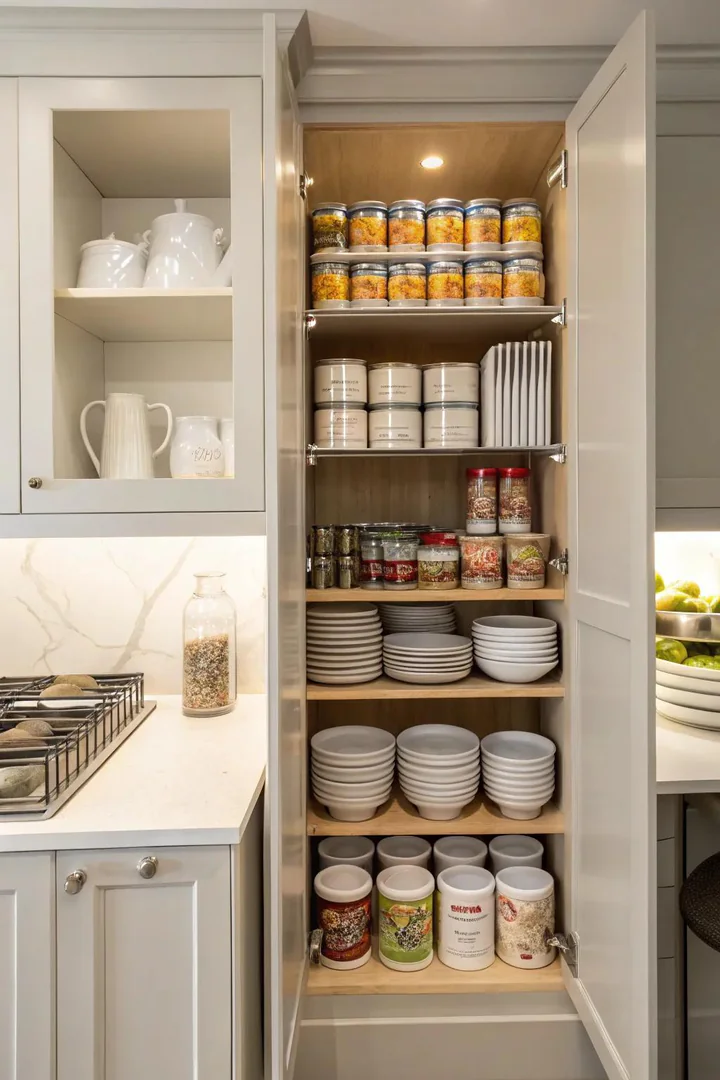
A cabinet shelf riser from SimpleHouseware Stackable ($15 for a 2-pack) or Seville Classics Mesh ($12 each) creates a second tier inside an upper cabinet by lifting a wire platform on four legs above the shelf surface. Short items (mugs, spice jars, small bowls) fit underneath, and taller items (glasses, canned goods) sit on top. A single riser reclaims 6 to 8 inches of dead airspace that upper cabinets waste when shelves are spaced too far apart for the items stored.
Chrome-plated wire risers resist moisture better than powder-coated steel in kitchens with high humidity near the dishwasher or sink. A riser with a solid (not mesh) top shelf surface prevents small items from tipping through the grid. Stack two risers to create three tiers inside a tall upper cabinet with 18-inch shelf spacing. Risers cost less than $10 each and require zero tools, making them the fastest and cheapest per-item storage gain in the kitchen.
4. Open Shelving on the Sink or Range Wall
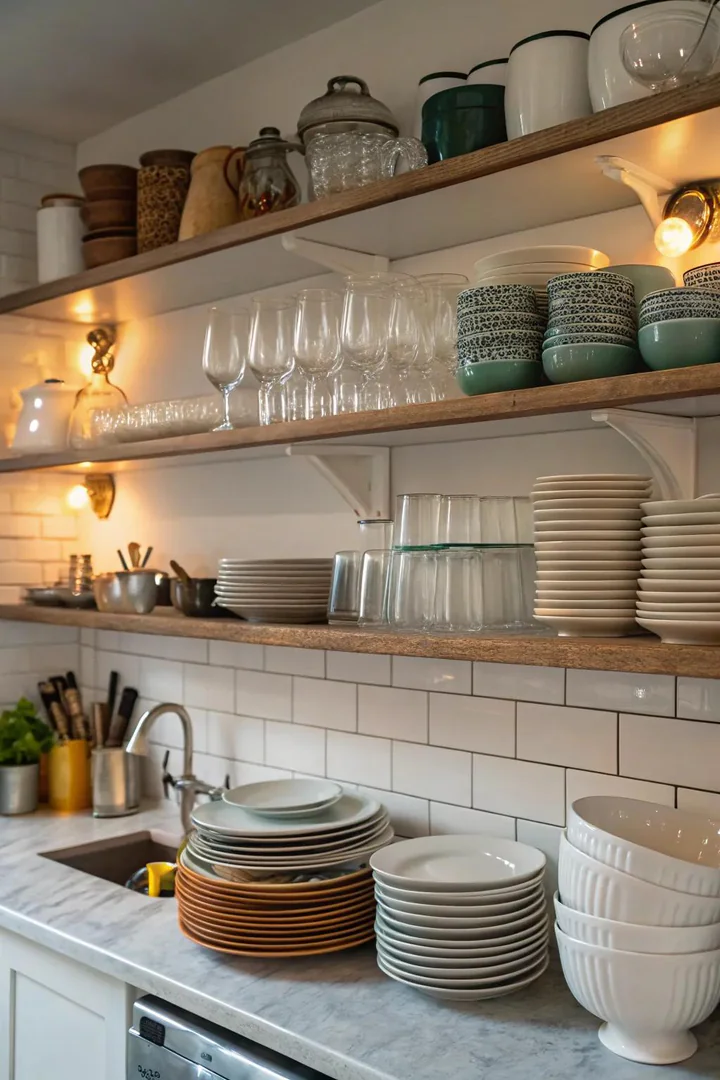
Replacing upper cabinets on one wall with floating wood shelves from IKEA LACK ($15 per 43-inch shelf) or Pottery Barn Benchwright ($149 per 36-inch shelf) trades a closed box for visible, grab-and-go storage. Open shelves hold everyday dishes, drinking glasses, and cookbooks at arm’s reach, freeing closed upper cabinets on adjacent walls for items that benefit from dust protection. A 36-inch floating shelf mounted on French cleats supports 50 to 75 pounds when anchored into wall studs.
Open shelving works for items used daily because exposed items collect kitchen grease and dust within a week if left untouched. Stack plates vertically in a plate rack insert and group glasses by type (wine, water, juice) to maintain visual order. Pair open shelves on one wall with closed cabinets everywhere else to balance accessibility with concealed storage for less attractive items like plastic containers and mismatched lids.
5. Rolling Kitchen Island or Cart
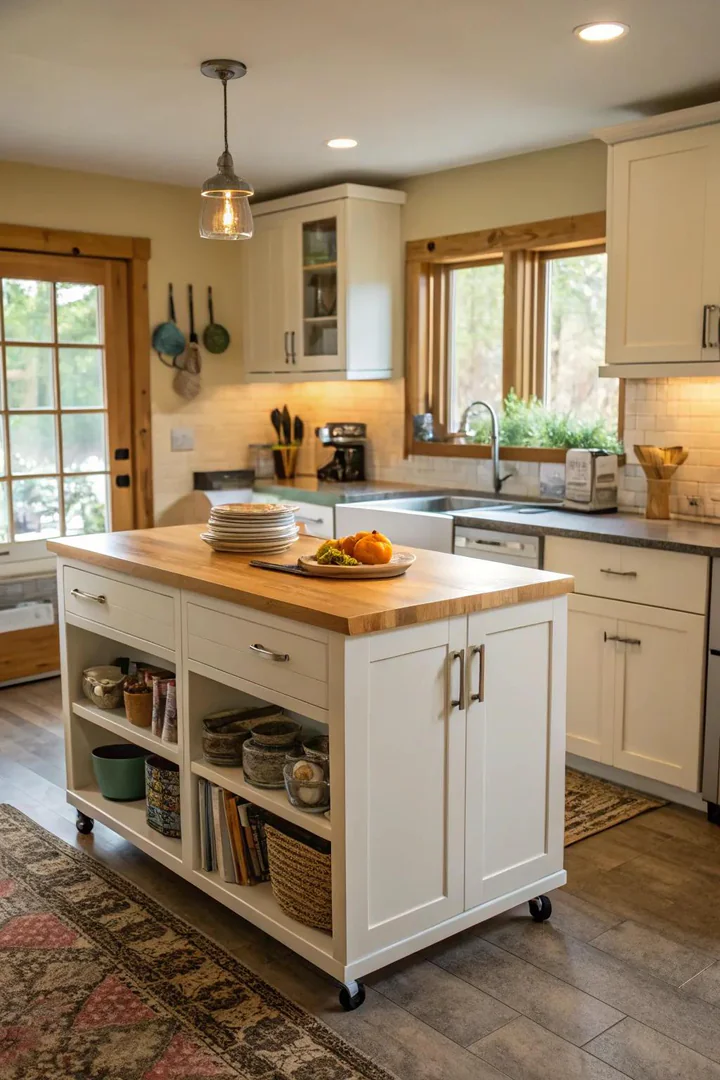
A rolling kitchen island from IKEA STENSTORP ($300) or Chris & Chris Pro Chef ($450) adds a butcher-block work surface, two shelves, a drawer, and a towel rack to a kitchen without permanent construction. Locking casters hold the cart in place during food prep and release for repositioning when the floor plan needs to open up for entertaining. A 36-by-20-inch rolling island fits in kitchens as small as 80 square feet without blocking traffic flow.
A cart with open lower shelves stores large mixing bowls, cast-iron skillets, and bulky small appliances that do not fit in standard cabinets. Hanging S-hooks on the cart’s towel bar adds utensil storage for spatulas, whisks, and tongs directly at the prep station. For small apartments and rental kitchens where permanent islands are not an option, a rolling cart provides the same prep surface, storage, and serving functionality of a built-in island at 10% of the cost.
6. Woven Basket Storage in the Pantry
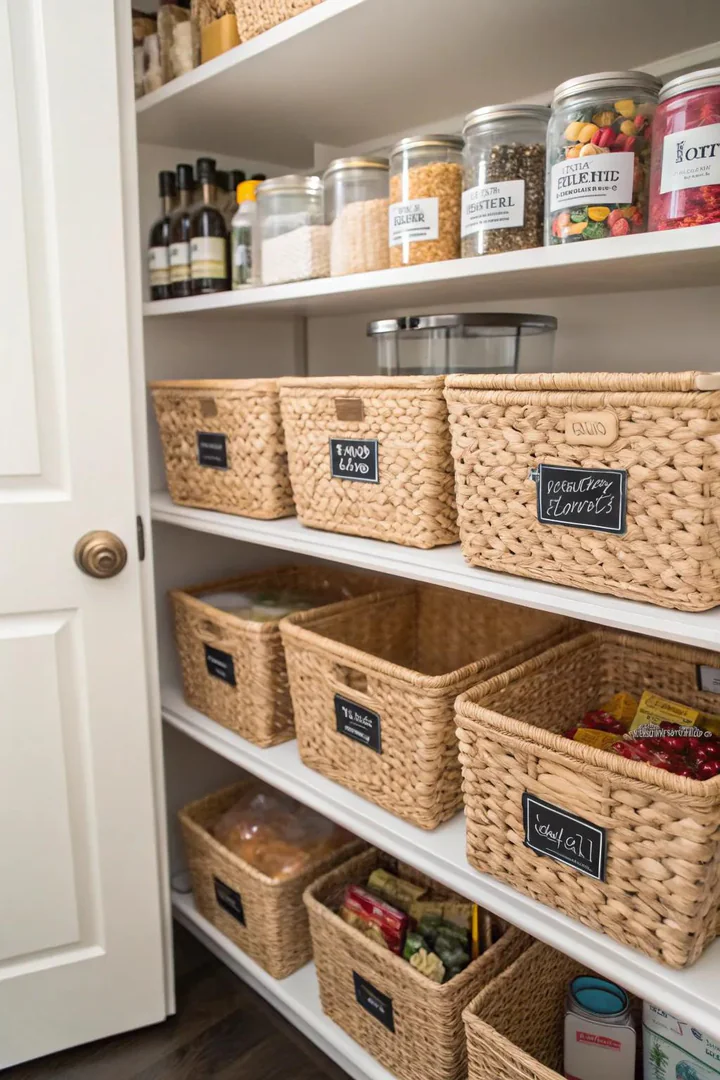
Grouping pantry items in woven seagrass or water hyacinth baskets from Threshold at Target ($12 each) or The Container Store Water Hyacinth bins ($15 each) turns a chaotic pantry shelf into a categorized system where each basket holds one food group: baking supplies, snacks, canned goods, pasta and grains, or breakfast items. Pulling one basket forward brings the entire category to the counter for cooking or meal prep without reaching past unrelated items.
Label each basket with a clip-on chalkboard tag ($6 for a 10-pack) or a printed label from a Brother P-Touch label maker ($30) so every household member returns items to the correct basket. Baskets with built-in handles slide on and off pantry shelves more easily than rigid bins with lip edges. A tall pantry with five shelves holds 10 to 15 labeled baskets, replacing the “everything loose on the shelf” system that leads to expired food, forgotten purchases, and duplicate buying.
7. Ceiling-Mounted Pot Rack Above the Island
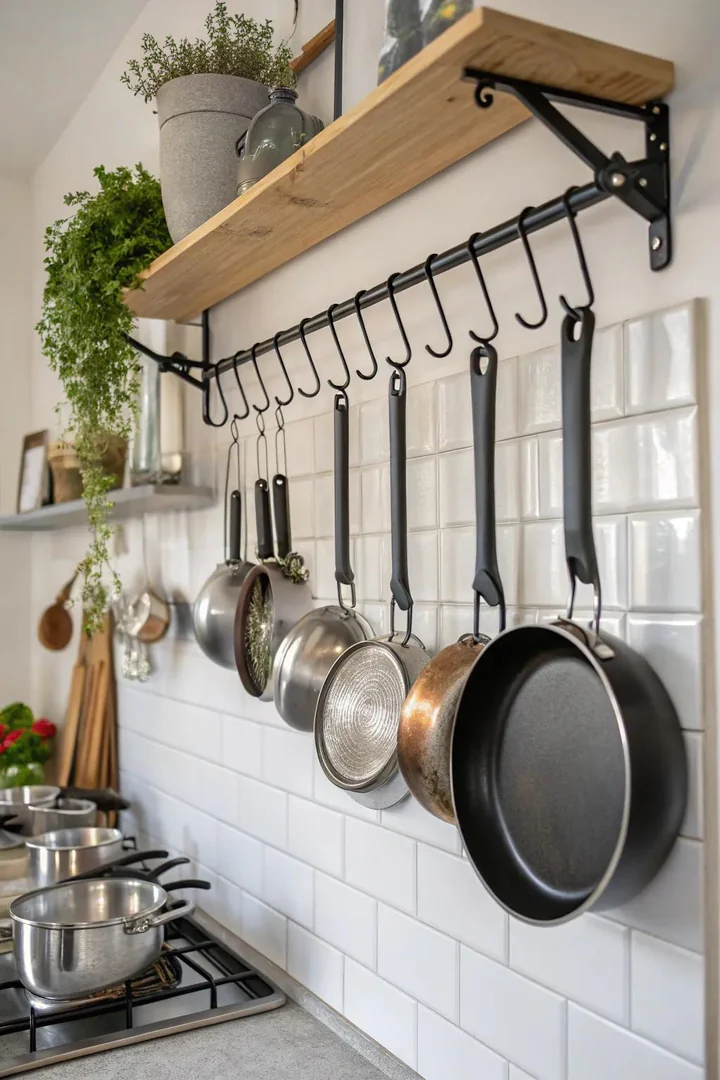
A ceiling-mounted pot rack from Enclume Premier ($250 for a 36-inch oval rack) or Old Dutch International ($80 for a 36-by-18-inch rack) suspends 8 to 12 pots and pans from S-hooks above the island or stove, freeing one to two full base cabinet shelves. The rack anchors into ceiling joists with lag bolts rated for 100+ pounds, and adjustable chains set the hanging height between 48 and 60 inches above the floor. Copper, brushed steel, and matte black finish options match common kitchen hardware palettes.
A pot rack positioned above the island keeps cookware at arm’s reach during prep without occupying wall space. Hang pots with the handle facing outward for quick grip, and alternate large and small pans to distribute visual weight evenly across the rack. A pot rack works best in kitchens with 9-foot or higher ceilings because an 8-foot ceiling leaves less than 2 feet of clearance between a standard 36-inch island countertop and the bottom of the hanging pans.
8. Door-Mounted Organizer Racks
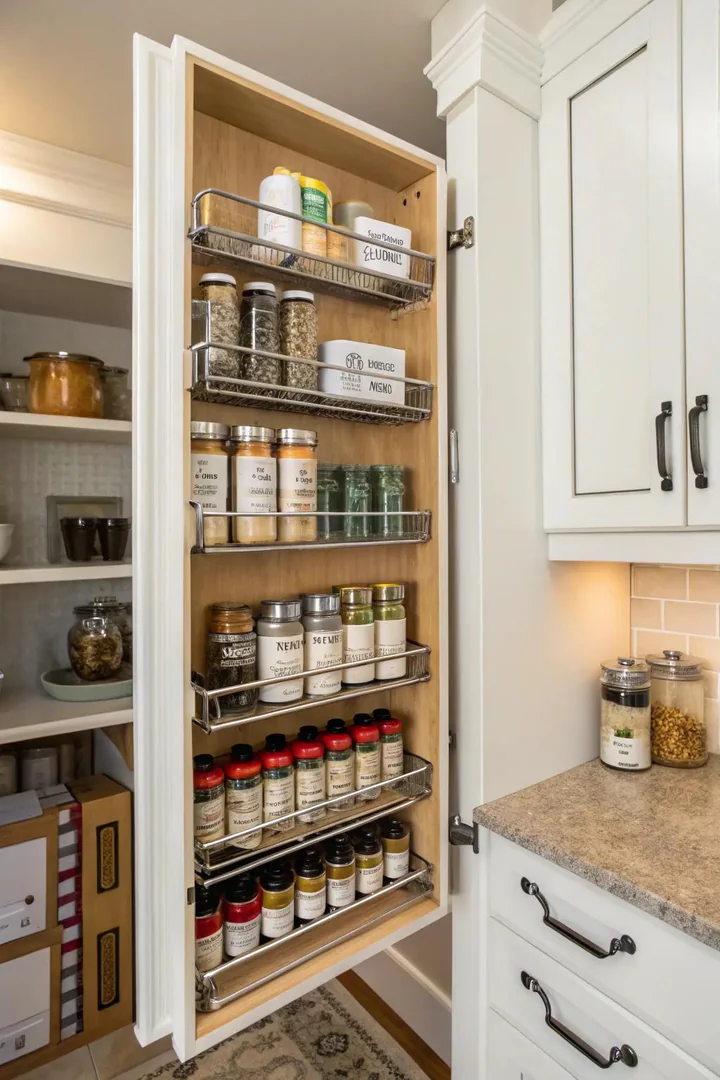
A wire door-mounted rack from SimpleHouseware Over-Cabinet Door Organizer ($15) or Rev-A-Shelf 4SR-18 ($25 for a swing-out rack) turns the blank inside face of every cabinet door into tiered storage for spice jars, foil and wrap rolls, cleaning products, and small bottles. A standard 18-inch-wide cabinet door holds a 3-tier wire rack that stores 12 to 15 small items without taking up shelf space inside the cabinet.
Door-mounted racks work best on cabinet doors with frame-style construction (Shaker, raised panel) where the outer frame provides solid wood for screw anchoring. On slab doors, use adhesive-backed racks from Command brand ($10 for a caddy) or over-the-door hooks that do not require screws. Keep the total weight on a door-mounted rack under 8 pounds to prevent the door hinges from sagging over time. Re-tighten the hinge screws every 6 months if the door starts to droop. Browse more backsplash and wall storage approaches at emerald green kitchen design ideas.
9. Bamboo Drawer Dividers for Utensils
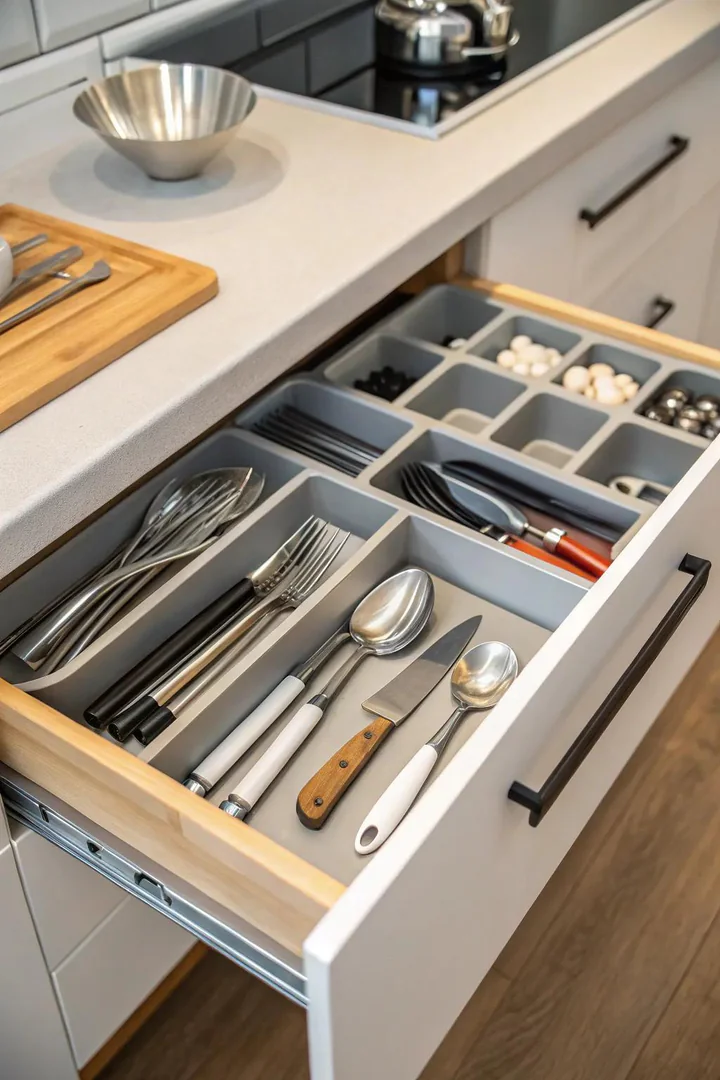
A spring-loaded bamboo drawer divider from Bambusi ($16 for a 4-pack) or a custom-fit bamboo utensil tray from KitchenEdge ($25 for a 6-slot tray) assigns every spatula, whisk, and peeler a designated slot, eliminating the tangled pile that wastes half the drawer surface. Spring dividers adjust to any drawer width by compressing between the drawer walls, while fixed trays fit standard 12-, 15-, 18-, and 21-inch widths.
Sort utensils by task: cooking (spatula, tongs, wooden spoon), serving (ladle, serving fork, cake server), and prep (peeler, zester, scissors). A deep drawer (6 to 8 inches) with a two-tier divider from Joseph Joseph DrawerStore ($20) stacks a shallow upper tray over a deeper lower compartment, doubling capacity in a single drawer slot. Bamboo resists moisture and odor absorption better than plastic dividers and matches the warm wood tone of butcher-block countertops.
10. Clear Airtight Containers for Dry Goods
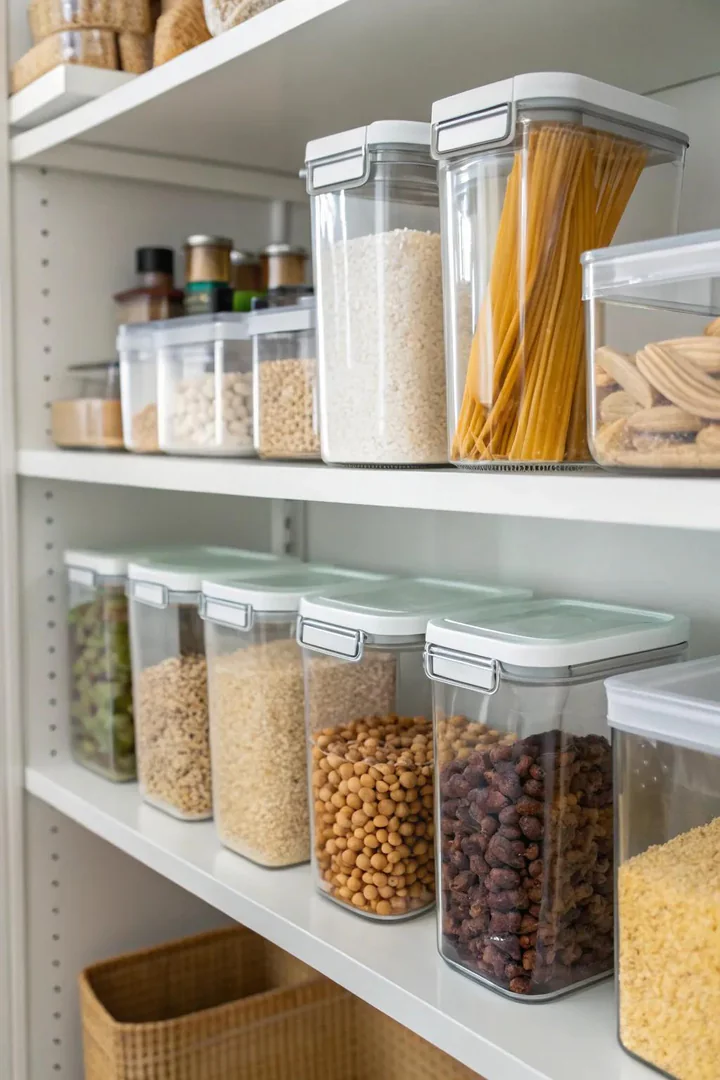
Transferring flour, sugar, rice, pasta, cereal, and snacks from their original bags and boxes into clear airtight containers from OXO Good Grips POP ($8 to $20 per container) or Rubbermaid Brilliance Pantry ($6 to $12 per container) standardizes container shapes for tighter shelf packing and makes contents visible at a glance. A uniform container set eliminates the wasted air space above half-empty cereal boxes and the spillage from torn-open bags.
Square and rectangular containers pack tighter on shelves than round containers because they eliminate the curved gap between adjacent cylinders. Label each container with the item name, purchase date, and expiration date using a label maker or a white-board marker on the container lid. A pantry with 20 to 30 uniform clear containers holds 30% to 40% more dry goods than the same shelf space with original packaging. Decanting also keeps pests (pantry moths, ants) out of food that sits open in bags or loosely folded boxes.
11. Lazy Susan Turntable in Corner and Upper Cabinets
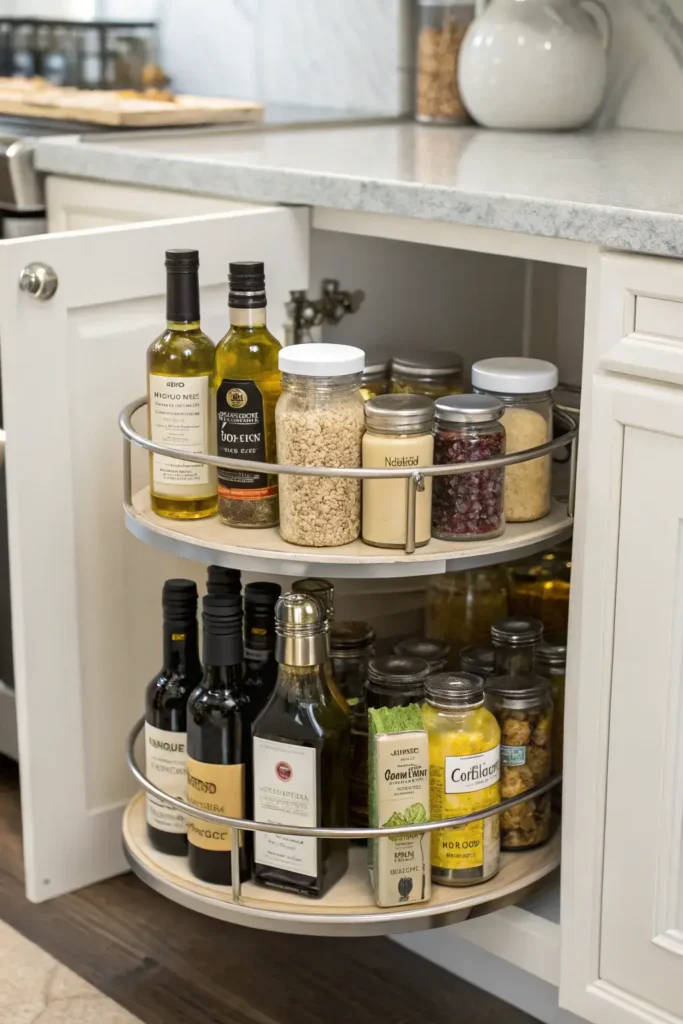
A Lazy Susan turntable from Copco Non-Skid ($10 for a 12-inch single-tier) or Rev-A-Shelf Full Circle ($80 for a 28-inch two-shelf cabinet unit) spins 360 degrees inside a cabinet, bringing items from the back to the front without reaching. A 12-inch single-tier turntable fits inside any upper cabinet and organizes oils, vinegars, spice bottles, and condiments that would otherwise hide behind taller items. A full-cabinet Lazy Susan in a corner base cabinet reclaims the 30% to 50% of dead space that standard corner cabinets waste.
Non-skid turntable surfaces prevent bottles from sliding during rotation. A two-tier stacked turntable ($15 from Copco) doubles the organized capacity inside a single upper cabinet without adding a shelf riser. Place the most frequently used items at the front of the turntable (closest to the door opening) and rotate less-used items toward the back, where they remain accessible with a half-turn but do not block daily-use bottles.
12. Floating Shelves Beside the Range Hood
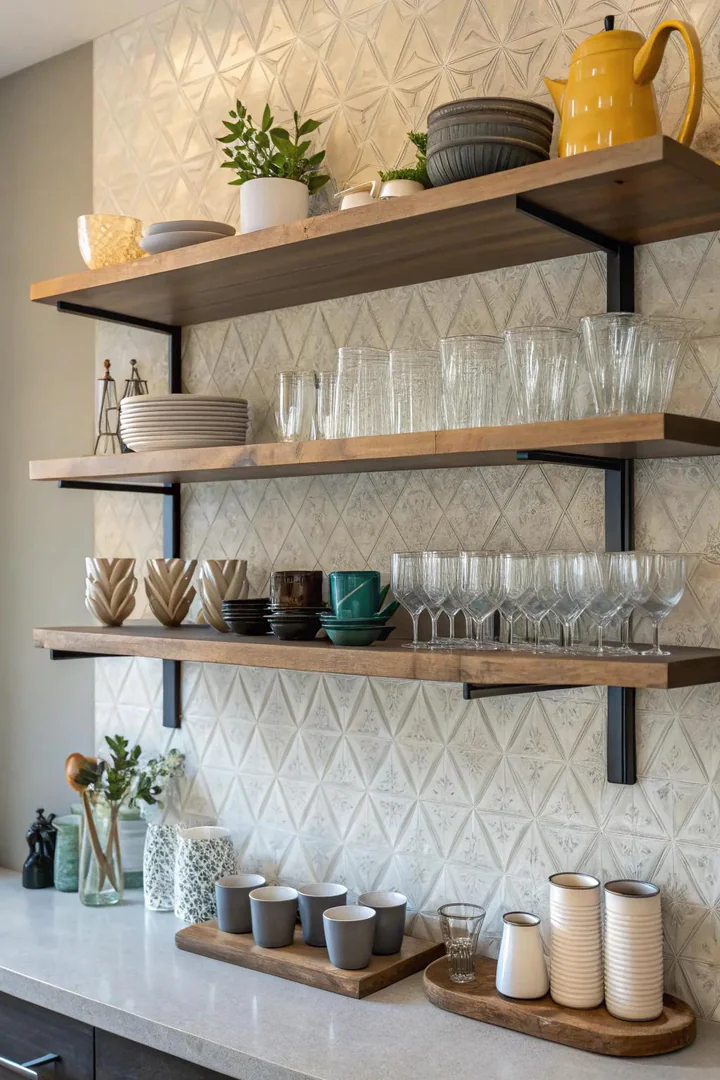
Mounting 12-inch-deep floating shelves on either side of the range hood creates a cooking-station storage zone for oils, salt, pepper, and the 5 to 8 spices used most frequently. Solid walnut floating shelves ($30 per linear foot from a local mill) or white-painted MDF shelves ($15 per linear foot from IKEA) installed on concealed brackets sit flush against the wall with no visible support hardware.
Keep range-side shelves no deeper than 12 inches to avoid interfering with the range hood airflow zone. Glass jars with airtight lids protect spices from heat and cooking moisture while keeping contents visible. A single shelf on each side of the hood holds 8 to 12 spice jars and a cruet of olive oil, eliminating the need to open a cabinet or a drawer during active cooking. Wipe shelves weekly to remove grease film from cooking vapors. Pair floating shelf storage with more countertop and layout ideas at cozy kitchen ideas.
13. Convert a Tall Cabinet into a Full Pantry
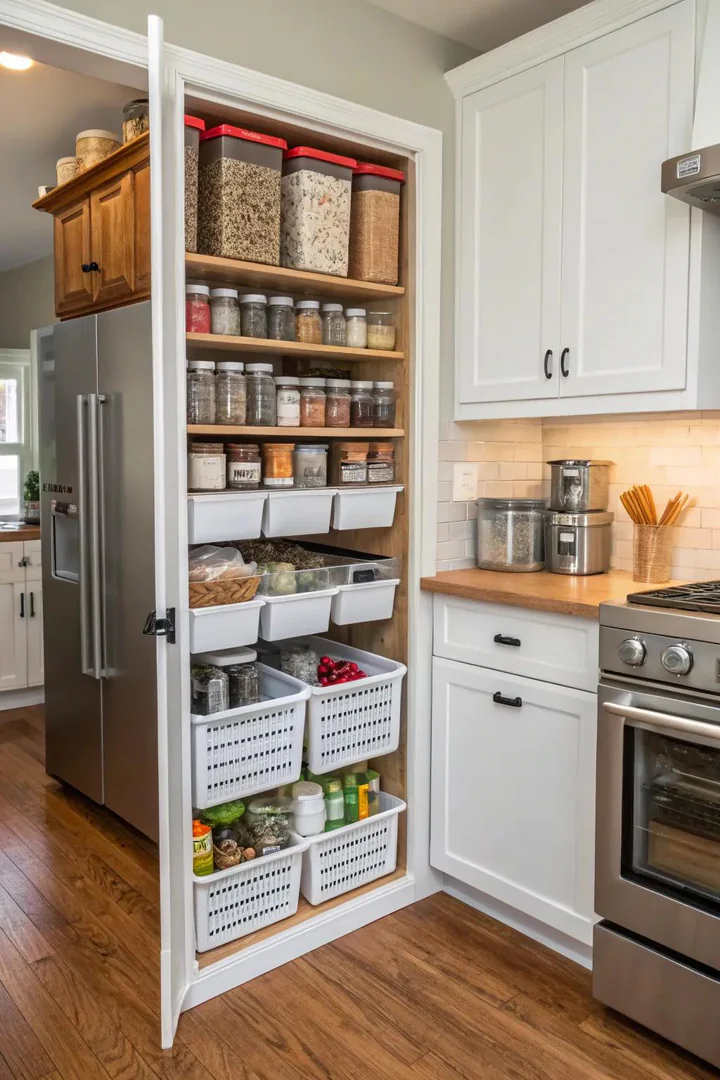
Repurposing a 24-inch-wide, 84-inch-tall utility cabinet with five adjustable shelves as a dedicated full-height pantry concentrates all dry goods, canned foods, and snacks in one vertical column, replacing the scattered storage of pantry items across multiple upper and lower cabinets. IKEA SEKTION 24x24x80-inch tall cabinet ($250 with doors) or a KraftMaid tall utility cabinet ($400) provides the shell. Add pull-out shelves, door-mounted racks, and clear containers for a fully organized system inside.
Organize the tall pantry by zone from top to bottom: top shelf for rarely used items (holiday baking supplies, specialty ingredients), middle shelves for daily items (cereal, pasta, canned goods, snacks), and bottom shelf for heavy items (bulk rice, flour, bottled water). Door-mounted racks on both doors add 2 to 4 additional tiers of narrow storage for spice jars, sauce packets, and small canned goods. A motion-sensor LED light strip ($12 from GE) inside the cabinet illuminates the interior when the door opens.
14. Wall-Mounted Magnetic Knife Strip
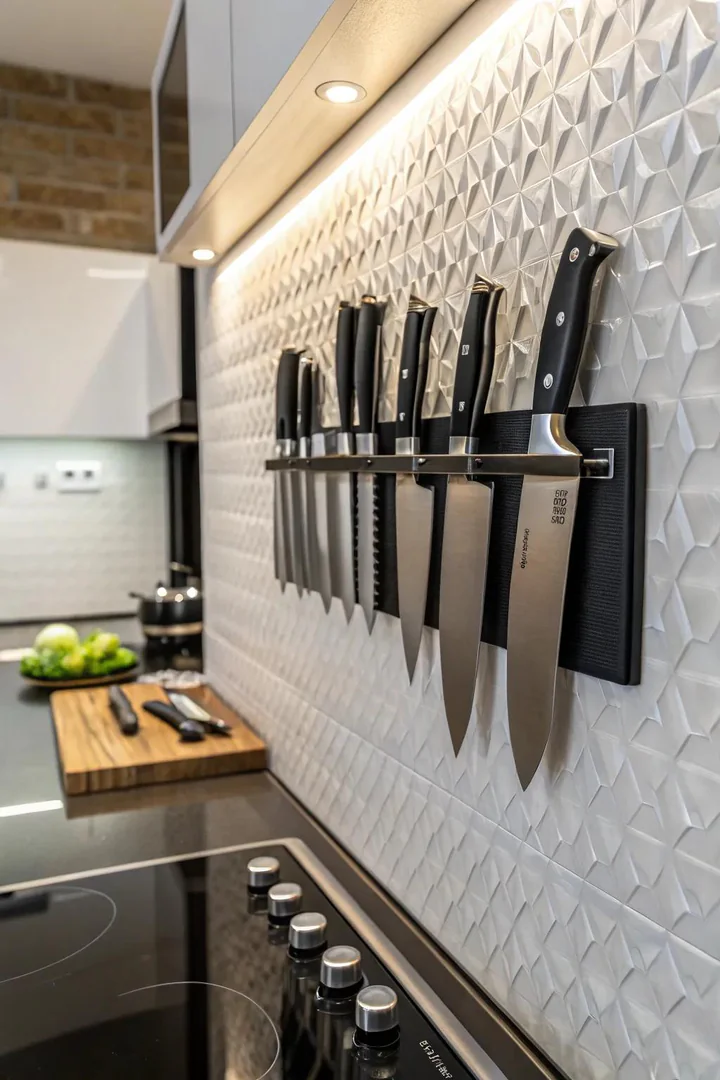
A 16-inch magnetic knife bar from Wusthof ($40) or Norpro 18-inch magnetic strip ($12) mounts on the backsplash or inside a cabinet door, pulling 6 to 8 knives off the counter and out of a drawer block. Rare-earth neodymium magnets hold blades up to 12 ounces each, covering every knife from a 3-inch paring knife to a 10-inch chef’s knife. A wall-mounted strip frees one full drawer slot (roughly 4 by 15 inches) and keeps blade edges sharper than a wooden block where blades drag against wood during insertion.
Mount the strip 18 inches above the countertop for easy reach without placing the magnets in the splash zone behind the faucet. For families with young children, mount the strip inside a wall cabinet door at adult eye level. Stainless-steel and walnut-faced magnetic strips from Benchusch Premium ($25) match kitchen hardware and wood finishes while hiding the raw magnet surface. A magnetic strip also stores metal scissors, a steel bottle opener, and a metal bench scraper.
15. Corner Cabinet Swing-Out or Pull-Out Tray
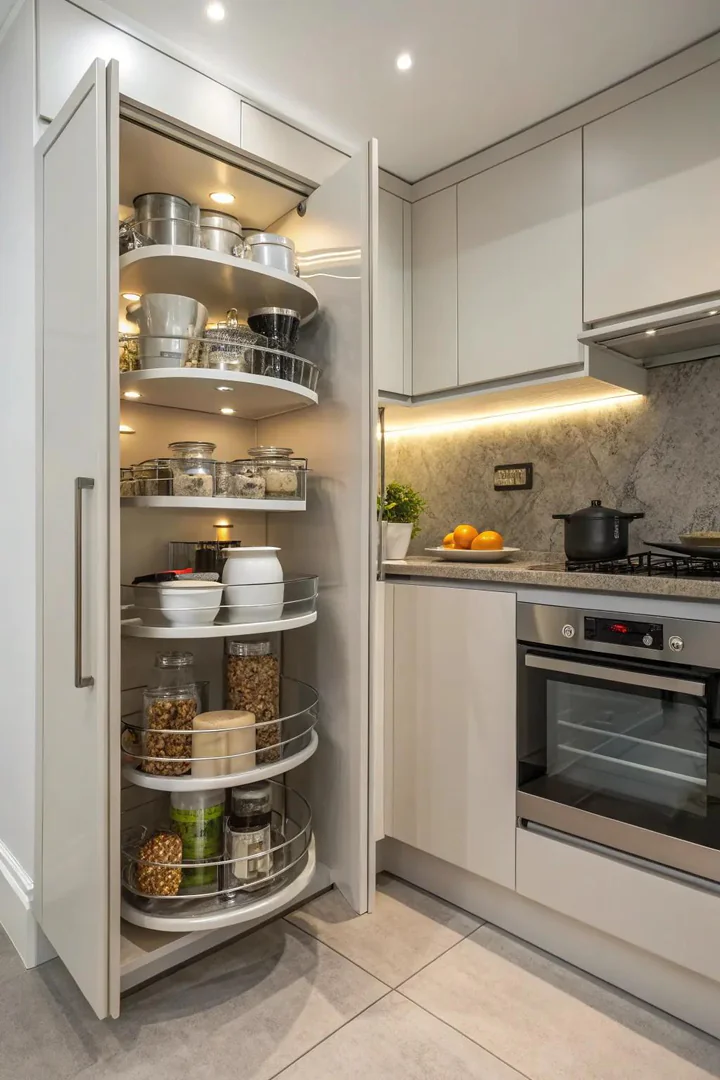
A blind-corner swing-out tray from Rev-A-Shelf 5PSP-15-CR ($150) or a half-moon pull-out shelf from Knape & Vogt?” ($90) brings items from the unreachable back corner of an L-shaped base cabinet to the front door opening with a single pull. Corner base cabinets waste 30% to 50% of their interior volume because the back corners sit 28 to 32 inches from the door, beyond comfortable arm reach. A swing-out mechanism attaches to the door and pivots the tray into the opening as the door swings.
Measure the cabinet opening width and depth before ordering: swing-out trays require a specific door-to-side-wall clearance (typically 3 to 5 inches) to pivot without hitting the adjacent cabinet face. A two-tier swing-out ($180 from Rev-A-Shelf) provides independent upper and lower trays that swing together with the door, separating heavy items (Dutch oven, stock pot) on the lower tier from light items (colanders, mixing bowls) on the upper tier.
16. Over-the-Door Towel Bar or Hook Rack
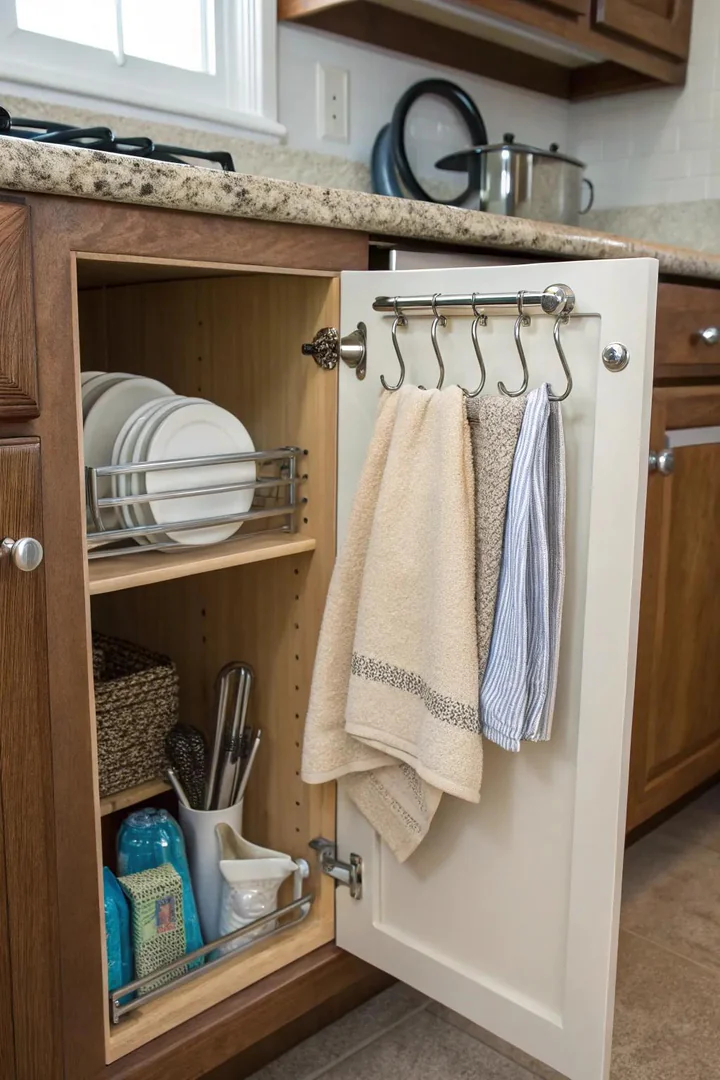
An over-the-cabinet-door towel bar from InterDesign Forma ($8) or Oxo Good Grips Over-Cabinet Towel Bar ($10) hangs a kitchen towel on the inside or outside of the sink cabinet door without screws, adhesive, or permanent mounting. The foam-padded hook drapes over the door top edge and holds one to two towels within arm’s reach of the sink. Stainless steel and brushed nickel finishes match standard cabinet hardware.
For multiple towels and pot holders, a 3-hook adhesive rack from Command brand ($6 for a 3-hook strip) or a rail-and-hook system from IKEA HULTARP ($10 for a 31-inch rail) mounts inside the pantry door or on an open wall near the stove. Hooks hold oven mitts, aprons, reusable grocery bags, and dustpans that do not fit in drawers. An over-door towel bar costs under $10 and installs in 10 seconds, making it the lowest-effort kitchen organization upgrade available.
17. Clear Acrylic Shelf Inserts
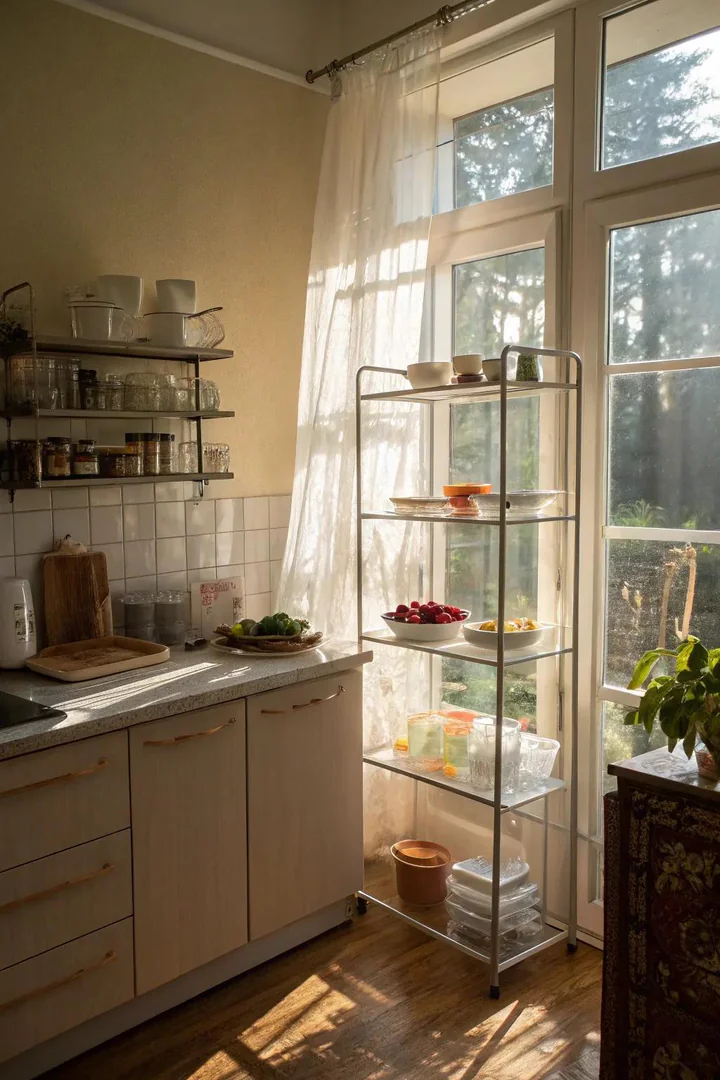
A clear acrylic shelf insert from mDesign Clarity ($18 for a 2-pack) creates a transparent second tier inside an upper cabinet that lets you see items on both levels simultaneously. Unlike wire risers, acrylic inserts do not obstruct the view of items stored below, making them ideal for cabinets where you store short and tall items on the same shelf. Acrylic holds 15 to 20 pounds per shelf and wipes clean with a damp cloth.
Acrylic shelf inserts suit glass-front cabinets where the internal organization is visible from outside. The clear material keeps the cabinet looking open and uncluttered while doubling the usable tier count. A 14-inch-wide, 6-inch-tall acrylic riser fits inside a standard 15-inch-wide upper cabinet. Match the insert width to the cabinet interior minus 1/2 inch per side for easy placement and removal during cleaning.
18. Above-Cabinet Storage Baskets and Bins
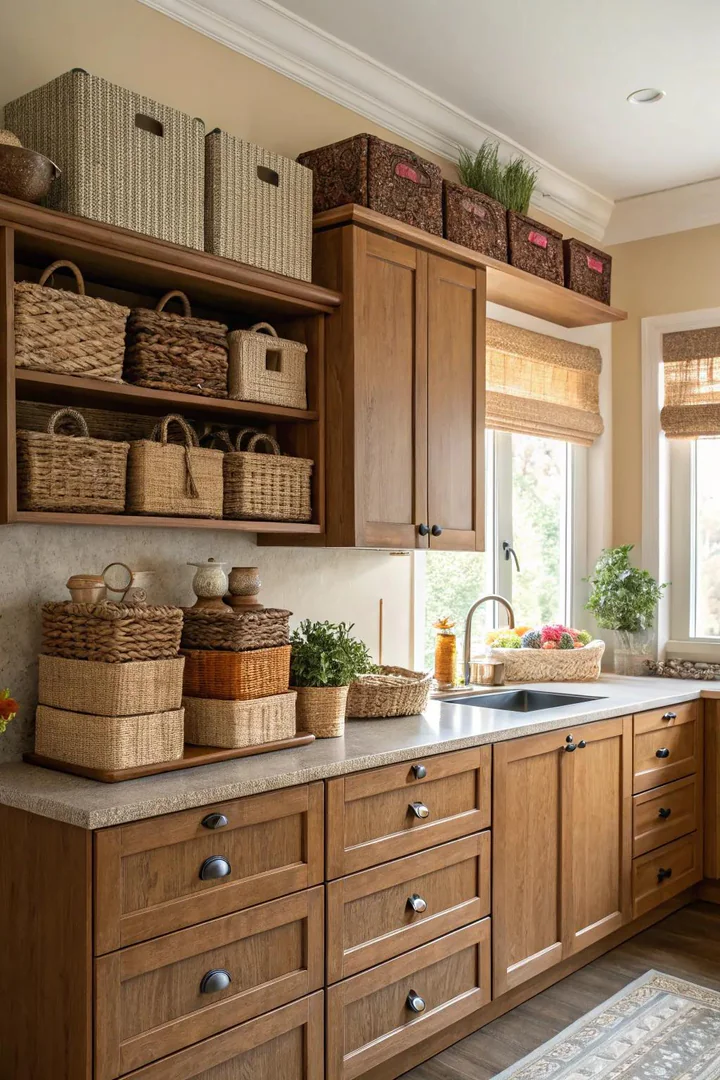
The 12-to-15-inch gap between the top of standard 30-inch upper cabinets and a typical 8-to-9-foot ceiling stores items in matching woven baskets from Threshold at Target ($15 each) or clear-lidded bins from The Container Store ($12 each). Seasonal items (holiday platters, tablecloths, special occasion dinnerware), bulk paper goods, and rarely used entertaining equipment sit safely above the cabinets where they stay accessible with a step stool but out of daily sight.
Uniform baskets or bins in a single color and style create a clean, intentional look from the kitchen floor, while mismatched boxes and exposed items read as clutter. Label each basket or bin so you can locate contents without climbing up to check. A small rechargeable LED tap light ($8) mounted on the soffit above each basket section lets you see contents during evening retrieval without turning on all the kitchen lights. See more style-and-storage combinations at grey kitchen cabinet ideas.
19. Dedicated Snack Drawer for Kids and Quick Access
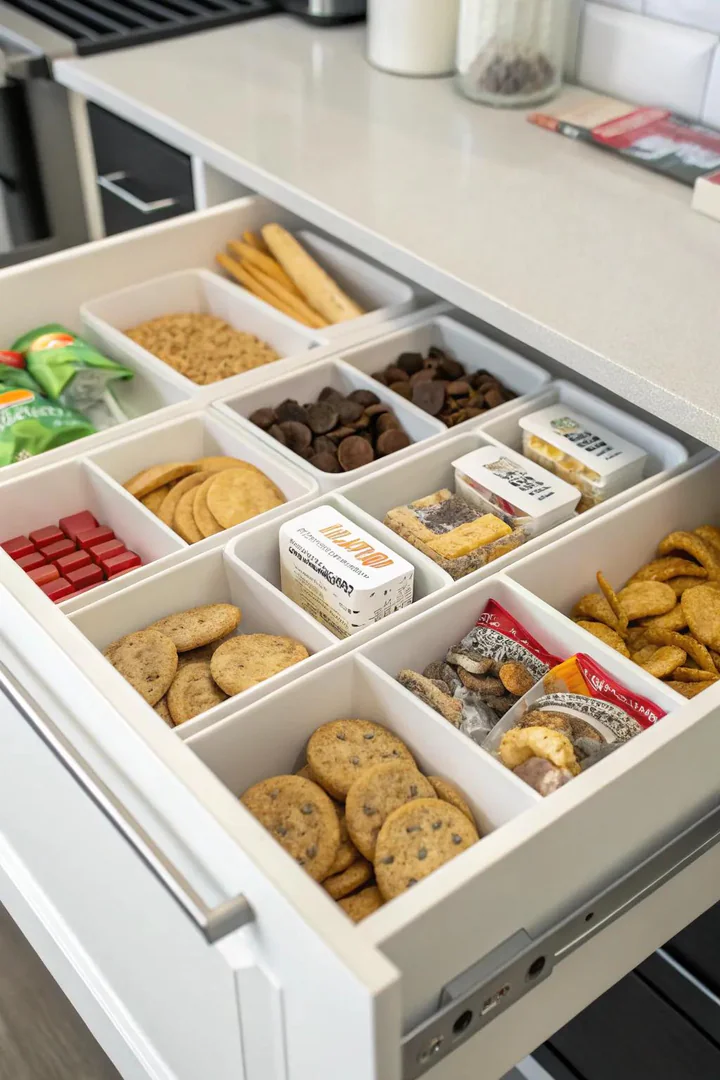
Designating one lower cabinet drawer as a snack-only zone with divided bins from mDesign Clarity Drawer Organizer ($14 for a 4-pack) lets kids and adults grab pre-approved snacks without rummaging through the pantry. Granola bars, fruit pouches, crackers, and trail mix packs stand upright in labeled bins, visible at a glance. A lower drawer (18 to 24 inches off the floor) puts snacks at child height, reducing the need for adult help during after-school hours.
Refill the snack drawer weekly during the grocery-shopping unpack to maintain a consistent inventory. Separate sweet snacks (granola bars, dried fruit) from salty snacks (crackers, pretzels, popcorn) into distinct bins so family members self-serve without digging. A dedicated snack drawer also prevents pantry disorganization because snack-seeking hands no longer shuffle through baking supplies and canned goods to find a granola bar.
20. Repurposed Dining Room Buffet or Sideboard
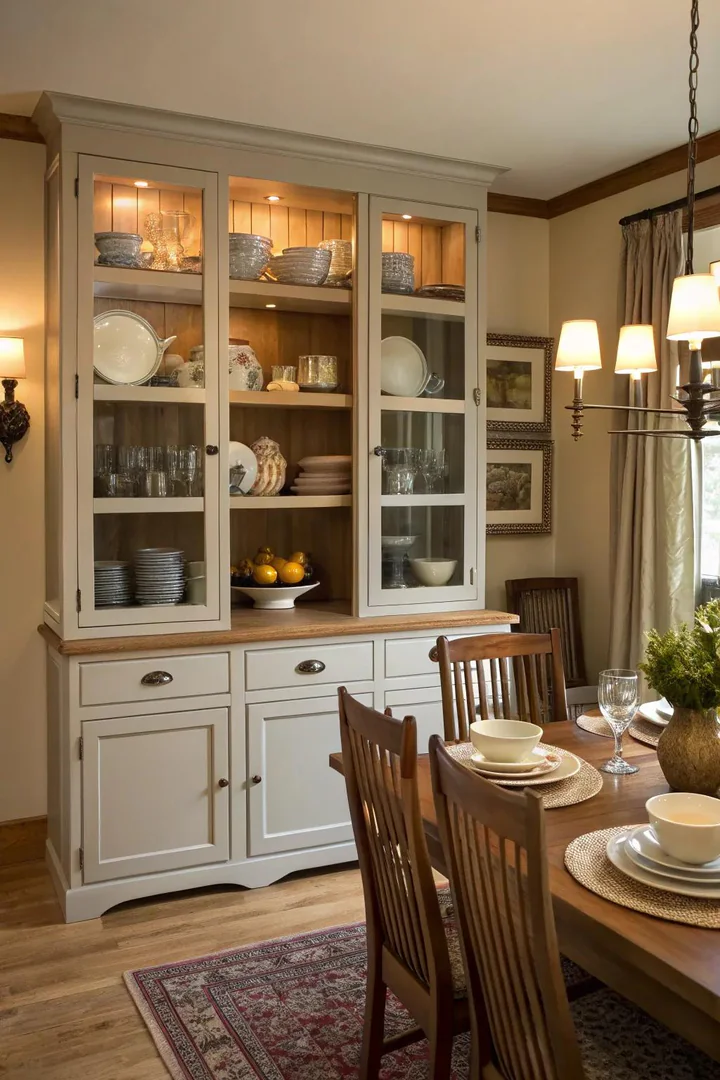
A dining room buffet or sideboard from IKEA BESTA ($200 for a 47-inch unit) or a vintage sideboard from a local estate sale ($100 to $400) placed against the kitchen or dining room wall stores overflow items that do not fit in kitchen cabinets: serving platters, table linens, candles, entertaining glassware, and seasonal dinnerware. A buffet with three or four doors and two drawers provides 6 to 10 cubic feet of bonus storage without modifying the kitchen itself.
Position the buffet along the wall closest to the dining table so serving platters and tablecloths travel the shortest distance during table setup. A buffet top doubles as a serving station during dinner parties, holding drinks, appetizer trays, and dessert plates at a comfortable 34-to-36-inch height. Vintage sideboards in solid wood (walnut, oak, mahogany) add warm material texture to a kitchen or dining room that is otherwise dominated by painted cabinets and stone countertops.
21. Narrow End-Cap Shelves on Cabinet Sides
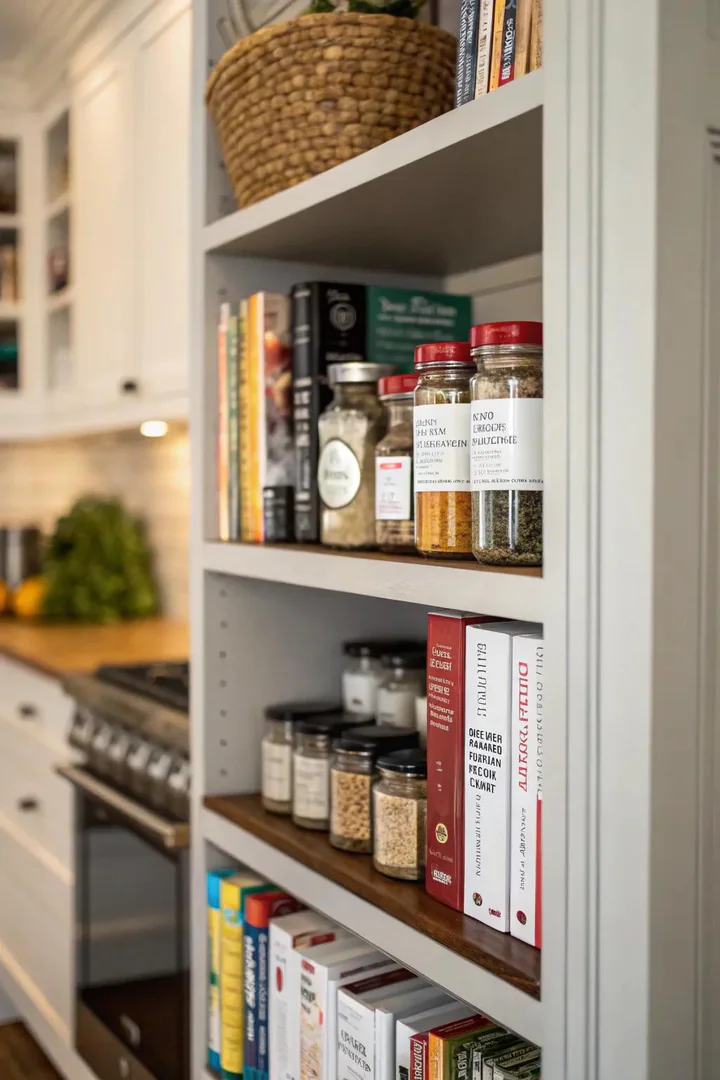
Attaching 6-inch-deep open shelves to the exposed side of a base or upper cabinet end panel creates a slim storage column for cookbooks, spice jars, or small decorative objects. Custom-cut 3/4-inch plywood shelves ($5 each from a home center) screwed into the cabinet side panel, or IKEA BEKVAM spice rack ($5 each, mounted horizontally) produce a narrow bookcase effect on an otherwise blank surface.
End-cap shelves suit cabinet runs that terminate at a doorway, window, or peninsula where the exposed side panel faces into the kitchen traffic zone. Three to four shelves spaced 8 to 10 inches apart hold 12 to 16 spice jars or a stack of 4 to 5 cookbooks. Paint or stain the shelves to match the cabinet finish so the end-cap reads as a built-in feature rather than an afterthought.
22. Glass Shelves Across a Kitchen Window
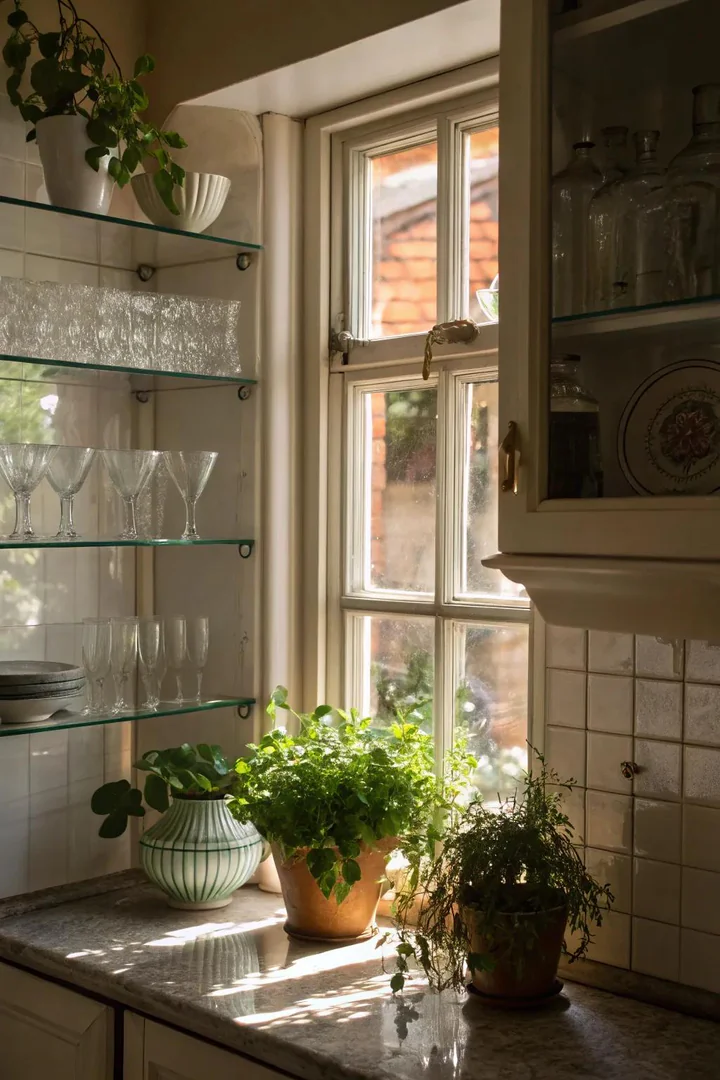
Mounting 1/4-inch tempered glass shelves ($20 per 36-by-8-inch panel from Dulles Glass) across a kitchen window creates a sun-lit display zone for herb pots, small succulents, and colored glass bottles. The transparent shelf allows daylight to pass through to the room below while adding a storage tier in a space that standard solid shelving would darken. Tempered glass rated for 30 pounds per shelf handles the weight of terra cotta herb pots and small kitchen objects.
Secure glass shelves on adjustable shelf brackets screwed into the window frame trim or flanking wall studs. Rubber bumper pads between the glass and the bracket prevent the glass from sliding. A window herb garden (basil, rosemary, thyme, mint) on glass shelves provides fresh cooking herbs within arm’s reach of the prep area and adds living greenery to the kitchen without consuming counter or cabinet space.
23. Stacking Turntable System in Deep Cabinets
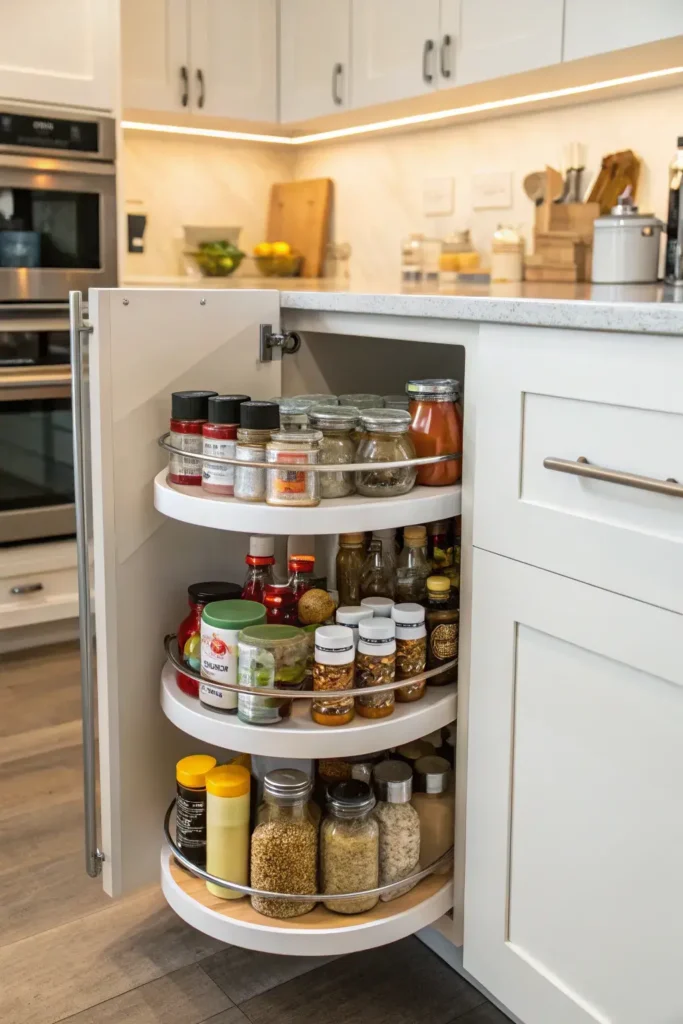
A two-tier stacking turntable from Copco 2-Tier Turntable ($15) or mDesign 2-Tier Lazy Susan ($20) doubles the rotating storage capacity of a single-tier Lazy Susan by adding a second spinning platform on top. The upper tier holds smaller items (spice jars, mustard bottles, hot sauce) while the lower tier holds taller items (olive oil bottles, vinegar, soy sauce). Both tiers rotate independently, allowing access to any item with a partial spin.
Stacking turntables suit 12-inch-deep upper cabinets where the 10-inch turntable diameter fits between the cabinet walls. Non-skid surfaces on both tiers prevent bottles from sliding off during rotation. A stacking turntable inside a pantry cabinet organizes the condiment and sauce collection that otherwise occupies a chaotic back-of-shelf zone. Replace lost or expired items by rotating the turntable monthly and checking expiration dates on each spin.
24. Adhesive and Screw-In Wall Hooks for Utensils

Mounting S-hooks on a wall-mounted rail from IKEA HULTARP ($10 for a 31-inch rail) or adhesive hooks from Command brand ($8 for a 6-pack of stainless hooks) hangs spatulas, ladles, whisks, and measuring cups on the backsplash, inside a cabinet, or on the side of a refrigerator. Wall-hung utensils free one to two drawer slots and keep cooking tools visible and within arm’s reach during active cooking at the stove.
A rail-and-S-hook system offers adjustable spacing: slide the hooks along the rail to accommodate different utensil widths. Adhesive hooks require a smooth, clean surface (tile, glass, painted drywall) and hold up to 4 pounds per hook. Screw-in cup hooks ($4 for a 10-pack) hold heavier items (cast-iron trivets, copper pans) but leave screw holes when removed. Position utensil hooks 6 to 12 inches above the countertop on the backsplash so hanging tools do not interfere with the counter surface.
25. Dedicated Cookbook Display Shelf or Ledge

A picture ledge shelf from IKEA MOSSLANDA ($10 for a 22-inch ledge) or a custom 4-inch-deep walnut ledge ($20 per linear foot) mounted on the wall below upper cabinets or above the counter creates a dedicated cookbook display zone. A ledge shelf props 3 to 5 cookbooks face-forward for cover-art display and quick page-flipping during recipe lookup, unlike a standard shelf where books sit spine-out and require pulling to identify.
Position the ledge 6 to 10 inches above the countertop so cookbooks stand upright with the top of the tallest book clearing the bottom of the upper cabinets. Rotate cookbooks seasonally (holiday baking in December, grilling in summer) to keep the display relevant and the recipe inspiration current. A ledge shelf beside the range hood holds the one cookbook currently in use, propped open with a bamboo cookbook stand ($15 from Amazon Basics), keeping the recipe visible while both hands stay free for cooking. Find more cabinet and countertop pairing ideas at DIY kitchen ideas, and visit The Designers Company for the full kitchen design library.
How to Organize a Kitchen Pantry from Scratch
1. Empty the Pantry and Sort Every Item
Remove every item from the pantry and place everything on the kitchen counter or table. Discard expired food, stale spices (spices lose potency after 12 to 18 months), and items no one in the household will eat. Group the remaining items into categories: baking supplies, canned goods, pasta and grains, snacks, breakfast items, condiments, and oils. Count the items in each category to determine how many containers, bins, or baskets each group needs.
2. Clean and Measure the Shelves
Wipe every shelf with a damp cloth and an all-purpose cleaner. Measure the width, depth, and height between each shelf with a tape measure. Record these dimensions so you can buy organizers, turntables, and bins that fit without measuring at the store. Adjust shelf pin heights to match the tallest item in each category: cereal boxes and oil bottles need 12 to 14 inches of shelf height, while canned goods and spice jars need only 6 to 8 inches.
3. Assign Zones by Category and Frequency
Place the most frequently used items (daily snacks, cooking oils, salt, coffee) on the shelf closest to eye level (50 to 60 inches off the floor). Store heavy items (bulk rice, flour, canned goods) on the lowest shelf to keep the center of gravity low. Place rarely used items (holiday sprinkles, specialty flours, backup supplies) on the highest shelf. Group baking supplies together, group breakfast items together, and group pasta and grains together so each category occupies one contiguous zone.
4. Install Organizers and Label Everything
Place clear containers for decanted dry goods, turntables for sauces and condiments, baskets for snack packs, and door-mounted racks for spice jars. Label every container, basket, and bin with the category name using a label maker or chalkboard tags. Labels ensure every household member returns items to the correct zone, maintaining the system beyond the initial setup day. Photograph the final organized pantry and tape the photo inside the door as a reference for restocking.
Kitchen Storage Organizer Comparison
| Organizer Type | Cost Range | Installation | Space Reclaimed | Best Zone | Rental Friendly |
|---|---|---|---|---|---|
| Shelf riser | $10–$15 | None (drop in) | 6–8 in. vertical | Upper cabinets | Yes |
| Pull-out shelf | $60–$120 | Moderate (drill) | 30–50% of base depth | Base/pantry cabinet | Minor holes |
| Lazy Susan | $10–$80 | None to moderate | 30–50% of corner | Corner or upper | Small: yes |
| Door-mounted rack | $10–$25 | Screws or adhesive | Full door face | Any cabinet door | Adhesive: yes |
| Drawer dividers | $15–$25 | None (drop in) | 30–40% wasted area | Utensil drawers | Yes |
| Clear containers | $6–$20 each | None | 30–40% of pantry | Pantry shelves | Yes |
| Magnetic knife strip | $12–$40 | Easy (2–3 screws) | One full drawer | Wall/backsplash | Minor holes |
| Pot rack | $80–$250 | Ceiling joists | 1–2 base cabinet shelves | Above island/stove | No (ceiling mount) |
| Rolling cart | $100–$450 | None (freestanding) | Adds 6–10 cu ft | Floor beside counter | Yes |
Frequently Asked Questions
What is the cheapest way to add kitchen storage?
Shelf risers ($10 for a 2-pack), tension rod dividers ($3 each), and adhesive wall hooks ($8 for a 6-pack) deliver the fastest storage gains for under $25 total. Shelf risers double upper-cabinet tiers with zero installation. Tension rods convert stacking zones into filing zones for sheet pans and cutting boards. Adhesive hooks hang utensils on the backsplash to free drawer space. A full kitchen organization overhaul using only drop-in, no-tool organizers costs $50 to $100 for a 20-cabinet kitchen.
Which kitchen storage organizers work in rental apartments?
Shelf risers, drawer divider trays, Lazy Susan turntables, clear containers, under-shelf clip-on baskets, over-door towel bars, adhesive hooks, rolling carts, and tension rod dividers require no screws, no drilling, and no permanent modification. Adhesive-backed magnetic knife strips from Command brand and over-door racks also qualify. Pull-out shelves and Lazy Susan cabinet units require screw holes in the cabinet interior, which most landlords treat as normal wear. Photograph the cabinets before and after installation for security deposit documentation.
How do you organize a kitchen with no pantry?
Dedicate one full upper cabinet and one full base cabinet entirely to food storage, using clear containers, turntables, shelf risers, and door-mounted racks to maximize internal capacity. Add a rolling cart from IKEA RASKOG ($30) as a mobile pantry that tucks into a 15-inch gap beside the refrigerator or a cabinet run. Repurpose a hallway coat closet within 10 feet of the kitchen as overflow dry-goods storage. A wall-mounted rail with S-hooks and hanging baskets on an empty kitchen wall provides additional produce and snack storage without requiring cabinet space.
How often should you reorganize kitchen storage?
A full pantry audit every 3 months catches expired food, identifies items bought in duplicate, and redistributes items that migrated from their assigned zones. A cabinet-by-cabinet review every 6 months adjusts shelf heights, replaces worn-out liners, and re-tightens door-mounted rack screws. Deep-cleaning the inside of every cabinet once per year removes accumulated dust, crumbs, and grease film. A well-organized kitchen with labeled zones and assigned bins requires less frequent reorganization because the system self-corrects when household members return items to labeled locations.
What is the single best organizer for small kitchens?
A pull-out shelf in the deepest base cabinet delivers the largest storage recovery per dollar because the back 12 inches of a 24-inch-deep base cabinet typically goes unused. A single pull-out shelf reclaims roughly 2 square feet of dead storage volume. For upper cabinets, a shelf riser costs under $10 and immediately doubles the usable tiers. Combining one pull-out shelf per base cabinet with one shelf riser per upper cabinet produces the highest total improvement for under $150 in a 10-cabinet kitchen.

