
Kitchen Cabinet Layout Ideas: 15 Smart Designs That Maximize
Kitchen cabinet layout determines how efficiently you can cook, clean, and move through the room — more than the countertop material, the backsplash style, or the paint color. A well-planned layout puts your most-used tools within arm’s reach, creates a logical flow between the sink, stove, and refrigerator, and provides enough storage and counter space to handle the way you actually use the kitchen, not the way a showroom photograph suggests you should.
The 15 kitchen cabinet layout ideas below cover every common floor plan — one-wall, L-shaped, U-shaped, galley, peninsula, and island — along with specific cabinet configurations like corner cabinets, glass-front uppers, hidden pantries, and vertical storage runs. Each layout includes sizing guidance, brand recommendations, and practical tips for making the configuration work in a real kitchen with real cooking habits.
1. Welcome the Marvel of One-Wall Design

A one-wall layout puts all cabinets, appliances, and countertop on a single wall — typically ten to fifteen feet long — which leaves the rest of the room open for dining, living, or circulation. This layout works best in studios, lofts, and open-plan spaces where the kitchen shares a room with another function and needs to stay visually contained. IKEA’s SEKTION line and CliqStudios’ custom frameless cabinets both offer sleek, handle-less door options that make a one-wall kitchen look like a built-in furniture piece rather than a working kitchen.
The challenge with a one-wall layout is that the sink, stove, and refrigerator all sit in a line, which means you walk laterally between them rather than turning between points of a triangle. Keep the sink in the center with the stove on one side and the refrigerator on the other to minimize walking distance. Add a portable island or a rolling cart on the opposite wall when you need extra counter space for meal prep, and roll it away when the space returns to its non-kitchen use.
2. Enhance Efficiency with L-Shaped Arrangements
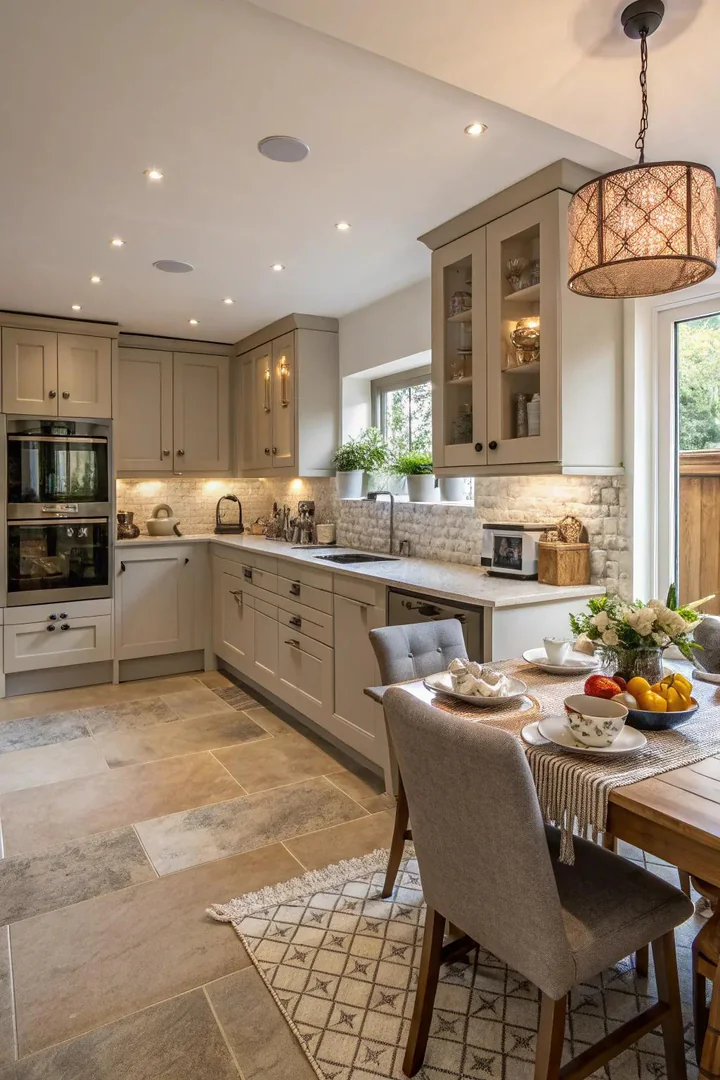
The L-shaped layout runs cabinets along two perpendicular walls, creating a natural work triangle between the sink (on one wall), the stove (on the other wall), and the refrigerator (at the end of either run). This configuration is the most versatile standard layout because it accommodates an island in the open area facing the L, provides ample counter space on both runs, and leaves one or two walls free for windows, doors, or a dining area.
Place the sink and dishwasher on the longer arm of the L and the stove and oven on the shorter arm so the most water-intensive tasks have the most counter space. A corner cabinet at the L’s junction can be a Lazy Susan, a blind corner pull-out, or a diagonal cabinet — all of which make the corner’s deep space accessible. Standard L-shaped kitchens work in rooms as small as eight-by-eight feet and scale up to large open-plan spaces where the L anchors one end of the room. For ideas on handling the space where the two arms of an L intersect, our guide to small kitchen storage covers corner organizers and pull-out solutions.
3. Ample Storage with a U-Shaped Design
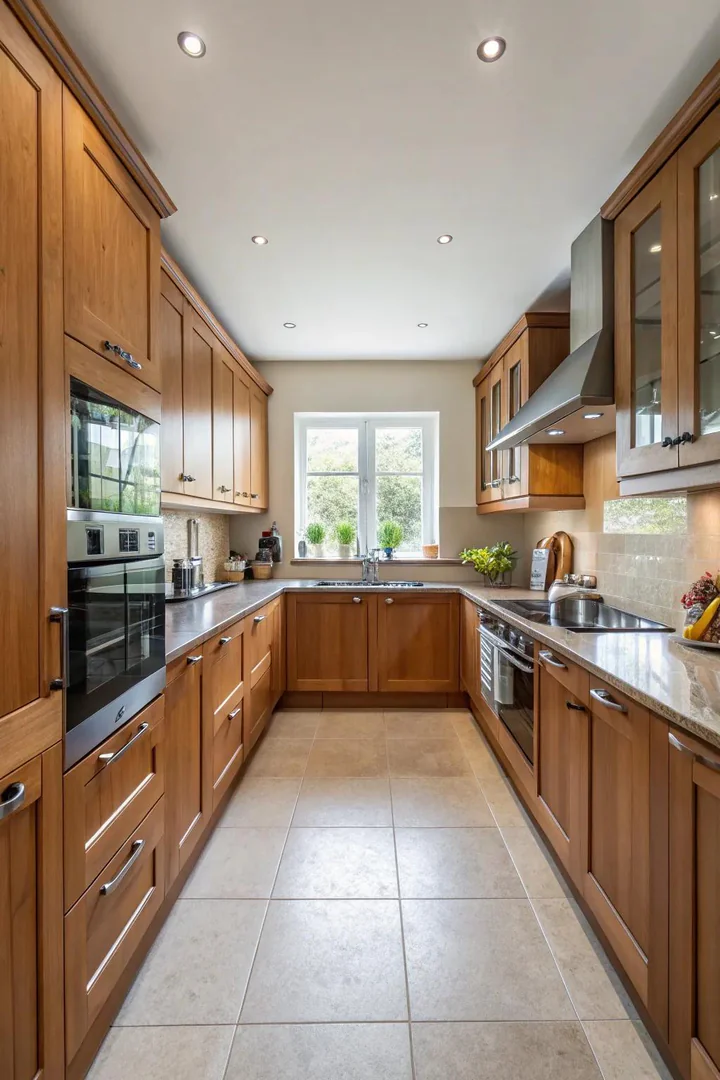
A U-shaped layout surrounds the cook on three sides with cabinets and countertop, providing the most storage and work surface of any standard layout. The three walls create an enclosed workspace where every tool, appliance, and ingredient is within one or two steps. Place the sink on the center wall (usually the one with a window), the stove on one side wall, and the refrigerator on the opposite side wall so the work triangle forms naturally within the U.
The U-shape requires a minimum aisle width of forty-two inches between opposing cabinet faces — thirty-six inches is technically walkable but feels cramped when two people are in the kitchen simultaneously. In a room wider than twelve feet, the U-shape’s three runs of cabinets provide so much storage that a separate pantry is usually unnecessary. KraftMaid, Diamond, and Merillat all offer full lines of base, wall, and tall cabinets that configure into U-shaped layouts with matching fillers and corner solutions.
4. Kitchen Design for Limited Areas
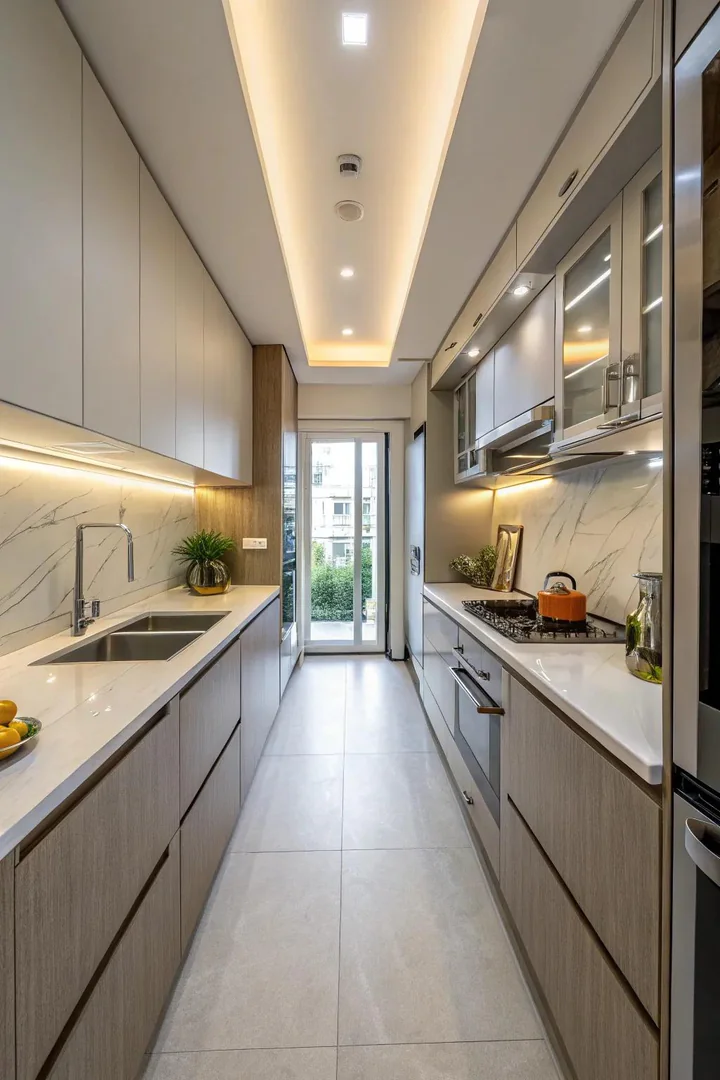
A galley layout places two parallel runs of cabinets and countertop on opposing walls with an aisle between them. This is the most space-efficient layout for narrow rooms because every inch of both walls is used for storage and counter, and the cook stands in the center with everything reachable by turning rather than walking. Professional kitchens use the galley layout for exactly this reason — it minimizes movement and maximizes the ratio of workspace to floor space.
The minimum aisle width for a galley kitchen is thirty-six inches, with forty-two to forty-eight inches preferred for comfort when two people share the kitchen. Place the sink and dishwasher on one wall and the stove and oven on the facing wall so the wet and hot zones are separated. Keep the refrigerator at one end of the galley near the entrance so grocery loading does not require walking through the cooking zone. Light-colored cabinets, under-cabinet LED strips, and one or two open shelving sections prevent the galley from feeling closed-in.
5. Incorporate a Peninsula for Additional Seating
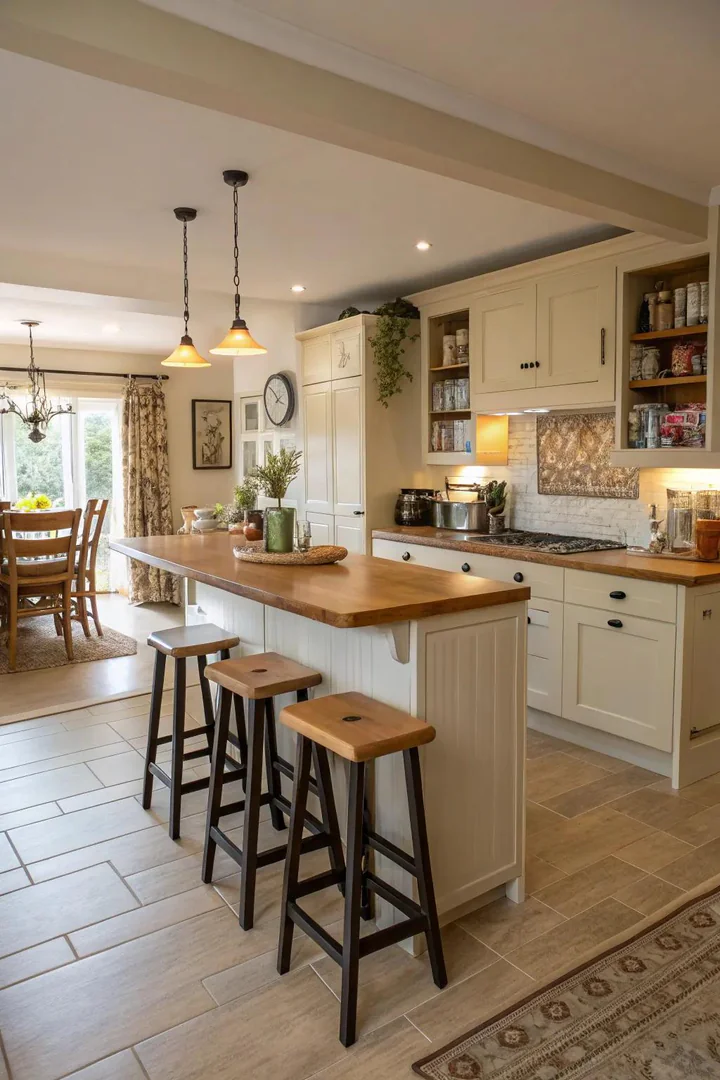
A peninsula is a cabinet run that extends perpendicular from a wall or the end of an existing counter, creating a three-sided enclosure like a U-shape but with one open end that provides bar seating on the outer face. The peninsula gives you the counter space and storage of a U-shaped kitchen while also creating a casual dining bar that faces the living or dining area — making it ideal for open-plan homes where the kitchen serves as a social hub.
A twelve-inch countertop overhang on the peninsula’s outer edge creates enough ledge for two to three bar stools. Standard peninsula depth is twenty-four inches (matching base cabinet depth) plus the twelve-inch overhang, for a total of thirty-six inches from the wall face to the outer countertop edge. For more on peninsula configurations and how they connect to existing counter runs, our guide to kitchen peninsula attached to wall ideas covers structural connections, seating dimensions, and layout variations.
6. Multifunctional Island Centers
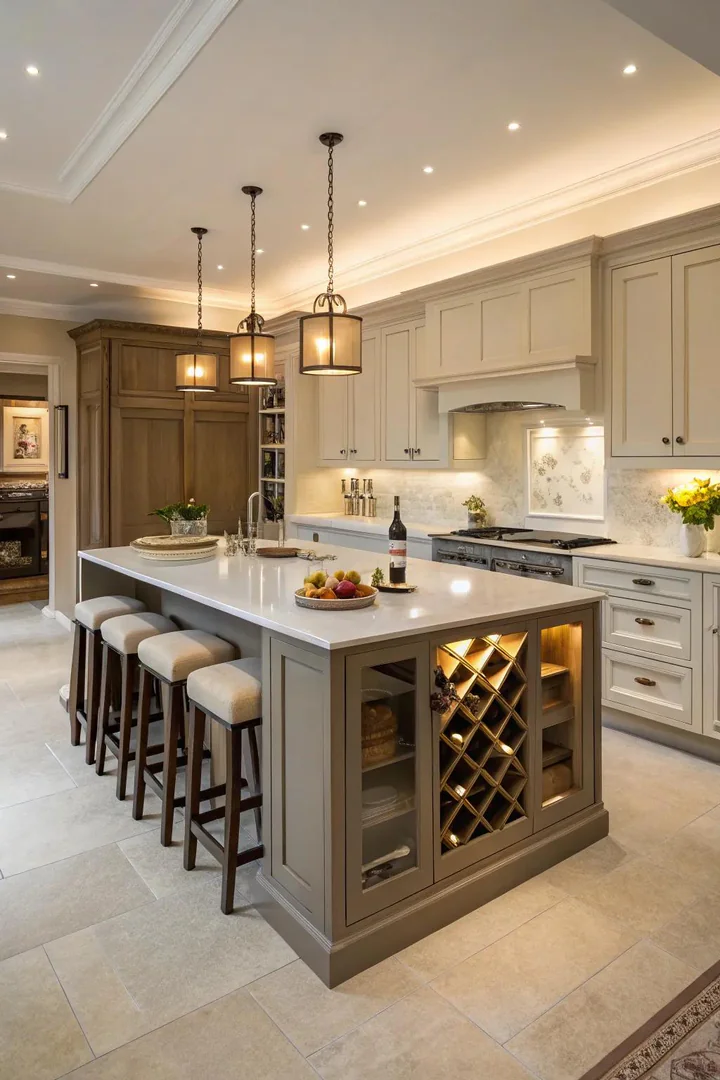
A kitchen island adds a freestanding cabinet-and-countertop block to the center of the room, providing extra storage, additional counter space, and often seating, a prep sink, or a cooktop. The minimum clearance around an island is thirty-six inches on all sides — forty-two inches on the side facing the dishwasher so the door can open with room to stand beside it. A standard island is four feet long by two feet deep, but larger kitchens can accommodate islands up to eight or ten feet long that become the room’s primary workspace.
Configure the island’s interior based on what your perimeter cabinets lack. If your wall cabinets provide enough dish and glass storage, fill the island with deep drawers for pots, pans, and baking sheets. If your counter space is tight, keep the island top clear and use it exclusively as a prep surface. Add an electrical outlet to the island’s end panel for countertop appliances, and install pendant lights above the island to define it as the kitchen’s centerpiece.
7. Efficient Corner Cabinets
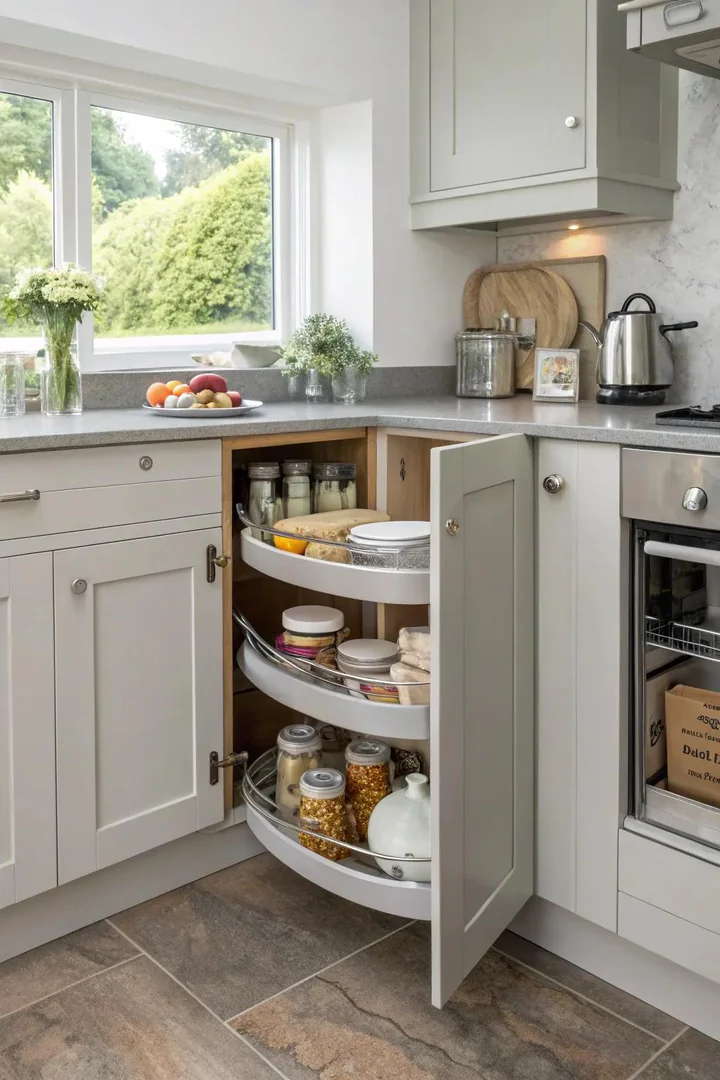
Corner cabinets in L-shaped and U-shaped layouts contain the most square footage of any single cabinet position, but without the right interior hardware, the deep triangular space becomes a dead zone where items disappear behind the door. A full-rotation Lazy Susan, a half-moon swing tray (from Rev-A-Shelf or Hafele), or a blind-corner pull-out converts the corner from dead storage into the most accessible cabinet in the kitchen — each option brings the back-row items forward so you never have to reach blindly into the corner.
A diagonal corner cabinet — a flat-front cabinet set at forty-five degrees across the corner — opens the corner’s full depth through a single wide door, which is easier to access than the standard L-shaped door opening. IKEA, KraftMaid, and Fabuwood all offer diagonal corner base and wall cabinets that fit standard ninety-degree corner configurations. The diagonal face takes up slightly more wall space than a blind corner, but the trade-off is full access to the interior without any special hardware.
8. Optimize Vertical Storage
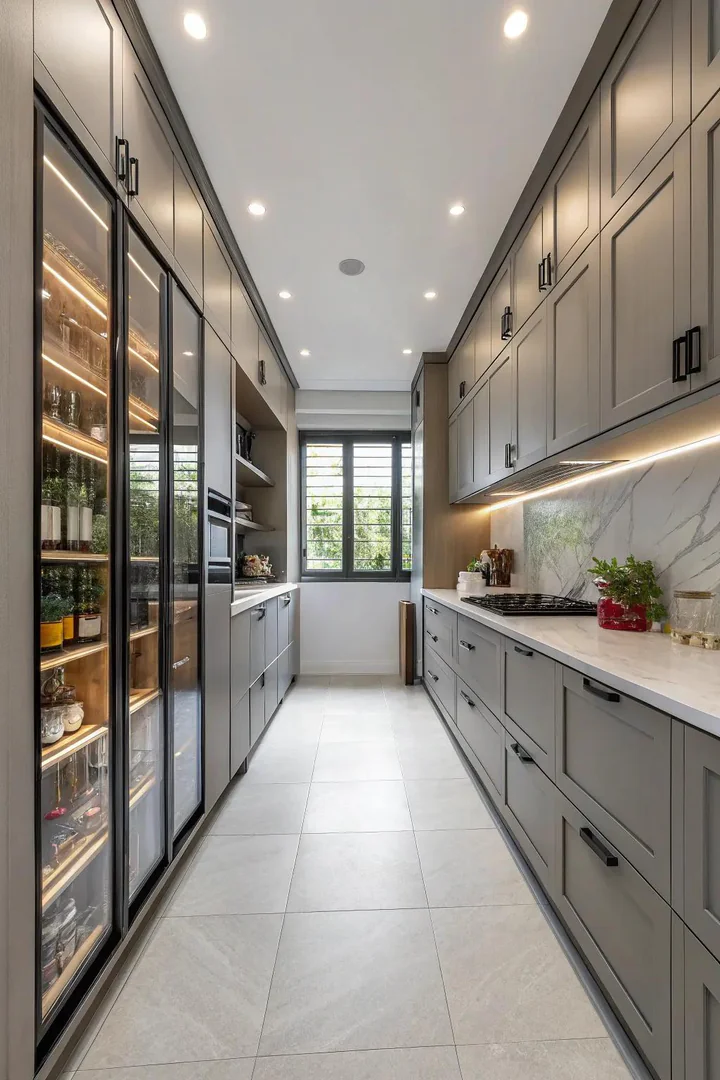
Extending wall cabinets to the ceiling eliminates the dust-collecting gap above standard upper cabinets and adds a full row of high-storage space for items you use infrequently — holiday platters, oversized serving bowls, extra appliances, and bulk pantry items. Standard wall cabinets are thirty to thirty-six inches tall, but forty-two-inch and custom-height options from CliqStudios, Semihandmade, and Fabuwood reach the ceiling in standard eight-foot rooms. A two-piece stacked configuration — a thirty-inch cabinet below and a twelve-inch cabinet above — achieves the same height with smaller, lighter doors that are easier to open.
Tall pantry cabinets — eighty-four to ninety-six inches high, twelve to twenty-four inches wide — provide floor-to-ceiling storage in a single vertical unit. Place one or two tall pantry cabinets at the end of a cabinet run, flanking the refrigerator, or in a filler spot where a standard base-and-wall pair would leave wasted vertical space. The tall cabinet’s interior holds six to eight adjustable shelves that store more linear footage of items than any other single cabinet position.
9. Combine Open and Closed Storage
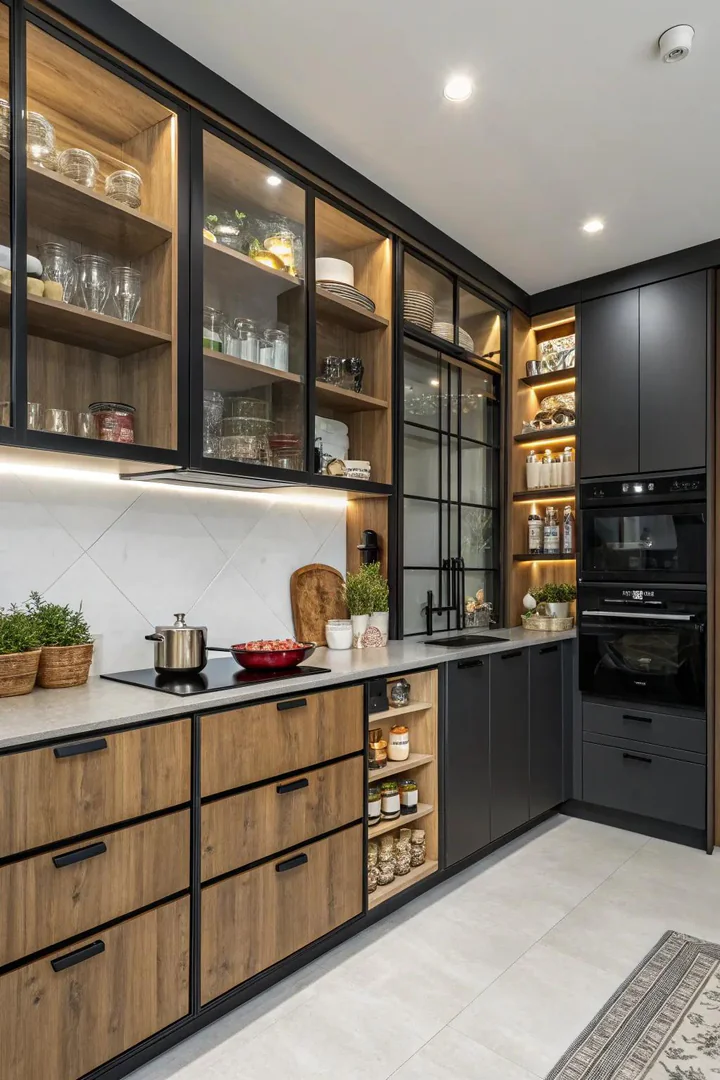
A layout that alternates closed cabinets with open shelving sections breaks up the solid wall of cabinet doors and creates a rhythm of display and concealment that makes the kitchen feel curated rather than uniform. Replace one or two upper cabinet positions with floating shelves to create a display zone for plants, cookbooks, and everyday dishes, while the surrounding closed cabinets hide less photogenic items — cleaning supplies, food packaging, small appliances.
Position the open shelves in the most visible locations — flanking a window, above the sink, or at the end of a cabinet run — so they read as intentional design features rather than missing cabinet doors. Keep the open sections to twenty to thirty percent of the total upper cabinet run so you maintain enough closed storage for everything that does not belong on display. A consistent shelf material (matching the cabinet’s wood finish or a contrasting natural wood) ties the open and closed sections into a cohesive design.
10. Integrate Integrated Appliances
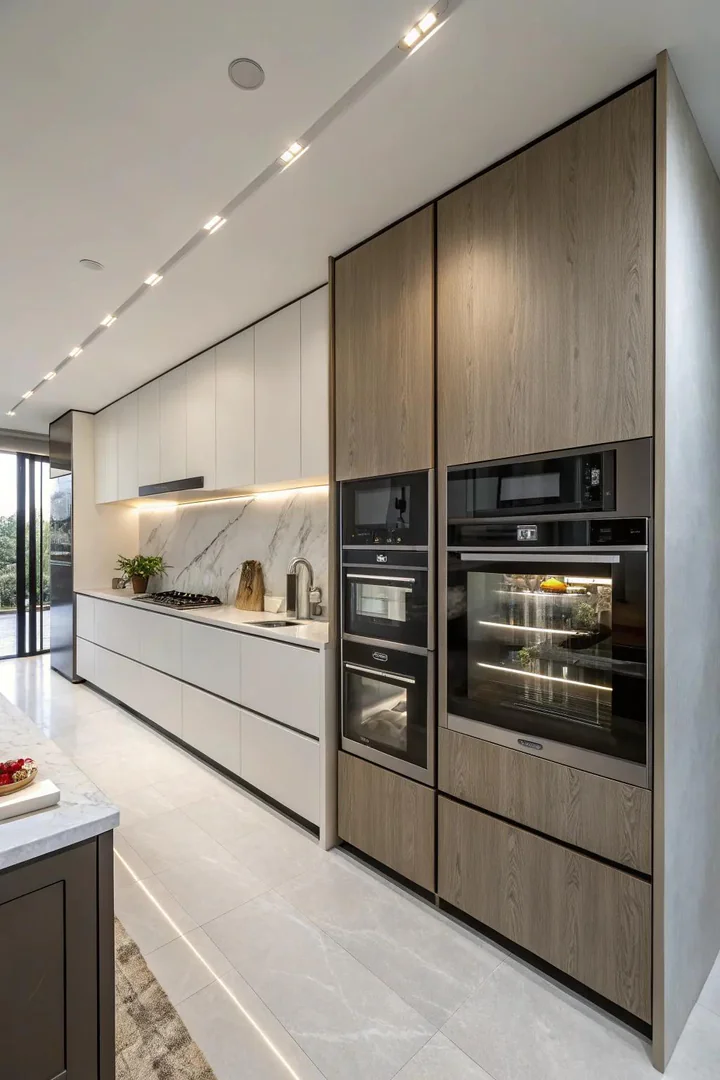
Panel-ready appliances — refrigerators, dishwashers, and built-in microwaves that accept a custom cabinet panel on the front — create a uniform cabinet wall where the appliances disappear behind matching door fronts. Bosch, Miele, Fisher & Paykel, and Sub-Zero all offer panel-ready models that accept three-quarter-inch-thick cabinet panels. The result is a kitchen where the visual line of cabinets runs unbroken from wall to wall, which makes the room look larger, cleaner, and more deliberately designed.
Panel-ready appliances cost fifteen to thirty percent more than their standard stainless-steel counterparts, and the custom panels add two-hundred to four-hundred dollars per appliance to the cabinetry order. The investment is worth it in kitchens where a seamless look is the design priority — particularly in modern, minimalist, and Scandinavian-style kitchens where visible appliances would disrupt the clean lines. In traditional or farmhouse kitchens, visible stainless appliances are part of the style, so panel-ready models offer no design advantage.
11. Incorporate a Hint of Symmetry
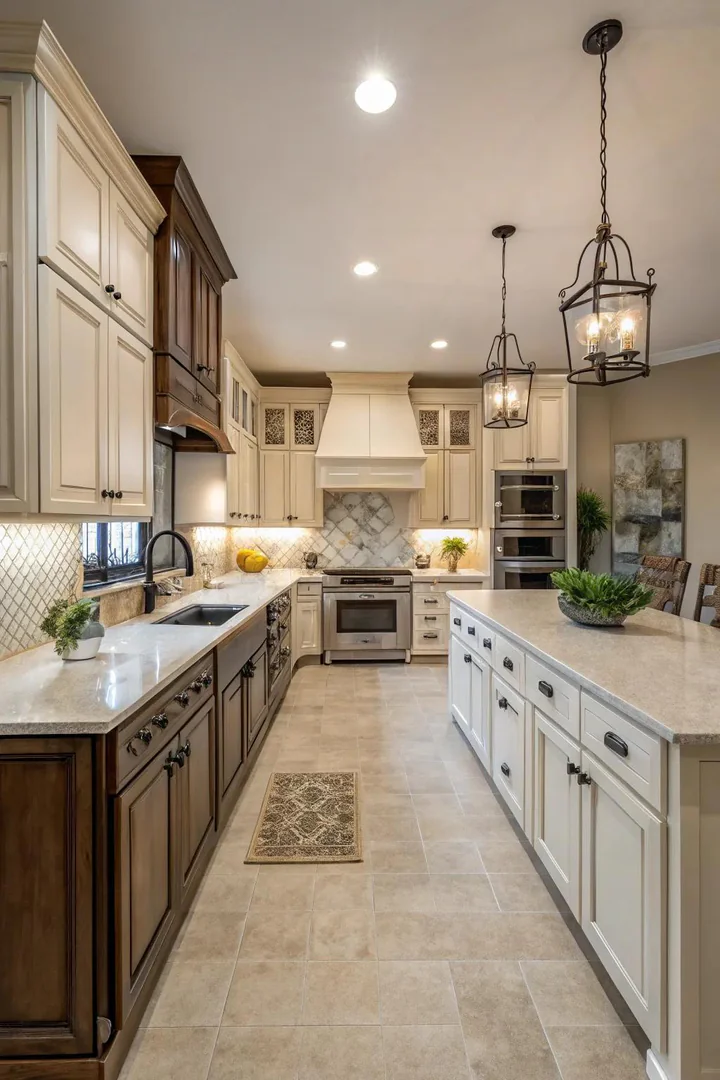
A symmetrical cabinet layout — matching cabinet configurations on both sides of a central focal point like a range, a window, or a hood — creates a sense of order and balance that makes the kitchen feel calm and intentional. Place two identical tall cabinets flanking the range, two matching glass-front cabinets flanking the sink window, or two open shelving units on either side of a hood to establish a mirror-image composition that the eye reads as organized and deliberate.
Symmetry does not require every cabinet in the kitchen to be mirrored — just the most visible wall. The stove wall or the sink wall is usually the kitchen’s primary view from the dining or living area, so symmetry on that one wall creates the impression of balance for the entire room. The remaining walls can be asymmetrical and utilitarian without disrupting the overall visual harmony. Use matching cabinet heights, matching door styles, and matching hardware on the symmetrical wall to reinforce the mirror effect.
12. Incorporate a Breakfast Nook
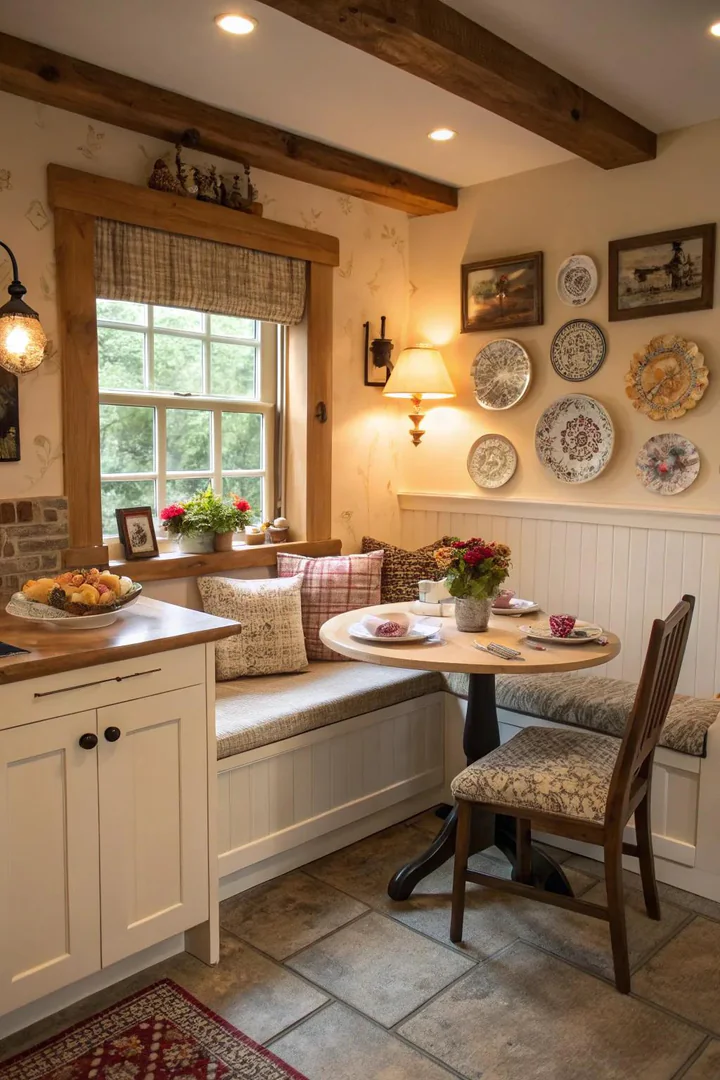
A breakfast nook built into the end of a cabinet run or tucked into a bay window creates an eat-in seating area that does not require a separate dining table taking up floor space. Built-in bench seating with storage compartments underneath wraps into an L-shape or a U-shape around a small table, providing seating for four to six people in a footprint that would barely fit a two-person bistro table and chairs. The bench storage holds table linens, placemats, and less-used kitchen items.
Position the breakfast nook at the end of the kitchen furthest from the stove so diners sit away from cooking heat and activity. A thirty-six-inch-wide table with twenty-inch-deep benches fits most breakfast nooks and provides a comfortable dining surface for casual meals. Add a pendant light or a small chandelier above the nook table to define it as a separate zone within the kitchen — the dedicated light signals that this corner is for sitting, not cooking.
13. Make Use of Glass-Front Cabinets
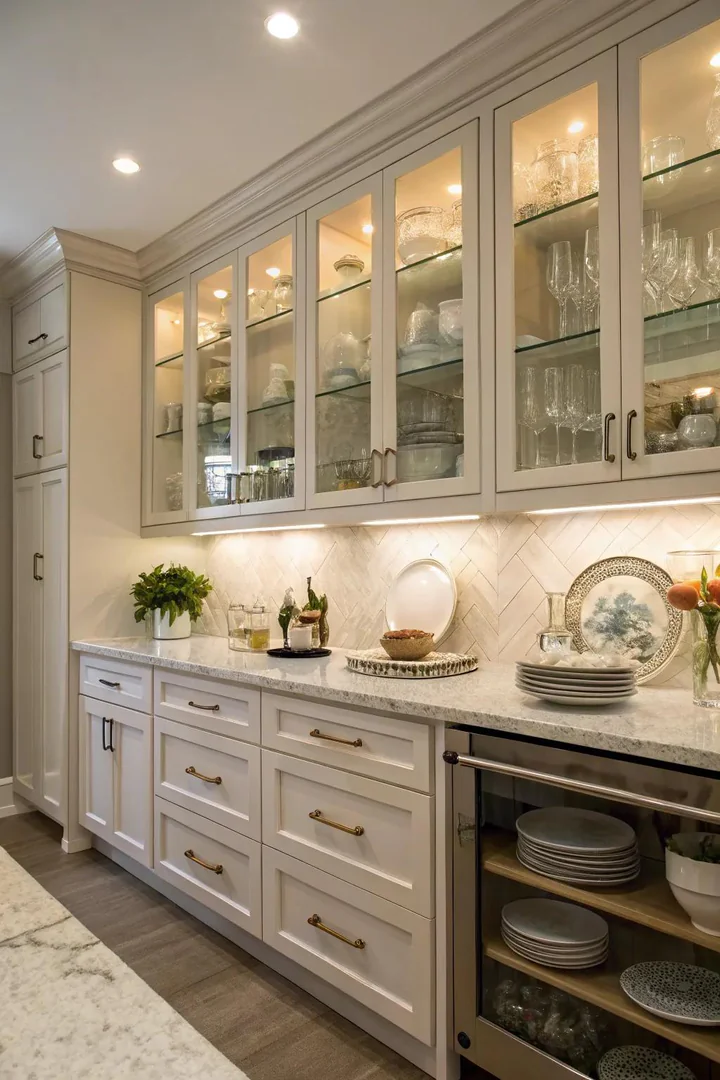
Glass-front upper cabinets — clear, frosted, or seeded glass in the door panel — break up the solid visual plane of a cabinet wall and add depth by revealing the cabinet’s interior. Use clear glass for cabinets that hold curated collections of matching dishes, glassware, or decorative objects. Use frosted or reeded glass for cabinets that hold everyday items you want partially hidden — the glass softens the view without fully concealing what is behind it.
Add interior LED lighting — puck lights or a strip mounted under the top shelf — inside glass-front cabinets to illuminate the contents and create a warm glow that enhances the kitchen’s ambiance after dark. For guidance on interior cabinet lighting placement and fixture types, our kitchen cabinet lighting ideas guide covers battery-powered, plug-in, and hardwired options for glass-front cabinets. Place glass-front cabinets on either side of the range hood or flanking the sink window for a symmetrical display that anchors the room.
14. Design a Concealed Pantry
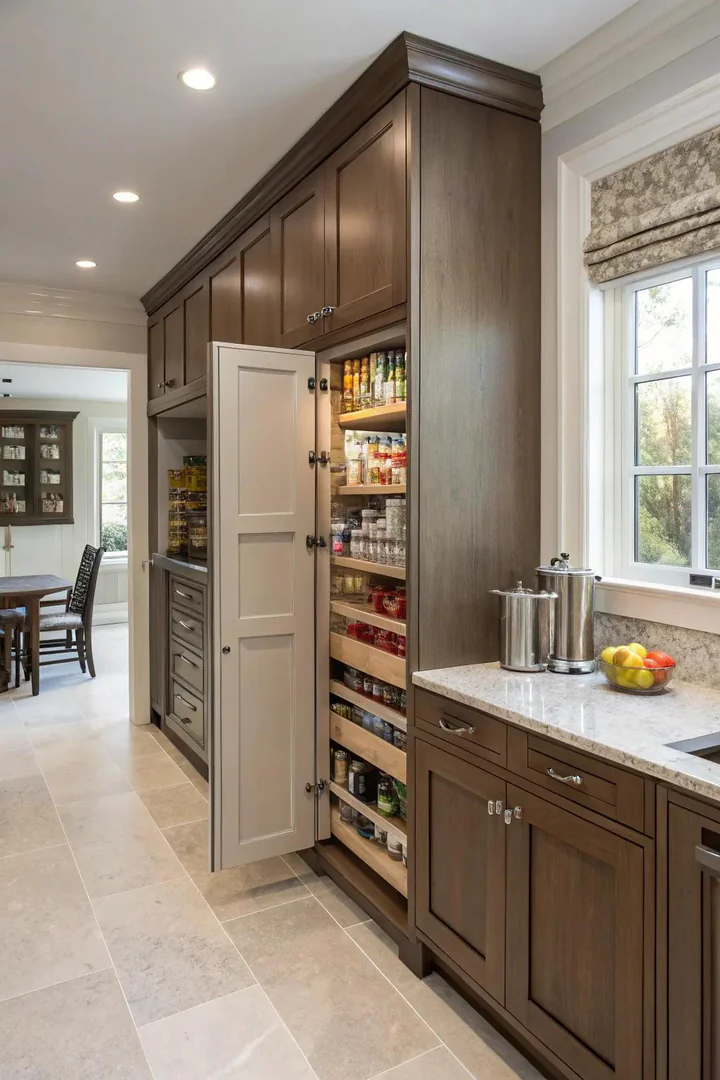
A hidden pantry — a tall cabinet or a pocket door concealing a walk-in or reach-in pantry — keeps dry goods, small appliances, and bulk items out of sight behind cabinet-matched doors that blend into the surrounding cabinetry. When the doors close, the pantry disappears into the wall. When the doors open, you have full access to shelving, pull-out drawers, and countertop space for appliances like a toaster, a coffee maker, and a blender that would otherwise clutter the main kitchen countertop.
A butler’s pantry variation includes a small countertop and a sink inside the hidden space, creating a secondary prep zone for messy tasks — mixing, juicing, blending — that stay hidden from the main kitchen. This configuration keeps the main kitchen’s countertops clear and presentable while the pantry handles the less photogenic work. Custom cabinet shops and IKEA’s SEKTION system both support hidden pantry configurations with matching door panels and interior fittings.
15. Try Out Different Cabinet Colors
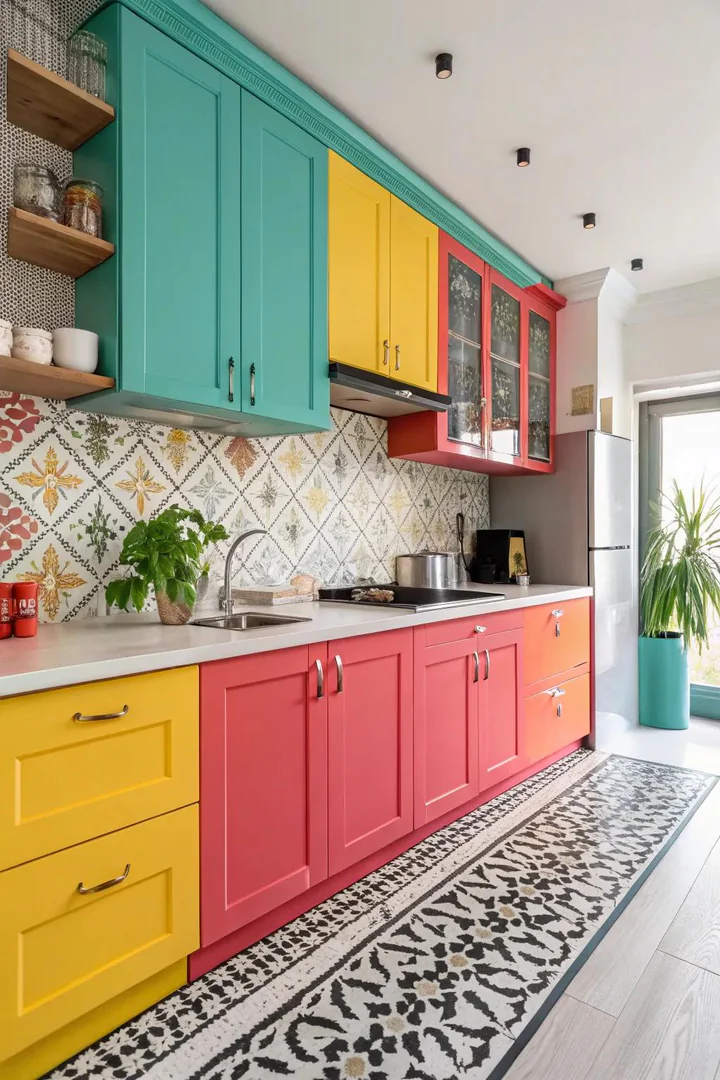
A two-tone cabinet color scheme — where upper cabinets are one color and base cabinets are another, or where the island is a different color from the perimeter — adds visual interest and depth to the layout without changing the cabinet positions or the floor plan. White uppers with navy base cabinets, grey uppers with natural wood lowers, or an all-white perimeter with a dark green island are all popular pairings that create a grounded, layered look.
The darker color goes on the lower cabinets or the island because weight at the bottom reads as stable, while lighter colors on the upper cabinets keep the room feeling open and bright. Benjamin Moore’s Hale Navy (HC-154), Sherwin-Williams’ Agreeable Gray (SW 7029), and Farrow & Ball’s Studio Green (No. 93) are all proven cabinet colors that hold up across styles and lighting conditions. For more tested combinations and paint recommendations, our guide to kitchen cabinet color ideas covers over thirty color pairings with photos and finish specifications.
How to Plan a Kitchen Cabinet Layout
Measuring and Mapping Your Space
Measure the kitchen’s total dimensions (length, width, ceiling height) and mark the locations of windows, doors, plumbing lines, electrical outlets, and any structural elements (columns, soffits, pipes) on a scaled floor plan. Use a quarter-inch-equals-one-foot scale on graph paper or a free tool like IKEA’s kitchen planner or RoomSketcher to create a digital layout. Accurate measurements prevent the most expensive layout mistake: ordering cabinets that do not fit the space. Measure twice, paying special attention to the distance from the corner to the nearest window or door — this dimension determines whether a corner cabinet fits without blocking the adjacent opening.
The Work Triangle Principle
The work triangle connects the sink, stove, and refrigerator with three imaginary lines. Each leg of the triangle should measure between four and nine feet, and the total perimeter should be between thirteen and twenty-six feet. A triangle that is too tight creates a cramped work area where you bump into open appliance doors. A triangle that is too spread out means excessive walking between tasks. Position these three points first, then fill in the cabinet, counter, and storage around them.
Storage vs. Counter Space
Every foot of upper cabinet you add provides closed storage but reduces the visual openness of the room. Every foot of upper cabinet you remove in favor of open shelving or no-cabinet wall space opens the room but reduces storage. Decide which you need more — storage or openness — and design the upper cabinet run accordingly. A good starting point: install upper cabinets above the stove and sink walls where storage is most needed, and leave the window wall and any walls facing the living area cabinet-free for openness and light.
Kitchen Cabinet Layout Comparison
| Layout | Best For | Min Room Size | Storage Level |
|---|---|---|---|
| One-wall | Studios, open-plan spaces | 10 ft linear wall | Low |
| Galley | Narrow rooms | 7 x 10 ft | Moderate |
| L-shaped | Most standard kitchens | 8 x 8 ft | Moderate |
| U-shaped | Dedicated kitchen rooms | 10 x 10 ft | High |
| Peninsula | Open-plan with seating | 10 x 10 ft | Moderate-high |
| Island | Large kitchens, entertaining | 12 x 12 ft | High |
Common Kitchen Layout Mistakes to Avoid
Blocking the work triangle with an island. An island placed too close to the perimeter cabinets disrupts the flow between the sink, stove, and refrigerator. Maintain at least forty-two inches of clearance between the island and the nearest countertop so two people can pass each other and appliance doors can open fully without hitting the island.
Placing the dishwasher too far from the sink. The dishwasher should sit directly adjacent to the sink — on either side — so you can scrape, rinse, and load in one motion without carrying dripping dishes across the kitchen. Every foot of distance between the sink and the dishwasher adds dripping water on the floor and wasted movement on every load.
Forgetting about door clearance. Cabinet doors, appliance doors, and room doors all swing into the kitchen and can collide if their arcs overlap. Check that the oven door, dishwasher door, and refrigerator door can all open fully without hitting each other, the island, or a wall. A quick template test — open all doors simultaneously on your floor plan — catches clearance conflicts before the cabinets are installed.
Under-lighting the workspace. A cabinet layout that blocks natural light from reaching the countertop creates shadows where you need to see most. Upper cabinets directly above the primary work surface (between the sink and the stove) should include under-cabinet lighting so the countertop stays well-lit regardless of your body’s shadow position. Visit The Designers Company for detailed cabinet layout templates, measurement guides, and design consultations for every kitchen size and shape.
Frequently Asked Questions
What is the most efficient kitchen layout?
The galley layout is the most efficient in terms of steps between tasks because the sink, stove, and refrigerator sit across from each other on two parallel walls, putting everything within a half-turn’s reach. For kitchens that also serve as social spaces, the L-shaped layout with an island provides a close second in efficiency while adding seating and a more open feel.
How much space do I need for a kitchen island?
The minimum kitchen size for an island is approximately twelve-by-twelve feet (one-hundred-forty-four square feet). The island itself needs to be at least two feet deep and four feet long to be useful, and you need thirty-six to forty-two inches of clearance on all sides. In a kitchen smaller than one-hundred-forty-four square feet, a peninsula or a portable cart provides similar functionality without the permanent footprint.
Should upper cabinets go to the ceiling?
Extending uppers to the ceiling adds storage and eliminates the dust-collecting gap above standard cabinets. The top shelf becomes high-storage for items you rarely use (holiday platters, extra vases, spare appliances). If your ceiling is nine feet or higher, a two-piece stacked configuration — standard thirty-inch cabinets below and a twelve-inch display or storage cabinet above — provides the height without requiring custom-height doors.
What cabinet colors have the best resale value?
White, off-white (Benjamin Moore’s Simply White, White Dove), and light grey (Revere Pewter, Repose Gray) are the safest choices for resale because they appeal to the widest range of buyers and coordinate with any countertop and hardware selection. Navy and dark green have strong appeal in current markets but are more style-specific. Natural wood tones (white oak, walnut) are trending upward and may hold long-term value as tastes shift toward warmer materials.
How do I make a small kitchen feel bigger with cabinets?
Use light-colored cabinets (white, light grey, natural wood) to reflect light. Replace some upper cabinets with open shelves to expose the wall and add visual depth. Extend uppers to the ceiling to draw the eye upward and make the room feel taller. Choose handleless or slim-profile hardware to reduce visual noise. Add under-cabinet lighting to brighten the countertop and eliminate shadows that make the space feel closed in.
Is it better to have drawers or doors on base cabinets?
Drawers provide better access because you can see the full contents from above without kneeling or reaching into the back of a shelf. A full-extension drawer on soft-close slides pulls completely out of the cabinet, putting every item in the drawer at eye level. Doors-with-shelves are cheaper per linear foot, but the back half of a twenty-four-inch-deep shelf becomes dead storage that holds forgotten items. For base cabinets that store pots, pans, baking sheets, and heavy items, drawers are the better choice.
Conclusion
The right kitchen cabinet layout is the one that matches how you actually cook and move through the room — not the one that looks best in a showroom or a magazine. Measure your space, identify where your sink, stove, and refrigerator work best in relation to each other, and build the cabinet and counter configuration around that triangle. The layout drives everything else: storage capacity, counter space, traffic flow, and how the kitchen feels when you are standing in it cooking dinner.
Start with the floor plan, test the work triangle, and then layer in the details — cabinet styles, colors, hardware, glass fronts, and specialty storage — once the bones of the layout are set. A well-planned layout with basic cabinets will always outperform a poorly planned layout with expensive custom cabinetry, because the layout determines how well the kitchen works, and the cabinets just fill it in.

