DIY Pallet Bar Ideas: 18 Stunning Designs to Transform Your Space
A DIY pallet bar turns free or low-cost shipping pallets into a backyard drink station, outdoor kitchen island, or party serving counter for $50-$300 in total materials. Standard 48×40-inch pallets (free from local businesses, $5-$15 each from hardware stores) provide enough lumber for a 4-6 foot bar when disassembled, or you can stack two pallets vertically for a ready-made bar frame with built-in shelving between the slats.
The 17 pallet bar builds below range from a basic backyard setup to an L-shaped outdoor kitchen bar, each with material lists, dimensions, and step-by-step construction notes. Visit The Designers Company for hundreds of additional outdoor project guides covering decks, patios, and garden builds.
1. Backyard Oasis Bar

A freestanding backyard pallet bar uses three pallets (two standing vertically for the frame, one laid flat across the top as the bar surface) to create a 48-inch-wide serving station that seats 3-4 people on bar stools. Sand all pallet surfaces with 80-grit sandpaper followed by 120-grit for a splinter-free finish, then apply two coats of exterior polyurethane ($12-$18 per quart from Minwax or Varathane) for water resistance.
Screw the two vertical pallets together at a 90-degree angle using 3-inch exterior wood screws ($8-$12 per box of 100) to form an L-shaped base that stays upright without tipping. Lay the top pallet across the open ends of the vertical pallets and secure with L-brackets ($1-$2 each). Add a 1×6 cedar or pine board ($6-$10 for an 8-foot length) across the front edge as a drink rail where guests can rest glasses without them sliding off the pallet gaps.
2. Tiki-Style Bar
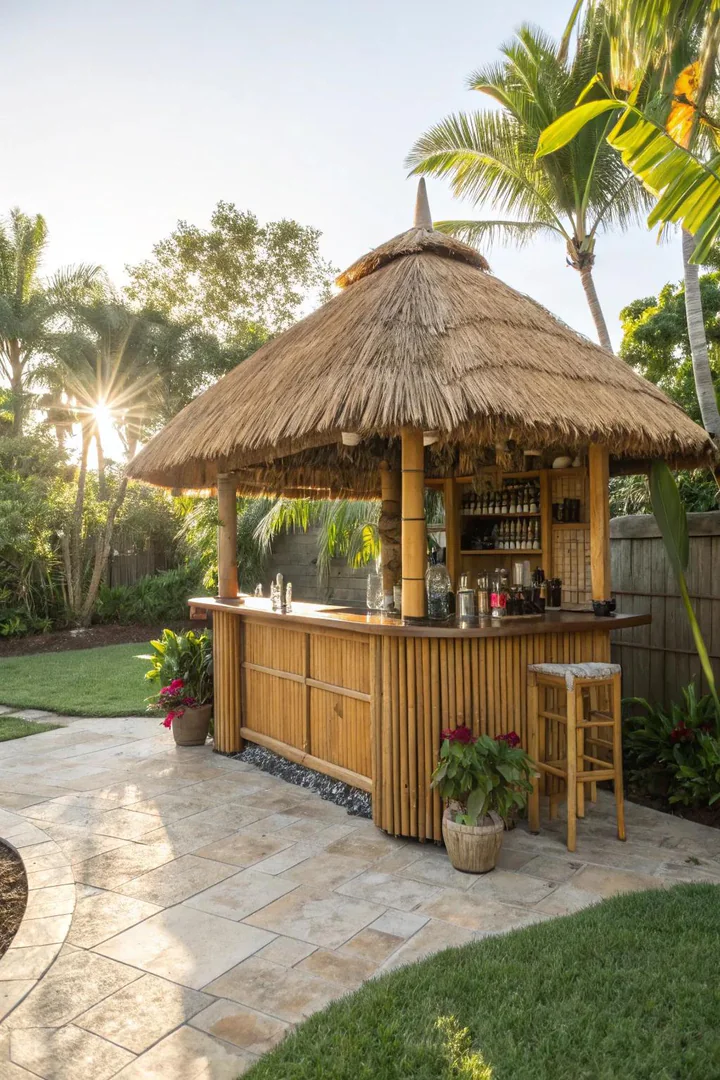
A tiki pallet bar wraps the front and sides with split bamboo fencing ($20-$40 for a 6×16-foot roll from Cali Bamboo or Home Depot) stapled directly over the pallet slats. Attach bamboo fencing with a pneumatic staple gun ($30-$50 rental or $60-$100 to buy) using 1/2-inch staples every 4-6 inches along the pallet rails. Add a thatched roof panel ($30-$80 for a 4×8-foot section of Mexican palm thatch) to a simple post-and-beam frame above the bar for shade and full tiki atmosphere.
Mount tiki torches ($5-$10 each) at each end of the bar using pipe clamps ($2-$3 each) bolted through the pallet frame. Hang a bamboo shelf ($15-$30) on the inside of the bar for bottle storage, and add a galvanized steel tub ($15-$25) on one end as an ice bucket for drinks. Battery-powered LED tiki string lights ($15-$25 for a 20-foot strand) wrapped around the roof posts complete the theme without any electrical wiring.
3. Compact Balcony Bar
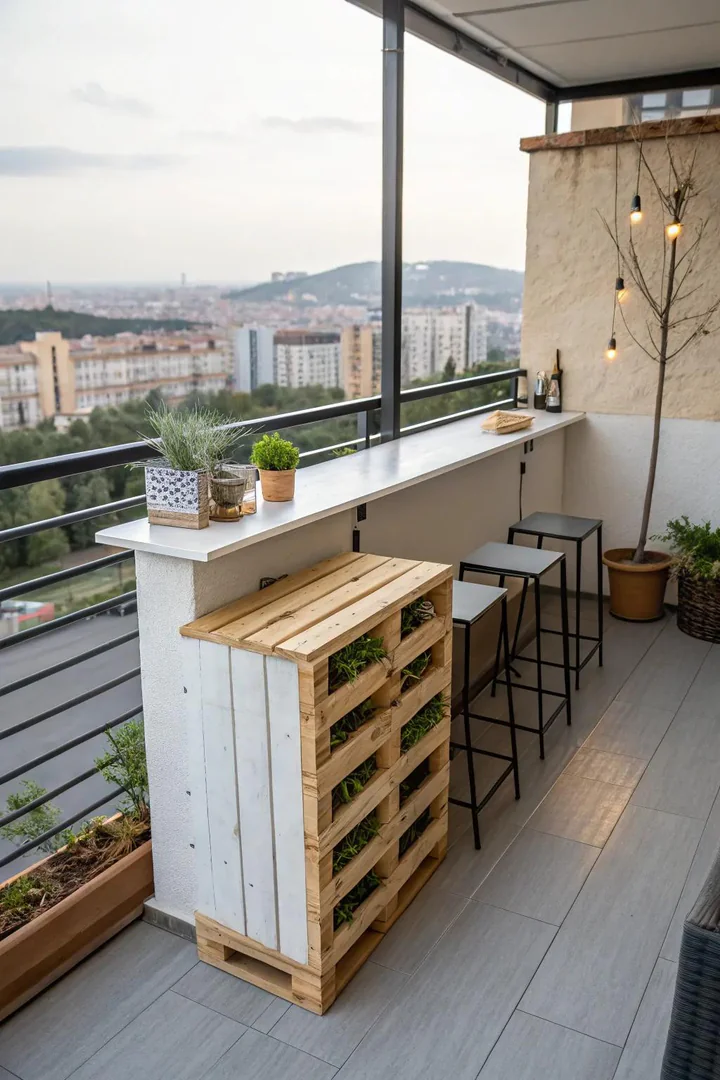
A balcony pallet bar uses a single pallet stood on its narrow end (40 inches tall, 48 inches wide, 6 inches deep) as a wall-mounted drink shelf that takes up under 1 square foot of floor space. Bolt the pallet to the balcony wall or railing with lag screws ($1-$2 each) into studs, or use heavy-duty French cleat hardware ($10-$15 per set) for a removable mount that doesn’t damage rental apartment walls.
Sand and stain the pallet in a light wash color (Minwax Classic Gray or Weathered Oak, $8-$12 per half-pint) for a clean look that fits a small outdoor space. Add a fold-down plywood shelf ($5-$10 for a 2×4-foot piece of 3/4-inch exterior plywood) hinged to the top pallet rail with 3-inch gate hinges ($5-$8 per pair) for a serving surface that folds flat against the pallet when not in use. Small balcony bars pair well with the space-saving furniture shown in small terrace ideas that maximize every inch of a compact outdoor area.
4. Garden Party Bar
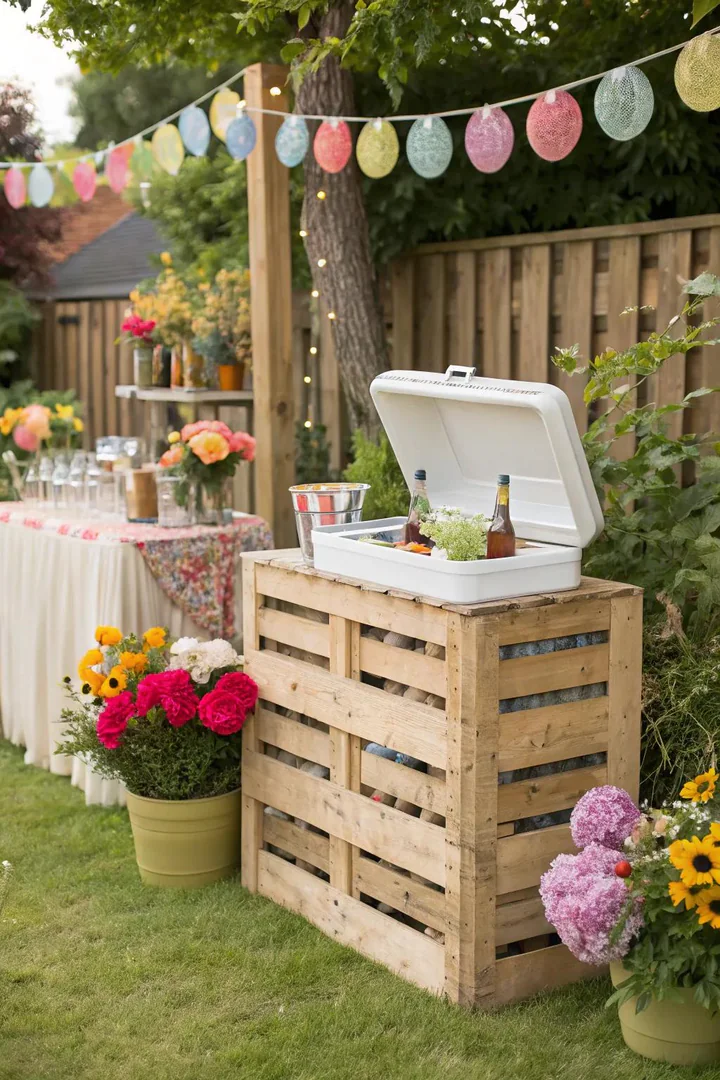
A garden party pallet bar stands on a grass or gravel surface for temporary event use, then breaks down and stores flat between parties. Build the bar from 4 pallets: two stacked vertically for the back wall, one as the front counter, and one as a lower shelf inside. Join the four pallets with carriage bolts ($0.50-$1 each) and wing nuts instead of screws so the entire structure disassembles in 10 minutes with no tools.
Wrap the front and top surfaces with a cotton tablecloth or burlap runner ($5-$15) that matches the party color scheme. Attach mason jar holders ($5-$8 for a 3-pack) to the pallet slats with hose clamps ($1-$2 each) for fresh-cut flower arrangements built right into the bar. Set the bar on a flat section of yard near the garden and position potted plants or planters on each end as natural bookends that anchor the setup visually.
5. Metal-Accent Bar
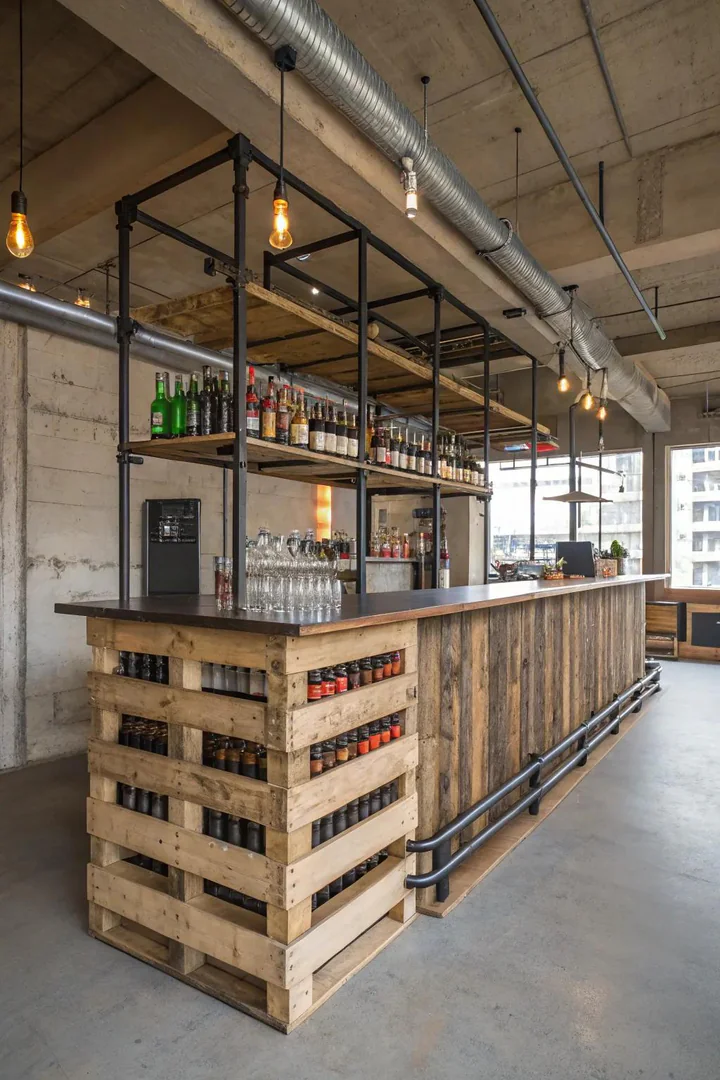
An industrial-style pallet bar pairs rough-sawn pallet wood with black iron pipe legs ($5-$15 per pipe from Plumbing Supply stores) and a corrugated galvanized steel panel ($15-$25 per 8-foot sheet) screwed to the front face. Thread four 3/4-inch diameter iron pipe legs into floor flanges ($3-$5 each) bolted to the underside of the bar top for a 42-inch standing-height counter. The pipe legs add 30-40 pounds of weight to the base, making the bar far more stable than a wood-frame version on uneven ground.
Mount a length of 3/4-inch black pipe along the front bottom rail as a foot rest ($8-$15 for a 4-foot pipe plus two elbow fittings). Cut the corrugated panel to size with aviation snips ($10-$15) and screw it to the front pallet face with self-tapping sheet metal screws ($5-$8 per box). Add Edison-style pendant lights ($15-$30 for a 3-pack) hanging from an overhead beam or pergola rafter for warm, low-level lighting above the bar surface. A metal-accent pallet bar also works on a covered front porch where the corrugated steel picks up the tones of metal roof panels and railing hardware.
6. Movable Pallet Bar
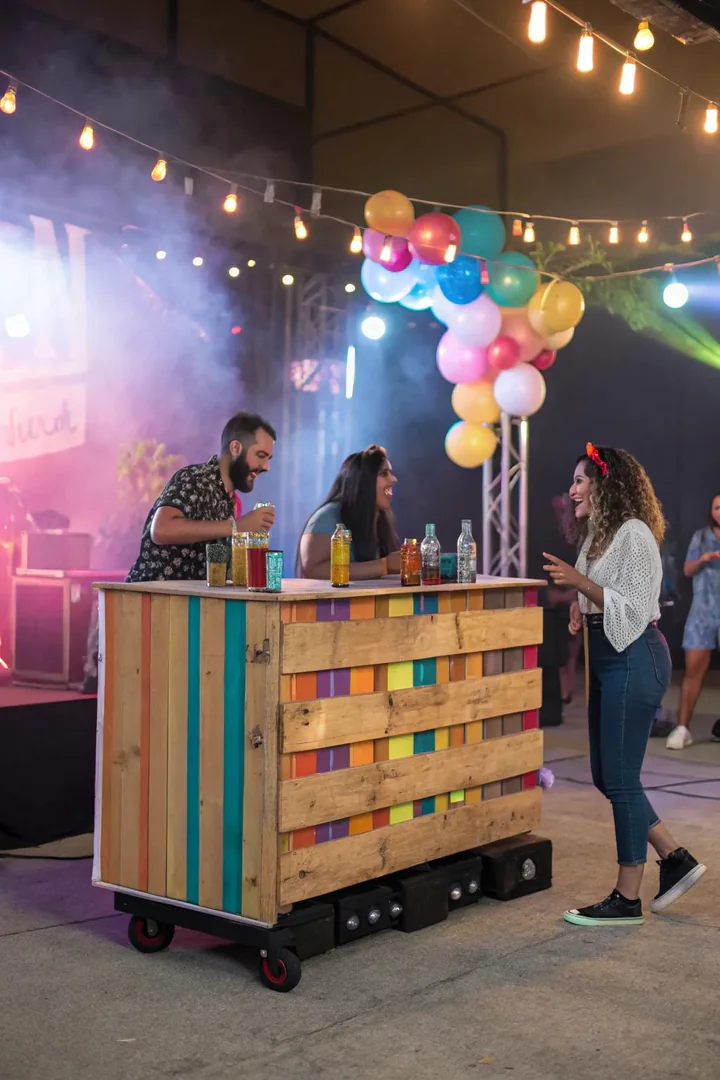
Adding 4-inch locking swivel casters ($5-$10 each, rated for 200+ pounds per caster) to the bottom of a pallet bar frame lets you roll the entire unit around the patio, into the garage for storage, or across the yard for different party setups. Bolt casters to a 2×4 base frame ($3-$5 per 8-foot board) screwed to the underside of the bottom pallet, since pallet deck boards alone are too thin to hold caster bolts under load.
Lock all four casters before using the bar to prevent rolling when guests lean on the counter. Add a pull handle ($5-$10 from a drawer hardware set) to one end for easy steering when rolling the bar to its next position. A movable bar on wheels works especially well for homeowners who host in both front and back yards or who need to clear the patio for other activities during the week.
7. Eco-Friendly Bar
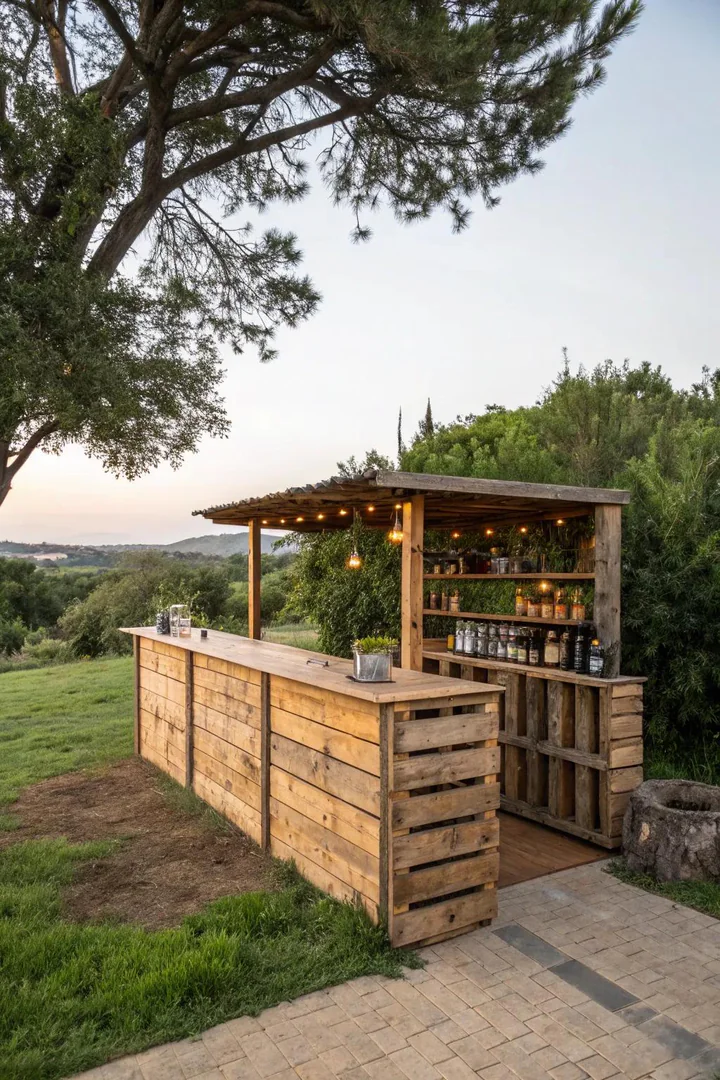
An all-reclaimed pallet bar uses salvaged materials throughout: pallet wood for the frame, reclaimed barn board ($3-$8 per board foot from salvage dealers) for the bar top, and recycled wine or beer bottles pressed into wet concrete for a decorative countertop inlay. Source heat-treated (HT-stamped) pallets exclusively, since methyl bromide-treated pallets (MB-stamped) contain a fumigant chemical not safe for food contact surfaces.
Fill gaps between pallet slats on the bar front with salvaged lath boards, fence pickets, or cut-down shipping crate wood for a solid face that hides the interior shelving and storage. Apply a food-safe finish (Howard Butcher Block Conditioner, $8-$12, or Waterlox Original, $30-$40 per quart) to any surface where drinks or food will sit. An eco-friendly bar pairs naturally with backyard desert ideas that use recycled materials and reclaimed stone throughout the outdoor space.
8. L-Shaped Bar
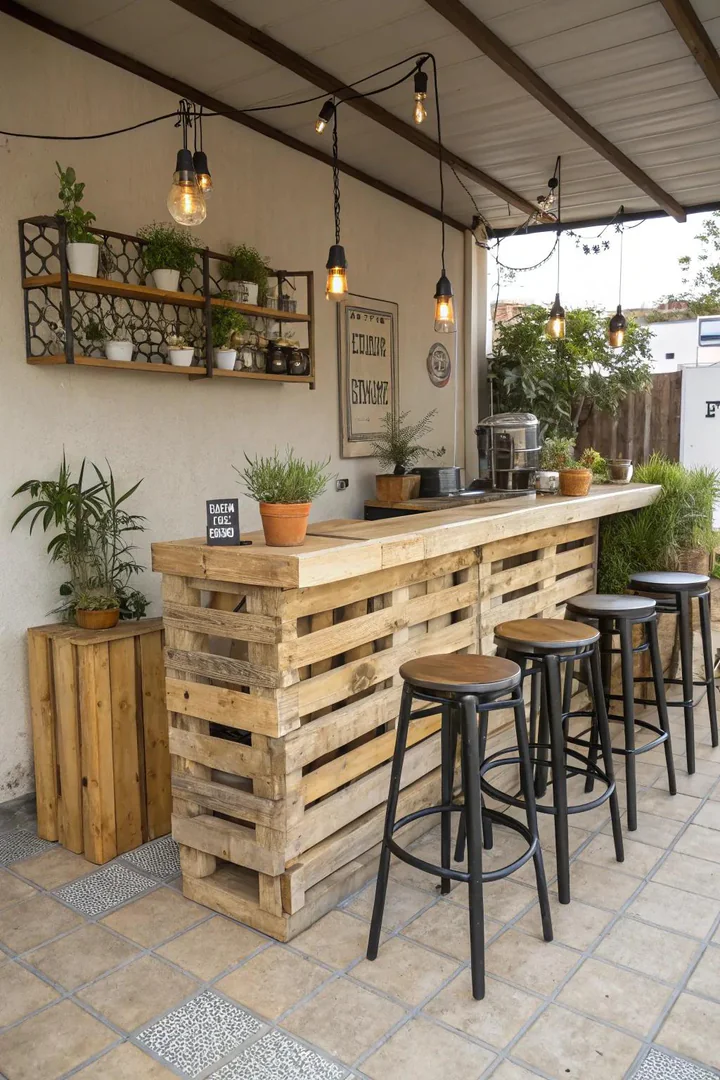
An L-shaped pallet bar seats 5-6 guests around two perpendicular bar sections, creating a drink station on one wing and a food prep or serving area on the other. Build each wing from 3 pallets (two vertical for the base, one horizontal for the top), then join the two wings at the corner using 3-inch lag screws ($0.50-$1 each) and a shared 4×4 post ($8-$12 for an 8-foot length) at the junction point for structural support.
Dedicate one wing as the drink bar (with a bottle shelf, ice tub, and glass rack) and the other as a prep counter (with a cutting board surface and trash hole cut into the top). An L-shaped layout creates an enclosed bartender zone behind the bar where you can store coolers, supplies, and backup bottles out of guest view. Size each wing at 48-72 inches long for a total bar footprint of 4×6 to 6×6 feet.
9. Bar with Shelving
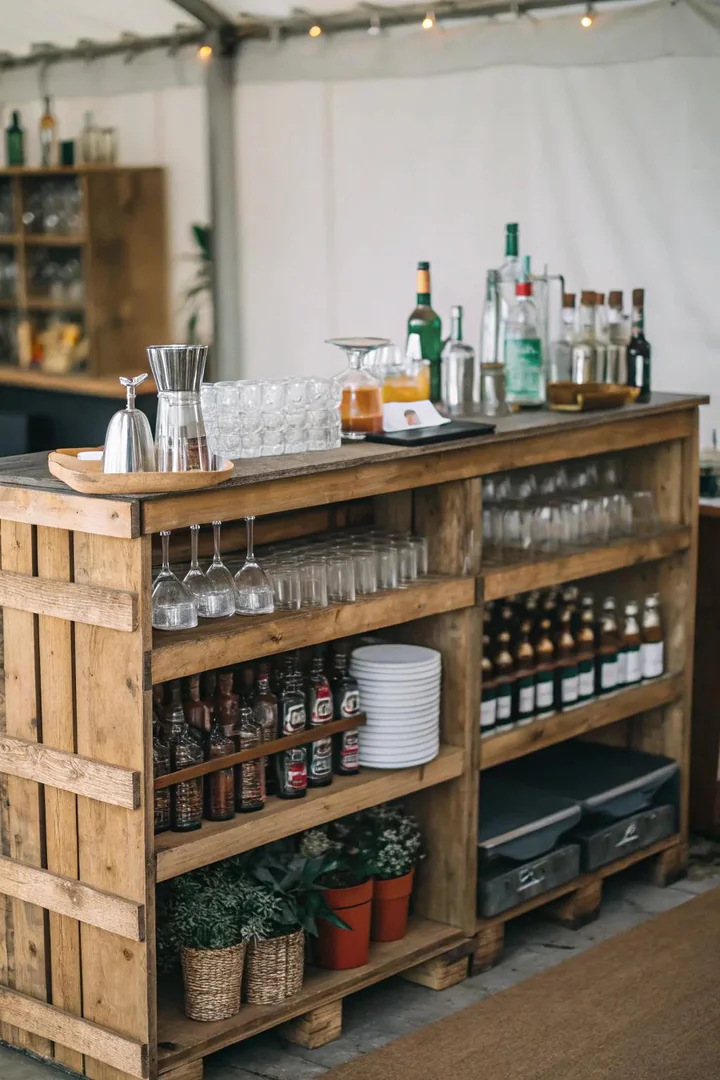
Adding a back-bar shelving unit doubles the storage capacity and gives you a place to display bottles, glassware, and bar accessories. Stack 3-4 pallets on top of each other vertically behind the main bar counter, with each pallet’s deck boards serving as a ready-made shelf surface. Screw each pallet to the one below it and anchor the top of the stack to a fence or wall to prevent tipping.
Sand and stain the shelving pallets to match the bar counter for a cohesive look. Add LED strip lights ($10-$20 for a 16-foot battery-powered strip) along the underside of each shelf for back-bar illumination that shows off bottle labels. Mount stemware rack hardware ($10-$20 for a set of under-shelf wine glass holders) to the bottom of one shelf for hanging wine glasses and cocktail coupes by their bases.
10. Bar with Lighting
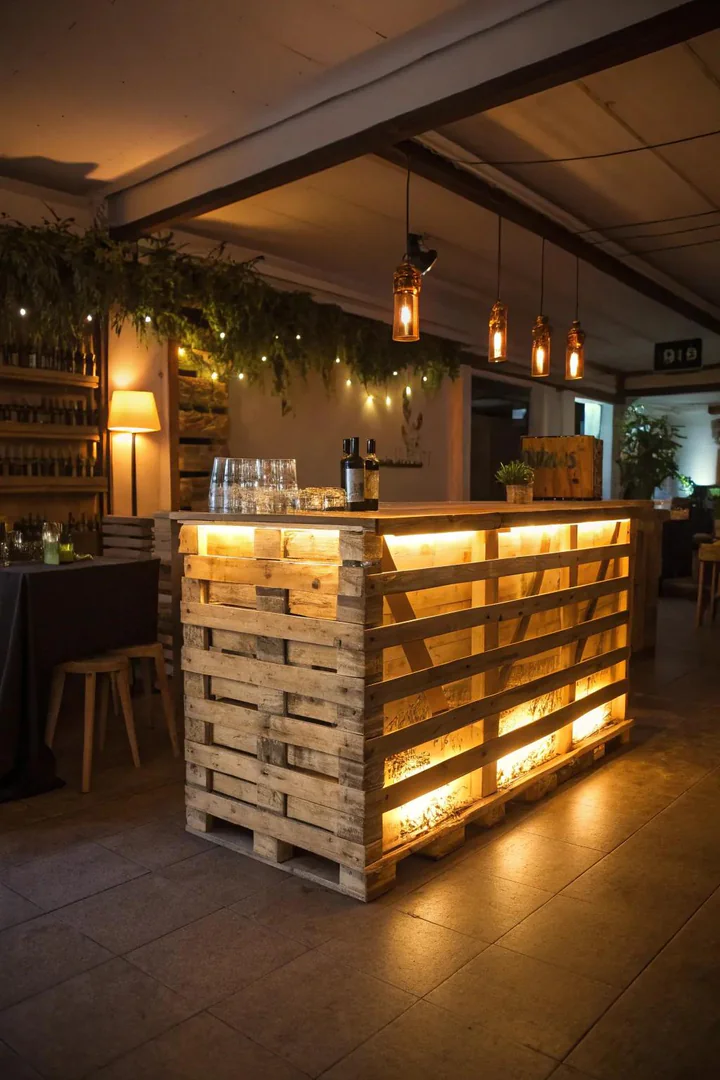
Built-in lighting turns a daytime pallet bar into an evening gathering spot without running electrical wiring to the yard. Wrap LED rope lights ($10-$20 for a 25-foot battery or solar-powered strand) around the base, along the underside of the bar top, and across the front face of the pallet slats. Staple the rope light in place with insulated cable staples ($3-$5 per pack) every 12 inches along the pallet rails.
Mount a pair of battery-powered wall sconces ($15-$30 each) or solar-charged jar lights ($10-$15 for a 4-pack) on the back-bar shelving for overhead task lighting while mixing drinks. Place pillar candles ($5-$10 each) or LED flameless candles ($8-$15 for a 3-pack) on the bar top inside glass hurricane holders ($5-$10 each) for table-level ambient glow. Solar-powered string lights ($15-$30 for a 48-foot strand) draped between poles above the bar provide general area lighting for the seating zone.
11. Outdoor Kitchen Bar
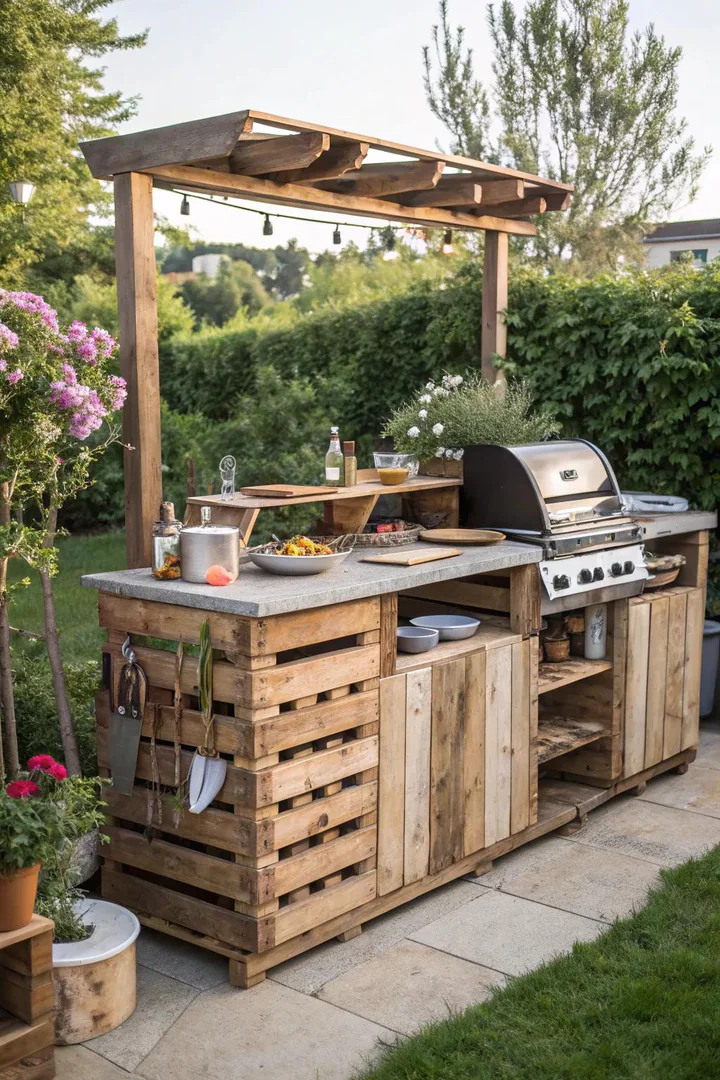
A pallet bar built as an extension of an outdoor grill station creates a continuous cooking-and-serving counter for backyard cookouts. Position the pallet bar perpendicular to the grill island, connecting the two with a shared countertop (3/4-inch exterior plywood topped with tile, concrete board, or butcher block) that spans the gap. Keep the pallet bar at least 36 inches from the grill firebox to prevent heat damage to the wood.
Install a drop-in cooler ($30-$60 for a stainless steel insert or $15-$25 for a plastic tub fitted into a plywood cutout) in the bar top so guests can grab cold drinks without walking to the kitchen. Add hooks ($1-$3 each) along the inside of the bar for hanging tongs, spatulas, and grill accessories. Line the interior shelf area with a sheet of galvanized steel ($10-$20 for a 2×4-foot panel) for a wipe-clean surface that handles spills and grease drips from the cooking station.
12. Colorful Pallet Bar
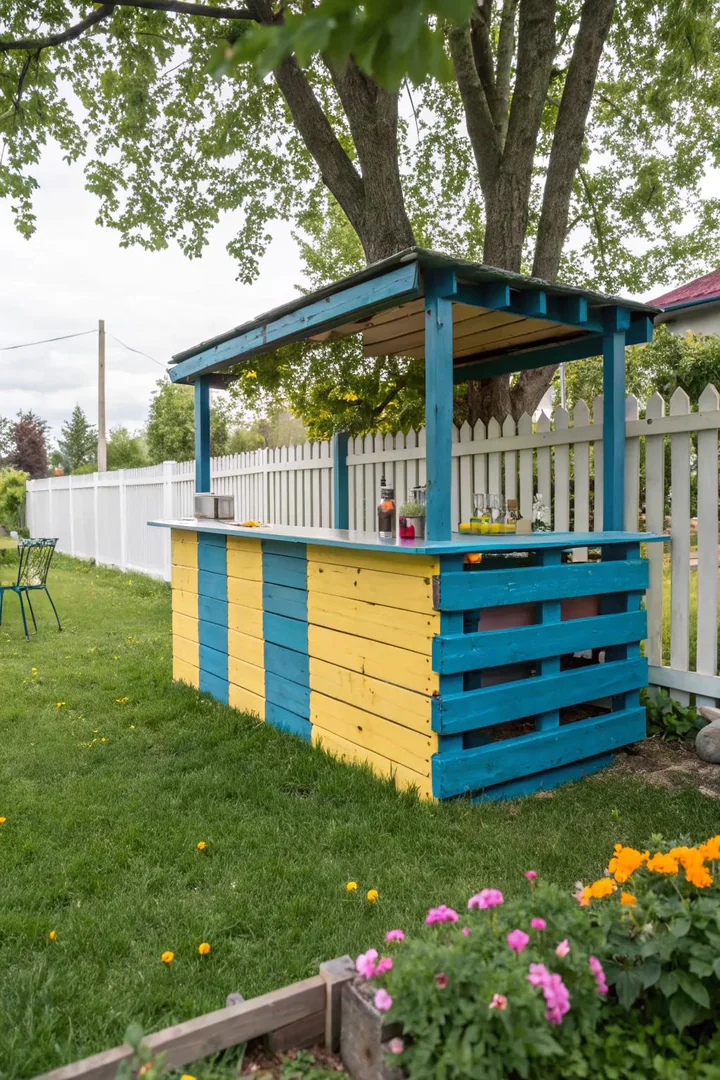
Painting each pallet slat a different color (or alternating 2-3 accent colors) produces a statement piece that stands out against any backyard setting. Use exterior latex paint ($15-$30 per quart from Behr, Benjamin Moore, or Rust-Oleum) in bold shades: turquoise, coral, sunflower yellow, lime green, or cobalt blue. Paint each slat before assembly so color edges stay crisp where boards meet, and seal with exterior clear coat ($10-$15 per can) for UV and rain protection.
Pair a multi-colored bar with neutral surroundings (gray gravel, brown fence, green lawn) so the bar reads as the focal point rather than competing with other color sources. Match one bar color to the seat cushions or umbrella fabric for a coordinated look. A color-blocked pallet bar suits pool parties, kids’ birthday events, and vacation rental properties where a fun, casual atmosphere matters more than a polished finish.
13. Vintage-Inspired Bar
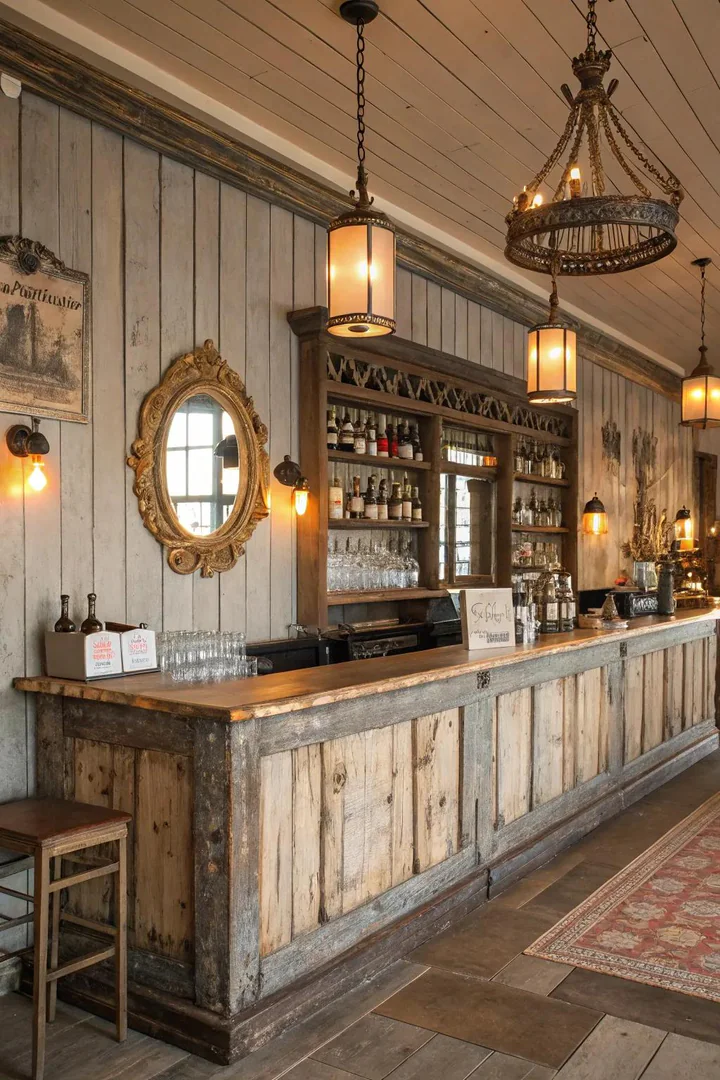
A vintage pallet bar uses distressed finishes, antique hardware, and hand-lettered signage to create a farmhouse or country pub atmosphere. Apply a whitewash or chalk paint finish (Annie Sloan Chalk Paint, $35-$40 per quart, or a DIY mix of latex paint thinned 50% with water) and sand back high-contact areas (edges, corners, bar top front) to reveal raw wood underneath for a naturally worn look.
Mount cast iron drawer pulls ($3-$8 each) or vintage barn door handles ($10-$20 each from Hobby Lobby or Etsy) as towel hooks and bottle openers on the front and sides. Hang a framed chalkboard ($10-$25 for a 16×20-inch board) above the back-bar shelf as a drink menu that changes for each event. Add vintage tin signs, enamelware pitchers ($8-$15 each from antique stores), and Ball mason jar drinking glasses ($10-$15 for a 12-pack) as finishing touches.
14. Bar with a View
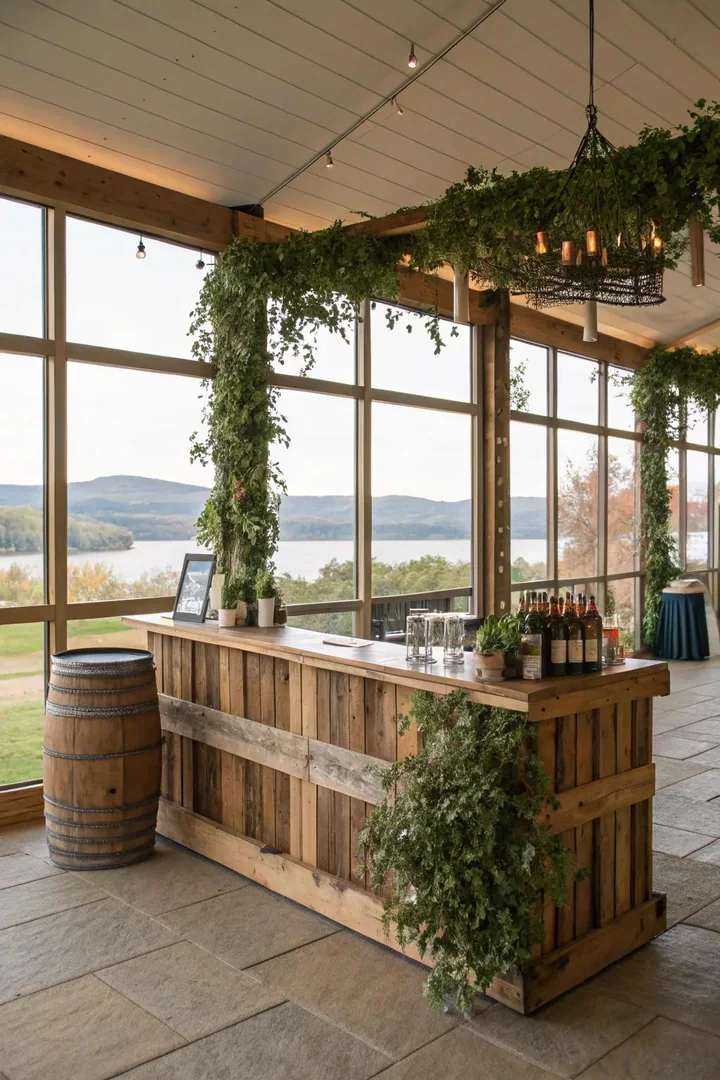
Position a pallet bar at the perimeter of a deck, patio, or hilltop yard so guests face outward toward the best view (garden, pool, sunset, or tree line) while sitting at the counter. Build the bar with a narrow footprint (18-24 inches deep) and mount it to the deck railing or fence top with lag bolts for a built-in drink ledge that doesn’t block the sightline from the main seating area behind.
Keep the bar height at 42 inches (standard bar height) with 30-inch bar stools so seated guests look over the railing rather than through it. A clear acrylic or glass panel ($20-$50 per 2×4-foot sheet) mounted below the bar top in place of solid pallet boards maintains the view from the seating area while still providing a knee wall and wind screen. Add a narrow shelf ($5-$10 for a 1×4 cedar board) along the underside of the bar top as a purse and phone ledge.
15. Convertible Bar
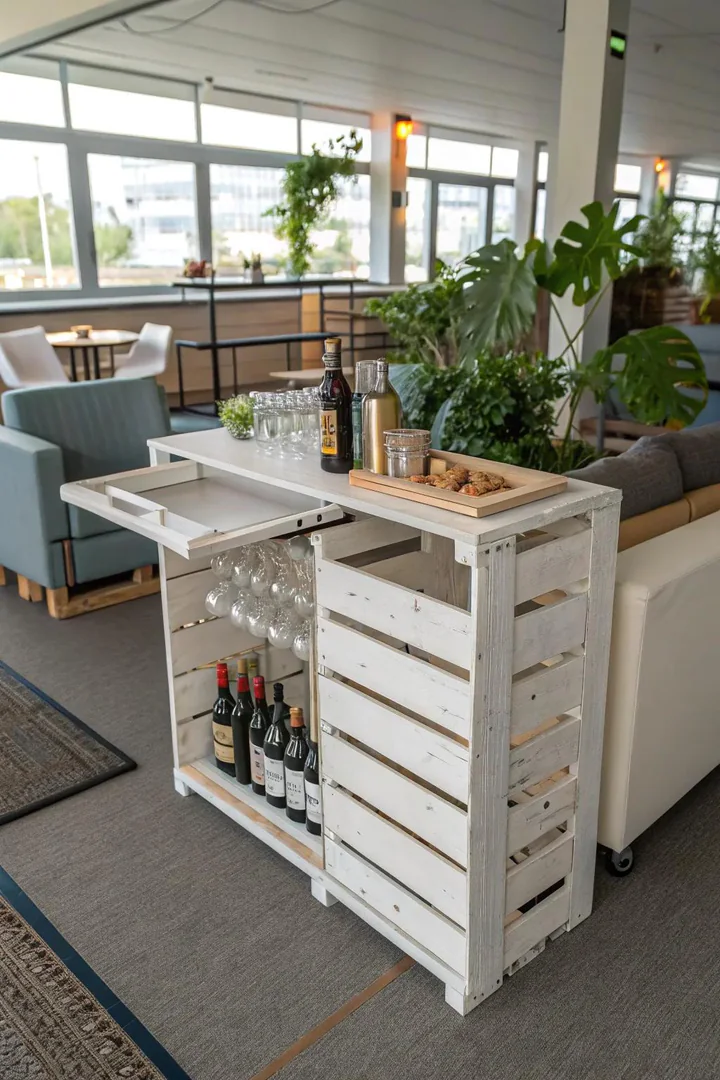
A convertible pallet bar opens as a serving counter for parties and folds down or reconfigures into a potting bench, garden tool station, or storage shelf during the week. Hinge the bar top ($5-$8 per pair of 3-inch gate hinges) so the serving surface folds down flat against the front, converting the bar into a narrow storage cabinet. Add a latch or barrel bolt ($3-$5) to lock the top in the open position during use.
Store the bar stools inside the enclosed base when the top is folded down, keeping everything contained in a single 48×40-inch footprint. Paint the exterior in a garden-friendly color (sage green, slate blue, or weathered gray) so the unit blends with the patio or garden shed between events. A convertible design works especially well for renters and homeowners with small outdoor spaces where a permanent bar structure would consume too much of the available area, similar to the space-saving layouts in corner stairs deck designs that maximize tight footprints.
16. Pallet Bar with Roof
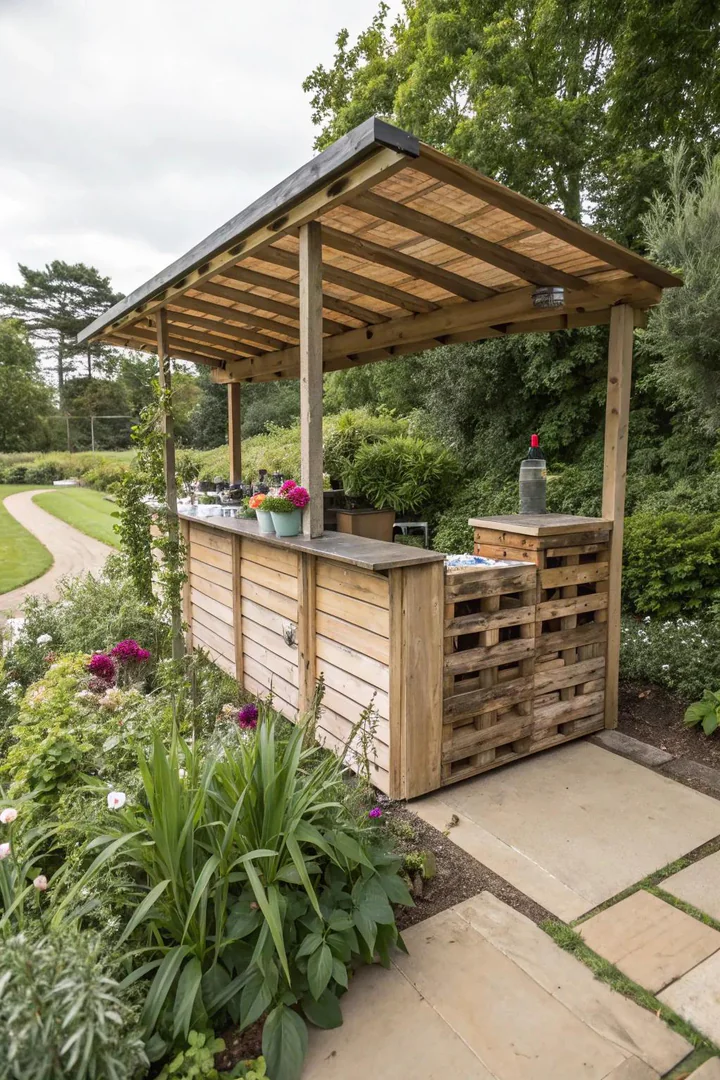
Adding a roof to a pallet bar protects the bartender, bottles, and electronics (speakers, blenders, phone chargers) from rain and direct sun. Build a simple post-and-beam roof frame from 4×4 posts ($8-$12 each for 8-foot lengths) bolted to the back corners of the bar, with 2×4 rafters ($3-$5 each) spanning front to back at a 15-20 degree slope. Top with corrugated polycarbonate panels ($15-$25 per 8-foot sheet from Suntuf or Palruf) that let in filtered light while shedding rain.
Anchor the roof posts to concrete footings (dig 18-24 inch post holes, fill with Quikrete) if the bar sits on grass or gravel, or bolt them to the deck framing with post base brackets ($5-$10 each from Simpson Strong-Tie) for a deck-mounted installation. Hang string lights from the underside of the roof beams, mount a Bluetooth speaker ($20-$50) to a rafter, and add cup hooks for hanging mugs and bar tools. A roofed bar extends the outdoor entertaining season through spring and fall rain without any permanent construction beyond the four post footings.
17. Bar with Integrated Planters
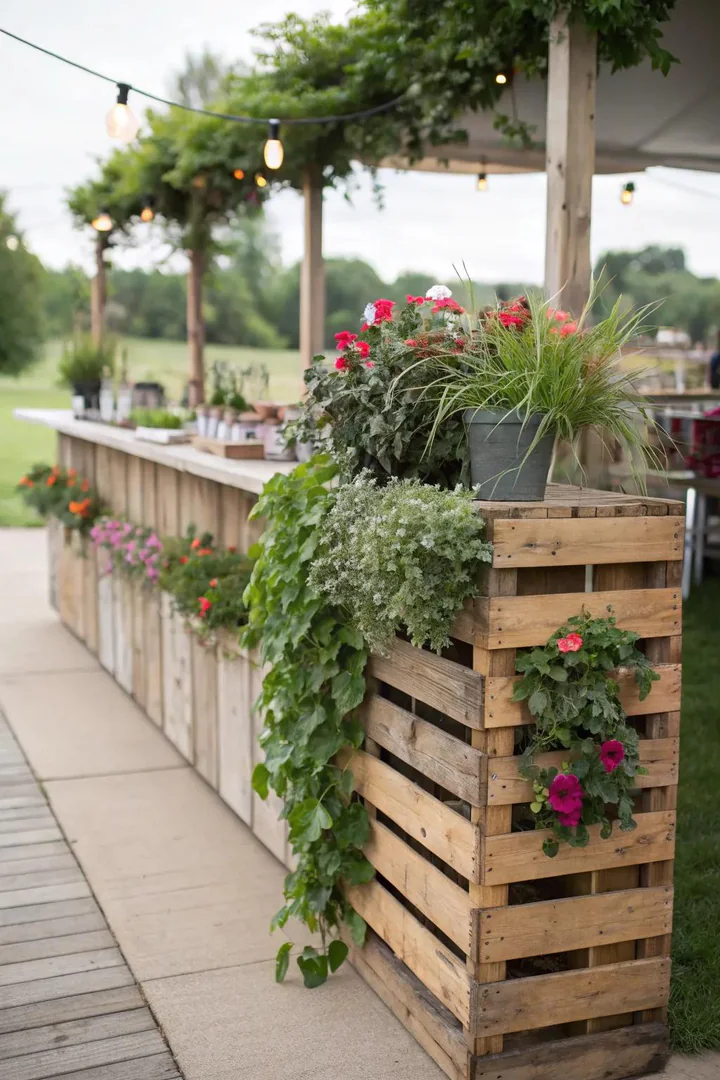
Building planter boxes into the front or end panels of a pallet bar adds live greenery and grows fresh cocktail herbs (mint, basil, rosemary, thyme) within arm’s reach of the bartender. Line one pallet section with heavy-duty plastic sheeting ($5-$10 for a 6×8-foot roll) stapled to the inside faces to create a waterproof planting trough. Drill 3-4 drainage holes in the bottom of the liner so excess water doesn’t pool and rot the pallet wood.
Fill planter sections with potting mix ($5-$10 per bag) and plant low-maintenance herbs and trailing flowers (sweet potato vine, calibrachoa, or nasturtium) that drape over the pallet edges. A drip tray ($3-$5 from a garden center) set under each planter opening catches runoff and protects the patio surface below. Position the planted side of the bar facing guests so they see the greenery, and keep the open utility side (shelves, storage, ice tub) facing the bartender behind the counter.
Pallet Bar Cost Comparison
| Bar Style | Pallets Needed | Additional Materials Cost | Total Build Cost | Build Time |
|---|---|---|---|---|
| Basic Backyard | 3 | $30-$60 | $30-$75 | 2-3 hours |
| Tiki-Style | 3-4 | $80-$150 | $80-$165 | 4-6 hours |
| Metal-Accent | 2-3 | $100-$200 | $100-$215 | 4-6 hours |
| L-Shaped | 6-8 | $50-$100 | $50-$140 | 5-8 hours |
| Roofed | 3-4 | $150-$300 | $150-$340 | 8-12 hours |
| Outdoor Kitchen | 4-6 | $100-$250 | $100-$280 | 6-10 hours |
| Convertible | 2-3 | $40-$80 | $40-$95 | 3-5 hours |
How to Build a Basic Pallet Bar
1. Source and Prepare Pallets
Collect 3-4 heat-treated (HT-stamped) pallets from local warehouses, shipping companies, or Craigslist free listings. Avoid pallets marked with MB (methyl bromide treated) or those stained with oil, chemicals, or unknown substances. Inspect each pallet for broken boards, protruding nails, and rot before starting. Pull any loose nails with a cat’s paw or pry bar, and replace split or cracked boards with scrap lumber cut to the same dimensions.
2. Sand and Finish All Surfaces
Sand every surface that guests will touch (bar top, front face, edges, armrest areas) with 80-grit sandpaper or a random orbital sander ($40-$60 rental or $50-$100 to buy), then follow with 120-grit for a smooth finish. Apply wood stain (Varathane or Minwax exterior stain, $8-$15 per quart) in your chosen color, let dry 4-6 hours, then seal with 2 coats of exterior polyurethane or spar urethane ($12-$18 per quart) with light sanding between coats.
3. Assemble the Frame
Stand two pallets on their long edges to form the front and back walls of the bar, spaced 18-24 inches apart. Connect the two vertical pallets at the bottom with a horizontal pallet (shelf) and at the top with a countertop pallet or plywood panel. Drive 3-inch exterior wood screws every 8-10 inches along each connection point, predrill to prevent splitting, and add L-brackets at each corner for extra rigidity.
4. Add the Bar Top and Finishing Touches
Lay a flat pallet or a sheet of 3/4-inch exterior plywood ($25-$40 for a 4×8-foot sheet) across the top of the frame and secure with screws from underneath. Attach a 1×6 or 1×8 drink rail ($6-$10 for an 8-foot board) along the guest-facing edge, extending 3-4 inches past the front face as an armrest and drip ledge. Mount a bottle opener ($5-$10) to the side, hang a small trash bin inside, and add non-slip rubber pads ($3-$5 for a pack of 8) under the base to prevent the bar from sliding on concrete or deck surfaces.
Frequently Asked Questions
Are shipping pallets safe to use for a bar?
Heat-treated pallets stamped with “HT” and the IPPC (International Plant Protection Convention) logo are safe for furniture and bar projects. Avoid pallets stamped “MB” (methyl bromide fumigated), unmarked pallets of unknown origin, and pallets stained with chemical spills or oil. Even HT pallets should be sanded smooth and sealed with food-safe finish on any surface where drinks or food will be placed.
Where can you find free pallets?
Ask at local garden centers, feed stores, pet supply warehouses, and small manufacturing shops, since these businesses receive pallets with every shipment and typically pay to have them hauled away. Large retailers (Home Depot, Lowe’s, Costco) reuse or recycle their pallets through contracted services and rarely give them away. Check Craigslist, Facebook Marketplace, and Nextdoor under “free stuff” listings, where pallet postings appear regularly in most metro areas.
How long does a pallet bar last outdoors?
A properly sealed pallet bar lasts 3-5 years outdoors with annual resealing of the bar top and exposed surfaces. Unfinished pallet wood deteriorates within 1-2 seasons from rain, UV exposure, and ground moisture. Extend the lifespan by storing the bar under a covered patio or tarp during winter months, keeping it on a hard surface (concrete, pavers) rather than directly on dirt or grass, and reapplying exterior sealant every spring before the outdoor season starts.
What tools do you need to build a pallet bar?
A basic pallet bar needs a drill/driver ($40-$100), a box of 3-inch exterior screws ($8-$12), a random orbital sander or sanding blocks ($5-$15 for a multi-grit pack), exterior stain and polyurethane ($20-$35 total), L-brackets ($1-$2 each, 8-12 needed), and a tape measure. A circular saw ($60-$120 or $15-$25 rental) speeds up any custom cuts but is optional if you use full pallets without modification. All other specialty items (bottle opener, hooks, casters, planters) are add-ons for specific builds.
Can you build a pallet bar without disassembling the pallets?
Most pallet bar designs use whole, intact pallets as building blocks rather than disassembled boards. Standing two pallets vertically and connecting them with a third across the top creates a bar frame in under an hour with no disassembly required. Disassembling pallets (with a pry bar, reciprocating saw, or pallet buster tool, $25-$40) gives you individual boards for a more polished, custom look, but the process adds 1-2 hours of labor per pallet and breaks 10-20% of the boards during removal.