DIY Fire Pit Ideas: 16 Stunning Designs to Transform Your Backyard

A DIY fire pit turns a bare patch of yard into the gathering point every backyard needs, and most builds finish in a single afternoon for $50-$300 in materials. Wood-burning fire pits require a minimum 10-foot clearance from structures, fences, and overhead branches (check local fire codes for your municipality’s exact setback), while propane conversion kits ($80-$150) offer a smokeless alternative with the same visual warmth.
The 16 builds below cover stone circles, repurposed drums and kegs, concrete blocks, brick inground pits, stacked stone, sandstone, retaining wall blocks, hexagonal layouts, cinder blocks, pavers, steel sheet, galvanized rings, and novelty conversions. Browse The Designers Company for hundreds of additional backyard and patio project guides.
1. Stone Circle Fire Pit
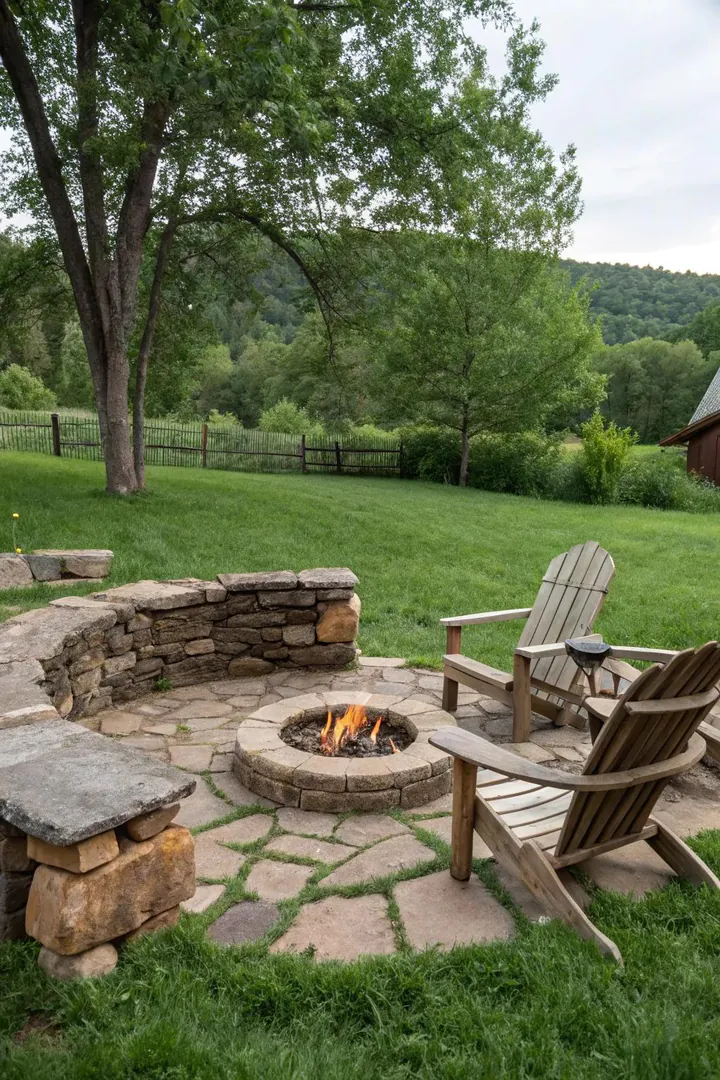
A stone circle fire pit uses natural fieldstone, river rock, or quarry stone ($50-$150 for enough material to build a 36-42 inch diameter ring, three courses tall) stacked dry (no mortar) into a ring that contains the fire and radiates heat outward. Choose flat-sided stones that stack well without wobbling, and angle each course slightly inward so the ring tapers toward the top and holds its shape without adhesive.
Dig a shallow bowl 4-6 inches deep and fill the bottom with 2-3 inches of pea gravel ($5-$10 per 50-pound bag) for drainage so rainwater doesn’t pool in the pit between uses. Line the inside of the stone ring with a steel fire ring insert ($30-$60 for a 36-inch ring from Amazon or a hardware store) to protect the stone from direct flame contact and extend the life of the pit. A stone circle fire pit suits rustic, cottage, and mountain-style backyards where natural materials match the surroundings.
2. Repurposed Washing Machine Drum
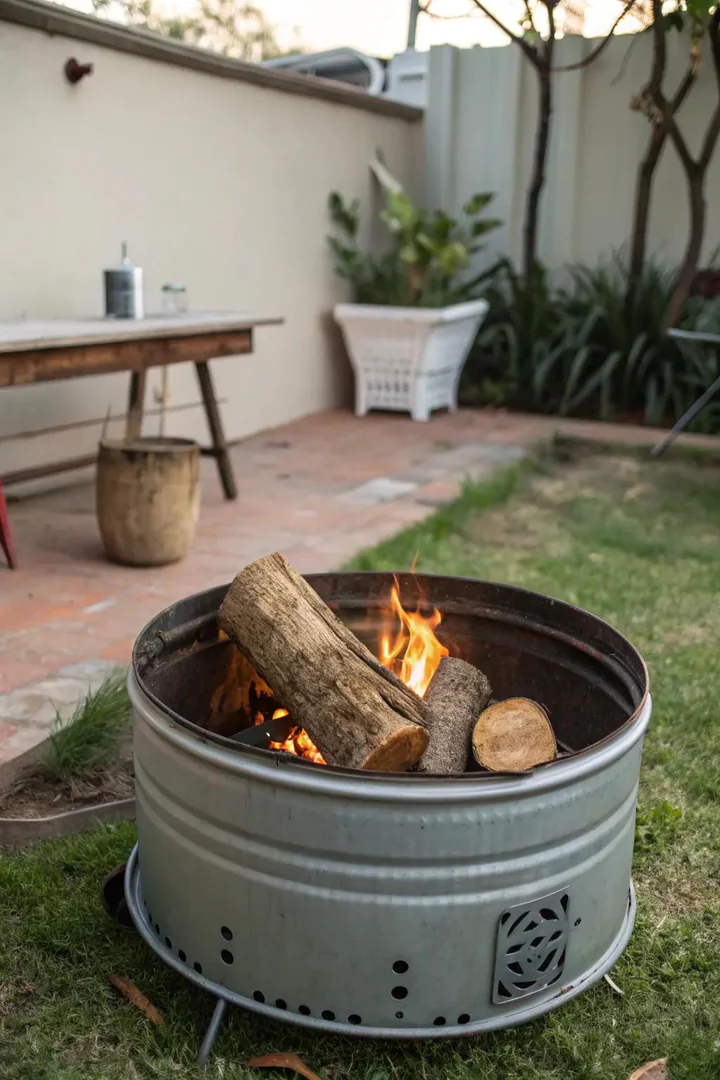
A front-loading washing machine drum (free from appliance repair shops, scrap yards, or curbside pickups) makes a ready-to-use fire pit with built-in ventilation holes, a stainless steel body, and a bowl shape that contains coals perfectly. Remove the drum from the machine housing, flip it upside down (spinner hub on top), and set it on a base of 3-4 concrete pavers ($2-$5 each) or a flat stone slab to protect the ground underneath.
The perforated sides allow air to reach the fire from every direction, producing a hotter, more complete burn with less smoke than a solid-walled pit. At night, the flames visible through the drum holes create a lantern-like glow pattern that no store-bought fire pit replicates. Stainless steel drums resist rust and heat warping for 5-10 years of regular use; standard steel drums develop surface rust faster but last 3-5 years in outdoor conditions.
3. Concrete Block Fire Pit
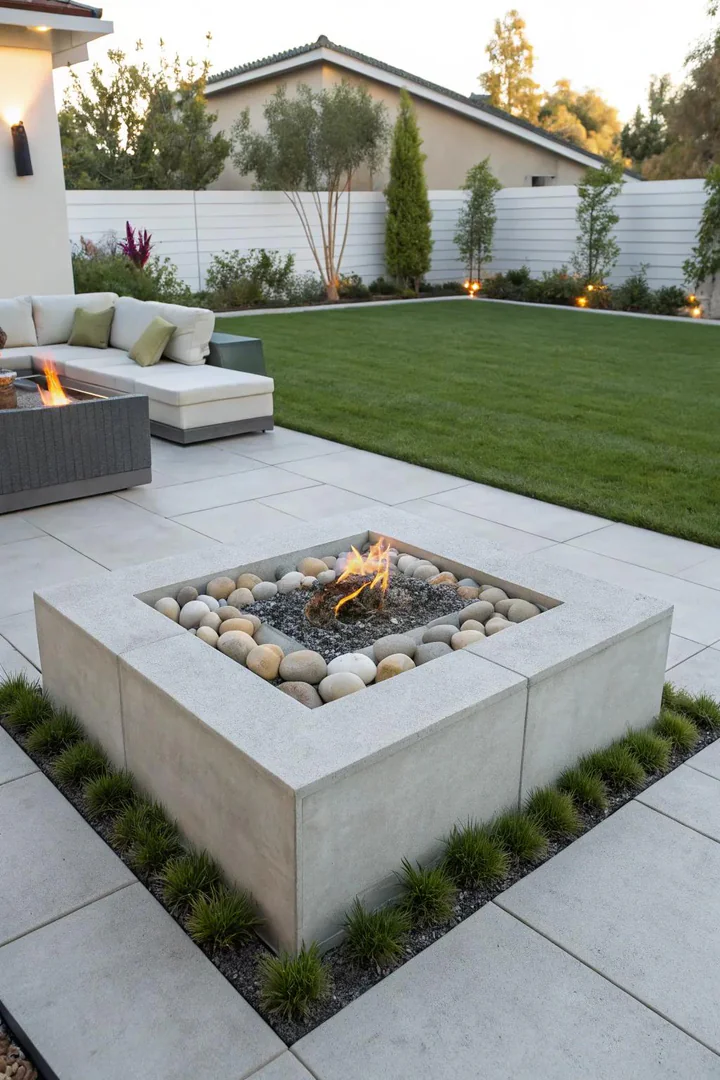
Standard 8x8x16-inch concrete blocks ($1-$2 each from Home Depot or Lowe’s) stack into a square or rectangular fire pit for $15-$40 in total materials. A 3-block-per-side square (using 12 blocks per course, two courses tall) creates a 32×32-inch interior fire area large enough for a standard campfire. No mortar is needed for a two-course build; the weight of the blocks (35-40 pounds each) holds the pit in place.
Lay the first course on a level pad of compacted gravel or packed dirt, and offset the second course by half a block length (running bond pattern) for a locked, stable wall. Fill the interior base with 2-3 inches of sand ($4-$8 per 50-pound bag) to insulate the ground below and provide a stable surface for log placement. A concrete block fire pit disassembles in 10 minutes and rebuilds in a new location just as quickly, making it a good option for renters or homeowners who haven’t committed to a permanent pit location.
4. Brick In-Ground Fire Pit
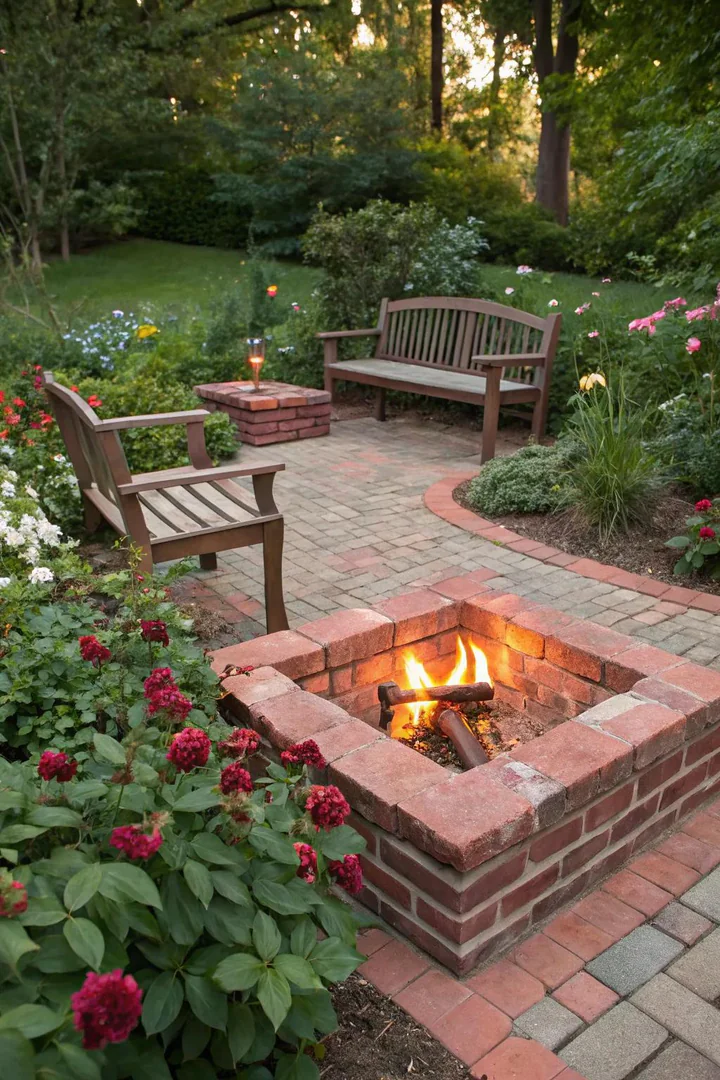
An in-ground fire pit dug 12-18 inches into the earth and lined with fire brick ($1-$3 per brick from a masonry supplier) or standard clay brick ($0.50-$1.50 per brick) sits flush with the surrounding ground for a clean, low-profile look. Dig a circular hole 36-42 inches in diameter, line the bottom with 3-4 inches of gravel, and stand bricks on end around the inside wall in a tight circle.
An in-ground pit blocks wind better than above-ground designs because the earth walls shelter the fire from gusts on all sides. Fill the space between the brick liner and the dirt wall with more gravel for drainage, and cap the top edge with a ring of flagstone or bluestone pavers ($3-$8 per piece) that serve as a finished rim and a place to rest marshmallow sticks, tongs, and drinks. Slope the surrounding grade slightly away from the pit so surface water flows outward rather than pooling in the fire bowl during rain.
5. Stacked Stone Fire Pit
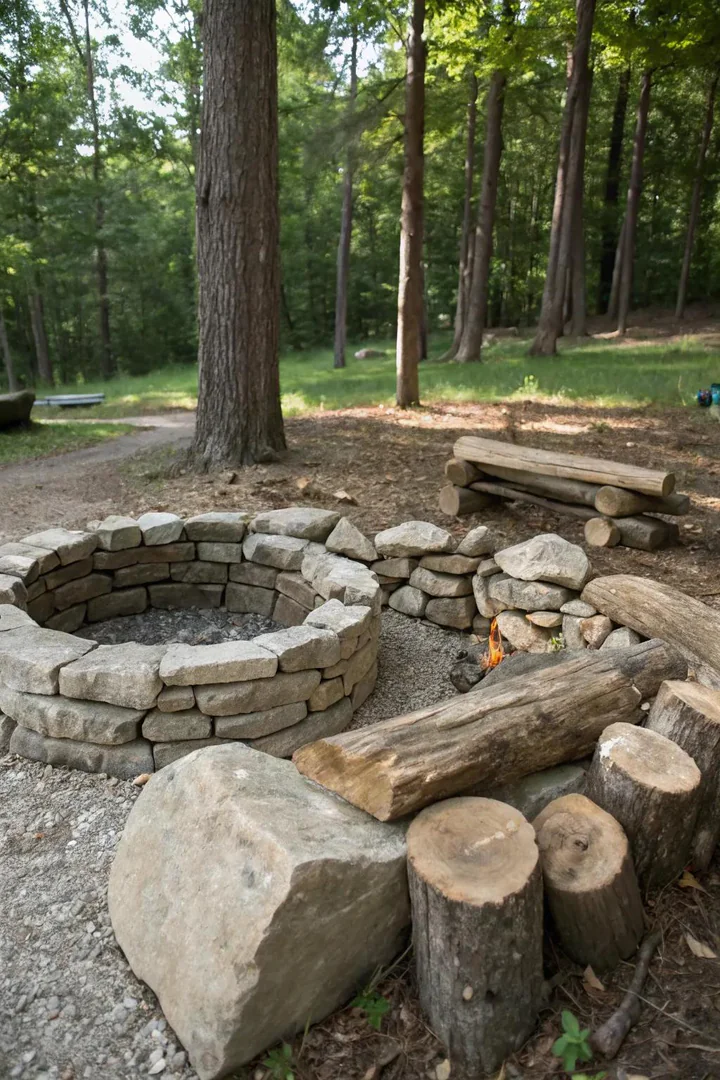
A stacked stone fire pit built 3-4 courses tall ($100-$300 in flat-faced wall stone from a stone yard or garden center) creates a substantial, permanent-looking fire feature that doubles as a visual anchor for a patio or garden seating area. Choose wall stone with flat top and bottom surfaces (Pennsylvania bluestone, Tennessee flagstone, or tumbled limestone) that stack evenly without large gaps between courses.
Apply construction adhesive ($5-$8 per tube of Loctite PL 500 or Liquid Nails) between each course for a bonded wall that won’t shift when bumped. A taller pit (18-24 inches above grade) reduces the need to bend down to tend the fire, keeps embers contained better than a low ring, and serves as a windbreak for the flames. Set the stacked stone pit on a poured concrete pad ($50-$100 for a 4×4-foot, 4-inch thick pad using Quikrete) for a stable, level base that won’t settle or heave over time.
6. Sandstone Slab Fire Pit
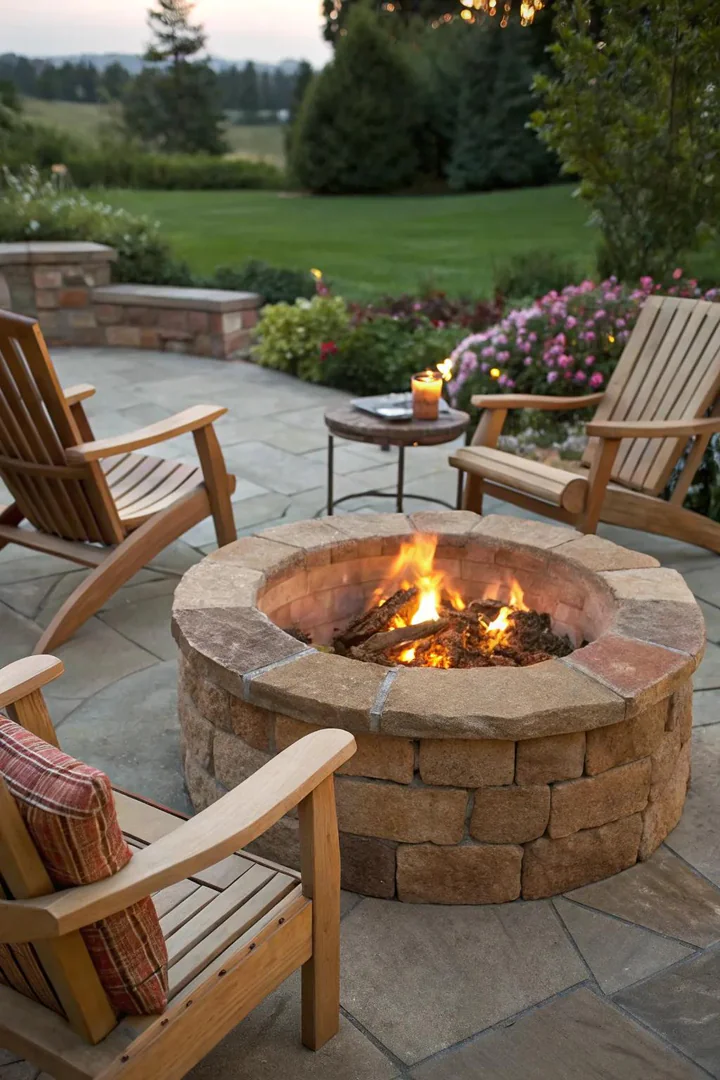
Large sandstone slabs ($5-$20 per slab from a stone yard, quarry, or garden center) stood on edge in a circle create a fire pit with the look of a natural rock formation. Sandstone’s warm tan, red, and brown tones complement desert, prairie, and southwestern-style backyards where gray concrete or dark brick would clash with the existing ground color.
Dig a 6-inch trench around the pit circumference and set each slab into the trench so it stands upright with 6 inches buried underground for stability. Sandstone is softer and more porous than granite or basalt, so expect surface spalling (small flakes popping off) after 2-3 years of direct flame contact. Line the interior with a steel fire ring ($30-$60) to reduce direct heat on the stone faces and extend the life of the sandstone by 3-5 additional years.
7. Retaining Wall Block Fire Pit
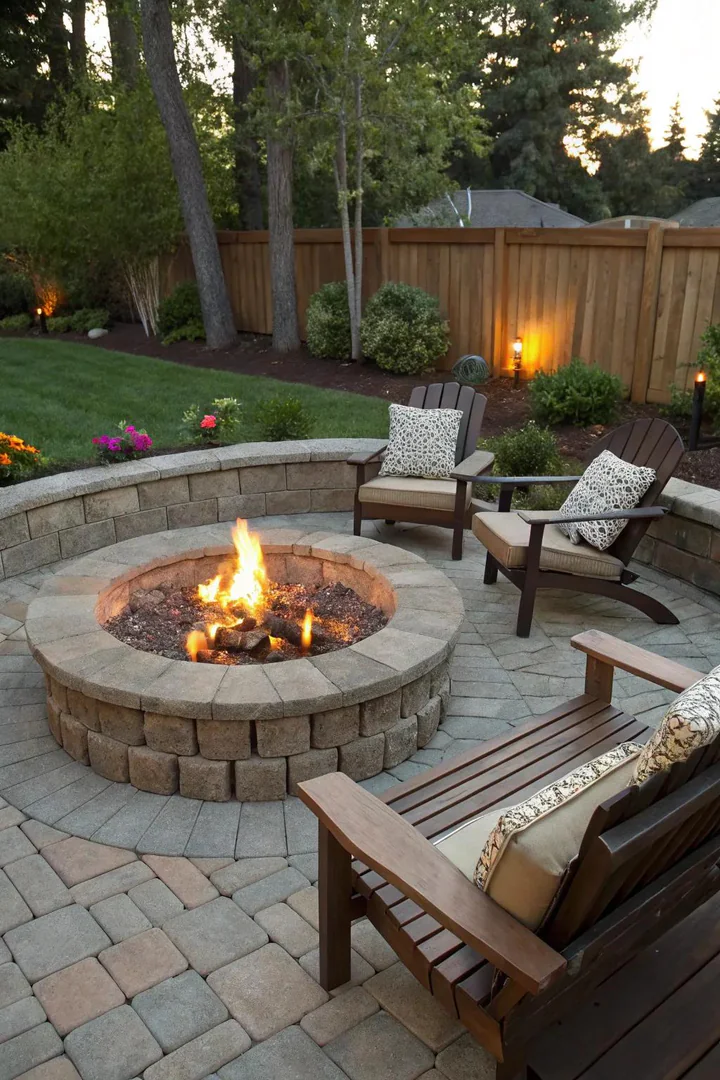
Interlocking retaining wall blocks ($2-$5 each from Home Depot, Lowe’s, or a masonry yard; brands include Pavestone, Belgard, and Anchor) stack into a curved fire pit ring using the blocks’ built-in lip that locks each course to the one below. A 36-inch diameter fire pit uses approximately 30-36 blocks for a two-course ring, costing $60-$180 in materials.
Retaining wall blocks come in consistent sizes and colors (charcoal, tan, red, gray) that produce a uniform, finished look without the irregular gaps of natural stone. The interlocking lip makes assembly foolproof: set the first course on a level gravel pad, snap the second course on top with the lips engaged, and the pit is ready for fire. Apply masonry adhesive ($5-$8 per tube) between courses for a permanent bond, or leave them dry-stacked for a pit that disassembles and stores flat during the off-season.
8. Hexagonal Fire Pit
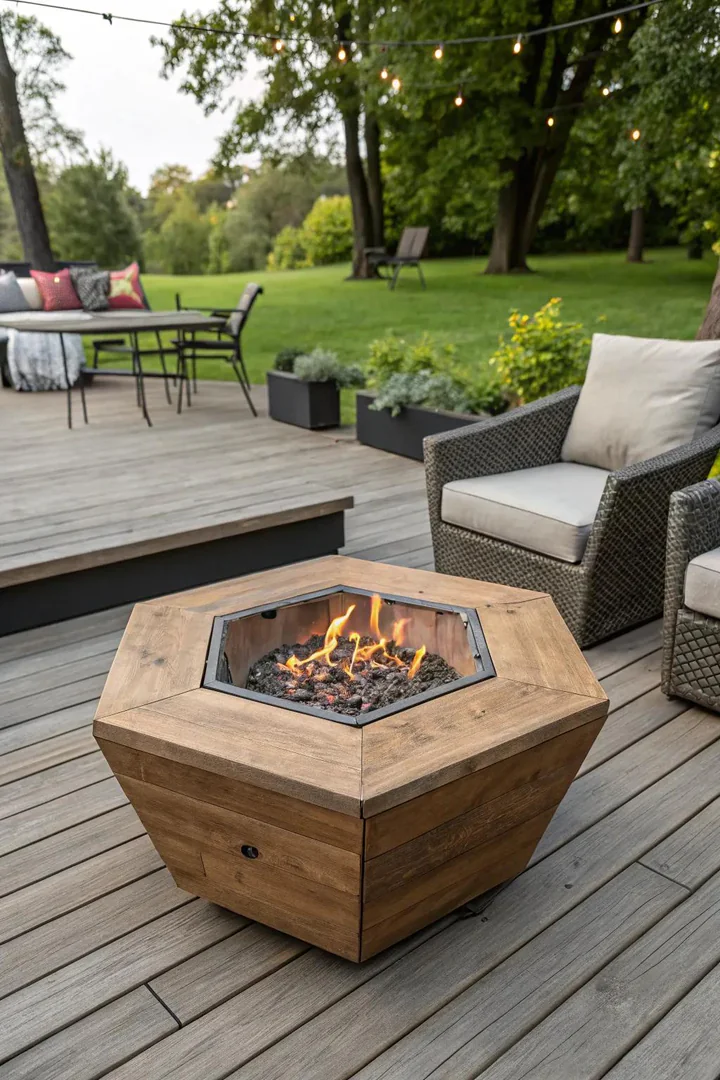
A hexagonal fire pit uses six straight wall sections set at 120-degree angles to form a six-sided ring that looks more geometric and intentional than a freeform circle. Build each wall section from 3-4 retaining wall blocks, pavers, or cut stone pieces ($80-$200 total for a 36-inch diameter hexagon), and miter the ends at 30 degrees for tight corner joints.
A hexagonal shape pairs well with hexagonal paver patios, geometric garden layouts, and modern outdoor furniture groupings where the angular lines echo the surrounding design. Build a matching hexagonal bench ring ($200-$500 in lumber) around the pit at a 4-5 foot radius for built-in seating that mirrors the pit shape. Mark the six corner points on the ground using a string and stake compass (set the string length to half the desired diameter) and position stakes at 60-degree intervals for a perfectly regular hexagon.
9. Cinder Block Fire Pit
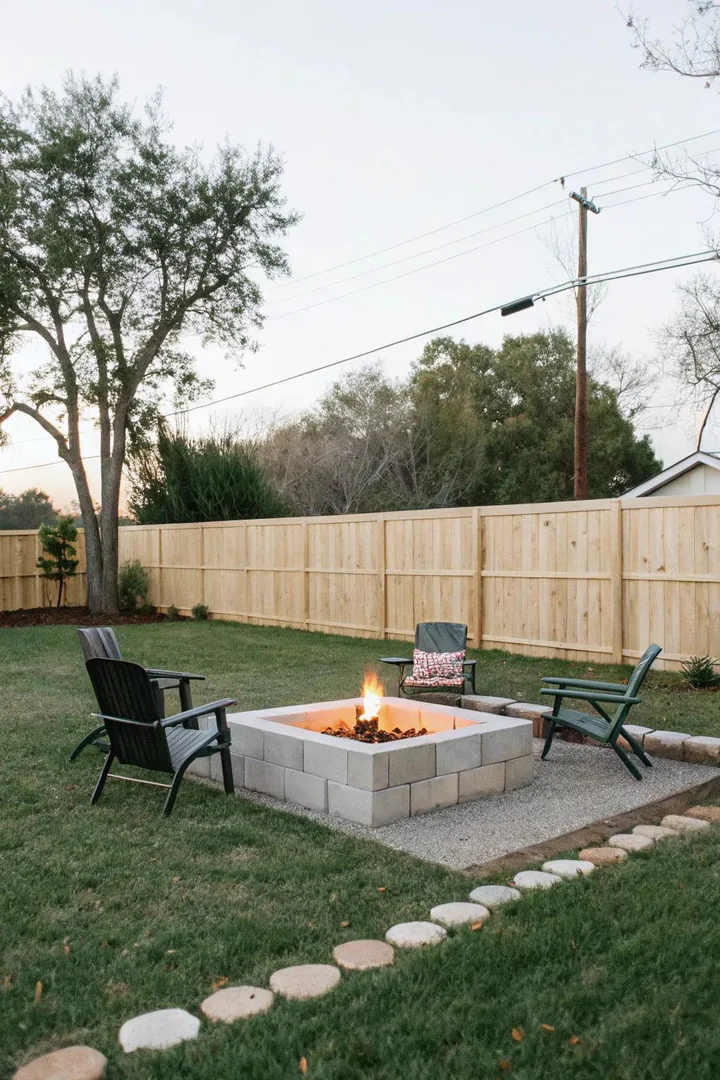
Standard 8x8x16-inch cinder blocks ($1-$2 each) lay flat with the open cells facing up to create a fire pit wall that doubles as a built-in shelf for drinks, phones, and roasting sticks. Arrange 12 blocks in a square (3 per side) for a single-course pit, or stack two courses for a taller wall. The open cells of the top course hold small potted succulents, citronella candles, or condiment bottles during cookouts.
Cinder blocks are lighter than solid concrete blocks (25-30 pounds versus 35-40 pounds) and cost the same, making them easier to carry and position. Paint cinder blocks with heat-resistant spray paint ($8-$12 per can of Rust-Oleum High Heat in black, silver, or flat gray) for a finished look that hides the industrial gray surface. A cinder block fire pit costs $12-$48 total for a single or double-course build, making it the lowest-cost permanent fire pit option available.
10. Paver Fire Pit
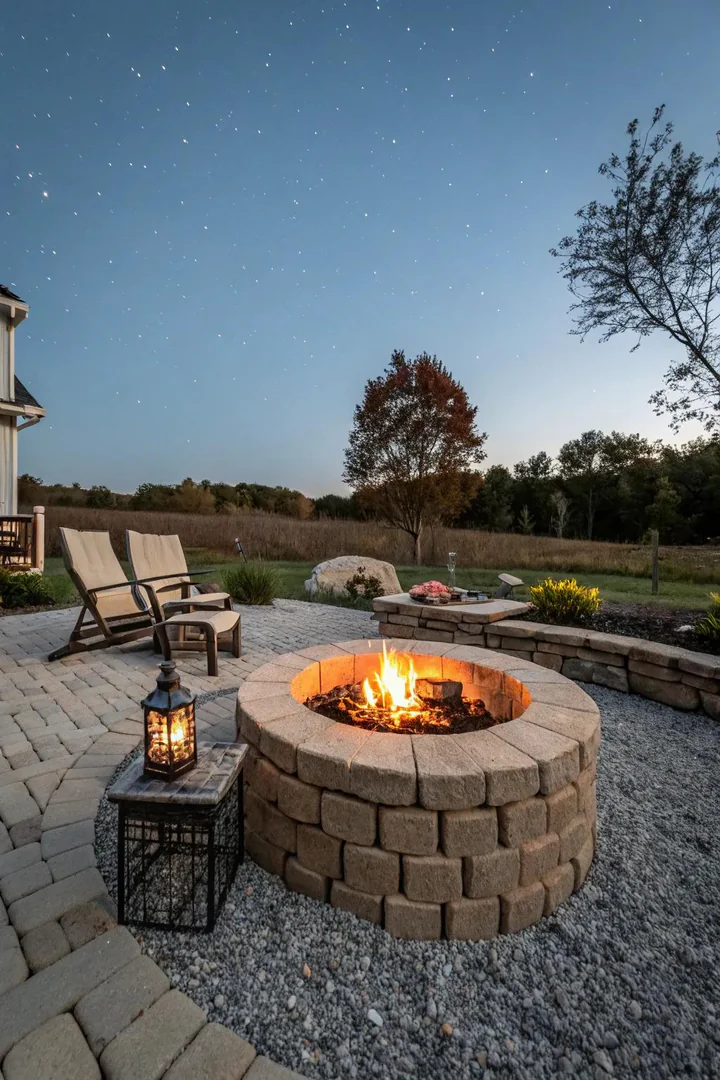
Dedicated fire pit pavers (wedge-shaped or trapezoidal blocks, $3-$8 each from Pavestone, Belgard, or Nicolock) interlock into a curved ring without cutting. A fire pit paver kit ($150-$350 from Home Depot or Lowe’s) includes all the pavers needed for a 36-46 inch diameter pit, pre-sorted by course, and assembles in 30-60 minutes on a level gravel base.
Fire pit paver kits produce the most polished, professional-looking result of any DIY fire pit method because the manufacturer has already calculated the curve radius, block count, and coursing pattern. Choose pavers that match or complement your existing patio pavers (same manufacturer, same color family) for a fire pit that looks built into the patio rather than dropped onto it. Cap the top course with matching wall caps ($4-$8 each) for a flat, comfortable rim that serves as extra seating when the fire is out.
11. Asymmetrical Brick Fire Pit
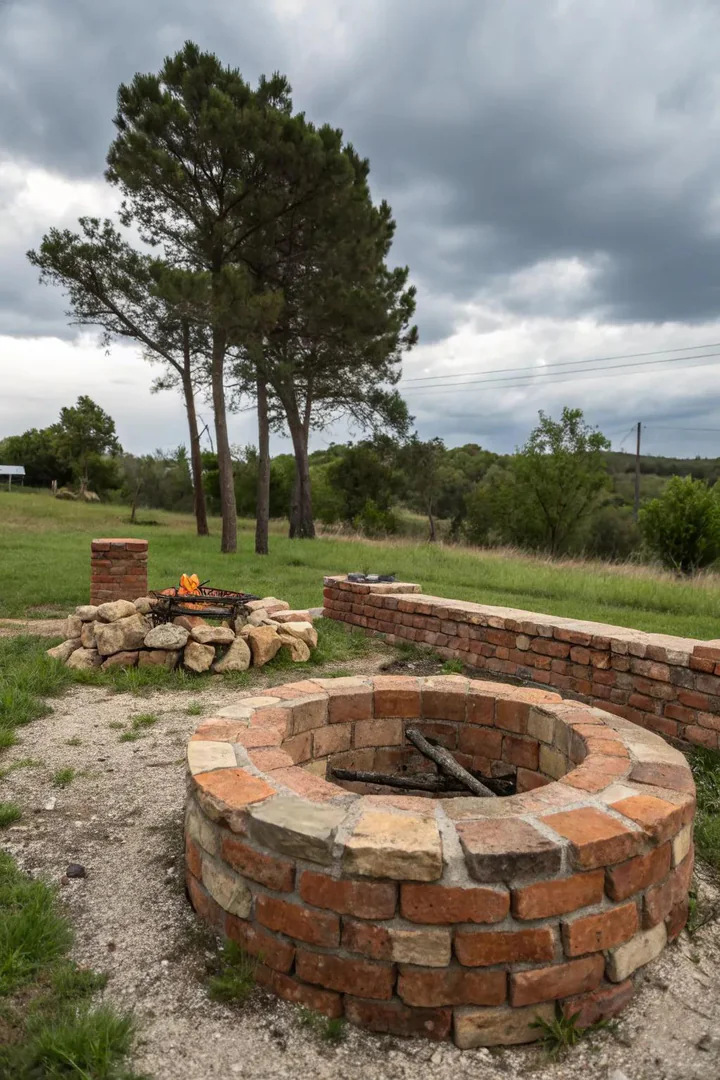
An asymmetrical fire pit with one tall wall (3-4 courses, 18-24 inches) and one low wall (1-2 courses, 6-12 inches) creates a windbreak on the tall side and an open view on the low side. Build the tall wall on the side facing prevailing winds to shield the fire, and keep the low wall facing the seating area so flames and heat radiate toward the chairs without obstruction.
Use standard clay bricks ($0.50-$1.50 each) laid in a running bond pattern with Type S mortar ($8-$12 per 80-pound bag) between courses. An asymmetrical design uses 40-60% fewer bricks than a full-height circular wall, cutting material costs and build time proportionally. The tall-side wall also serves as a backdrop that reflects heat toward the low side, concentrating warmth in the direction of the seating like a fireplace reflects heat into a room.
12. Steel Sheet Fire Pit
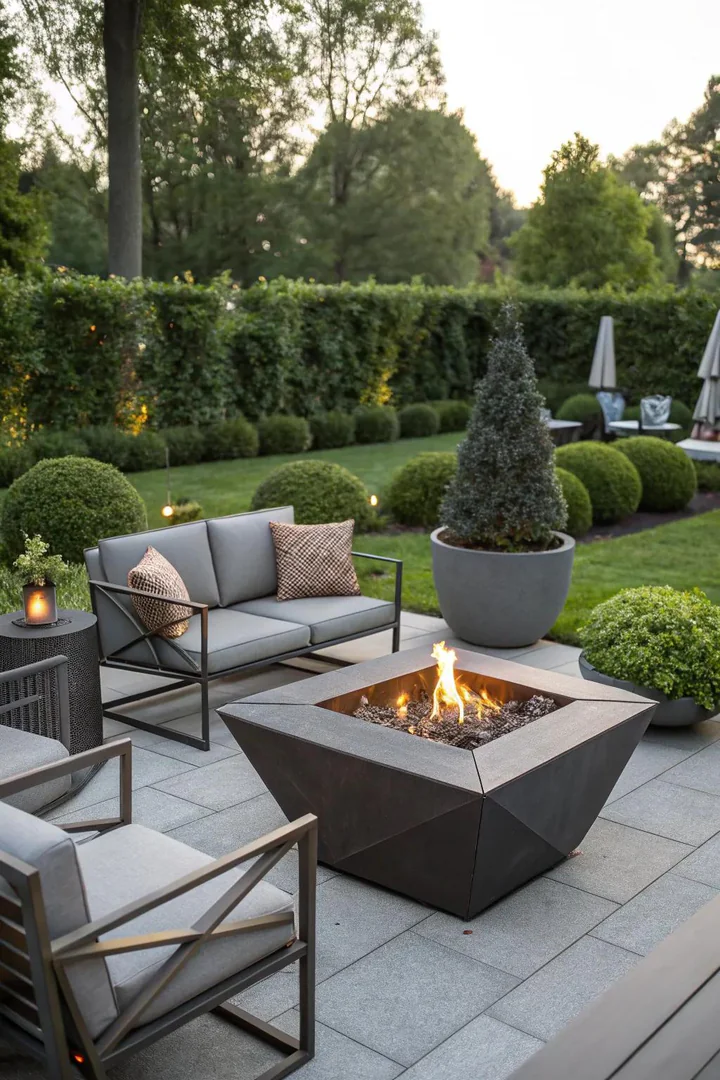
Flat steel plate (1/8-inch or 3/16-inch thick, $30-$80 for a 4×4-foot sheet from a metal supplier or online retailer like SendCutSend or Metals Depot) cuts and welds into a square or rectangular fire pit box with clean, sharp edges that suit modern and minimalist outdoor spaces. Cut four side panels and a bottom panel to size with an angle grinder or plasma cutter, and weld the corners with a MIG welder ($150-$300 from Lincoln, Hobart, or Forney).
Drill 8-12 drainage and air holes (1/2-inch diameter) in the bottom panel so water drains out and air feeds the fire from below. Raw steel develops a rust patina within 2-4 weeks outdoors, producing a warm orange-brown finish that many homeowners prefer to painted steel. For a rust-free finish, apply high-heat spray paint ($8-$12 per can of Rust-Oleum High Heat) or have the pit powder-coated ($100-$200 at a local coating shop) in matte black or dark bronze.
13. Repurposed Beer Keg Fire Pit
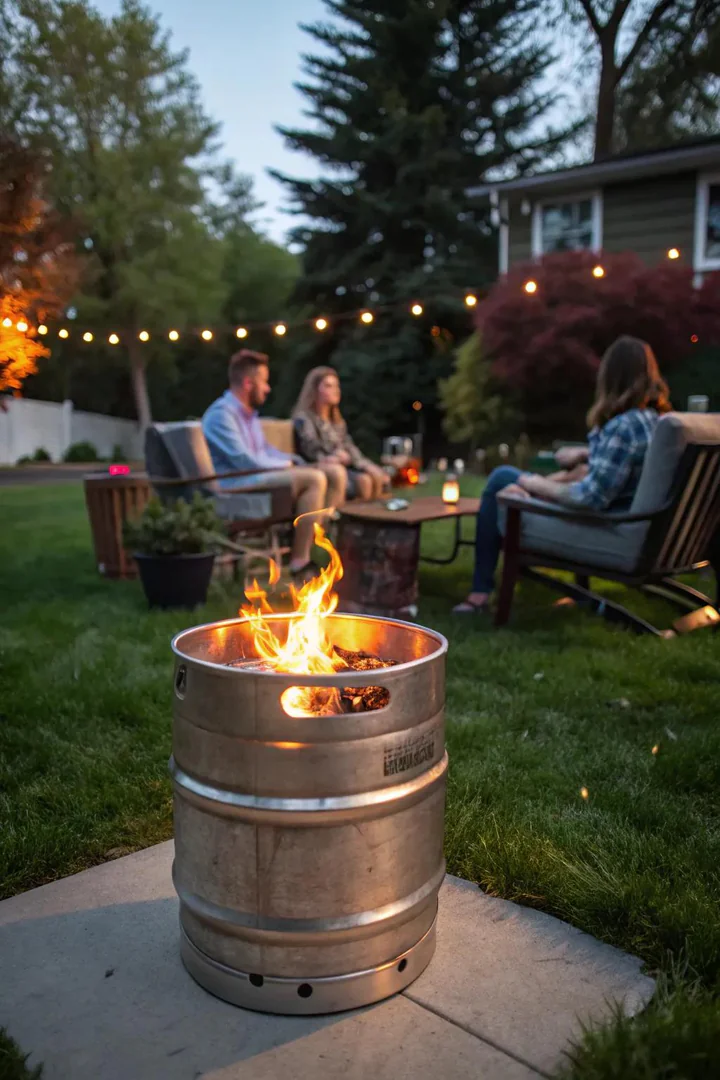
A decommissioned half-barrel beer keg ($30-$60 from a brewery, bar supply company, or scrap metal dealer) cut in half lengthwise or with the top removed becomes a stainless steel fire bowl that holds up to high heat without warping. Use an angle grinder with a cutting disc ($5-$10 per disc) to remove the top third of the keg, leaving a 15-gallon capacity bowl that holds a full load of split firewood.
Weld or bolt three steel legs ($5-$15 each for 18-24 inch lengths of 3/4-inch steel pipe or rebar) to the bottom of the keg for a raised fire pit that allows air circulation underneath and keeps the heat off the ground surface. Drill 6-8 air holes (1/2-inch diameter) around the lower sidewall for draft ventilation that feeds oxygen to the fire base. A keg fire pit weighs 15-25 pounds empty, making it portable enough to move around the yard or load into a truck for camping, tailgating, or beach bonfires.
14. Galvanized Fire Ring
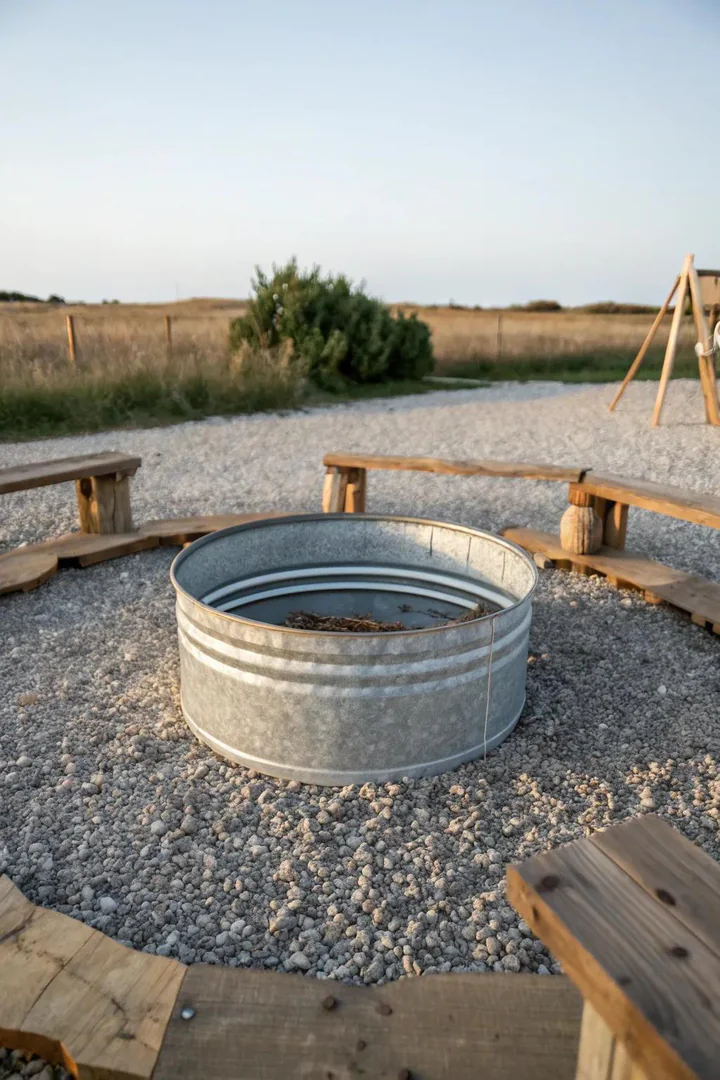
A galvanized steel ring ($20-$50 for a 36-inch diameter, 12-inch tall ring from a farm supply store, Amazon, or a metal fabricator) sets directly on the ground as the simplest possible fire pit: one piece, no assembly, no tools, ready for fire in 30 seconds. Galvanized steel resists rust for 5-10 years outdoors, and the zinc coating burns off harmlessly from the interior surfaces exposed to direct flame within the first few fires.
Place the ring on a bed of sand or gravel (2-3 inches deep, extending 6 inches beyond the ring on all sides) to protect the grass or soil underneath from heat damage. A galvanized ring works well as a temporary or seasonal fire pit that stores flat against a wall or in a shed during the off-season. Pair the ring with a matching galvanized steel grill grate ($15-$30) that rests on top for cooking burgers, hot dogs, and foil packets directly over the wood fire.
15. Bird Bath Fire Pit
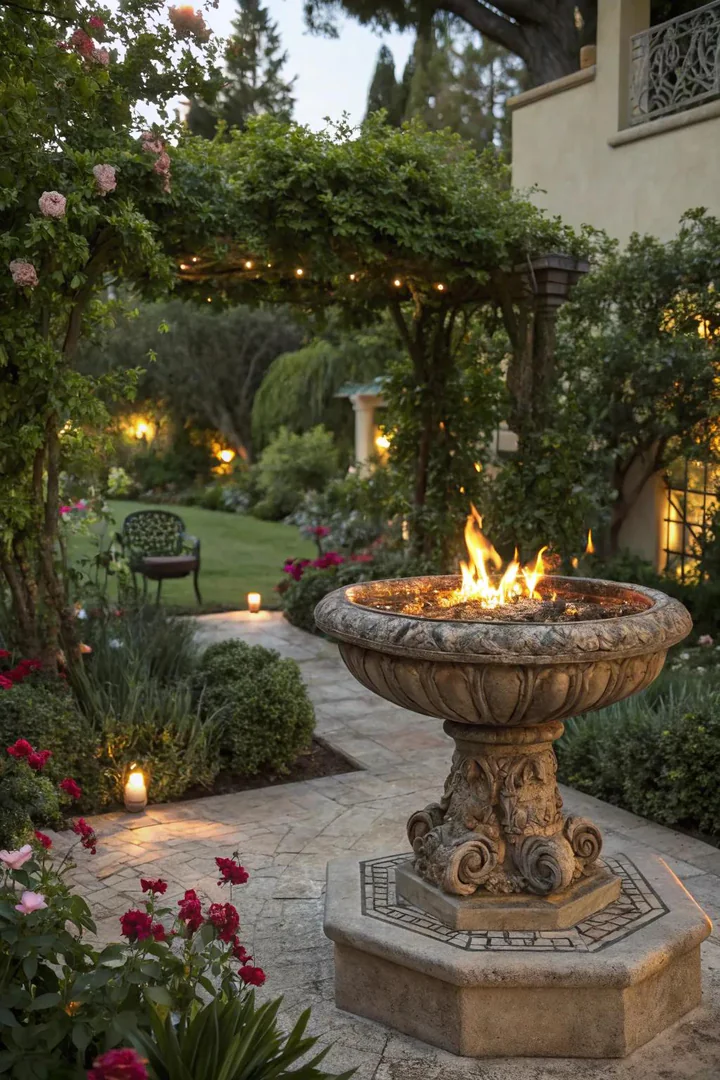
A concrete or cast stone bird bath ($20-$60 at garden centers, thrift stores, or estate sales) converts into a raised fire bowl by filling the basin with lava rock ($8-$15 per 10-pound bag) and adding a propane burner kit ($40-$80 for a 12-inch ring burner from Amazon or a fireplace supply store). The bird bath pedestal raises the flame to table height (24-30 inches), putting the fire at a comfortable viewing level from a seated position.
Connect the burner to a standard 20-pound propane tank ($30-$50 for the tank, $15-$25 per refill) hidden behind a planter, under a table, or inside a decorative cover. A propane-fed bird bath fire pit produces no smoke, no ash, and no sparks, making it safe for small patios, balconies, and covered porches where a wood-burning fire is prohibited or impractical. Check that the bird bath bowl is solid concrete or cast stone (not thin resin or fiberglass) that can handle the sustained heat of a gas flame without cracking or melting.
16. Peekaboo Brick Fire Pit
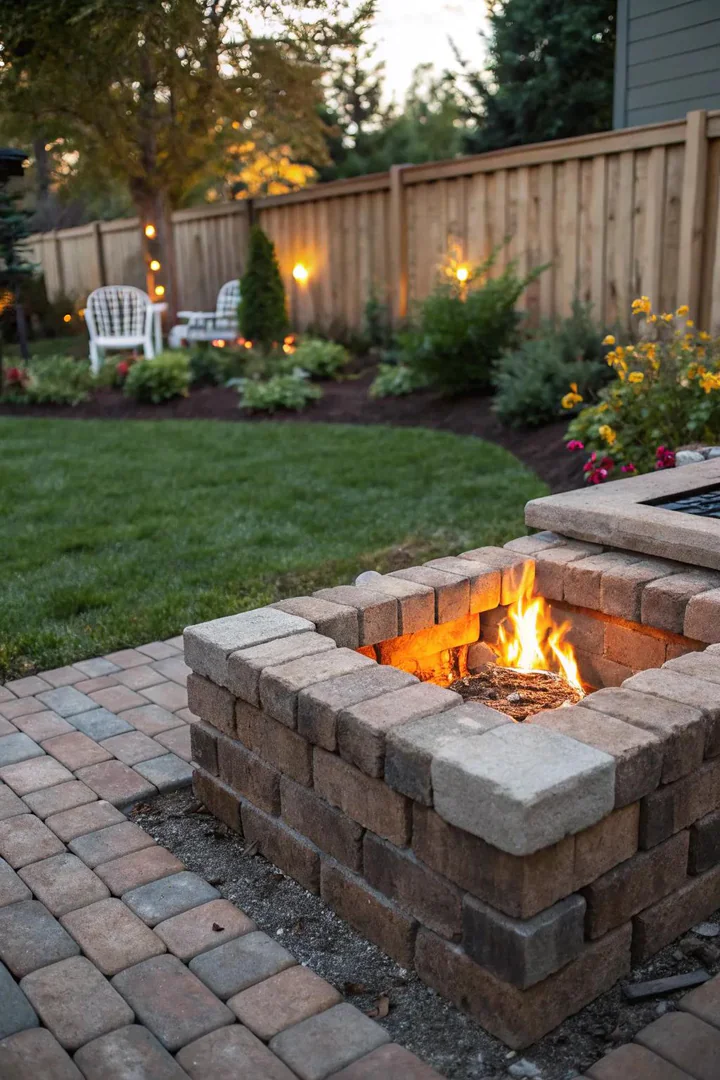
A peekaboo fire pit leaves deliberate gaps (1-2 inches) between alternating bricks in each course so flames and glowing coals are visible through the walls from outside the ring. Lay bricks in a standard circular pattern but space every other brick 1-2 inches apart, using small pebbles or spacer blocks during construction to maintain even gaps, then remove the spacers before the first fire.
The gaps serve double duty as both a visual feature and ventilation ports that feed air to the fire from all sides, producing a hotter, cleaner burn with less smoke than a solid-walled pit. Use fire brick ($1-$3 each) rather than standard clay brick for a peekaboo design, since the gaps expose more brick surface to direct flame contact and fire brick withstands temperatures up to 2,300 degrees F versus 1,800 degrees F for standard brick. A peekaboo fire pit looks especially striking at night when the flame pattern glows through the brick gaps like a perforated lantern. Pair the fire pit with surrounding seating from covered deck designs for a complete outdoor living setup.
Fire Pit Material and Cost Comparison
| Material | DIY Cost (36″ pit) | Build Time | Lifespan | Skill Level |
|---|---|---|---|---|
| Cinder Blocks | $12-$48 | 30 minutes | 5-10 years | Beginner |
| Concrete Blocks | $15-$40 | 30-45 minutes | 10-15 years | Beginner |
| Retaining Wall Blocks | $60-$180 | 1-2 hours | 15-20 years | Beginner |
| Fire Pit Paver Kit | $150-$350 | 1-2 hours | 20-30 years | Beginner |
| Clay Brick (mortared) | $50-$150 | 3-5 hours | 15-25 years | Intermediate |
| Natural Fieldstone | $50-$150 | 2-3 hours | 20+ years | Beginner |
| Welded Steel Sheet | $50-$120 | 2-4 hours | 10-20 years | Advanced (welding) |
| Repurposed Metal (drum/keg) | $0-$30 | 1-2 hours | 5-10 years | Intermediate |
How to Build a Safe Fire Pit Base
1. Choose the Location
Position the fire pit at least 10 feet from any structure, fence, overhead branch, or flammable material (check local codes for your municipality’s exact setback requirement, which ranges from 10-25 feet). Avoid low spots where water collects, areas directly under power lines, and locations near propane tanks, fuel storage, or dry brush. Place the pit on level ground or grade the area flat before building.
2. Excavate and Level the Pad
Dig out a circular area 12-18 inches wider than the fire pit diameter and 4-6 inches deep. Compact the exposed dirt with a hand tamper ($20-$30) or plate compactor (rent for $50-$80 per day). Fill the excavated area with 2-3 inches of compacted crushed gravel (3/4-inch minus or road base, $30-$50 per cubic yard delivered) for a stable, well-drained foundation that won’t settle or shift under the weight of the fire pit walls.
3. Install a Fire Ring Liner
Set a steel fire ring insert ($30-$60 for a 36-inch ring from Amazon, Menards, or a hearth supply store) inside the pit walls to protect the masonry from direct flame contact. The steel liner absorbs the thermal shock that causes stone, brick, and concrete to crack and spall, extending the life of the outer wall by 5-10 years. Size the liner 1-2 inches smaller in diameter than the inner wall dimension so a small air gap insulates the masonry from the liner’s heat.
4. Add Drainage and a Spark Screen
Fill the bottom of the pit with 2-3 inches of pea gravel or lava rock ($5-$15 per bag) so rainwater drains through rather than pooling in the fire bowl. A spark screen ($20-$40 for a hinged mesh dome from Amazon or a hearth store) covers the top of the pit during use to catch airborne embers and sparks before they land on dry grass, deck boards, or nearby furniture. Keep a garden hose or 5-gallon bucket of water ($0) within arm’s reach of the fire pit at all times. See outdoor plant stand ideas for heat-safe display options near fire features.
Frequently Asked Questions
What is the cheapest material for a DIY fire pit?
Cinder blocks at $1-$2 each produce a complete fire pit for $12-$48 (12-24 blocks for a single or double-course square). Repurposed materials (washing machine drums, beer kegs, steel wheels) cost $0-$30 when sourced from scrap yards, appliance recyclers, or curbside pickups. Standard concrete blocks ($1-$2 each) are equally affordable and produce a slightly sturdier wall than cinder blocks due to their denser composition and higher weight per block.
Do you need fire brick for a fire pit?
Fire brick (rated to 2,300 degrees F) is recommended for the interior liner of pits that burn hot, long fires (3+ hours of sustained use) or pits built from materials that crack under thermal stress. Standard clay brick (rated to 1,800 degrees F) and concrete blocks handle typical backyard campfire temperatures (900-1,200 degrees F) adequately for 5-10 years. Use fire brick when you can afford the $1-$3 per brick premium over standard brick, and prioritize it for in-ground pits and peekaboo designs where more brick surface contacts flame directly.
How deep should you dig for an in-ground fire pit?
Dig 12-18 inches deep for an in-ground fire pit, with 4-6 inches of gravel at the bottom for drainage and 6-12 inches of brick or stone liner above the gravel. Deeper pits (18+ inches) contain embers better and block wind more, but produce less radiant heat for people sitting at ground level around the rim. Shallower pits (8-12 inches) put the fire closer to the seated viewer and radiate more warmth, but allow more sparks and embers to escape.
Can you use regular concrete blocks for a fire pit?
Standard concrete blocks and cinder blocks work for fire pits that burn moderate fires (under 1,000 degrees F at the wall surface), which covers most backyard campfires. Concrete blocks can crack or spall after repeated exposure to high heat over several years, especially if they absorb moisture between uses and then heat rapidly. Reduce cracking by letting wet blocks dry before lighting a fire, and by lining the interior with a steel fire ring insert that absorbs thermal shock before it reaches the concrete.
Is a fire pit legal in my area?
Fire pit regulations vary by municipality, county, and state. Most jurisdictions allow wood-burning fire pits that meet minimum setback distances (10-25 feet from structures), maximum pit diameter (3-4 feet), and stack height (2-3 feet) limits. Some municipalities require a burn permit (free or $10-$25) or restrict open burning during high fire-danger periods. Contact your local fire department or building department for the specific rules in your area, and check your HOA’s CC&Rs if you live in a community with deed restrictions. Browse front porch decor ideas and DIY pool cabana ideas for more backyard features that may require local permits.