Outdoor Plant Stand Ideas: 19 Stylish Ways to Display Your Plants
An outdoor plant stand lifts containers off the ground, adds vertical display layers, and turns a porch, patio, or deck into a tiered garden without permanent planting beds. Stands range from free repurposed items (ladders, crates, stumps) to purpose-built metal and wood shelving ($20-$150 per unit), and most hold 3-15 pots in under 4 square feet of floor space.
The 19 ideas below cover repurposed ladders, tires, stumps, crates, pallets, wire frames, cinder blocks, gabion baskets, woven baskets, concrete columns, vintage chairs, A-frames, rolling shelves, copper pipe builds, antique finds, iron stands, trellis stands, bar carts, and milk churns as plant displays. Visit The Designers Company for hundreds of additional outdoor and garden project guides.
1. Repurposed Ladder Stand
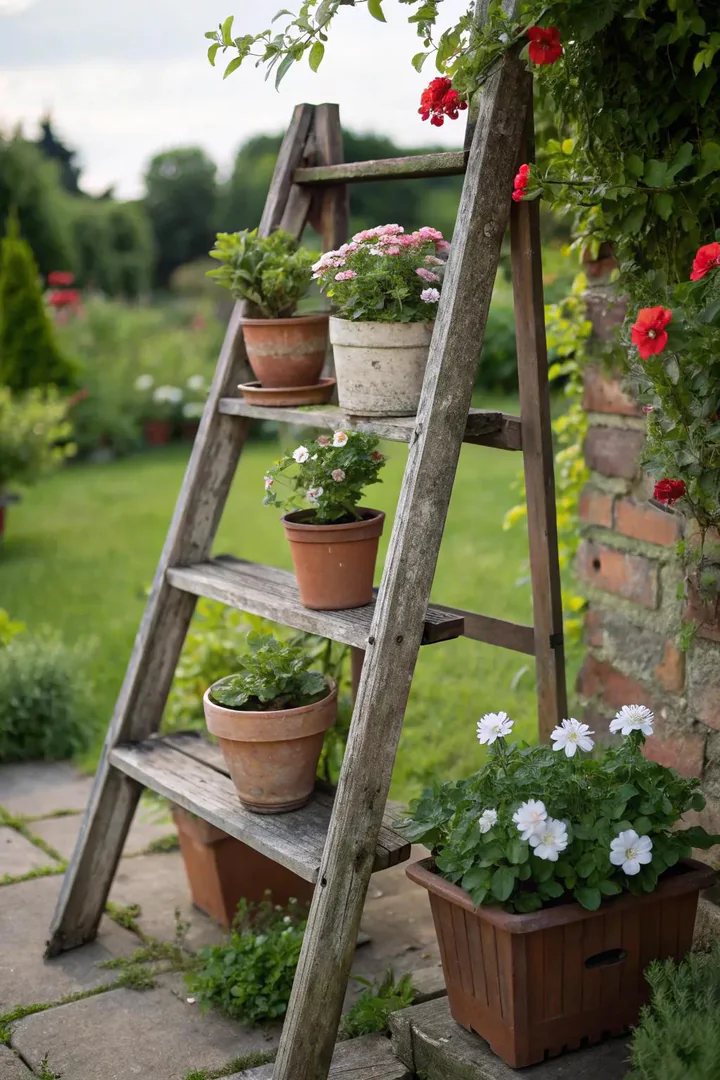
A retired wooden step ladder or orchard ladder ($10-$30 at thrift stores, barn sales, or Craigslist) makes a ready-made tiered plant stand when leaned against a wall or opened as a freestanding A-frame. Each rung holds a 4-6 inch pot, and wider rungs or flat steps on step ladders accommodate 8-10 inch pots. Sand rough edges and apply one coat of exterior spray paint or polyurethane ($8-$12 per can) to seal the wood against rain.
Lean the ladder at a 15-20 degree angle against a wall or fence and secure the top with a single screw or hook to prevent tipping in wind. For a freestanding display, open the step ladder fully and hang S-hooks ($5-$8 for a 10-pack) from the rungs to hold small hanging baskets. A ladder stand works especially well on narrow porches and balconies where floor space is limited but vertical wall space is available.
2. Colorful Tire Plant Stand
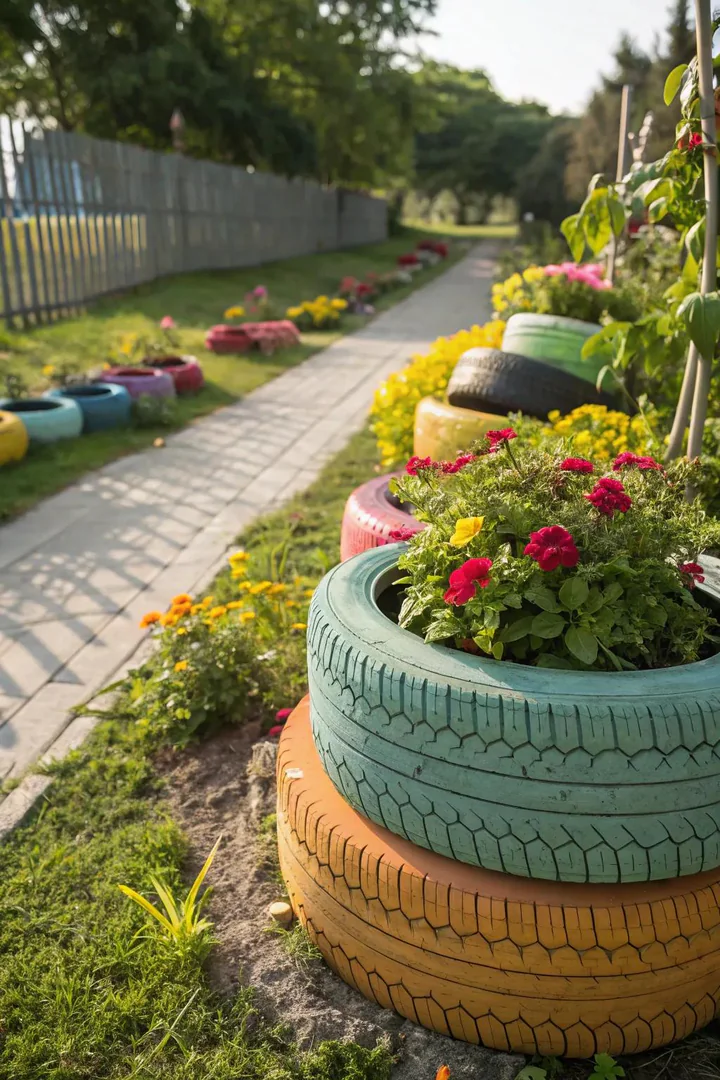
Old car or truck tires (free from tire shops, auto garages, or Craigslist) stack into a bold, colorful plant stand when spray-painted in bright exterior colors (Rust-Oleum or Krylon, $5-$8 per can). Stack 2-3 tires, fill each with potting soil, and plant directly into the open centers. A standard 15-inch car tire holds enough soil for a 12-14 inch planting area, large enough for trailing petunias, marigolds, or small vegetable plants.
Drill 4-6 drainage holes through the bottom sidewall of each tire using a 1/2-inch drill bit so excess water doesn’t pool inside. Stack tires in graduating sizes (truck tire on the bottom, car tire in the middle, compact tire on top) for a tapered tower shape. Offset stacked tires by 90 degrees at each level so the second tier’s planting area faces a different direction from the first, giving 360-degree coverage of blooms and foliage.
3. Tree Stump Plant Stand
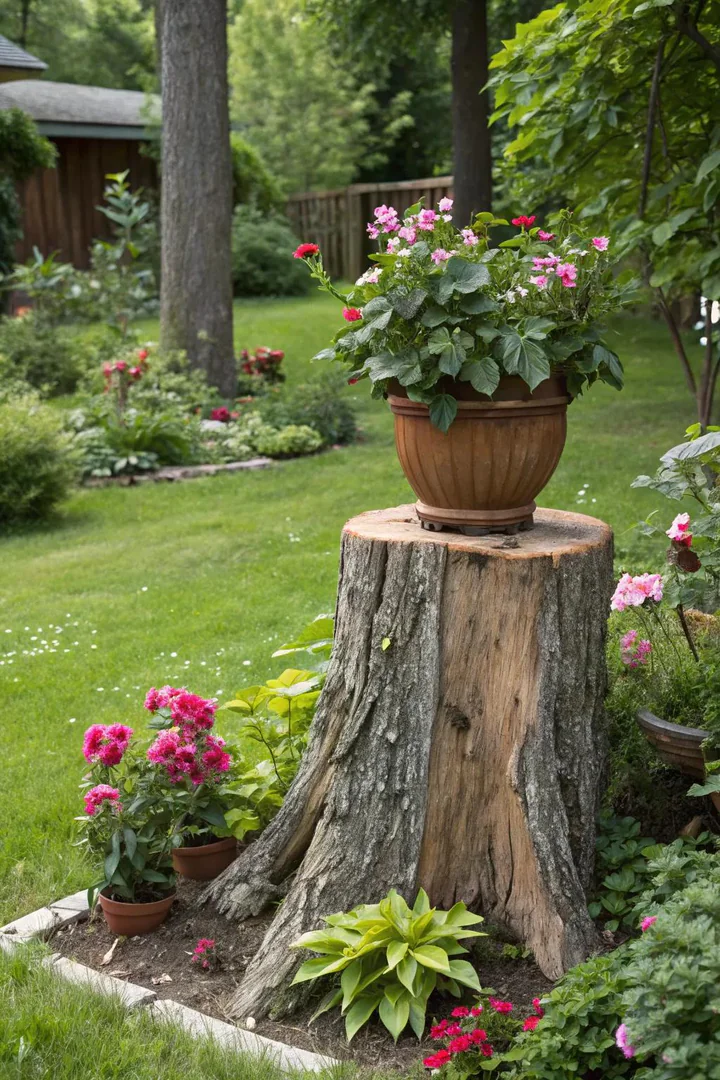
A cut tree stump (free from tree service companies, neighbors, or your own yard) serves as a natural pedestal that brings a potted plant to eye level. Stumps cut at 12, 18, and 24 inches tall create a staggered trio for grouping 3 plants at different heights. Flat-top the stump with a chainsaw or circular saw for a stable platform, and strip the loose bark if you want a cleaner look (bark left on adds to the rustic character).
Seal the cut top surface with a wood stabilizer or exterior polyurethane ($12-$18 per quart) to slow checking and cracking as the stump dries over the first year. Place a ceramic or plastic saucer ($2-$5) under each pot to prevent water stains on the stump face. Cedar, black locust, and white oak stumps resist rot for 5-10 years outdoors without treatment, while pine and poplar stumps decompose within 2-3 seasons and work better as temporary seasonal stands.
4. Wooden Crate Display
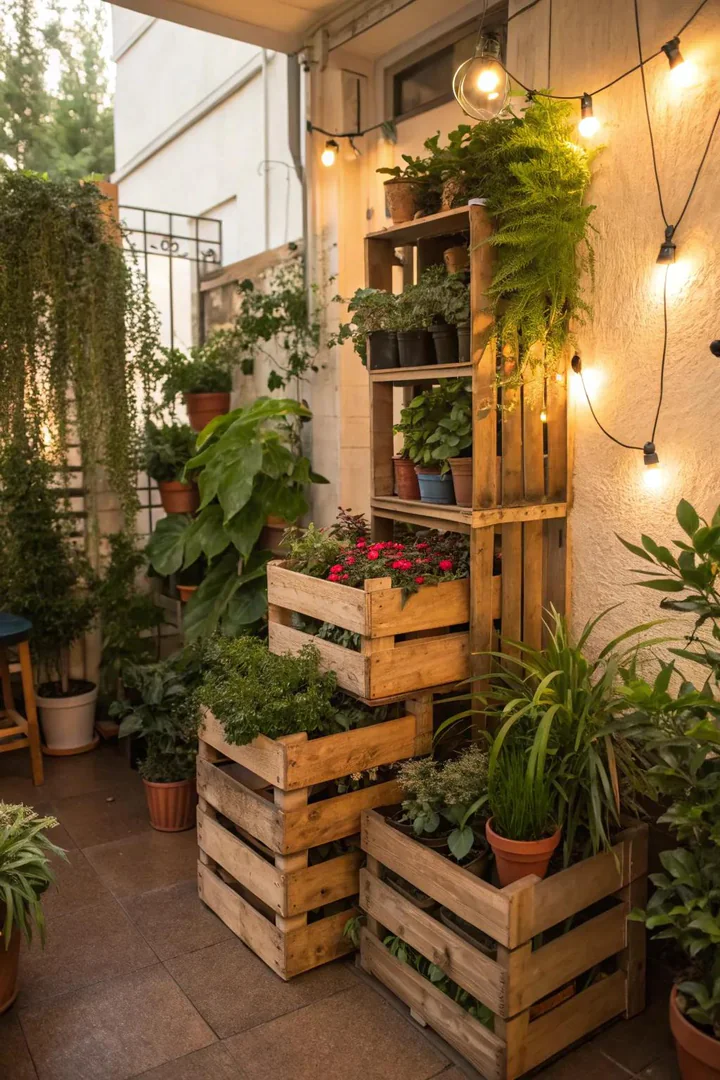
Wooden crates ($5-$15 each from craft stores, wine shops, or online retailers like Etsy) stack into a freestanding bookshelf-style plant display. Arrange 4-6 crates in a staircase pattern (alternating horizontal and vertical orientation at each level) and screw adjoining crates together with 2-inch wood screws ($5-$8 per box of 100) for a stable, multi-tier unit. Each crate compartment holds one 6-8 inch pot or two 4-inch pots.
Sand and stain crates in a coordinating color (Minwax Classic Gray, Early American, or White Wash, $8-$12 per half-pint) for a uniform look, or leave them raw for a farmhouse feel. Line the bottom of each crate with a plastic tray or cut piece of garbage bag to protect the wood from water draining through pot holes. A stacked crate display fits flat against a fence or wall and provides 6-12 plant positions in under 3 square feet of floor space.
5. Pallet Plant Stand
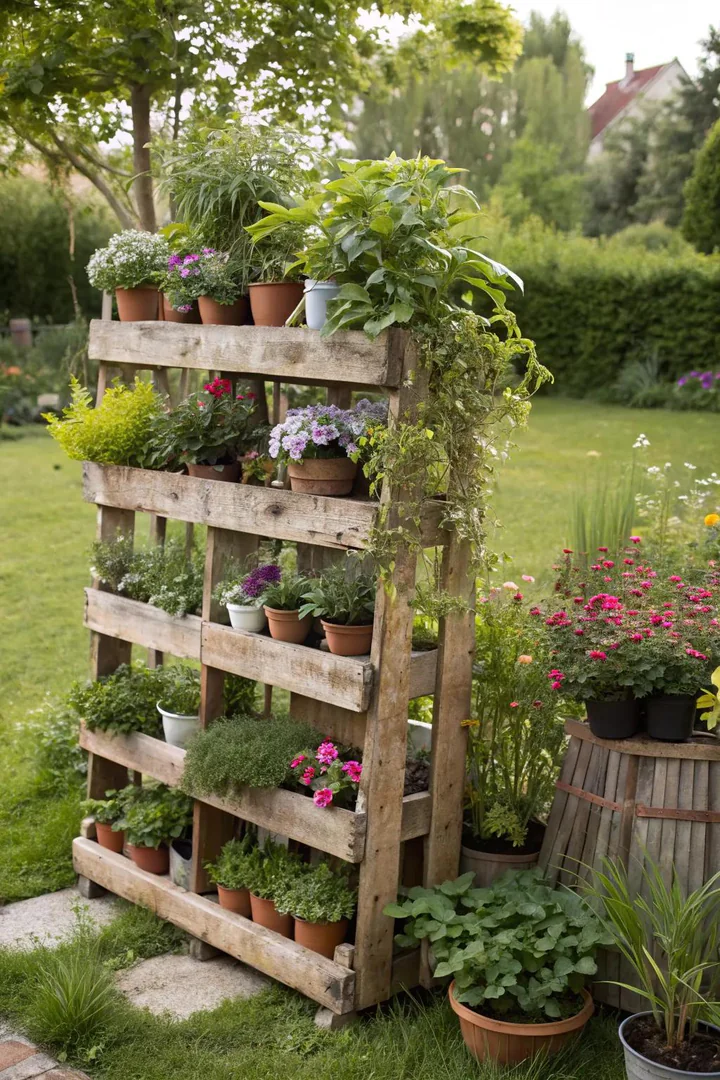
A shipping pallet stood on end and leaned against a wall creates a vertical plant stand with built-in pocket shelves between the deck boards. Staple weed barrier fabric or garden cloth across the back and bottom of each pocket to hold potting soil in place, then plant directly between the slats. Choose trailing species (creeping Jenny, bacopa, sweet potato vine) that drape over the front of each pocket for a living wall effect.
For a pot-based approach, screw 6-inch shelf brackets ($2-$4 per pair) to the face of each slat and set potted plants on the brackets. A single 48×40-inch pallet holds 8-12 plants in a vertical footprint of just 4×3.5 feet. Sand and seal the pallet with exterior polyurethane before planting, and mount the top to the wall or fence with two lag screws ($1-$2 each) to prevent tipping. Source heat-treated (HT-stamped) pallets only for garden use, as covered in backyard pavilion ideas and other outdoor building guides.
6. Wire Frame Stand
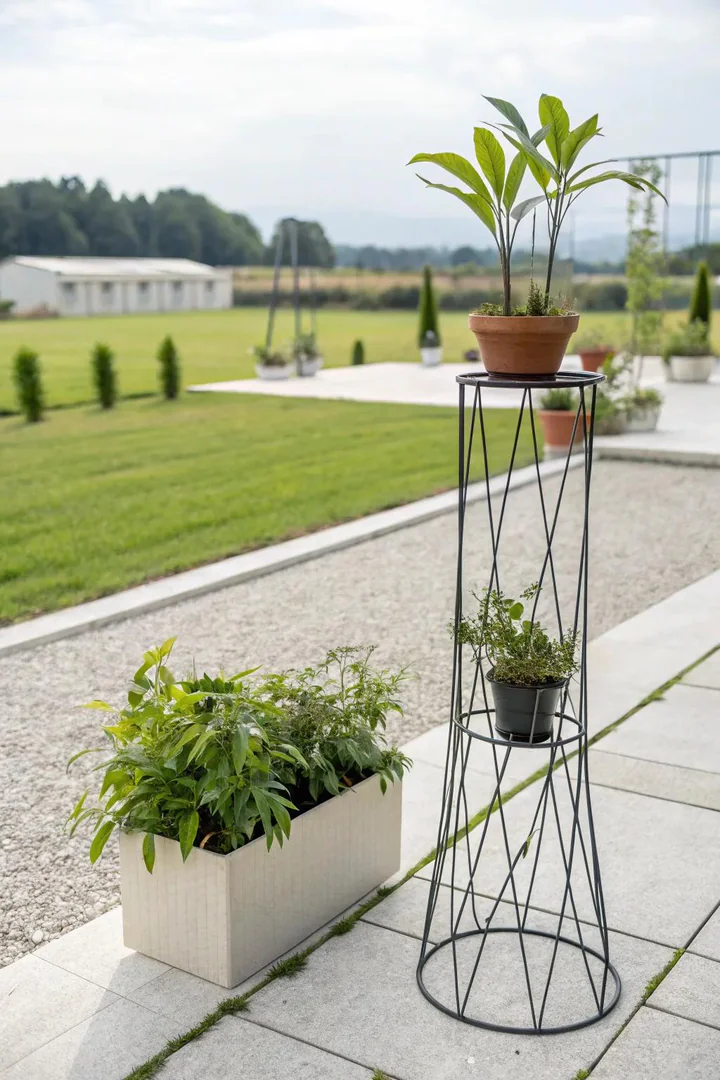
Wire frame plant stands ($15-$40 each from Amazon, Target, or garden centers) offer an open, airy display that shows off both the pot and the plant without visual bulk. A 3-tier wire stand holds three 8-10 inch pots at graduated heights (12, 24, and 36 inches) in a floor footprint of just 12×12 inches. Black powder-coated wire resists rust and pairs with any pot color, while white and gold finishes suit brighter, more colorful displays.
Choose a stand with a flat, stable base plate or splayed legs that won’t tip on textured surfaces like brick, stone, or gravel. Wire stands work best for lightweight pots (plastic, fiberglass, or thin terracotta) since the wire supports flex under heavy ceramic or concrete containers. Group 2-3 wire stands at different heights beside a door, along a walkway, or at the corner of a patio for a collected look that fills an empty vertical zone.
7. Cinder Block Bench Stand
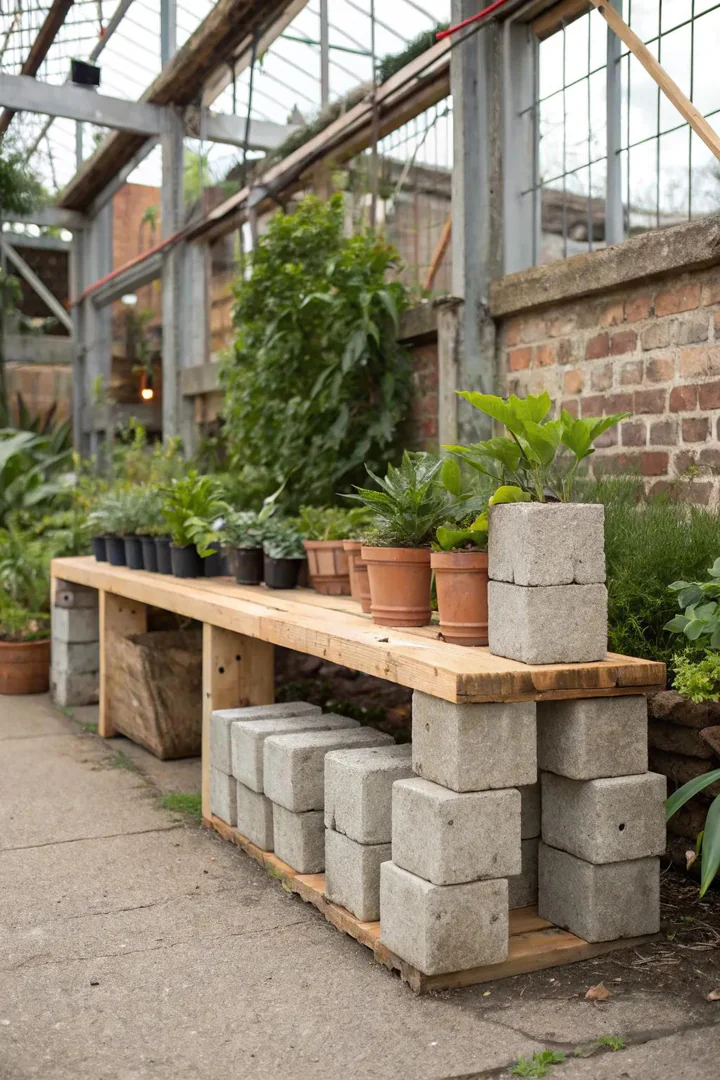
Stacking 6-8 standard cinder blocks ($1-$2 each from Home Depot or Lowe’s) with 2×10 or 2×12 lumber planks ($6-$10 per 8-foot board) creates a sturdy bench-height plant stand that doubles as outdoor seating. Lay two stacks of 3 blocks each (openings facing up), spaced 4-5 feet apart, and place a lumber plank across the tops as a shelf. Stack a second tier of blocks on the plank for a two-level display.
Fill the open block holes with soil and plant succulents, herbs, or trailing flowers directly in the cavities for built-in greenery between the potted plants on the shelves. Paint cinder blocks with exterior spray paint ($5-$8 per can) in a single bold color or alternating shades for a pop of pattern. A cinder block plant bench costs $15-$30 total in materials, weighs enough to resist wind, and disassembles in minutes for storage or reconfiguration.
8. Gabion Plant Stand
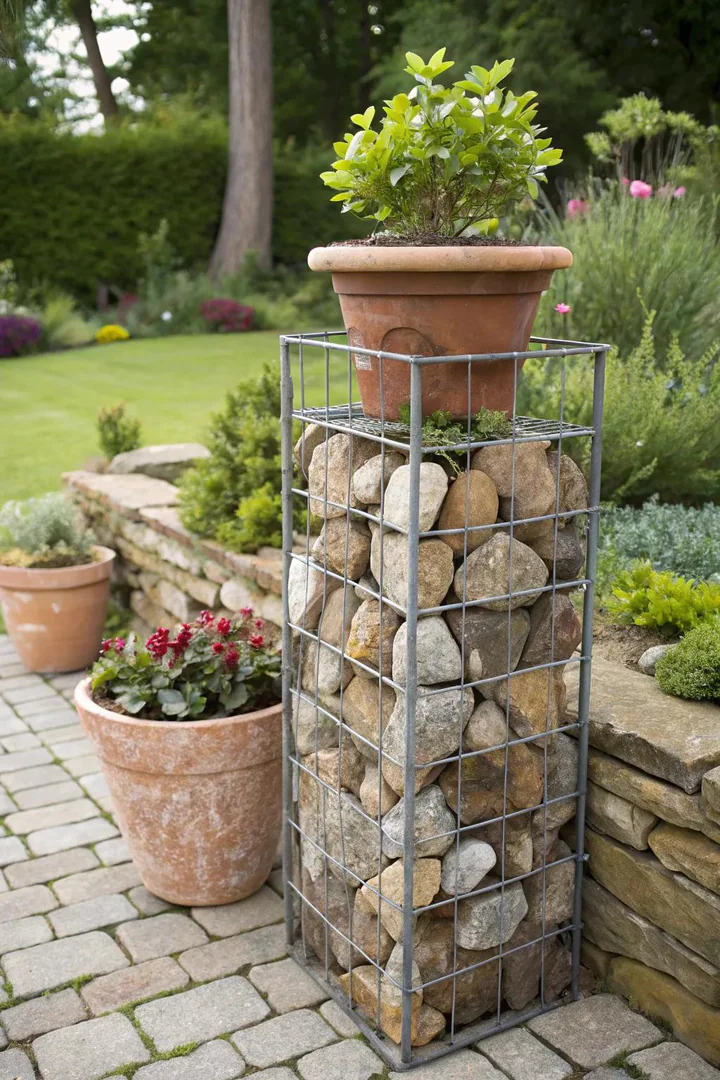
A gabion cage (welded wire mesh box, $20-$50 for a 12x12x24-inch unit from landscaping suppliers) filled with river rock, fieldstone, or broken concrete chunks becomes a heavy-duty pedestal that supports even the largest ceramic planters. Stack two gabion boxes for a 3-4 foot tall display column that weighs 100-200 pounds and stays put through wind and storms without anchoring.
Fill the gabion with stones that match your yard’s existing materials (tan river rock, gray granite, red lava rock) for a cohesive hardscape connection. A flat flagstone cap ($5-$15 per piece) placed on top of the gabion creates a level platform for the pot. Gabion stands bring an architectural, modern look to a garden and pair well with large specimen plants (agave, ornamental grasses, or topiary forms) that match the bold scale of the stone-filled column.
9. Woven Basket Stand
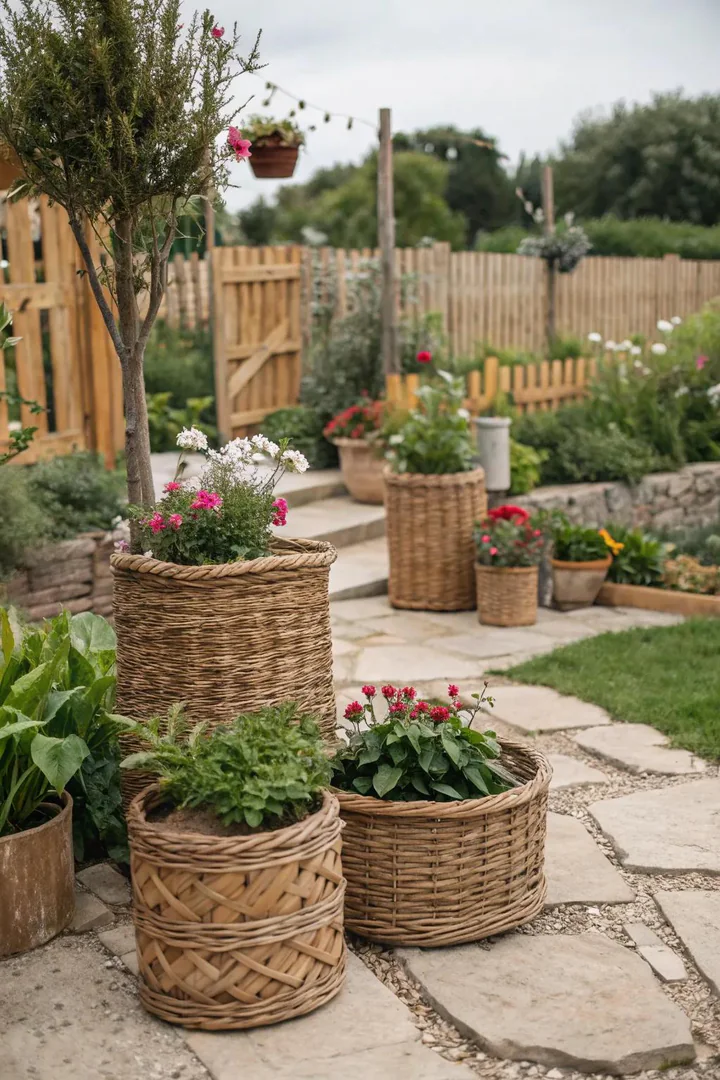
Woven baskets ($10-$25 each from Target, HomeGoods, or World Market) serve as decorative plant stand covers that hide plain nursery pots behind handwoven texture. Place a plastic nursery pot inside the basket with a saucer underneath to catch drainage water and protect the basket from moisture damage. Rattan, seagrass, jute, and water hyacinth baskets all work outdoors on covered porches and patios where they stay sheltered from direct rain.
Group 3-5 baskets in graduated sizes (8, 10, 12, 14, and 16 inch diameter) at different heights using overturned crates, stools, or stacked pavers as hidden risers underneath. Matching baskets in a single material and color create a cohesive set, while mixed basket styles and weave patterns produce a collected, global-market look. Replace woven baskets every 2-3 seasons when they begin to fray, or extend their life by spraying with a clear acrylic sealer ($8-$12 per can).
10. Concrete Column Stand
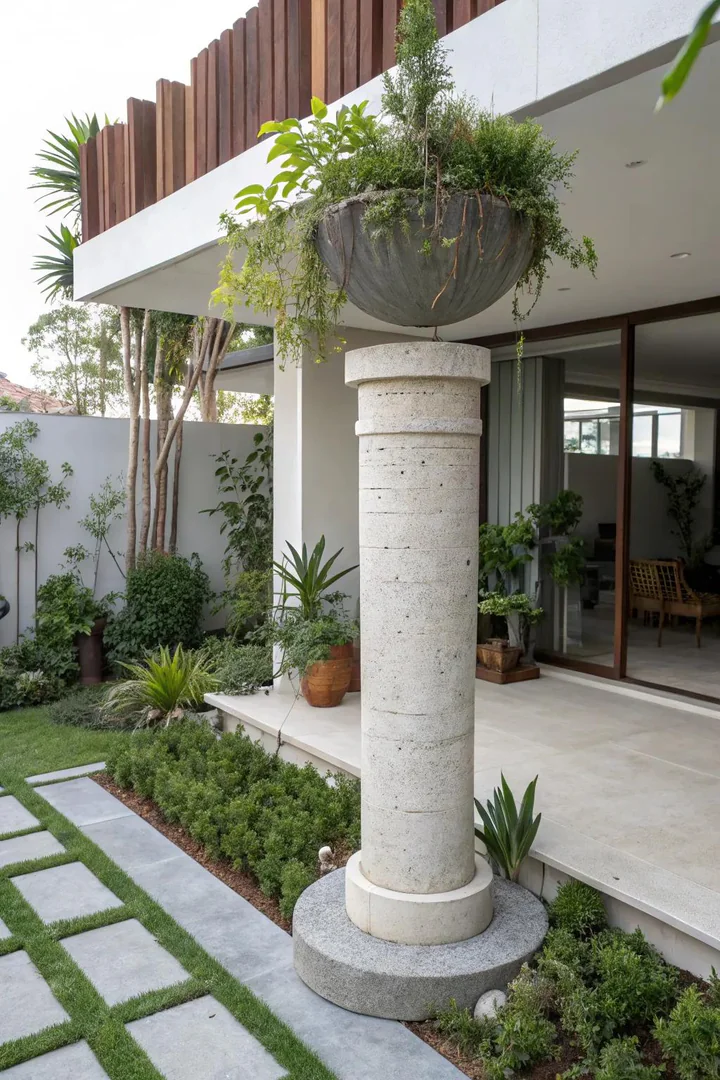
A concrete column or pedestal ($30-$80 for a 24-36 inch tall cast column from garden supply stores or Wayfair) raises a single statement plant to eye level for a formal, architectural display. Precast concrete columns come in smooth, fluted, and carved styles that match classical, modern, and Mediterranean garden settings. A single column with a large fern, agave, or topiary creates a focal point at a garden entry, pathway intersection, or patio corner.
Pour your own concrete columns using a sonotube form ($5-$10 for a 12-inch diameter x 4-foot cardboard tube) filled with Quikrete ($5-$8 per 80-pound bag) for a custom-height pedestal at a quarter of the retail price. Strip the cardboard after 48 hours of curing, sand smooth, and seal with concrete sealer ($10-$15 per quart) for a polished finish. Cast concrete weighs 15-25 pounds per column, making it stable enough to support heavy pots without tipping.
11. Vintage Chair Stand
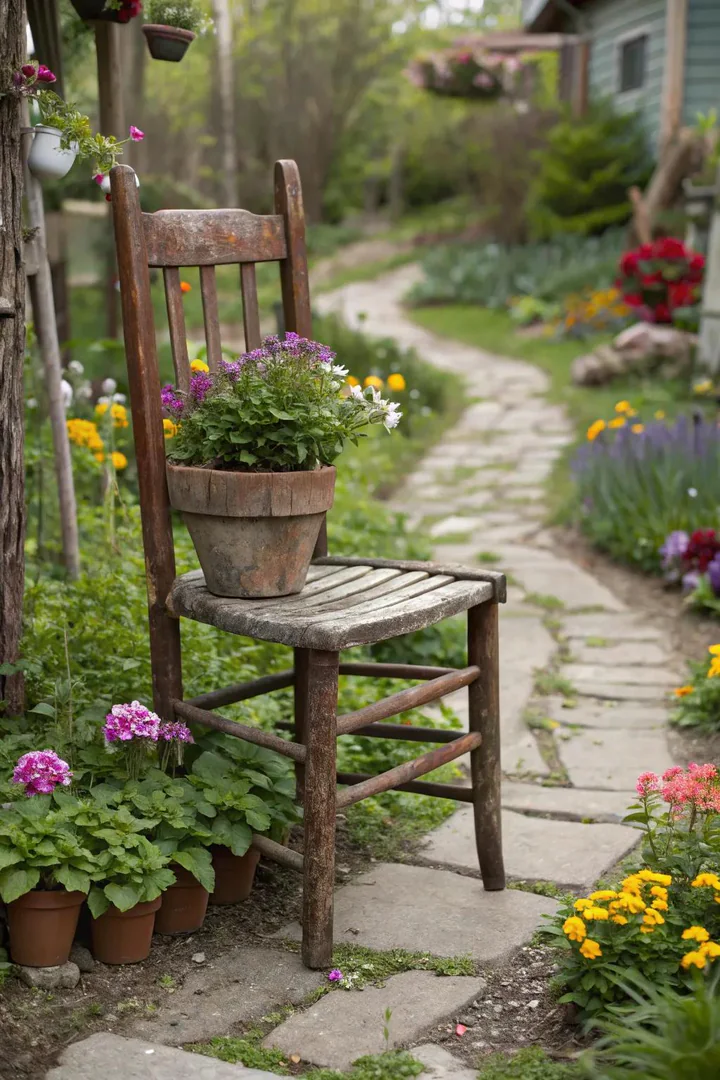
A retired wooden chair ($5-$15 at thrift stores, yard sales, or curbside giveaways) becomes a charming plant stand by setting a pot on the seat, removing the seat and dropping in a pot that fits the opening, or cutting a hole in the seat for a drop-in planter. Dining chairs, rocking chairs, and stools all work, and the more weathered and peeling the paint, the better it looks as a garden accent.
Drill 2-3 drainage holes in the seat if you plant directly into it, or set a potted plant on top with a saucer underneath. Secure the chair to a wall, fence, or stake with wire or zip ties if it sits on uneven ground where tipping is a concern. A mismatched set of 2-3 different vintage chairs, each holding a different plant, creates a collected display that tells a story and adds personality to a porch or garden path. Similar repurposing approaches appear in hot tub surroundings where salvaged furniture anchors planted areas around outdoor features.
12. A-Frame Plant Ladder
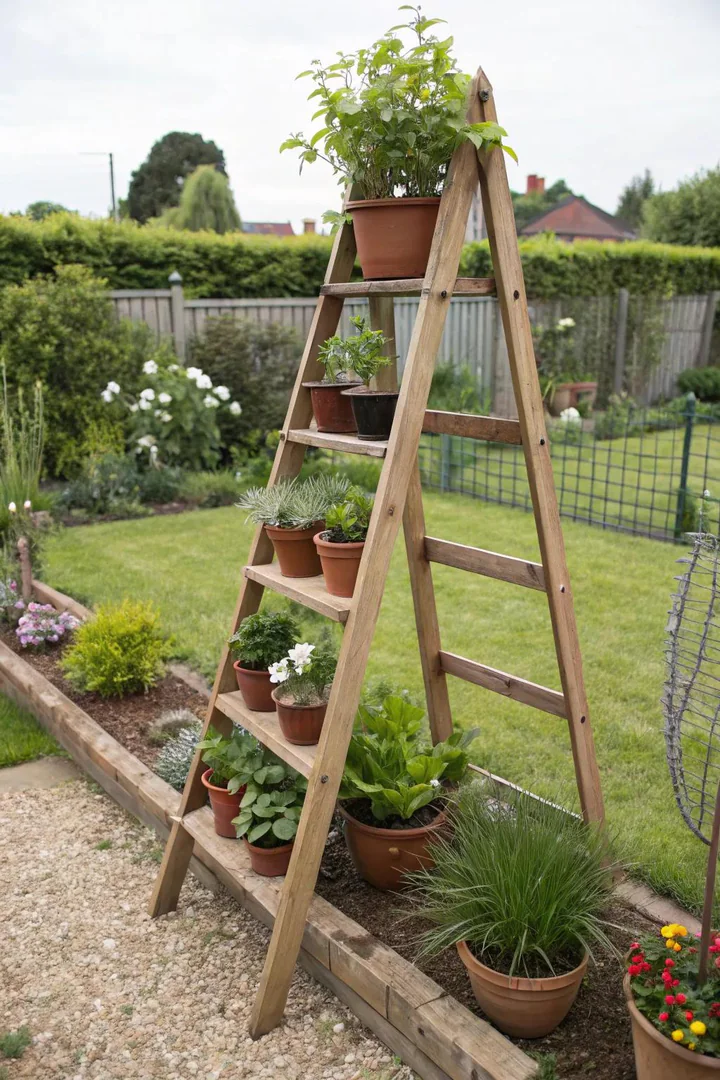
An A-frame plant ladder ($30-$80 from Amazon, Wayfair, or garden centers, or $15-$30 as a DIY build from 2×2 lumber and 1×6 shelf boards) opens into a freestanding pyramid display with 3-5 shelf tiers. A-frame stands hold 8-15 pots depending on the shelf width and tier count, and fold flat for storage during winter months. Cedar or teak A-frames ($60-$120) resist rot for 10-15 years outdoors without treatment.
Place wider, heavier pots on the lower shelves and smaller, lighter pots on the upper tiers for stability. Drill pilot holes and screw shelf boards to the side rails rather than relying on friction or resting weight, since wind can blow an unanchored A-frame over. Position the A-frame against a wall or fence on windy sites, or anchor the bottom legs with sandbags ($5-$10 per bag) or tent stakes ($3-$5 per pack of 4).
13. Tiered Rolling Shelves
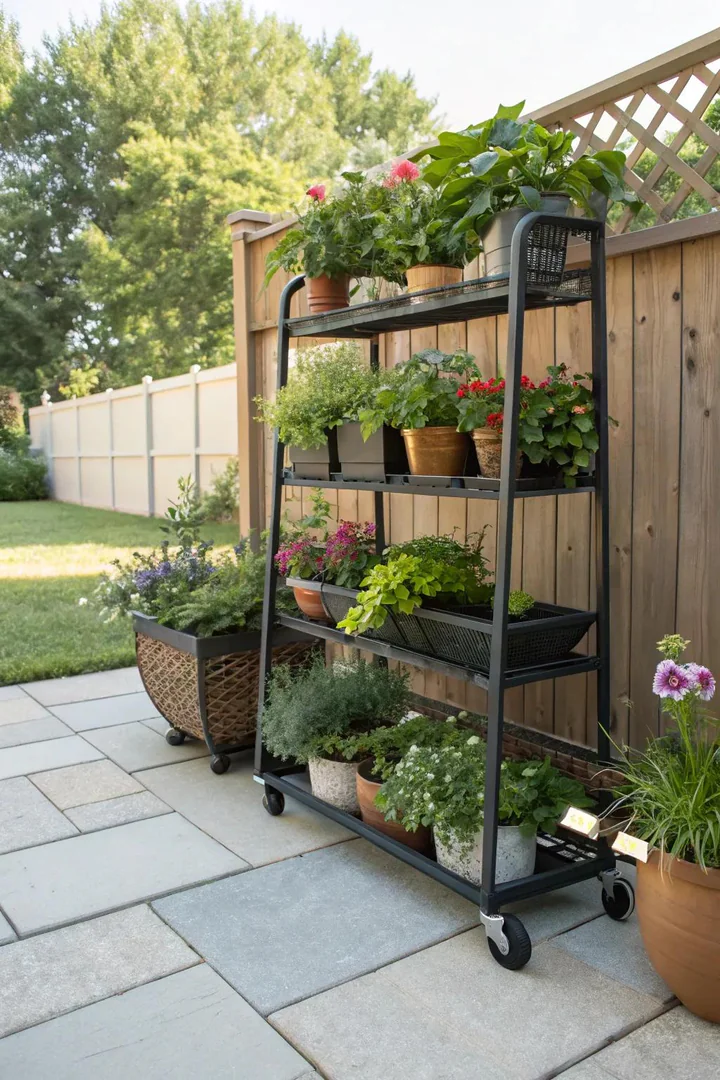
A rolling plant shelf ($30-$60 from Amazon or Wayfair) on 4 locking caster wheels moves an entire collection of 10-20 plants from sun to shade, indoors to outdoors, or out of the way when you need the patio space for entertaining. Metal wire shelving units (3-4 tiers, $25-$50 from Amazon Basics or Trinity) hold the most weight per shelf (100-250 pounds each) and resist moisture better than wood.
Lock all 4 casters when the shelf is in its display position to prevent rolling on sloped surfaces. Add humidity trays ($5-$10 per shelf-sized tray) on each shelf to catch pot drainage and protect the surface below. Rolling shelves work especially well for tropical plants and tender perennials that spend summer outdoors and winter indoors, since you can wheel the entire collection through a doorway in one trip rather than carrying pots one at a time.
14. DIY Copper Pipe Stand
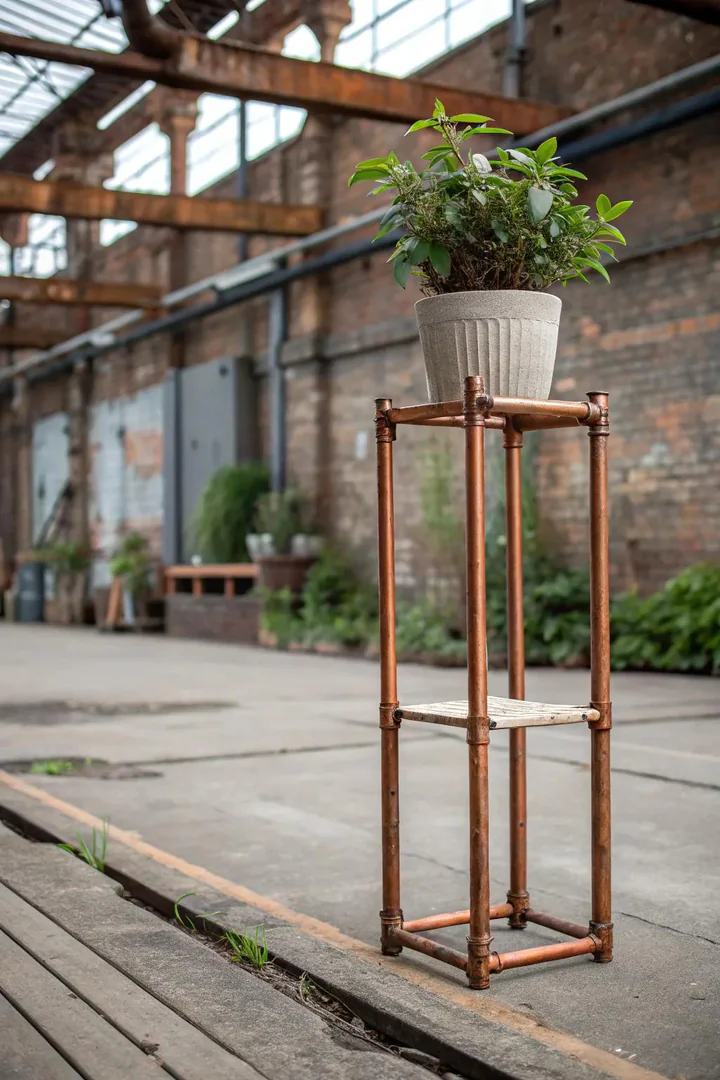
Copper pipe and fittings from the plumbing aisle ($3-$6 per 10-foot length of 1/2-inch or 3/4-inch Type M copper pipe, $1-$3 per elbow or tee fitting) cut and connect into a modern geometric plant stand for $15-$40 in total materials. A basic tripod stand uses three 18-inch pipe legs joined at the top with a 3-way tee fitting, with a copper ring ($5-$8 for pre-formed or bend your own) holding the pot at the intersection.
Cut copper pipe with a tube cutter ($8-$15) and join with push-fit or sweat-soldered fittings. Leave the copper bright for a new-penny shine, or spray with saltwater and vinegar to accelerate the green patina that copper develops naturally over 6-12 months outdoors. A copper pipe plant stand suits modern porches, mid-century patios, and minimalist gardens where the clean metallic lines contrast with the organic shapes of the plant and pot.
15. Antique Finds
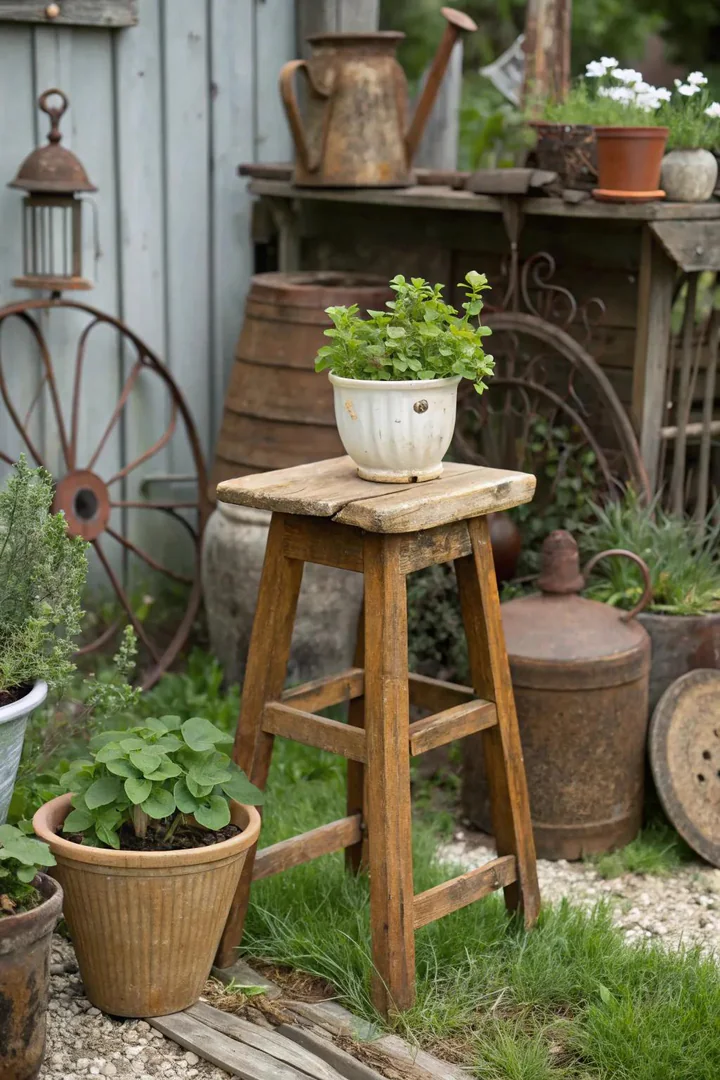
Antique washstands, sewing machine tables, iron shoe racks, and parlor tables ($15-$80 at estate sales, flea markets, and antique shops) become one-of-a-kind plant stands that no store can replicate. A marble-top washstand holds a heavy ceramic planter, an old sewing machine base supports a wood slab shelf, and a Victorian plant stand retains its original purpose after 100+ years of service.
Check antique pieces for structural stability before loading with heavy pots: tighten loose joints with wood glue and screws, and replace missing hardware with reproduction pieces ($3-$10 from House of Antique Hardware). Position antique stands under a porch roof or overhang where they stay sheltered from direct rain that accelerates deterioration of old finishes. A single well-chosen antique stand displayed beside the front door makes a stronger first impression than a row of matching store-bought stands.
16. DIY Iron Stand
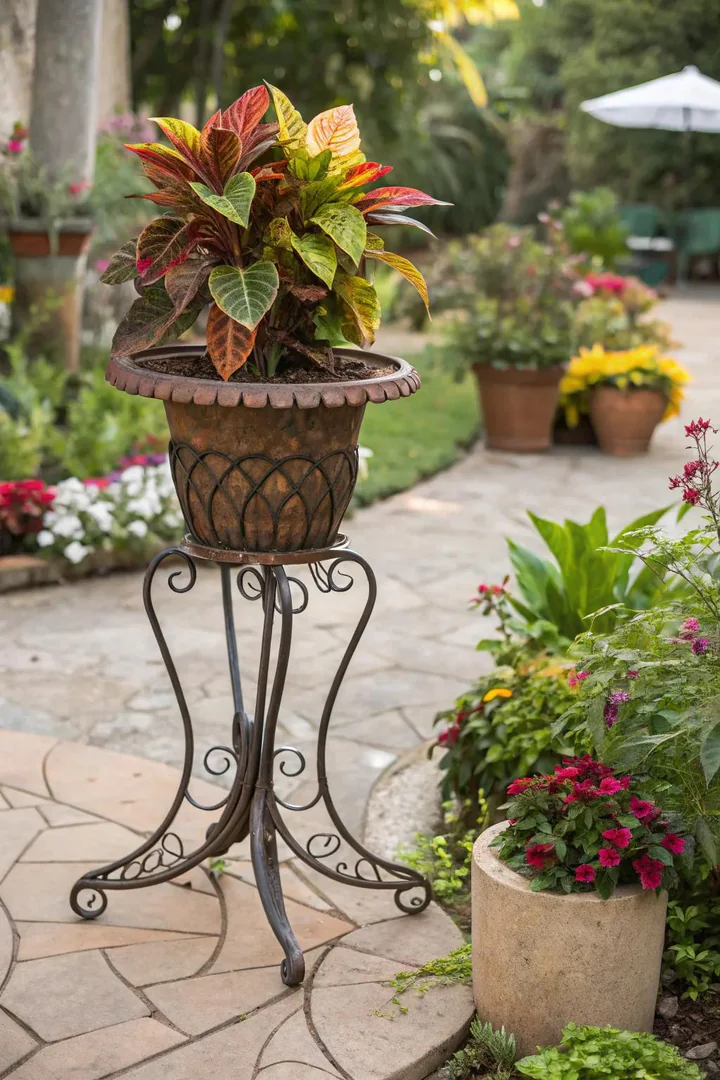
A welded iron plant stand built from 3/8-inch or 1/2-inch round steel bar ($5-$15 per 10-foot length from a metal supply store) creates a durable display piece that lasts decades outdoors. Three legs bent into gentle S-curves and welded to a ring top ($3-$5 for a pre-made steel ring or bend your own) produce the classic iron plant stand shape. A basic MIG welder ($150-$300 from Lincoln, Hobart, or Forney) handles the joints with minimal welding experience.
Grind welds smooth with an angle grinder ($30-$50) and apply a coat of Rust-Oleum flat black or hammered-finish spray paint ($5-$8 per can) for a professional look. A DIY iron stand costs $10-$20 in materials compared to $40-$80 for a comparable retail piece. Build 3 stands at graduated heights (12, 18, and 24 inches) from the same batch of steel for a matching set that groups together on a porch or patio.
17. Wooden Trellis Stand
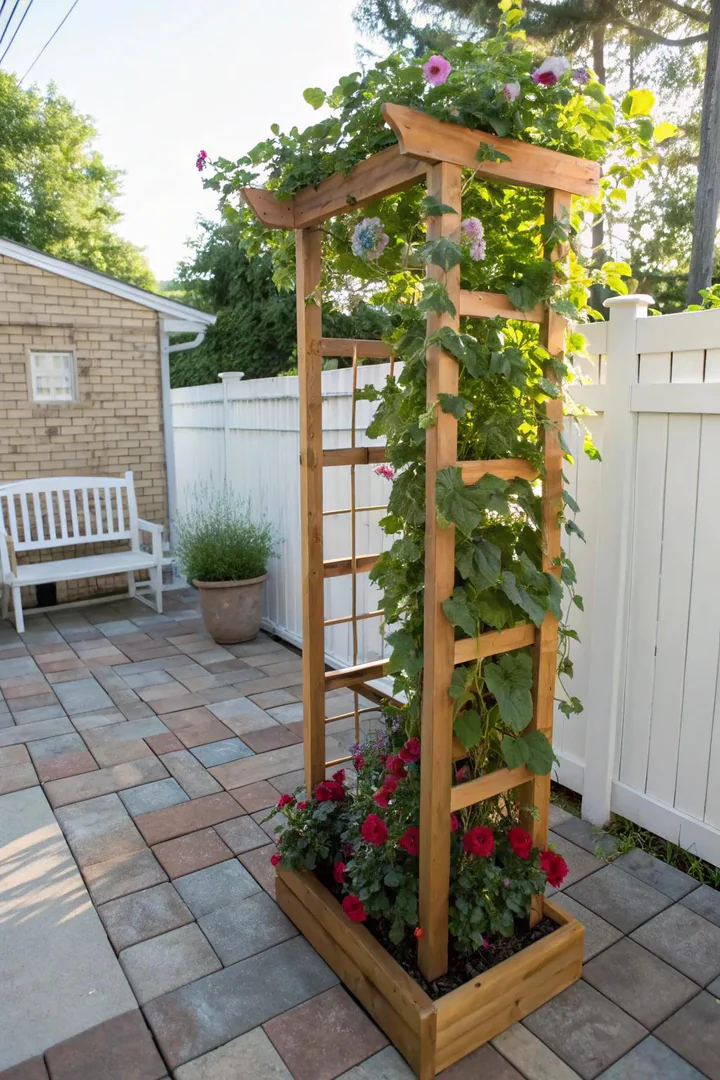
A trellis panel with integrated planter boxes at the base serves double duty as both a plant stand and a climbing support for vines and trailing plants. Build a 2×4-foot trellis from 1×2 cedar strips ($2-$4 per 8-foot board) nailed in a grid pattern, and attach a 6-inch deep planter box ($10-$20 for materials, or $15-$30 pre-made from Gardener’s Supply) at the bottom. Plant climbing nasturtium, sweet pea, or morning glory in the box and train the vines up the trellis lattice.
Mount the trellis to a fence, wall, or freestanding posts for a vertical garden that takes up zero floor space beyond the planter box footprint. Add 2-3 small shelf brackets ($2-$4 per pair) screwed to the trellis at staggered heights for additional potted plants at mid-level. A trellis plant stand works especially well along the blank side of a garage, shed, or fence where a flat green wall covers an otherwise bare surface.
18. Repurposed Bar Cart
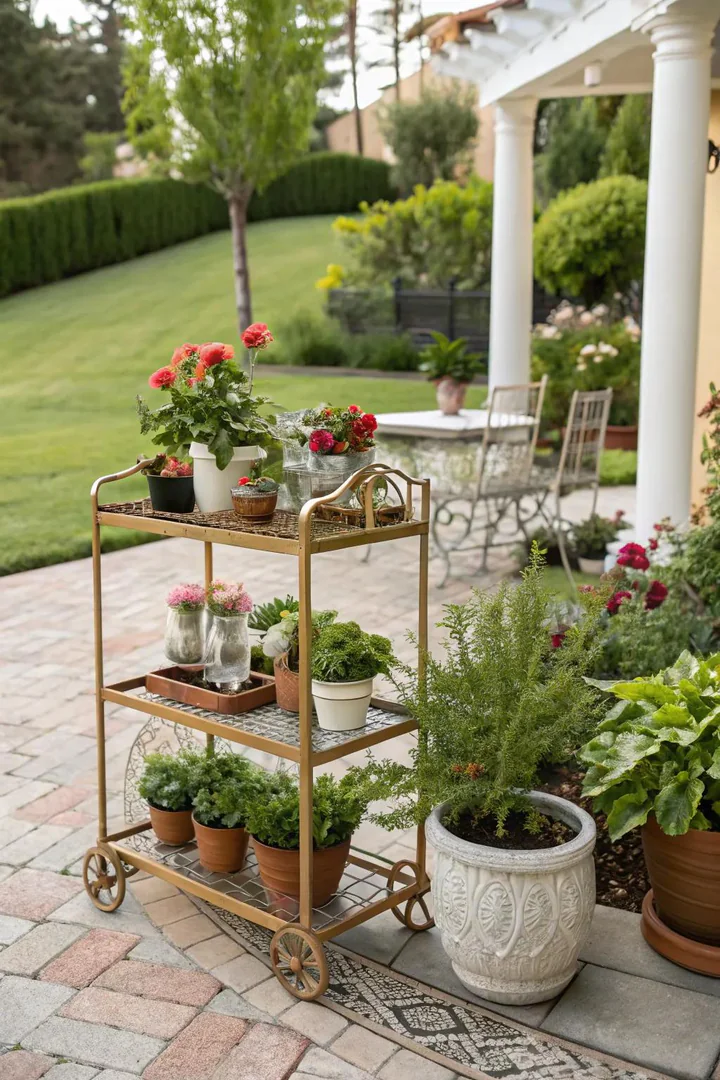
A bar cart ($30-$80 from Target, IKEA, or thrift stores) rolls outdoors as a mobile plant station with 2-3 shelves, a handle for steering, and wheels that move the display from sun to shade throughout the day. Metal bar carts with powder-coated finishes handle rain and humidity better than wood carts, which need a waterproof liner or tray on each shelf to protect against pot drainage.
Arrange trailing plants on the top shelf and upright plants on the lower tiers for a layered display visible from all angles. Add a small watering can, pruning shears, and a bag of potting soil to the bottom shelf for a self-contained garden station that keeps supplies with the plants. A repurposed bar cart makes an excellent seasonal plant stand that displays outdoor plants from spring through fall and rolls inside to host indoor tropicals during winter months. Coordinate the cart’s style with outdoor seating and covered deck features from covered deck ideas for a unified patio look.
19. Milk Churn Planter
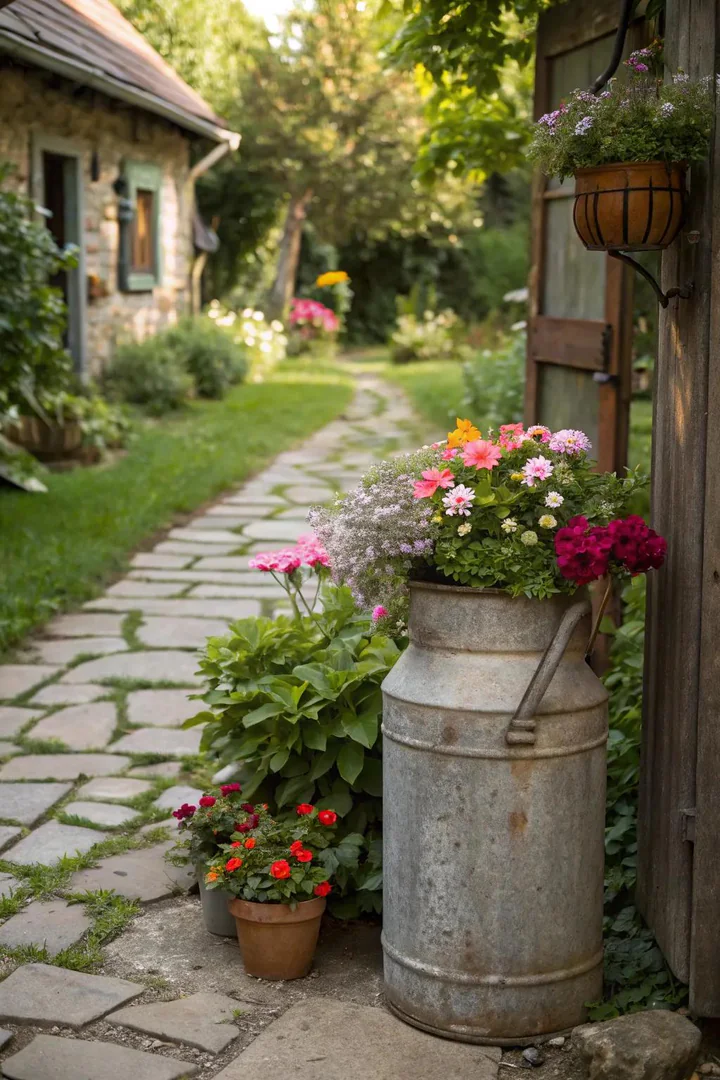
A vintage or reproduction milk churn ($20-$60 for galvanized steel reproductions from Hobby Lobby, Amazon, or antique shops) stands 18-24 inches tall and holds a 6-8 inch pot in the open top or serves as a pedestal for a plant displayed on the lid. Genuine antique milk churns ($40-$150 depending on condition and size) carry dents, patina, and maker stamps that add character no reproduction can match.
Drill 3-4 drainage holes in the bottom if planting directly inside the churn, or set a plastic nursery pot in the opening for easy seasonal swaps. Pair a milk churn with a matching watering can, galvanized bucket, and metal garden sign for a farmhouse-style porch arrangement. Group 2-3 churns at different heights (standard 18-inch and tall 24-inch models) beside the front door with seasonal flowers (spring tulips, summer geraniums, fall mums) for a display that rotates with the calendar. Check DIY fire pit ideas for more repurposed metal container projects that bring salvaged materials into the garden.
Plant Stand Material Comparison
| Material | Cost Range | Weight Capacity | Weather Resistance | Lifespan Outdoors |
|---|---|---|---|---|
| Wrought Iron | $20-$80 | High (50-100 lbs) | Excellent (with paint) | 20-30 years |
| Powder-Coated Steel | $15-$60 | High (50-100 lbs) | Very Good | 10-20 years |
| Cedar/Teak Wood | $30-$120 | Medium (30-60 lbs) | Good (natural rot resistance) | 10-15 years |
| Pine/Fir (treated) | $10-$40 | Medium (30-60 lbs) | Fair (needs sealing) | 5-8 years |
| Copper Pipe | $15-$40 (DIY) | Low-Medium (15-30 lbs) | Excellent (patinas naturally) | 20+ years |
| Concrete/Cast Stone | $30-$80 | Very High (100+ lbs) | Excellent | 30+ years |
| Woven Basket | $10-$25 | Low (10-20 lbs) | Poor (covered areas only) | 2-3 seasons |
How to Choose the Right Plant Stand Size
1. Measure the Pot and the Plant
Measure the pot’s base diameter (the bottom of the pot that contacts the stand) rather than the rim diameter, since most pots taper from top to bottom. The stand platform or ring must be at least 1 inch wider than the pot base on all sides for stable seating. Factor in the mature plant height and spread: a top-heavy plant on a narrow stand tips over in the first strong breeze.
2. Match the Stand Height to the Display Location
Place short stands (8-12 inches) on tables, benches, and railings where the plant needs a small boost. Use medium stands (18-24 inches) on the ground beside furniture, doorways, and pathway edges for eye-level viewing from a seated position. Reserve tall stands (30-42 inches) for floor-level placement where the plant needs to reach standing eye height, such as a porch entry, stairway landing, or garden gate.
3. Account for Weight and Wind
A 12-inch ceramic pot filled with wet soil weighs 25-40 pounds; a 16-inch pot weighs 40-70 pounds. Match the stand’s rated capacity to the filled pot weight, not the empty pot weight, since a stand that holds 20 pounds comfortably may buckle under 50 pounds of wet soil and ceramic. On windy sites (rooftops, open patios, coastal locations), choose heavy base stands (iron, concrete, or stone-filled gabion) over lightweight wire or wood frames that blow over.
4. Group Stands at Odd Numbers and Varied Heights
Group plant stands in sets of 3, 5, or 7 at different heights (short, medium, tall) for a collected, natural-looking display. Even-numbered pairs read as formal and symmetrical, while odd groupings feel casual and garden-like. Leave 4-6 inches between grouped stands so each plant gets airflow and light on all sides, and so individual pots can be watered and maintained without moving the entire arrangement.
Frequently Asked Questions
What is the best material for an outdoor plant stand?
Powder-coated steel and wrought iron offer the best combination of strength, weather resistance, and lifespan for outdoor use. Both materials support heavy pots (50-100 pounds), resist rust with a factory finish, and last 10-30 years with minimal maintenance. Cedar and teak wood stands are the best natural-material option, lasting 10-15 years outdoors without treatment. Avoid untreated pine, MDF, and unsealed wicker for fully exposed outdoor locations where rain and UV destroy these materials within 1-3 seasons.
How do you keep plant stands from tipping over?
Anchor lightweight stands by filling the base tray with gravel or sand (5-10 pounds of added weight), staking the legs to the ground with tent stakes ($3-$5 per pack), or securing the stand to a wall or fence with a wire or zip tie. Choose stands with wide, splayed legs or a flat base plate rather than narrow tripod designs for windy locations. The heaviest pot in a multi-tier stand should always go on the lowest shelf, and the overall filled weight of pots should not exceed the stand’s rated capacity.
Can you leave metal plant stands outside in winter?
Powder-coated and galvanized metal stands survive winter outdoors in all climates. Painted wrought iron develops rust at chip and scratch points where bare metal contacts rain, so touch up any exposed metal with matching spray paint before winter. Move stands under a porch roof or covered area if possible, since reducing direct rain exposure by even 50% doubles the time between paint touch-ups. Empty ceramic and terracotta pots from the stands before freezing temperatures arrive, since water expanding inside the pot cracks the material.
What height plant stand is best for a front porch?
A 24-30 inch stand places the plant at eye level for a person standing at the front door, making it the ideal height for a porch entry display. Shorter stands (12-18 inches) work on porch railings, stairs, and beside seating areas where the plant should sit below eye level. Mix 2-3 heights on a front porch for a layered look: a tall stand beside the door, a medium stand on the top step, and a short stand or pot directly on the porch floor.
How do you waterproof a wooden plant stand?
Apply 2 coats of exterior polyurethane or marine-grade spar urethane ($12-$18 per quart from Minwax, Varathane, or Helmsman) to all surfaces, paying extra attention to end grain and joints where water enters wood fibers fastest. Let each coat dry 4-6 hours and sand lightly with 220-grit sandpaper between coats for adhesion. Reapply sealant every 1-2 years (annually for stands in full sun and rain exposure). Even sealed wood stands benefit from a plastic or metal drip tray between the pot and the wood surface to prevent standing water from sitting on the finish.