
Kitchen Backsplash Tile Ideas: 18 Creative Styles You’ll Love
Kitchen backsplash tile protects the wall between your countertop and upper cabinets from grease splatter, water damage, and food stains while anchoring the entire room’s design. Choosing the right tile material, pattern, and grout color determines whether your kitchen reads as modern, traditional, farmhouse, or Mediterranean, and the decision affects both your daily cleaning routine and long-term resale value.
Ceramic and porcelain tiles cost $2 to $15 per square foot and resist heat, moisture, and staining without a sealer. Natural stone options like marble, travertine, and slate range from $7 to $35 per square foot and require periodic sealing with a penetrating impregnator such as Miracle Sealants 511. Glass tile reflects light and makes small kitchens feel larger, while handmade zellige and cement tile deliver artisan texture that factory-pressed alternatives cannot match.
The 18 backsplash tile ideas below cover every material category, layout pattern, and design style. Browse The Designers Company for more kitchen renovation inspiration that pairs tile choices with cabinetry, countertops, and lighting decisions.
1. Classic Subway Tile Backsplash
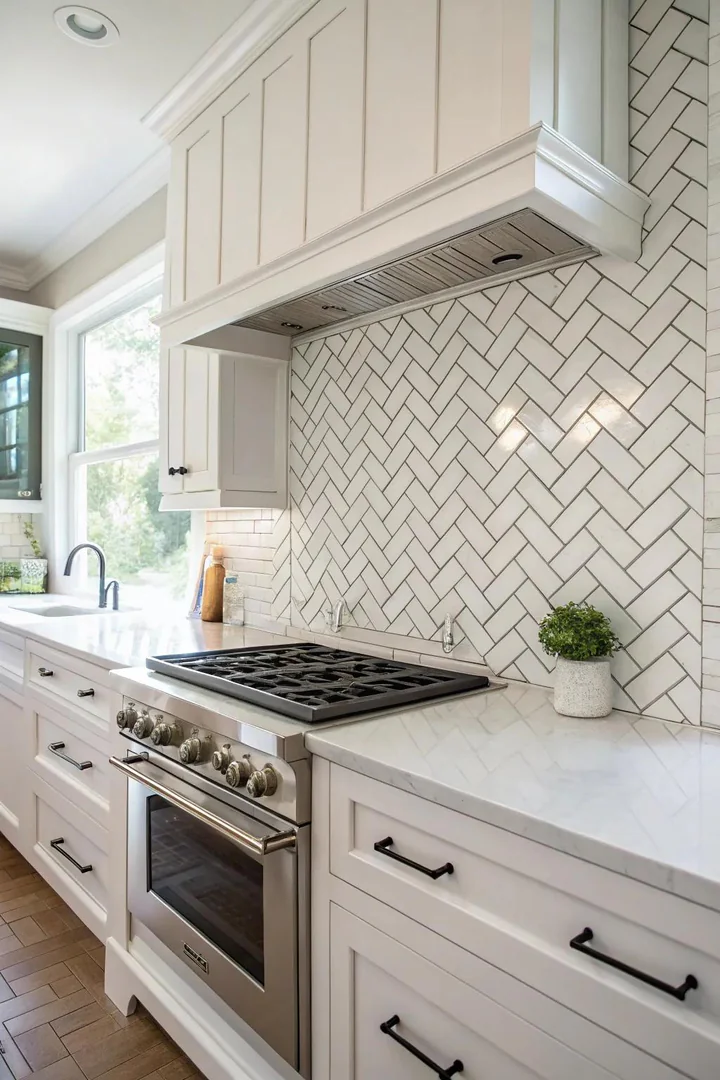
A standard 3-by-6-inch subway tile laid in a running bond pattern remains the most popular kitchen backsplash in North America because the format suits every cabinet style from flat-slab modern to raised-panel traditional. Daltile’s Rittenhouse Square and American Olean’s Starting Line both offer glossy white ceramic subway tiles for under $3 per square foot, keeping a full 30-square-foot backsplash well below $100 in material cost.
Switching the layout from running bond to herringbone or vertical stack bond changes the visual effect without changing the tile itself. A herringbone arrangement draws the eye upward and adds visual height to kitchens with standard 8-foot ceilings. Pair white subway tile with Mapei Keracolor U unsanded grout in Avalanche (bright white) for a clean, blended look, or choose Charcoal grout to outline each tile and create a graphic, high-contrast grid.
Subway tile works equally well behind a range, around a window, or as a full-wall backsplash extending from countertop to ceiling. The flat, glazed surface wipes clean with a damp microfiber cloth and resists grease buildup from stovetop cooking.
2. Bold Mosaic Tile Patterns
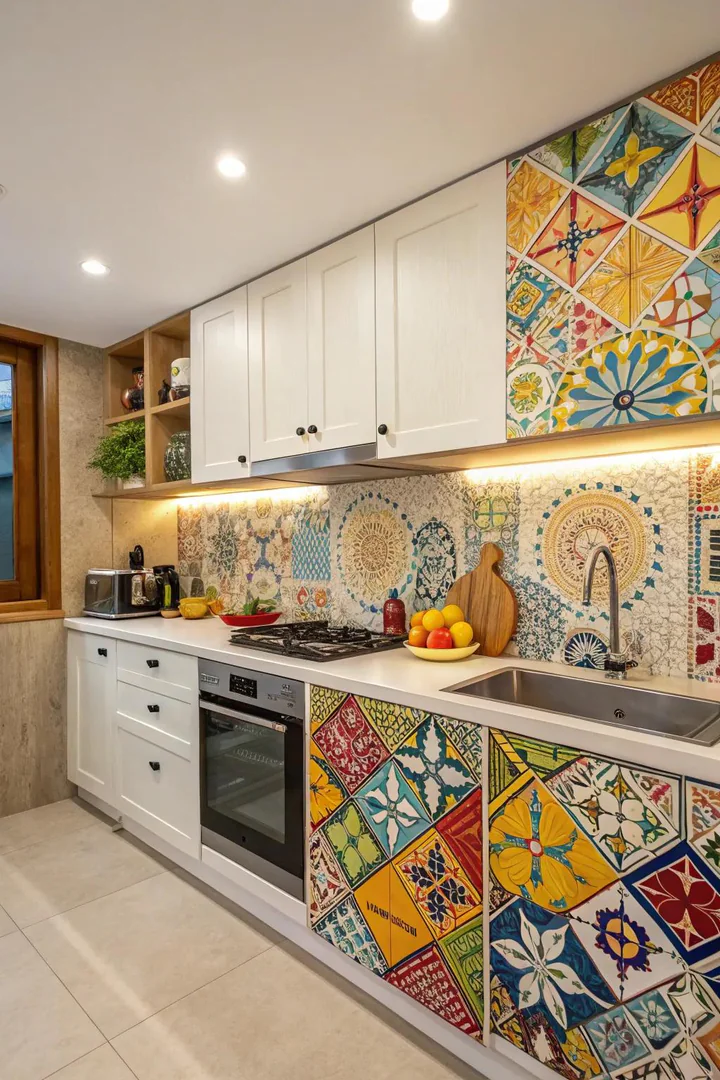
Mosaic tile backsplashes use small pieces, typically 1-inch or 2-inch squares, mounted on a mesh-backed sheet for faster installation. Brands like Jeffrey Court, Lunada Bay Tile, and Oceanside Glasstile offer mosaic blends that combine glass, ceramic, and natural stone tesserae in a single sheet. A three-color gradient of teal, aqua, and white glass mosaic brings a Mediterranean or coastal energy to a white-cabinet kitchen.
Mesh-backed mosaic sheets speed up installation because the thinset mortar bonds the entire 12-by-12-inch sheet in one press rather than setting hundreds of individual pieces. Use Laticrete 254 Platinum thinset for glass mosaic installations, as standard thinset lacks the bond strength glass requires. Grout the mosaic with a sanded formula in a color that matches the dominant tile tone to unify the blend, or pick a contrasting grout to define each individual tessera.
Mosaic backsplashes work as a full-wall treatment or as a focused accent strip behind the cooktop. A 6-inch mosaic border set into a field of larger subway or field tiles creates a decorative band that breaks up a monotone wall without overwhelming the room.
3. Fluted Textured Tile
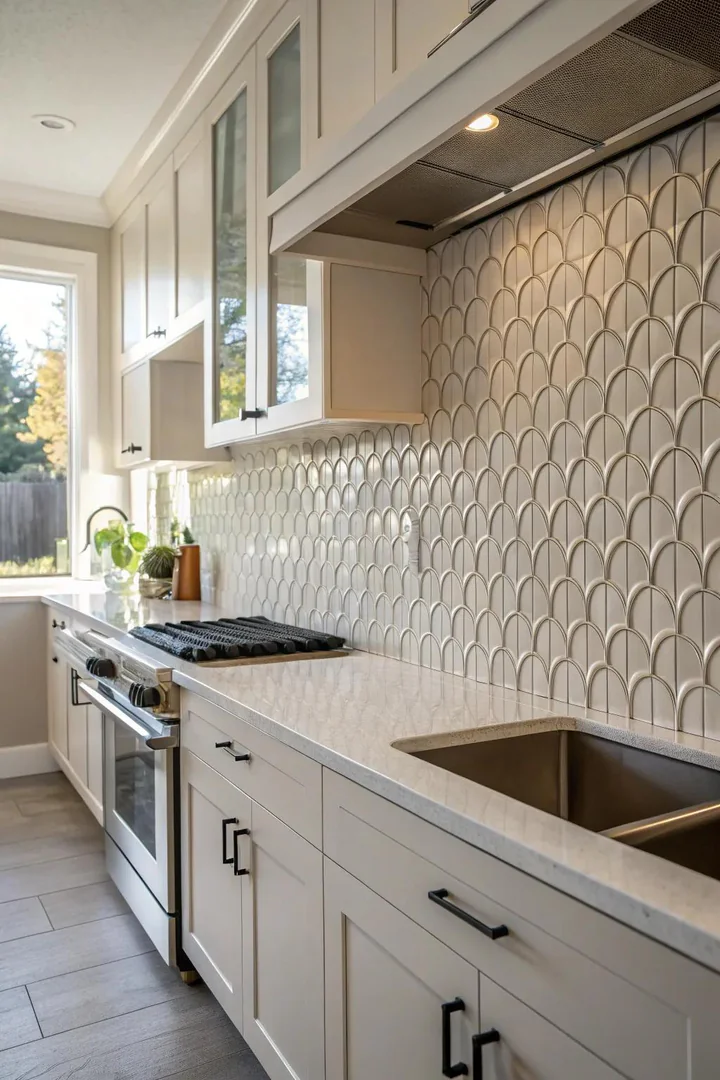
Fluted tile features vertical raised ridges that catch side light and cast soft parallel shadows across the backsplash surface. Bedrosians’ Costa collection and Emser Tile’s Rhythm line both offer fluted ceramic tiles in matte white, sage green, and warm taupe finishes. The three-dimensional surface adds visual depth to a flat wall without introducing color or pattern, making fluted tile a strong choice for minimalist and Scandinavian-inspired kitchens.
Install fluted tiles with the ridges running vertically to accentuate ceiling height, or rotate them horizontally to widen a narrow galley kitchen. The grooves between ridges collect slightly more dust than a flat tile, so wipe them monthly with a soft-bristle brush and warm water. Under-cabinet LED strip lights mounted at a 45-degree angle toward the backsplash amplify the shadow play and turn the fluted surface into a textural focal point after dark.
Pair fluted white tile with a quartz countertop in Caesarstone’s Fresh Concrete or Silestone’s Calacatta Gold for a tonal, layered look that relies on texture rather than color contrast. Matte black cabinet pulls from Amerock’s Bar Pull collection complete the monochromatic palette.
4. Glass Tile Backsplash
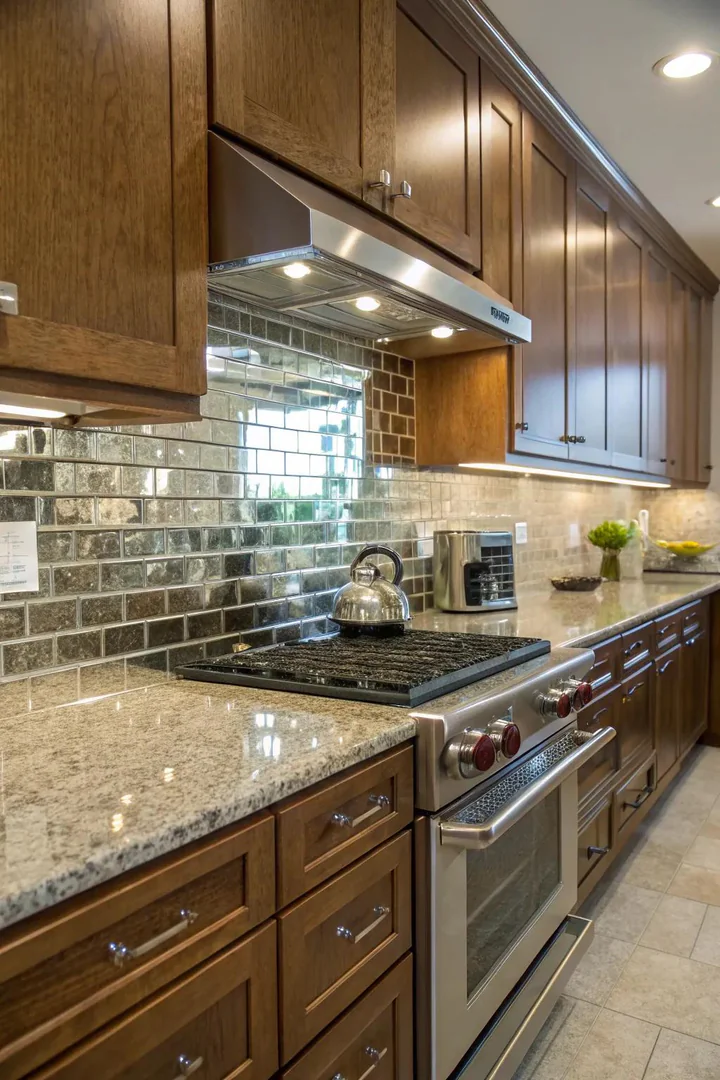
Glass tile reflects up to 30 percent more ambient light than ceramic, making compact kitchens with limited natural light feel noticeably brighter. Oceanside Glasstile’s Tessera collection and Lunada Bay’s Tomei series offer hand-pressed glass tiles in translucent and iridescent finishes that shift color as the viewing angle changes. A 3-by-6-inch glass subway tile in sea-glass green or smoky gray adds color without competing with busy countertop veining.
Glass tile requires a white thinset mortar, not gray, because the adhesive color shows through the translucent body. Use Laticrete 254 Platinum or Custom Building Products’ Glass Tile Premium Mortar applied with a 3/16-inch V-notch trowel. Back-butter each tile individually for complete thinset coverage, as air pockets behind glass tile create visible dark spots once the mortar cures.
The non-porous glass surface never needs sealing and resists mold, mildew, and kitchen grease. A spray of diluted white vinegar and a squeegee keeps glass tile spotless between deep cleans. Homeowners planning kitchen wall sconce placement beside the backsplash can use sconce light to accentuate the reflective quality of glass tile at eye level.
5. Rustic Brick Veneer Tile
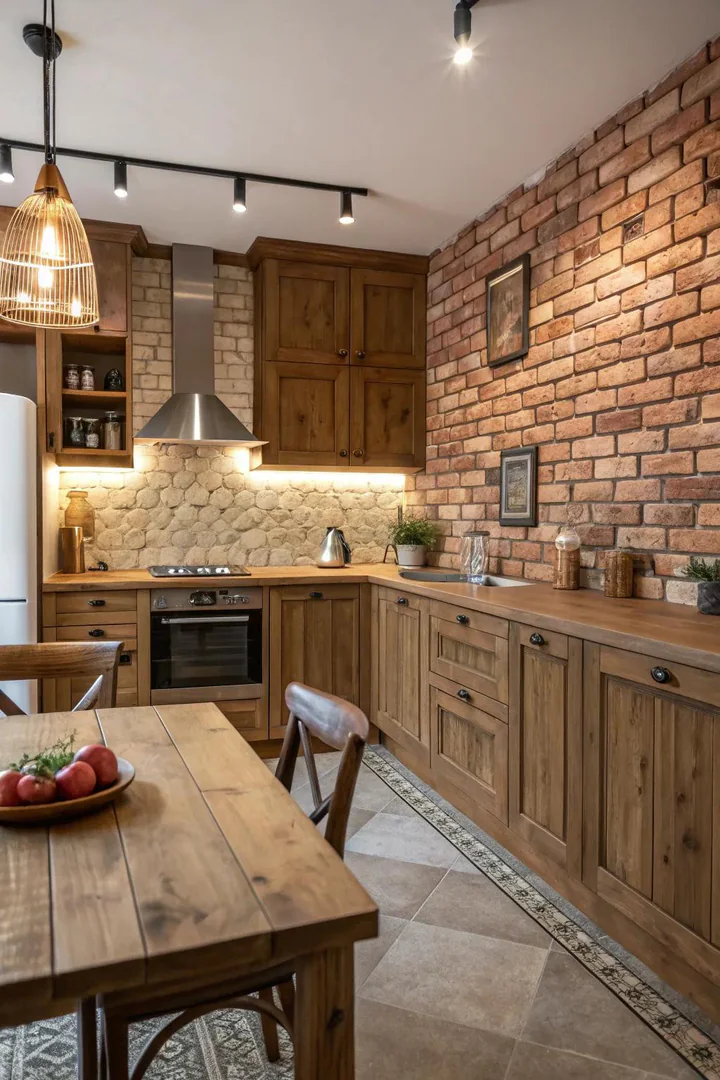
Thin brick veneer tile replicates the texture and warmth of a full masonry wall at a fraction of the weight and cost. Old Mill Brick’s Colonial Collection and Brickweb panels offer 1/2-inch-thick clay brick slices that adhere directly to drywall with construction adhesive or thinset mortar. Colors range from classic red and heritage brown to whitewashed and tumbled gray, fitting farmhouse, industrial loft, and rustic cottage kitchens.
Brick veneer weighs roughly 4 pounds per square foot compared to 25 pounds for full-depth brick, so existing kitchen walls support the load without structural reinforcement. Apply a clear matte sealant like Ghostshield Siloxa-Tek 8500 to prevent oil and grease from absorbing into the porous clay surface. Reapply the sealer every two to three years, or sooner in heavy-cooking households where the backsplash sits directly behind a gas range.
Pair brick veneer with butcher-block countertops in walnut or maple, open wood shelving, and pendant lights with aged-metal shades for a cohesive farmhouse kitchen lighting scheme. The rough, hand-molded texture of real clay brick adds a tactile warmth that printed ceramic brick-look tiles cannot replicate.
6. Hexagonal Tile Backsplash
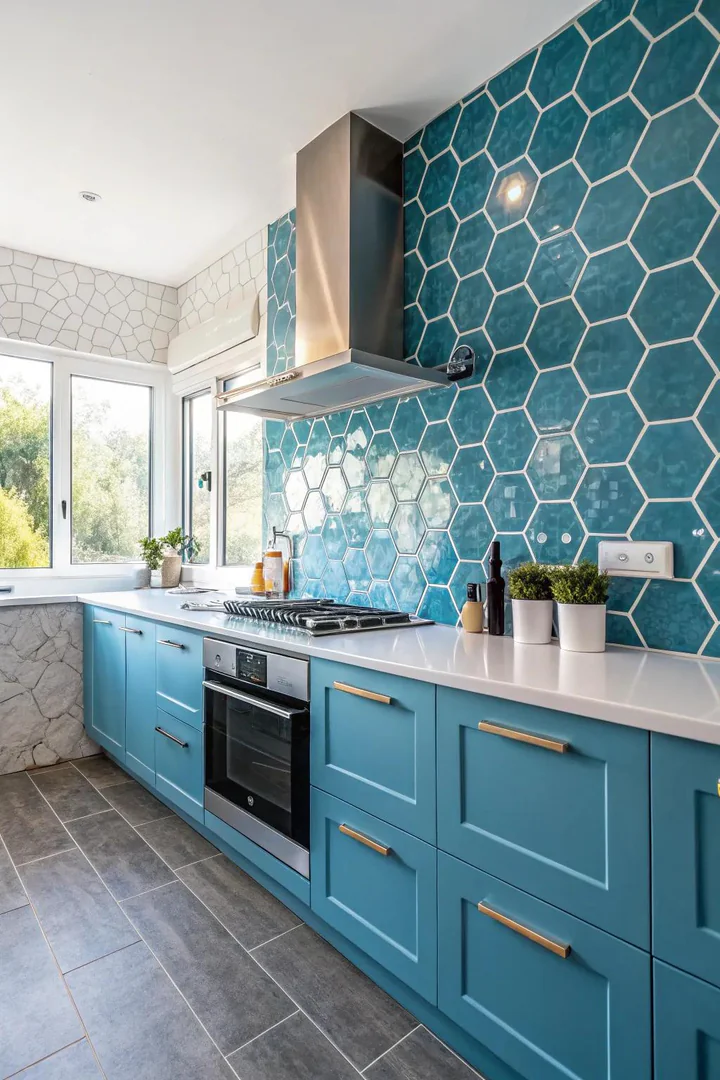
Hexagonal tile, sometimes called hex tile, creates a honeycomb pattern that reads as modern geometric without the sharp angularity of chevron or herringbone layouts. Merola Tile’s Cosmo Hex collection at Home Depot offers glazed porcelain hex tiles in 2-inch and 4-inch sizes, with colors spanning matte white, glossy black, sage green, and terrazzo-flecked neutrals. A field of white hex tile with randomly scattered colored hexagons produces a confetti effect that adds personality to a neutral kitchen.
Large-format 6-inch or 8-inch hexagonal tiles from Bedrosians’ Celine line cover a backsplash with fewer grout joints, creating a cleaner, less busy pattern. Small 1-inch hex mosaics on mesh backing deliver a classic penny-round alternative that works well in Craftsman and mid-century modern kitchens. Use a contrasting grout, dark gray with white hex or white with black hex, to define the geometric shape and make the honeycomb pattern pop.
Hexagonal tile also allows creative edge treatments. Rather than ending the backsplash with a straight horizontal line, let the hex tiles cascade irregularly along the top edge where they meet painted drywall. A feathered hex edge creates a transition that looks intentional and architectural.
7. Handmade Zellige Tile
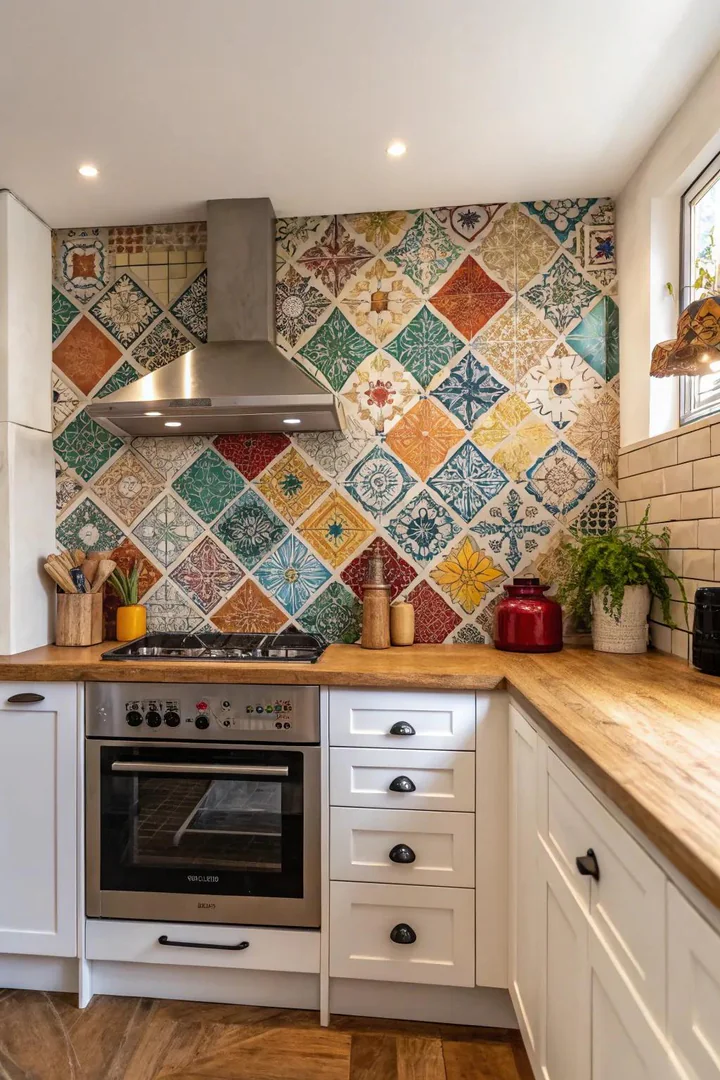
Zellige tile originates from Fez, Morocco, where artisans hand-cut each piece from a slab of unfired clay, glaze it individually, and fire it in a wood-burning kiln. The result is a tile with an intentionally irregular surface, uneven edges, slight color variation, and a glossy crazing pattern that gives every installation a one-of-a-kind artisan character. Clé Tile, Zia Tile, and Cle Zellige all import authentic Moroccan zellige in square, rectangular, and star-and-cross shapes.
Each zellige tile measures roughly 2 by 2 inches or 4 by 4 inches and ranges from $15 to $30 per square foot, placing it in the premium backsplash category alongside natural marble and handmade cement tile. The surface irregularities mean wider grout joints, typically 1/8 inch, and slightly more thinset than factory-pressed tile requires. Use an unsanded grout in a tone that complements the glaze color, such as Prism’s Delorean Gray with white zellige.
Zellige’s handmade imperfections suit Mediterranean, Moroccan, Spanish Colonial, and bohemian kitchen styles. The glossy glaze reflects light in unpredictable directions, creating a shimmering, alive quality that flat factory tile cannot match. Seal zellige with a water-based impregnating sealer before grouting to prevent staining from the grout itself.
8. Marble Slab and Tile Backsplash
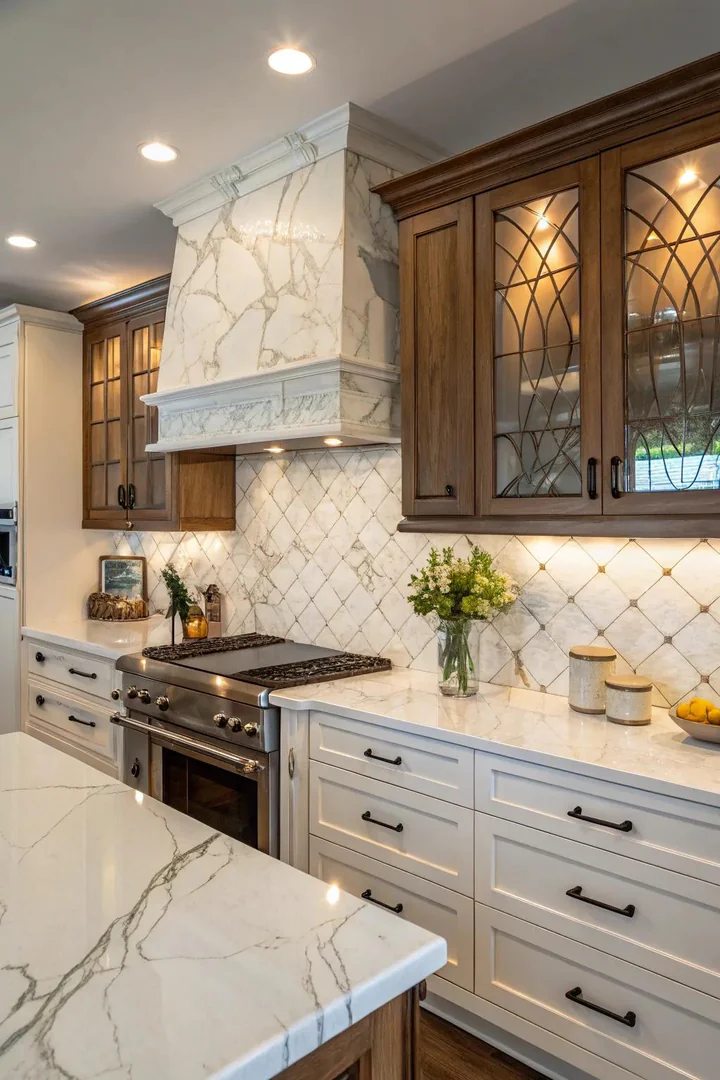
Marble backsplash tile brings natural veining patterns that range from the soft, feathery gray wisps of Carrara to the bold, dramatic strokes of Calacatta Gold and Statuario. A full slab of bookmatched Calacatta marble installed as a single backsplash panel creates a mirror-image veining pattern that serves as the kitchen’s primary visual anchor. Marble slab backsplashes cost $40 to $100 per square foot installed, while 3-by-6-inch marble subway tiles from MSI or Anatolia Tile start at $8 per square foot.
Marble is a calcium-based stone that reacts to acidic liquids like lemon juice, tomato sauce, and red wine. Seal the surface with a penetrating impregnating sealer, such as Tenax Proseal or StoneTech BulletProof, before grouting and reapply annually. Choose honed (matte) marble over polished for a kitchen backsplash, as the honed finish hides minor etching and water spots better than a mirror-polished surface.
Marble herringbone, basketweave, and arabesque mosaic patterns on mesh-backed sheets offer the look of natural stone with faster installation than individual tile setting. Pair a Carrara marble backsplash with a white quartz countertop to avoid placing two natural-stone surfaces next to each other, as competing vein patterns can clash visually.
9. Chevron Pattern Tile
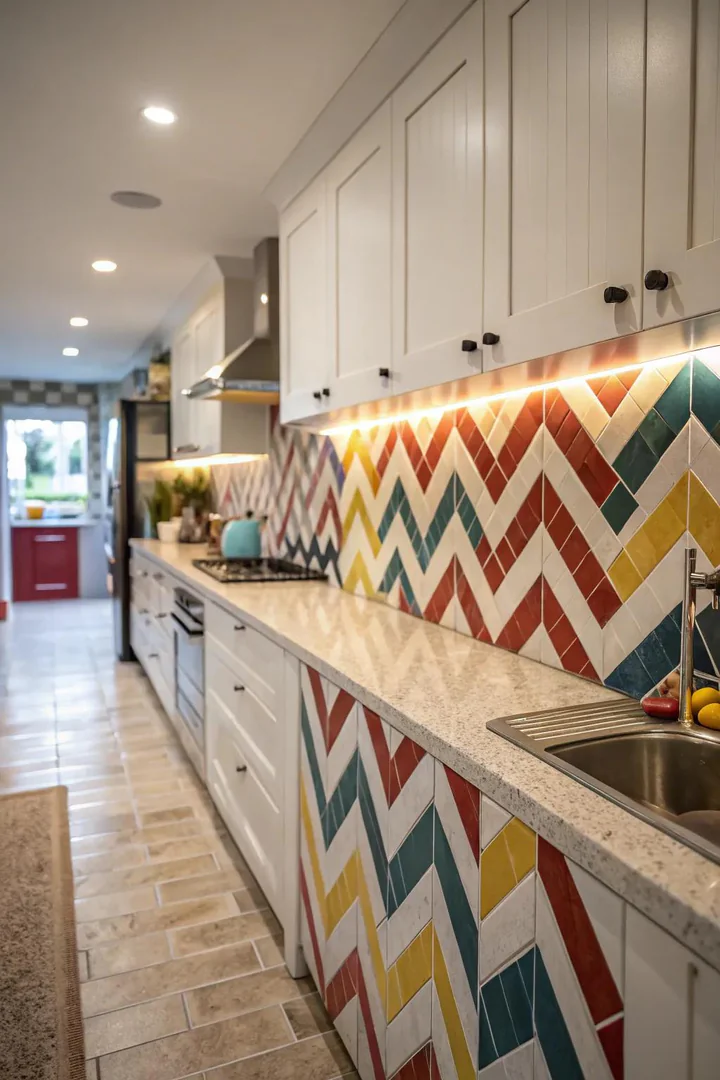
Chevron tile arranges parallelogram-shaped pieces into a continuous V-shaped zigzag that creates a sense of directional movement across the backsplash. Unlike herringbone, which uses standard rectangular tiles set at opposing angles, true chevron tiles have mitered ends that form a clean, pointed seam at the center of each V. Walker Zanger’s Studio Moderne line and Ann Sacks’ Savoy collection offer porcelain and ceramic chevron tiles in neutral tones that suit both modern and transitional kitchens.
A vertical chevron pattern draws the eye upward and adds perceived height to a kitchen with 8-foot ceilings, while a horizontal chevron widens a narrow galley layout. Use a matching-tone grout to let the zigzag pattern read as a subtle texture, or choose a contrasting grout to make each individual chevron tile stand out as a graphic element.
Chevron tile installation requires precise miter cuts and careful layout to keep the V-pattern centered on the wall. A professional tile setter typically charges $8 to $15 per square foot for chevron or herringbone patterns, roughly double the labor cost of a straight running-bond layout. Pre-drawn layout lines snapped with a chalk line ensure the chevron peaks align vertically from countertop to the top of the backsplash.
10. Porcelain Field Tile
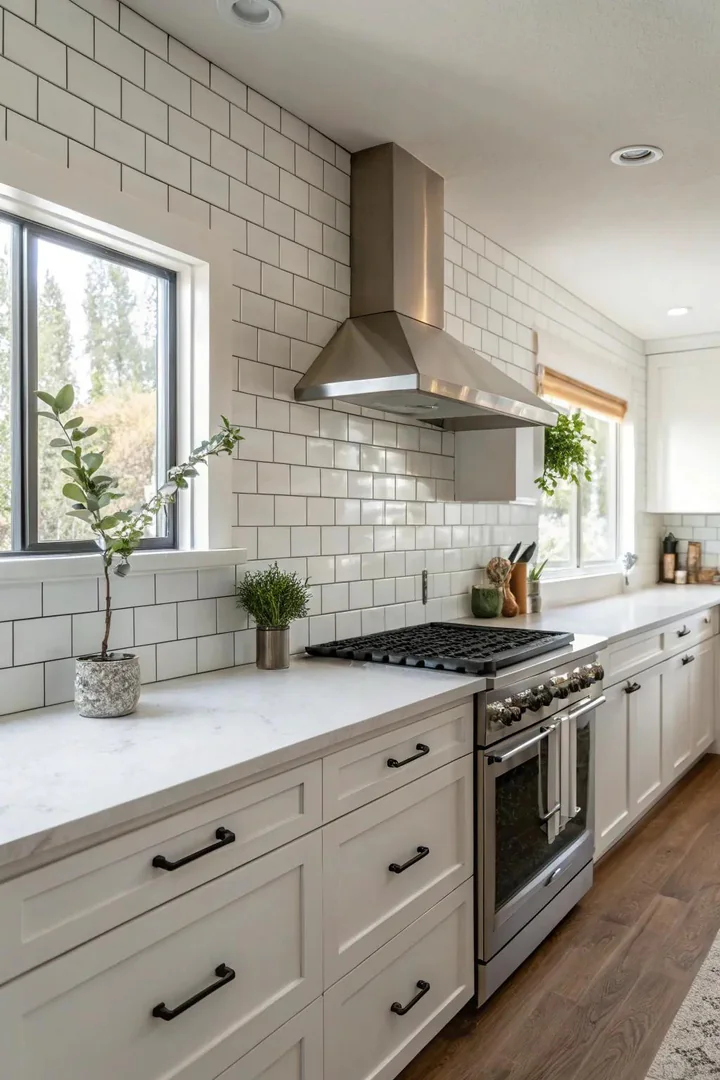
Porcelain tile fires at 2,200°F to 2,500°F, producing a body with a water absorption rate below 0.5 percent, the lowest of any ceramic-family tile. That near-zero porosity means porcelain backsplash tile resists staining, moisture penetration, and bacterial growth without sealing. Brands like Crossville, Florida Tile, and Atlas Concorde offer large-format porcelain tiles in 12-by-24-inch and 24-by-48-inch panels that cover a backsplash with minimal grout joints.
Large-format porcelain slabs mimic the look of marble, concrete, or natural limestone through high-definition inkjet printing on the tile surface. Crossville’s Laminam Ultra line produces porcelain panels as thin as 3mm and as large as 5 by 10 feet, allowing a continuous, nearly groutless backsplash that resembles a single slab of stone. The thin profile bonds to drywall with a flexible thinset mortar without adding meaningful weight to the wall.
For a minimalist kitchen, select a matte or lappato (semi-polished) finish in off-white, warm gray, or greige. Pair the porcelain backsplash with same-tone countertops and cabinetry for a tonal, monochromatic look where texture and light variation provide the visual interest instead of color contrast.
11. Metallic Accent Tile
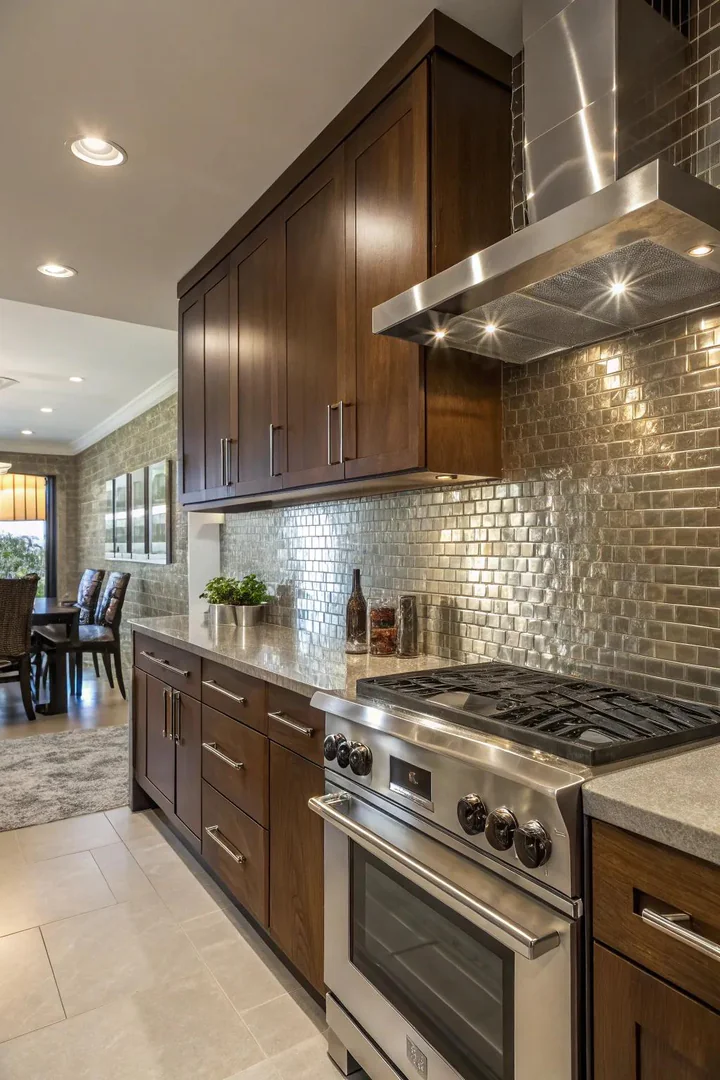
Metallic tile introduces a warm, reflective sheen that standard ceramic and glass tiles cannot reproduce. Real metal tiles from Aspect Peel and Stick, Soci, and Metal Tile Co. use stainless steel, copper, bronze, or brushed aluminum bonded to a ceramic or composite backer. Copper tiles develop a natural patina over months, gradually shifting from bright penny to warm brown to eventual verdigris green, giving the backsplash a living, evolving finish.
Stainless steel tile suits contemporary and industrial kitchens, especially behind a professional-grade range where the metal backsplash matches the appliance finish. Brushed-finish stainless hides fingerprints better than mirror-polished, and the material cleans with the same stainless wipes used on appliances. Bronze and copper metallic tiles pair naturally with warm wood cabinets, oil-rubbed bronze faucets, and pendant lights in matching metal tones.
Mix metallic accent tiles into a field of neutral ceramic or stone to create a scattered, confetti-like effect. Insert a single row of 1-by-1-inch copper mosaics as a liner strip between field tiles for a subtle metallic accent that catches light without overwhelming the backsplash. Metal tiles conduct heat, so maintain a 6-inch clearance from an open gas flame or use a heat-rated adhesive behind the cooktop zone.
12. Contrasting Grout Design
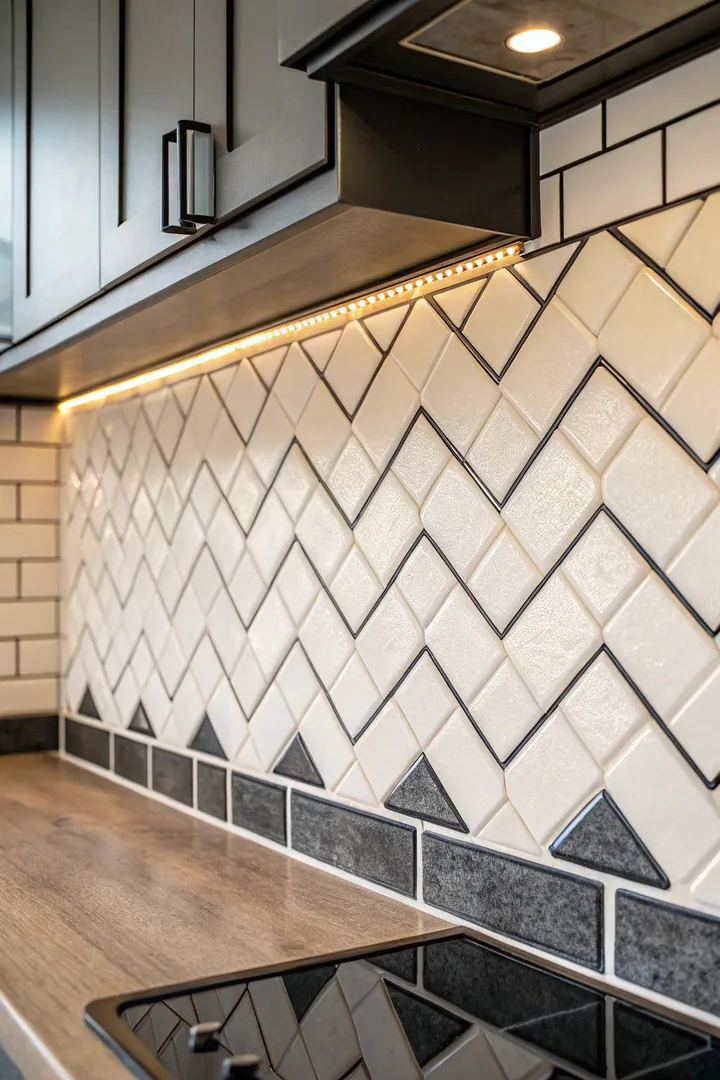
Grout color transforms the appearance of any tile layout without changing a single tile. White subway tile with matching white grout produces a clean, blended wall where the tile edges nearly disappear. The same white subway tile with Mapei Keracolor U in Black grout creates a bold, graphic grid that outlines every individual piece and turns a simple backsplash into a high-contrast statement wall.
Dark grout also hides staining from cooking oils and sauces better than white or light gray grout, reducing the need for frequent scrubbing behind the range. For a softer contrast, choose a medium gray like Laticrete’s Pewter or a warm taupe like Polyblend’s Haystack. Epoxy grout from Laticrete’s SpectraLOCK Pro or Mapei Kerapoxy resists staining, cracking, and discoloration permanently, though the material costs three to four times more than standard cement grout.
Grout joint width also affects the finished look. A 1/16-inch joint creates a tight, modern grid, while a 1/8-inch or 3/16-inch joint delivers a more traditional, hand-set appearance. Wider joints suit rustic and farmhouse styles where the handmade, imperfect character of the installation is part of the design.
13. Vintage Encaustic Pattern Tile
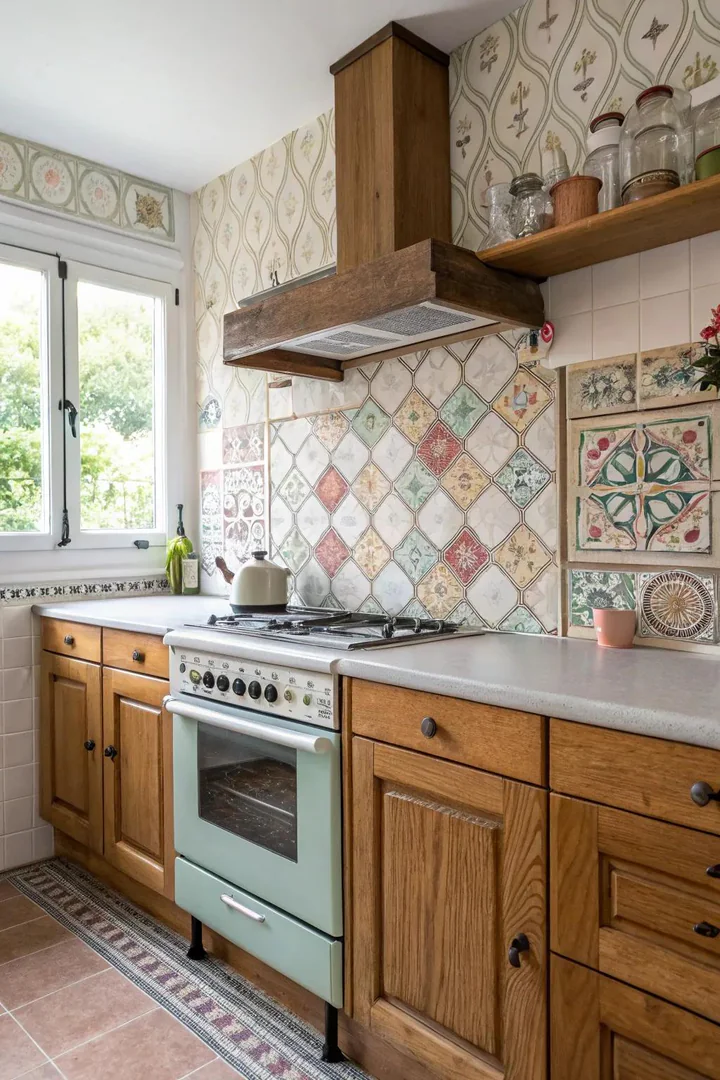
Encaustic cement tile features patterns pressed into the tile body using layers of colored cement, not printed onto a glazed surface. The pigment runs several millimeters deep, so the pattern survives decades of wear without fading. Cement Tile Shop, Villa Lagoon Tile, and Granada Tile produce encaustic tiles in hundreds of geometric, floral, and Moorish patterns ranging from $8 to $20 per square foot.
A backsplash of black-and-white geometric encaustic tile behind a simple white kitchen creates a bold focal wall that anchors the entire room. Cement tile absorbs water and oil readily, so seal the surface with two coats of Dry-Treat Stain-Proof before grouting and once more after the grout cures. Use unsanded grout in a neutral tone that blends with the tile’s background color to avoid competing with the pattern.
Vintage encaustic patterns suit Spanish Colonial, Mediterranean, Art Deco, and eclectic kitchen styles. Pair encaustic tile with solid-color countertops in honed quartz or butcher block to keep the countertop from fighting the busy tile pattern for attention. A single patterned encaustic strip used as a decorative border within a field of plain subway tile delivers vintage charm without the visual weight of a full patterned backsplash.
14. Natural Stone Backsplash
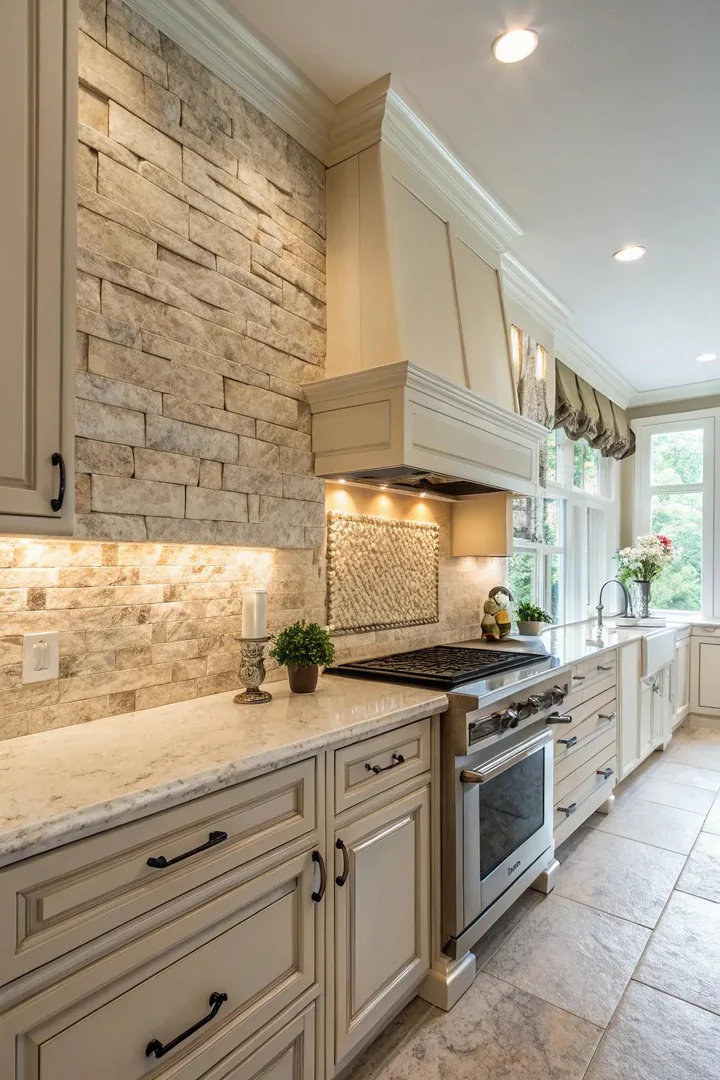
Natural stone backsplash options include travertine, slate, quartzite, soapstone, and limestone, each with a distinct grain pattern, color range, and maintenance profile. Travertine from Turkey or Mexico features warm cream-and-tan tones with characteristic pitted holes that can be left unfilled for a rustic look or filled with matching grout for a smoother surface. Slate from Vermont, Brazil, or India offers dark charcoal, forest green, and rust-colored layers that split naturally into thin, textured tiles.
Stacked stone ledger panels, like those from Norstone or Realstone Systems, deliver a three-dimensional natural stone wall that adds genuine geological texture to a kitchen backsplash. Each panel consists of thin stone strips bonded to a mesh backing, and the staggered depths create shadow lines that change throughout the day as natural light shifts. Ledger panels cost $8 to $15 per square foot and install with a polymer-modified thinset mortar.
Every natural stone backsplash requires sealing. Apply a penetrating impregnating sealer, not a topical coating, to protect the stone from oil, wine, and acidic food stains without altering the surface appearance. Reapply annually or whenever water stops beading on the stone surface. Homeowners designing a complete kitchen layout should plan the stone backsplash alongside the countertop selection to ensure the two stone surfaces complement rather than compete.
15. Decorative Patterned Cement Tile
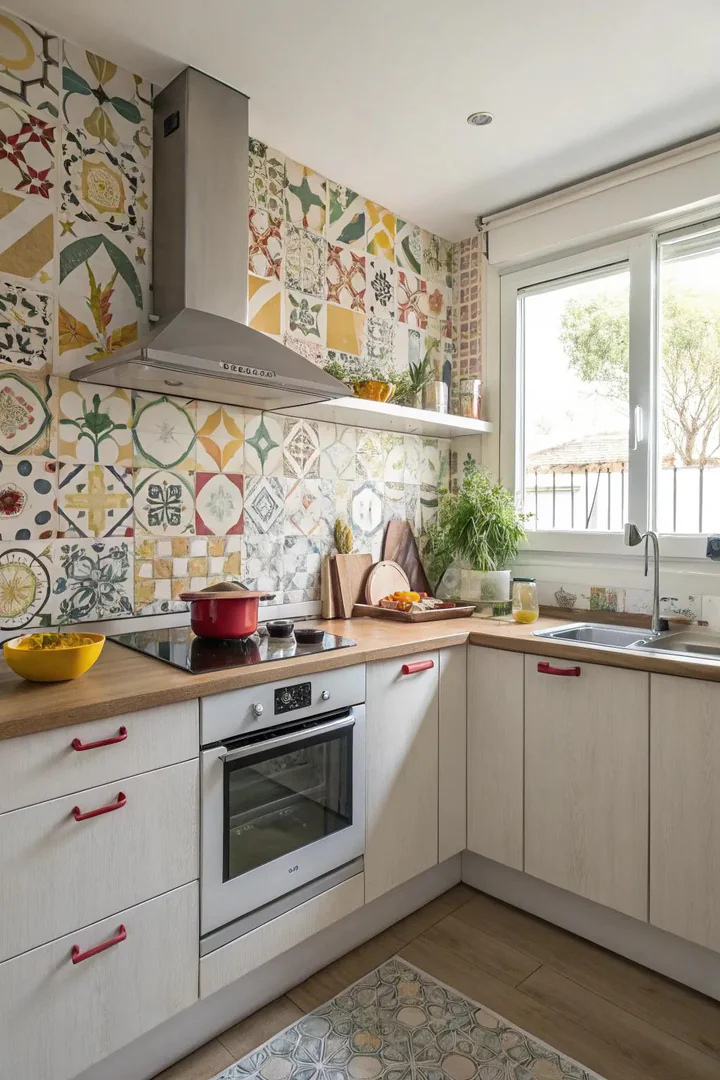
Decorative patterned tiles bring color, geometry, and artisan craft to a kitchen backsplash in ways that solid-color field tiles cannot. Fireclay Tile offers hand-glazed ceramic tiles with screen-printed patterns in over 100 designs, from simple stripes to complex Moorish arabesques. Popham Design creates custom cement tiles with bold, contemporary graphic patterns in any Pantone color, allowing homeowners to build a backsplash that matches their exact color scheme.
A full wall of patterned tile behind the range or sink creates the kitchen’s primary accent. Keep cabinetry, countertops, and flooring in solid neutral tones, white, gray, or natural wood, to let the patterned backsplash command attention without visual competition. Pull one accent color from the tile pattern into bar stools, pendant light cords, or kitchen textiles to connect the backsplash to the broader room palette.
Patterned tile works at any scale. A single row of decorative tiles used as a border strip between plain field tiles introduces pattern without overwhelming a small kitchen. A full-height patterned backsplash from countertop to ceiling suits open-concept kitchens where the backsplash wall is visible from the living and dining areas.
16. Blue Ceramic and Glass Tile
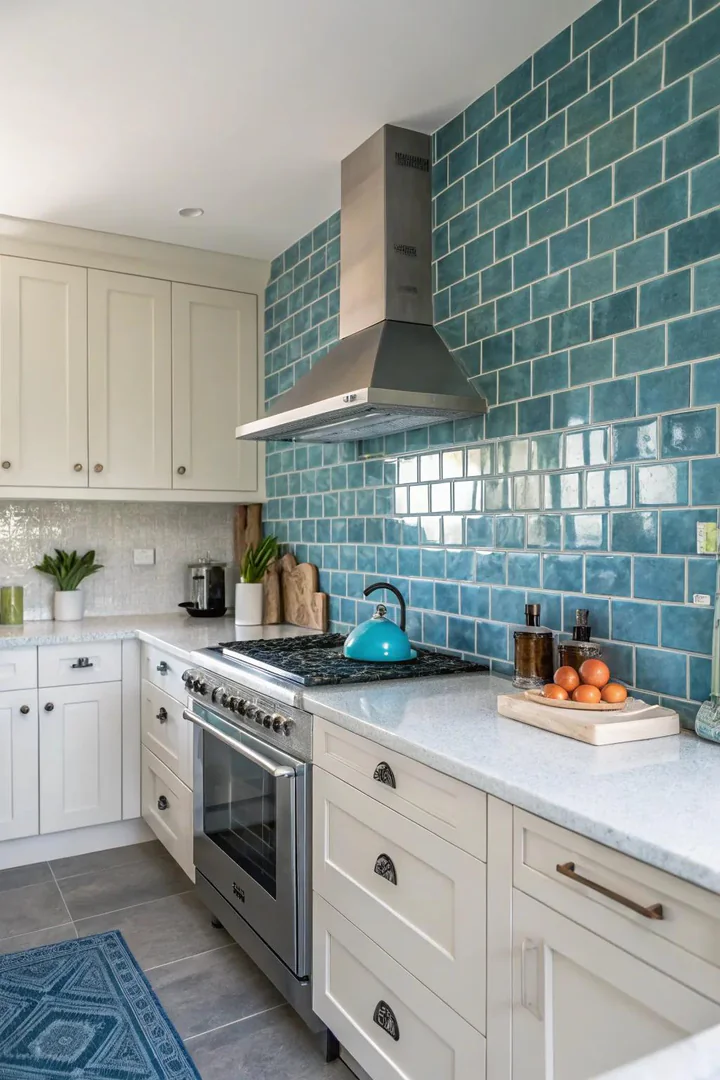
Blue backsplash tile spans a color range from pale sky blue and powder blue through navy, cobalt, and deep indigo. Heath Ceramics’ Classic Field tile in Glacier Blue and Fireclay Tile’s Sea Glass color deliver handmade quality with slight surface variation that gives each tile individual character. A glossy cobalt blue subway tile from Daltile’s Color Wheel collection costs under $5 per square foot and pairs naturally with white shaker cabinets, Carrara marble countertops, and brushed-nickel hardware.
Blue-and-white kitchens follow a centuries-old design tradition rooted in Delft pottery, Portuguese azulejo tile, and Greek island architecture. A Moroccan fish-scale (or fan) tile in cerulean blue from Mercury Mosaics or Clay Imports adds both color and a non-rectangular shape that breaks the grid monotony of standard subway layouts. Fish-scale tiles require a skilled setter because the curved edges demand precise spacing and consistent grout joints.
For a subtler blue backsplash, choose a matte blue-gray or slate-blue large-format tile that reads as a neutral with just a whisper of color. Pair the blue tile with warm wood open shelving, brass or gold cabinet hardware, and warm-white 2700K under-cabinet lighting to prevent the blue from reading cold or clinical.
17. Onyx and Translucent Stone Tile
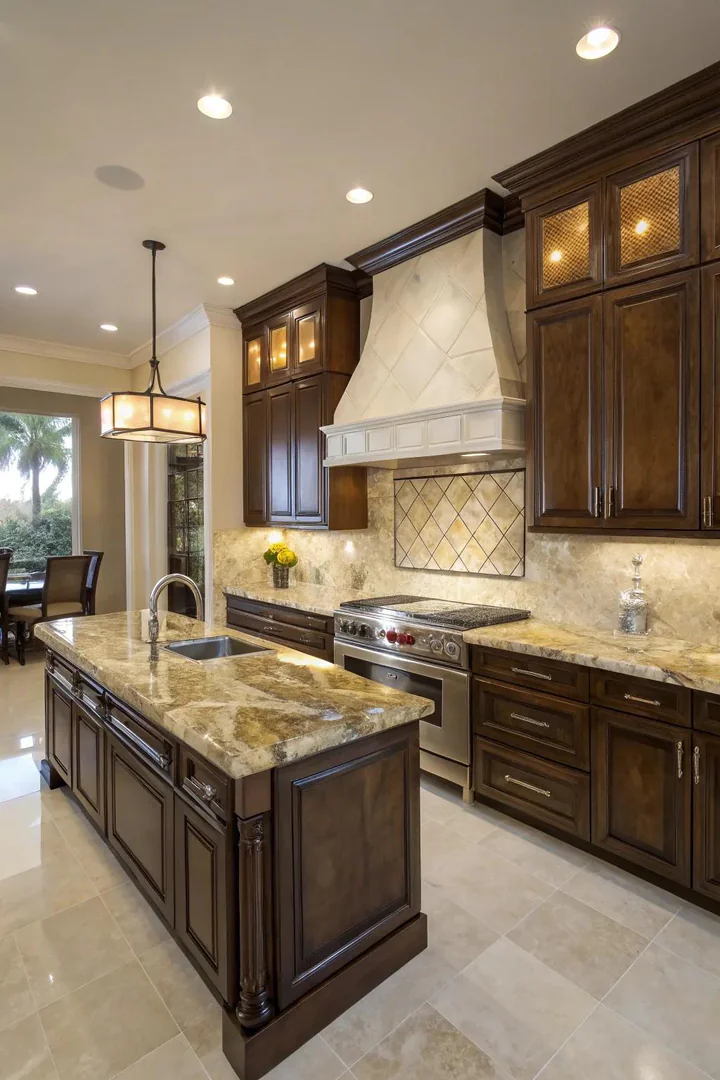
Onyx is a translucent banded stone that transmits light through its crystalline layers, making it the only natural stone suitable for backlighting. A honey onyx or white onyx slab backsplash with LED strip lights mounted behind the stone panel creates a warm, amber or white glow that transforms the backsplash into a luminous feature wall. Onyx slab backsplashes cost $50 to $150 per square foot installed, placing them firmly in the luxury category alongside bookmatched Calacatta marble.
The stone’s translucency requires a light-colored adhesive and backer. Mount the onyx slab on a white acrylic light panel with diffusion film to distribute the LED light evenly and eliminate hot spots. Use Warm White (2700K to 3000K) LEDs for honey onyx and Cool White (4000K) for white or green onyx to complement the stone’s natural color temperature.
Onyx is softer and more porous than marble, rating 6.5 on the Mohs hardness scale compared to marble’s 3 to 5 (onyx and marble overlap, but onyx’s banding makes it more fragile along the layers). Seal onyx with Tenax Proseal and avoid placing acidic foods or cleaners directly on the surface. Reserve onyx backsplashes for areas that receive gentle use, such as a bar, butler’s pantry, or a backsplash zone away from the primary cooking station.
18. Eclectic Mix-and-Match Tile
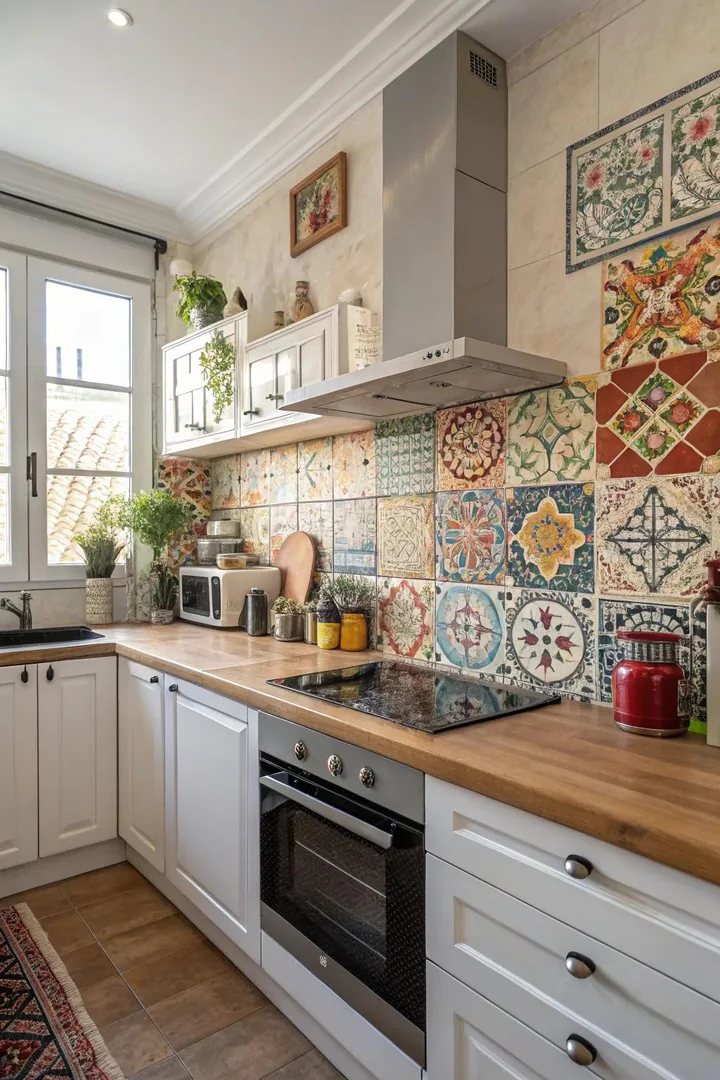
A mix-and-match backsplash combines two or more tile types, shapes, or colors into a single installation that looks collected and curated rather than uniform. Pair a field of white subway tile with a band of decorative encaustic tile at eye level and a row of small penny-round mosaics at the countertop edge. The layered combination creates visual interest at multiple scales and lets the homeowner express personality without committing every square foot to one bold pattern.
Keep the mix cohesive by limiting the palette to two or three colors and maintaining a consistent grout color across all tile types. A common approach blends two tile shapes in the same color family, such as white hexagonal tile above the counter paired with white subway tile on the upper portion, separated by a thin pencil liner in brushed brass or polished nickel. The shape contrast provides visual texture while the shared color prevents chaos.
Eclectic backsplashes suit maximalist, bohemian, and global-inspired kitchens. Homeowners planning a basement kitchen build-out can use a mix-and-match backsplash to inject warmth and personality into a below-grade space that lacks natural light and architectural detail. The varied tile textures catch and scatter artificial light in multiple directions, compensating for the absence of windows.
How to Install a Kitchen Backsplash Tile
1. Prepare the Wall Surface
Turn off power to any outlets on the backsplash wall and remove the outlet covers and switch plates. Wipe the drywall with a damp sponge to remove grease and dust, then sand any glossy paint with 120-grit sandpaper to give the thinset mortar a surface to grip. Fill any drywall dents or screw holes with lightweight joint compound, let it dry, and sand flush. A clean, flat, and dust-free wall ensures full thinset contact and prevents tiles from popping off months after installation.
2. Plan the Layout and Mark Reference Lines
Measure the backsplash area from countertop to the underside of the upper cabinets, then find the horizontal and vertical center of the wall. Snap a level chalk line at the vertical center and another at the horizontal midpoint. Dry-lay a row of tiles along the countertop edge, using tile spacers, to check whether the end tiles will be cut to less than half-width. Shift the starting point left or right to keep end cuts balanced and avoid a narrow sliver tile at one side.
3. Mix and Apply Thinset Mortar
Mix polymer-modified thinset mortar, such as Versabond or Mapei Kerabond, to a smooth, peanut-butter consistency according to the bag directions. Spread the thinset onto a 3-to-4-square-foot section of wall with the flat side of a 1/4-by-3/8-inch V-notch trowel, then comb through the mortar with the notched side at a 45-degree angle. Work in small sections so the thinset does not skin over before tiles are pressed into it. For glass tile, back-butter each tile with a thin layer of white thinset in addition to the wall application.
4. Set the Tiles and Spacers
Press each tile firmly into the combed thinset with a slight twisting motion to collapse the mortar ridges and achieve full contact. Insert tile spacers between every tile to maintain consistent grout joints, typically 1/16-inch for a tight modern look or 1/8-inch for a traditional joint. Check every three or four rows with a 2-foot level to confirm the tiles remain plumb and level. Cut tiles for edges and outlets with a wet tile saw fitted with a diamond blade, or use tile nippers for small curved cuts around pipes.
5. Grout, Seal, and Finish
Allow the thinset to cure for 24 hours before grouting. Mix sanded grout (for joints 1/8-inch or wider) or unsanded grout (for joints under 1/8-inch) to the manufacturer’s consistency. Spread the grout diagonally across the tile joints with a rubber float, pressing the grout into every seam. Wipe the excess with a damp sponge in circular motions, rinsing the sponge frequently. After the grout hazes over (about 15 to 20 minutes), buff the tile surface with a dry microfiber cloth. Seal cement-based grout with a penetrating grout sealer, such as Aqua Mix Sealer’s Choice Gold, 72 hours after grouting to prevent staining.
Backsplash Tile Material Comparison
| Material | Cost Per Sq Ft | Water Absorption | Sealing Required | Best Kitchen Style | Durability |
|---|---|---|---|---|---|
| Ceramic | $2 – $10 | 3% – 7% | No | Traditional, transitional | High |
| Porcelain | $3 – $15 | Below 0.5% | No | Modern, minimalist | Very high |
| Glass | $7 – $25 | 0% | No | Contemporary, coastal | High (scratch-prone) |
| Marble | $8 – $35 | 0.2% – 0.5% | Yes (annually) | Classic, luxury | Medium (etches) |
| Zellige | $15 – $30 | 5% – 10% | Yes (before grouting) | Mediterranean, bohemian | Medium |
| Cement/Encaustic | $8 – $20 | 5% – 8% | Yes (2 coats + annual) | Spanish, Art Deco, eclectic | High (pattern is deep) |
| Natural Stone | $7 – $30 | 1% – 5% | Yes (annually) | Rustic, organic | Varies by stone |
| Metallic | $10 – $40 | 0% | No (patina optional) | Industrial, contemporary | High |
Frequently Asked Questions
What is the most durable kitchen backsplash tile material?
Porcelain tile offers the highest durability for kitchen backsplashes because the material fires at temperatures above 2,200°F, producing a near-zero water absorption rate and a surface that resists scratching, staining, and heat without sealing. Large-format porcelain panels from Crossville or Florida Tile cover backsplash walls with minimal grout joints, further reducing maintenance. Porcelain outlasts ceramic, glass, and natural stone in terms of daily wear resistance behind a range or sink.
How much does a kitchen backsplash tile installation cost?
A professional backsplash installation costs $10 to $40 per square foot for labor, depending on the tile pattern and material. A standard 30-square-foot backsplash using ceramic subway tile runs $300 to $600 in labor plus $60 to $300 in materials. Complex patterns like herringbone, chevron, or mosaic add $5 to $15 per square foot in labor because they require more cuts and slower layout. Natural stone and handmade tile add another $3 to $8 per square foot in labor due to the extra care needed during cutting and setting.
Can I install backsplash tile over existing tile?
Yes, provided the existing tile is firmly bonded, flat, and free of loose or cracked pieces. Sand the glazed surface with 80-grit sandpaper or apply a bonding primer like Mapei ECO Prim Grip to give the new thinset a surface to grip. The added thickness of a double-layer installation may require outlet box extenders to bring electrical receptacles flush with the new tile surface. Remove existing tile first for best results, as a single-layer installation delivers a thinner profile and a stronger bond to the drywall substrate.
What grout color should I use with white backsplash tile?
White grout creates a clean, monolithic look where the tile joints nearly disappear. Light gray grout adds subtle definition without high contrast. Dark gray or black grout produces a bold graphic effect that outlines every tile and makes the pattern the focal point. Choose grout color based on how much you want the individual tiles to stand out versus blending into a unified surface. Epoxy grout in any color resists staining permanently, while cement grout requires sealing within 72 hours of curing.
How do I clean and maintain a tile backsplash?
Wipe ceramic, porcelain, and glass backsplashes weekly with a damp microfiber cloth and a spray of warm water mixed with a tablespoon of dish soap. For grease buildup behind the stove, apply a paste of baking soda and water, let it sit for 10 minutes, and scrub with a soft nylon brush. Clean natural stone and cement tile with a pH-neutral stone cleaner like StoneTech’s Stone and Tile Cleaner, never vinegar or acidic cleaners that etch calcium-based stone. Reseal grout lines annually with a penetrating grout sealer to prevent staining and mildew growth.
What backsplash tile works best in small kitchens?
Light-colored glossy tiles reflect the most light and make small kitchens feel larger. White or pale gray glass subway tile, high-gloss ceramic tile, or a mirrored metallic mosaic all bounce light from under-cabinet fixtures and windows around the room. Large-format tiles with minimal grout joints create fewer visual breaks and make the wall appear more expansive. Avoid dark, matte, or heavily patterned tiles in kitchens under 100 square feet, as busy patterns and dark colors visually compress the space.
Conclusion
A kitchen backsplash tile choice affects the room’s appearance, maintenance routine, and resale appeal in equal measure. Ceramic and porcelain deliver the best value and lowest upkeep, glass and metallic tiles add light and warmth, natural stone and zellige bring artisan texture, and patterned cement tile injects bold personality.
Start by identifying your kitchen’s dominant style, modern, farmhouse, Mediterranean, or transitional, then choose a tile material and pattern that reinforces that direction. Match the grout color to your desired contrast level, plan the layout to avoid narrow end cuts, and seal any porous tile before grouting. Every option on this list protects the wall, cleans easily, and gives the kitchen a finished, intentional look that lasts for years.

