
Kitchen Bulkhead Ideas: 19 Stunning Solutions That Hide or Shine
Kitchen bulkhead ideas address the boxed-in structural soffits — the drywall-covered enclosures above cabinets that conceal ductwork, plumbing, wiring, and structural beams — by turning these functional necessities into deliberate design features. A bulkhead (also called a soffit or a fascia) drops the ceiling line above the upper cabinets, and without intentional design treatment, it reads as a clunky, unfinished leftover that cheapens the kitchen’s appearance.
The 19 kitchen bulkhead ideas below cover recessed lighting, height illusions, drop-ceiling effects, geometric shapes, natural materials, art display niches, functional dividers, mixed textures, metallic accents, decorative moldings, accent lighting, curved profiles, coffered designs, smart technology, acoustic panels, glass elements, color accents, LED strip lighting, and built-in shelving. Each idea includes specific materials, products, construction guidance, and design strategies for making the bulkhead look intentional, finished, and integrated with the rest of the kitchen design.
1. Add Recessed Lighting

Installing recessed can lights (downlights) directly into the face or bottom surface of the bulkhead turns the soffit from a dead, shadowy mass into an active lighting source that washes the countertop, cabinet fronts, and backsplash with focused, even light. The bulkhead already drops the ceiling — recessed lights take advantage of that lower plane by bringing task lighting closer to the work surface where it matters most.
Use 3-inch or 4-inch ultra-thin LED recessed fixtures (from WAC Lighting, Halo, or Lithonia) spaced 18 to 24 inches apart along the length of the bulkhead. Choose a warm white color temperature (2700K to 3000K) for a welcoming kitchen glow, or a neutral white (3500K to 4000K) for better color rendering on food and surfaces. Install the fixtures on a dimmer switch (Lutron Caseta or Leviton Decora) so the recessed lights serve double duty: full brightness for task lighting during cooking and prep, dimmed to 20-30% for ambient evening mood lighting. For more layered kitchen lighting strategies, see our kitchen lighting ideas guide.
2. Generate a Sense of Height
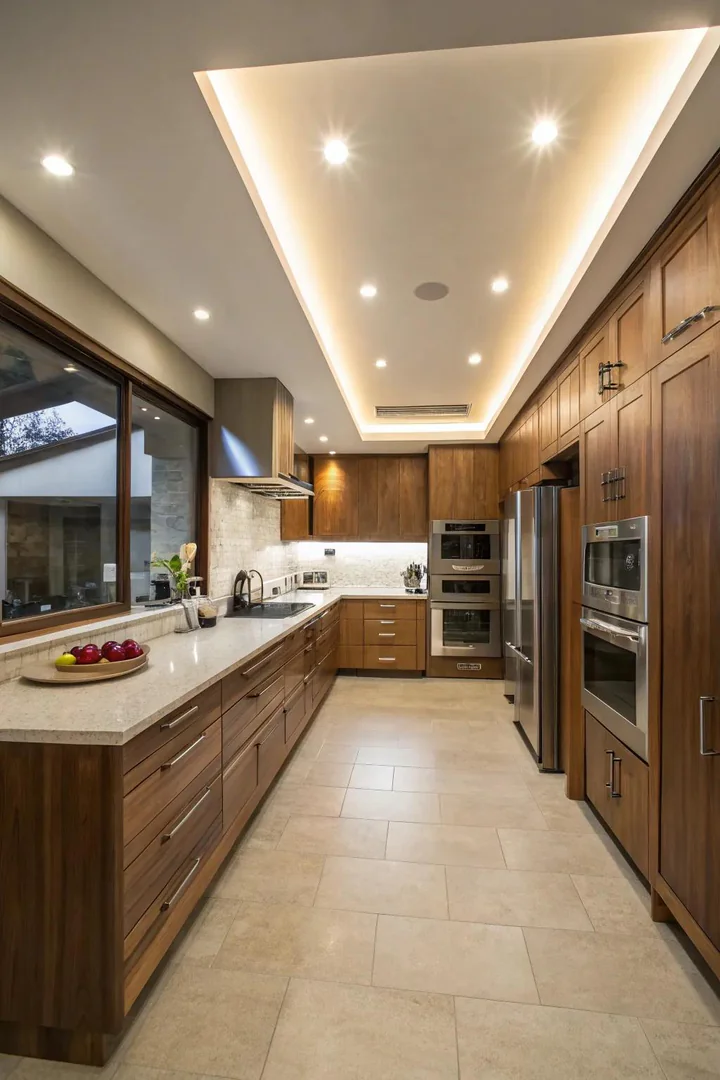
Painting, finishing, or treating the bulkhead surface to visually recede — using the same color as the ceiling, adding vertical lines, or installing a mirrored or glossy surface — creates the illusion that the ceiling extends uninterrupted past the bulkhead, making the kitchen feel taller than it actually is. The goal is to minimize the visual weight of the bulkhead so it blends into the ceiling plane rather than drawing attention to its lower height.
The simplest approach: paint the bulkhead the exact same color and sheen as the ceiling (typically flat or matte white) so the bulkhead visually merges with the ceiling above it. For a more pronounced height effect, add vertical board-and-batten or tongue-and-groove paneling (from Metrie or a lumber yard) to the face of the bulkhead — vertical lines draw the eye upward and counteract the horizontal, compressive effect of the soffit. A high-gloss paint finish (Benjamin Moore Advance in high-gloss) on the bulkhead face reflects light and surrounding surfaces, creating a sense of depth and openness that a flat, matte surface cannot achieve.
3. Think About a Drop Ceiling Effect
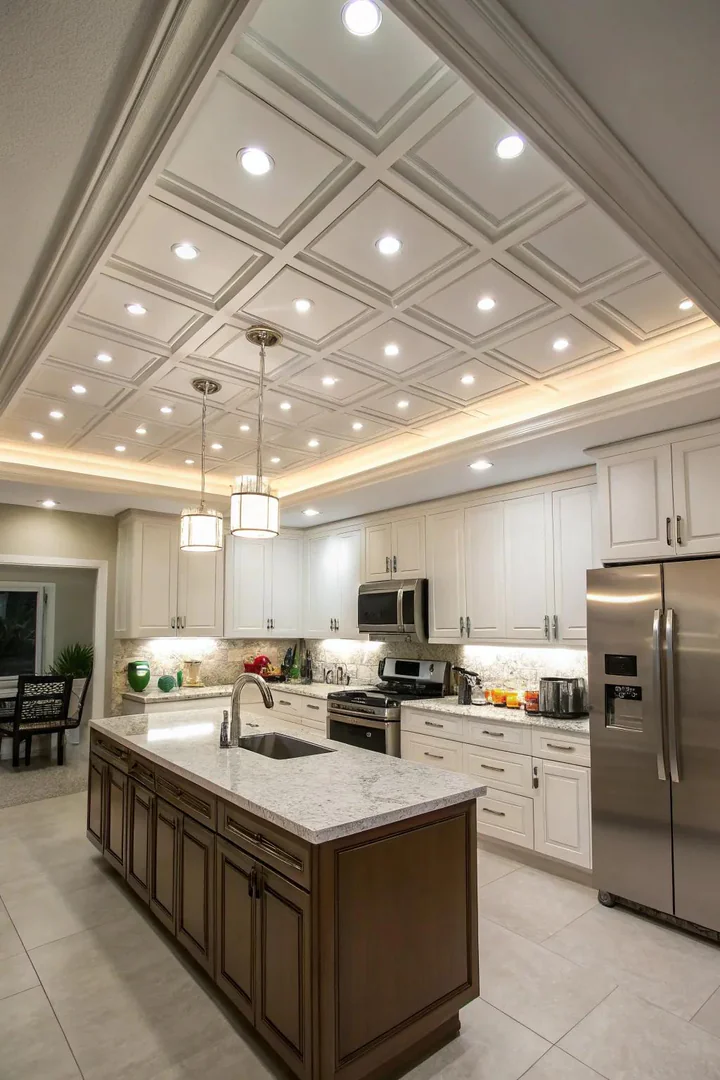
Extending the bulkhead across the entire ceiling of the kitchen work zone — from wall to wall, covering just the cooking and prep area — creates a deliberate drop ceiling that defines the kitchen as a distinct architectural zone within an open floor plan. Instead of looking like a structural patch, a full-width drop ceiling reads as an intentional design choice that separates the kitchen from the adjacent living or dining area above.
Build the drop ceiling at the same depth as the existing bulkhead (typically 8 to 14 inches below the main ceiling) and finish it with a smooth, flat surface painted to match or contrast the surrounding ceiling. Add cove lighting — LED strip lights (from Philips Hue, HitLights, or Govee) installed in a recessed channel around the perimeter of the drop ceiling — to wash the surrounding walls and ceiling with an upward glow that emphasizes the layered ceiling planes and prevents the lowered section from feeling dark or oppressive. The drop ceiling approach works best in open-plan kitchens with 9-foot or taller ceilings where the lowered zone still maintains at least 8 feet of clearance.
4. Trial with Forms
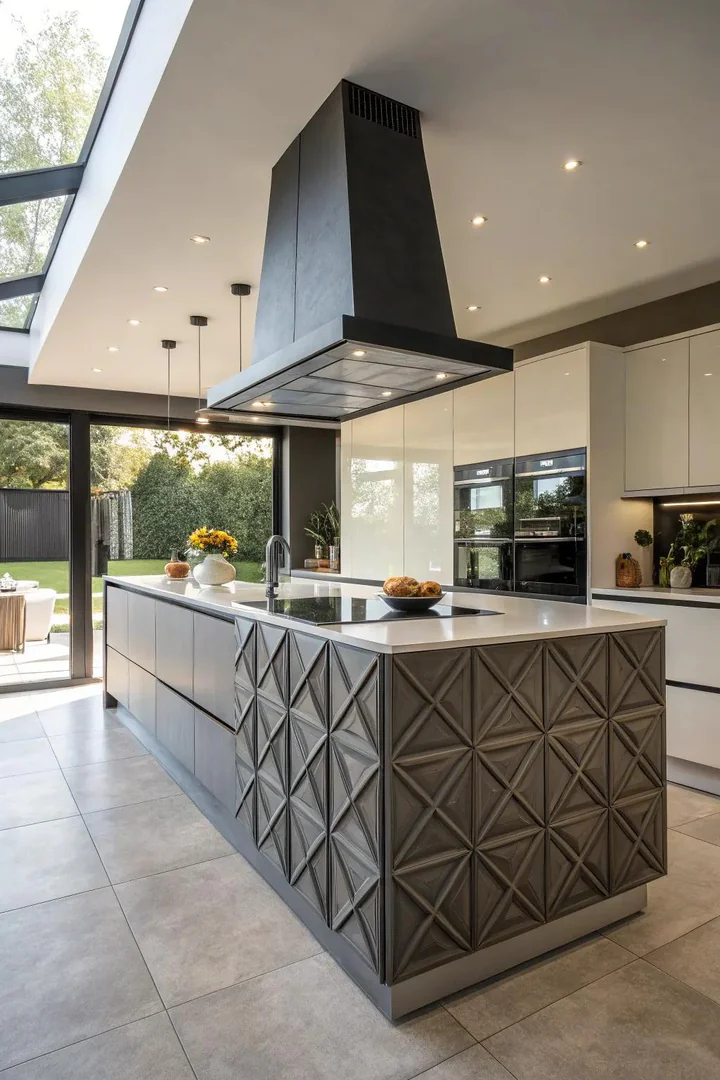
Moving beyond the standard rectangular box shape — by building the bulkhead with angled faces, stepped profiles, arched undersides, or geometric cutouts — turns the soffit into a sculptural, architectural feature that adds visual drama and spatial interest to the kitchen ceiling. A shaped bulkhead looks custom and deliberate, instantly distinguishing the kitchen from the generic, flat-faced soffits found in builder-grade homes.
A stepped profile (two or three tiers descending from the ceiling to the cabinet tops) adds visual depth and provides multiple surfaces for recessed lighting, cove lighting, and decorative trim. An arched or curved underside (created with flexible drywall or curved plywood) softens the angular, boxy character of the bulkhead and introduces flowing lines into a room dominated by right angles. A geometric cutout (a rectangular or circular opening in the bulkhead face, backed with a contrasting material like metal, wood, or glass) creates a window-like feature that breaks up the solid mass and reveals the cavity behind.
5. Present Natural Materials
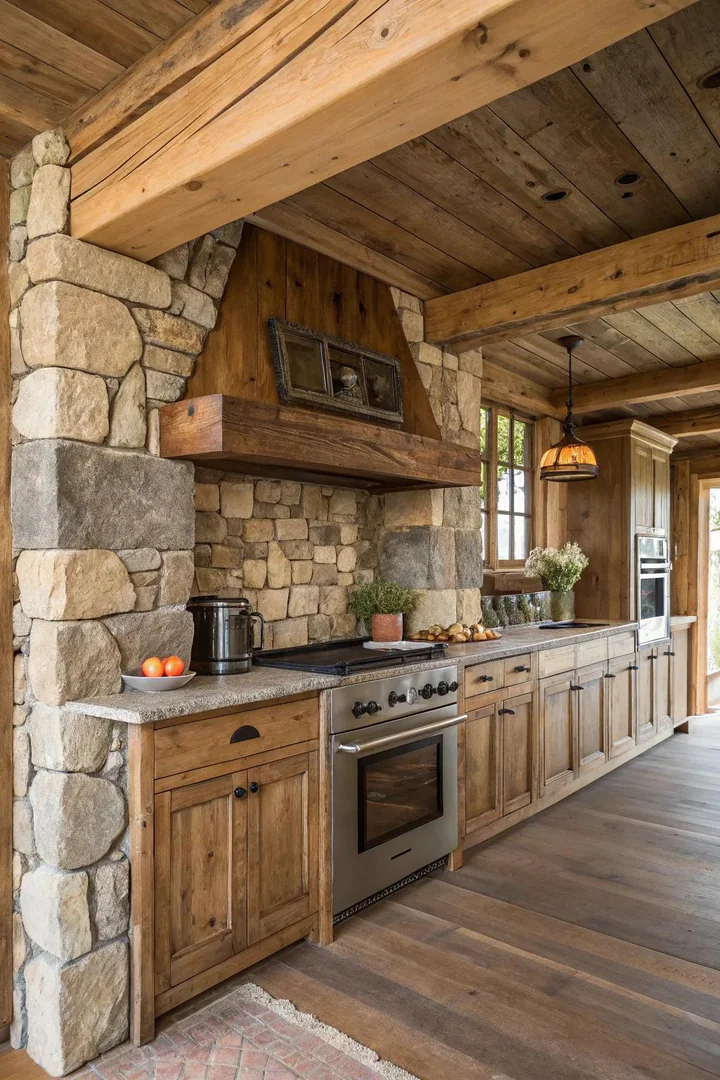
Cladding the bulkhead face with natural materials — real wood planks, reclaimed barn wood, stacked stone veneer, cork panels, or bamboo slats — introduces warmth, texture, and organic character that drywall and paint alone cannot provide. Natural materials on the bulkhead connect the upper zone of the kitchen to the natural wood, stone, and organic elements typically found on the lower surfaces (countertops, floors, cutting boards).
Tongue-and-groove wood planks (cedar, pine, or white oak from a lumber yard, or prefinished Stikwood peel-and-stick planks) installed horizontally across the bulkhead face create a shiplap-like effect that adds warmth and texture. Reclaimed barn wood (from Vintage Lumber Sales or a local salvage yard) brings aged character and unique grain patterns. Thin stone veneer panels (from Norstone, Realstone Systems, or MSI) in stacked ledger stone or travertine add a substantial, high-end material presence to the bulkhead without the weight of full-thickness stone. Finish all wood cladding with a clear matte polyurethane or an oil finish to protect against kitchen moisture and grease.
6. Use Bulkheads for Art Exhibits
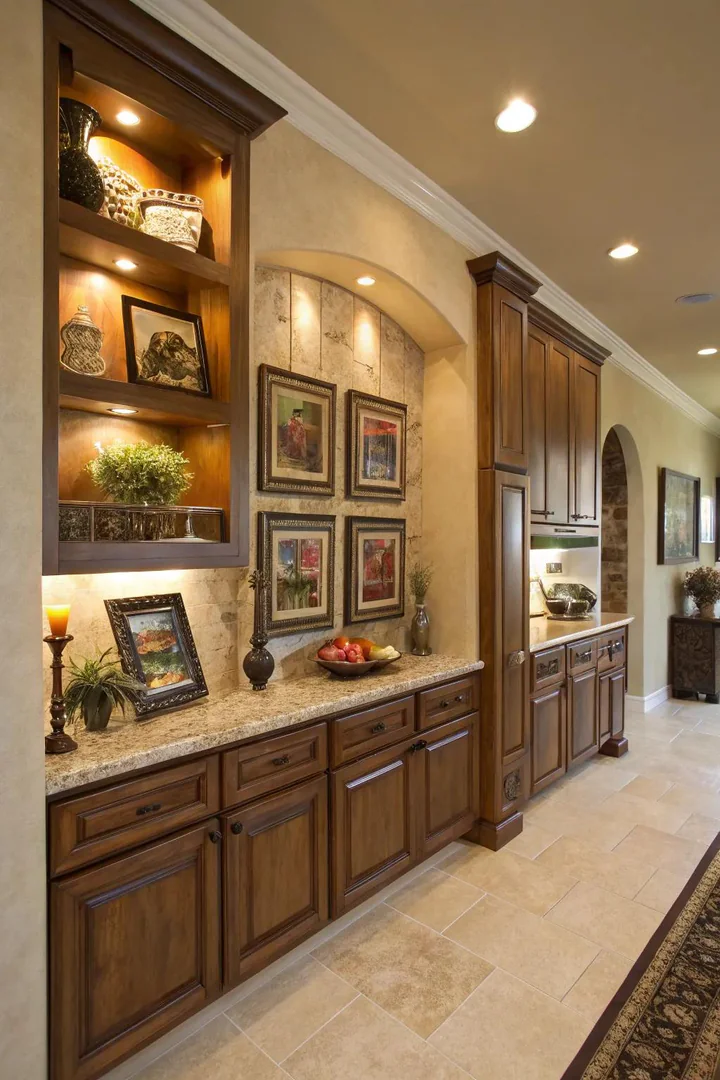
Cutting niches, insets, or shadow boxes into the face of the bulkhead — or mounting art, decorative objects, and display shelves on its surface — turns the soffit into a gallery wall that fills the otherwise dead vertical space between the cabinet tops and the ceiling. Art displayed on the bulkhead is at or above eye level, which gives it prominence and visibility without taking up any counter, wall, or floor space below.
Built-in niches (rectangular cutouts framed with drywall returns and backed with a contrasting paint color or a backlit panel) create architectural display alcoves sized for small sculptures, vases, or decorative bowls. Surface-mounted art (framed prints, decorative plates, or small canvases hung directly on the bulkhead face) works best when the bulkhead is wide enough (at least 10 inches tall) to accommodate the pieces without crowding. Install picture lights or small LED puck lights (from WAC Lighting or Kichler) above each display niche or artwork to spotlight the objects and draw the eye upward.
7. Design Practical Dividers
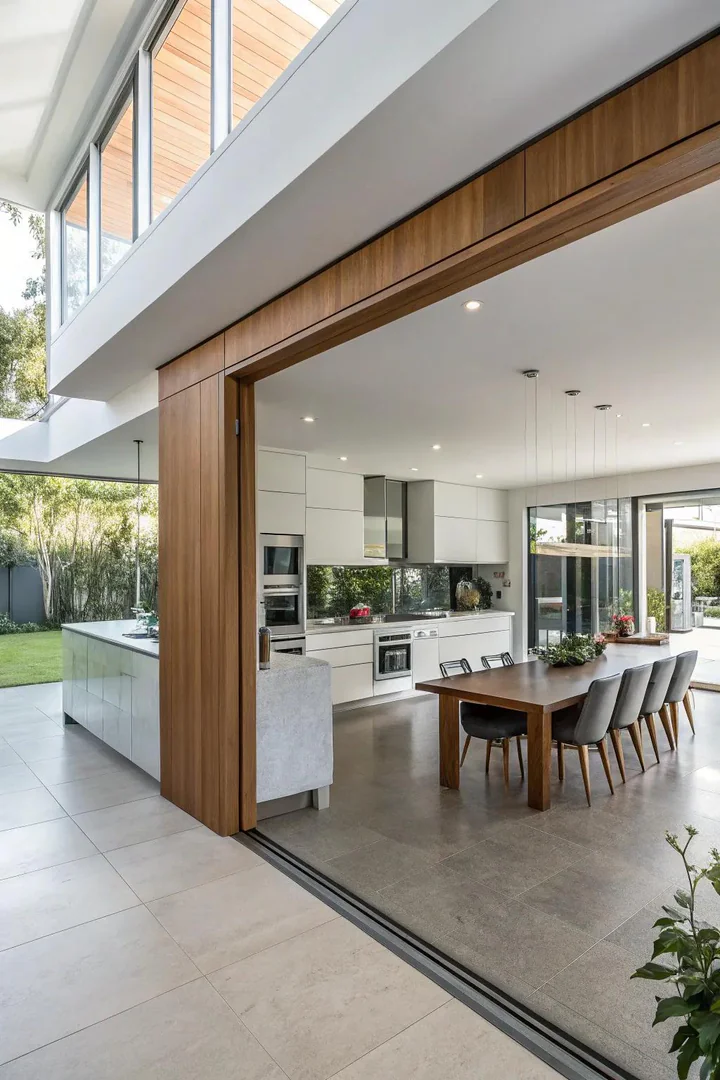
Extending the bulkhead downward from the ceiling to create a partial wall or a header beam between the kitchen and the adjacent room defines the kitchen as a distinct space without closing it off completely. This approach works especially well in open floor plans where the kitchen, dining room, and living room share one continuous ceiling — the bulkhead-as-divider signals the transition between zones while maintaining visual and spatial openness.
A shallow divider bulkhead (12 to 18 inches deep, extending from the ceiling) frames the kitchen opening like a wide, flat header beam. A deeper divider bulkhead (24 to 36 inches deep) provides enough mass to house recessed lights, speakers, or a vent return while creating a more pronounced room separation. Finish the divider bulkhead to match the surrounding ceiling and trim for a seamless, built-in look, or contrast it with a different material (wood, stone, or a bold paint color) to make it a deliberate design feature.
8. Merge Textures for Added Depth
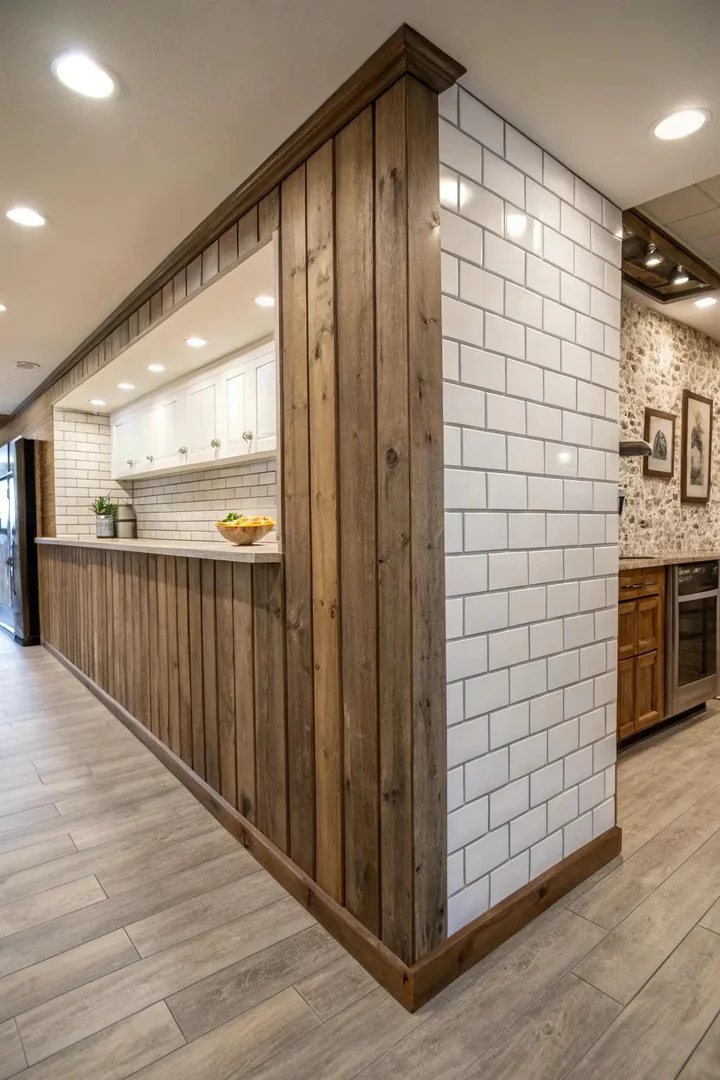
Applying two or more contrasting textures to the bulkhead surface — smooth drywall paired with rough wood planks, polished tile next to matte plaster, or metal panels beside fabric acoustic tiles — adds visual and tactile depth that makes the bulkhead look intentionally designed rather than hastily covered. A single flat, painted surface reads as basic; layered textures read as curated and architectural.
A popular combination: shiplap or tongue-and-groove wood on the bulkhead face paired with a smooth, painted return (the short surface that wraps from the bulkhead face to the ceiling). This two-texture approach highlights the wood’s grain and shadow lines while keeping the transition to the ceiling clean. Another option: tile the bulkhead face with the same tile used on the backsplash below to create a continuous surface that flows from the counter up to the ceiling, with the smooth drywall ceiling providing contrast above. Use lightweight materials (thin wood planks, peel-and-stick tiles, veneer panels) to avoid overloading the bulkhead’s framing structure.
9. Employ Metallic Highlights
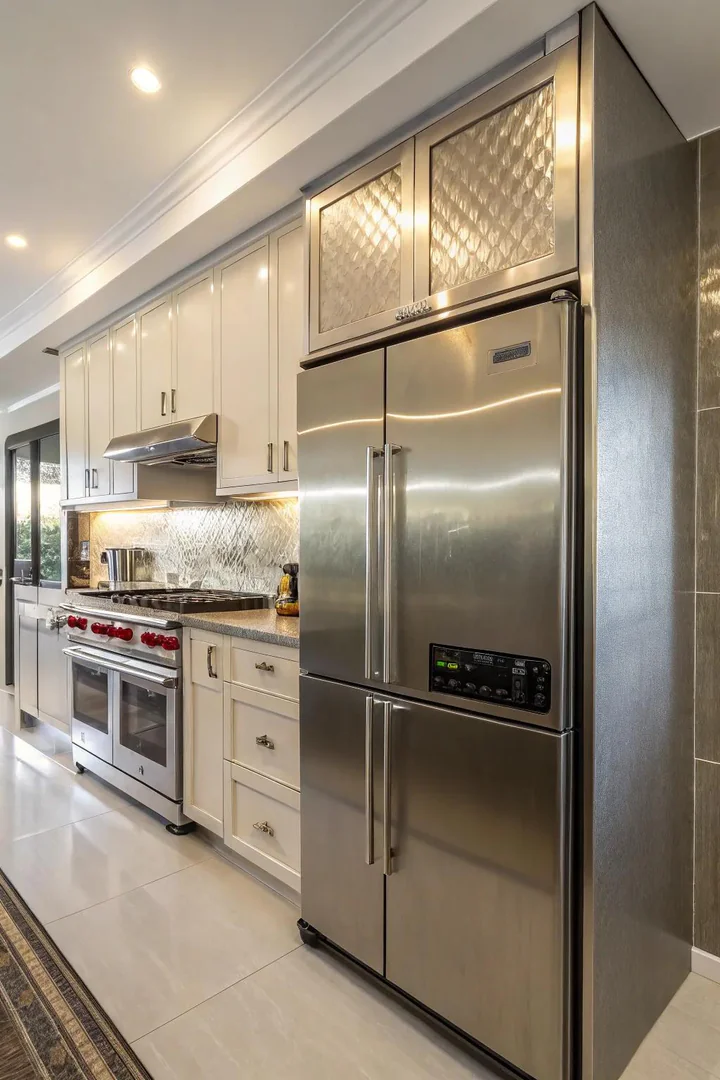
Adding metallic finishes — copper sheeting, brushed stainless steel panels, brass trim, or metallic-painted surfaces — to the bulkhead face introduces reflective, light-catching surfaces that energize the kitchen’s upper zone and connect the bulkhead to the kitchen’s existing metal elements (appliances, hardware, fixtures, range hood). Metal on the bulkhead is unexpected, which makes it a conversation piece and a focal point.
Thin copper or brass sheet metal (from Online Metals, Metal Supermarkets, or a local metal supplier) can be cut to fit the bulkhead face and attached with construction adhesive or small brads. Brushed stainless steel panels (from McNICHOLS or Direct Metals) echo the finish of stainless steel appliances. For a lower-cost metallic effect, use metallic paint (Modern Masters Metallic Paint in brass, copper, or champagne) or metallic peel-and-stick wallpaper (from Tempaper or Chasing Paper) applied to the bulkhead face. Match the metallic finish on the bulkhead to the dominant metal finish in the kitchen — brass bulkhead with brass cabinet pulls, copper bulkhead with copper pendant lights.
10. Choose Decorative Trim
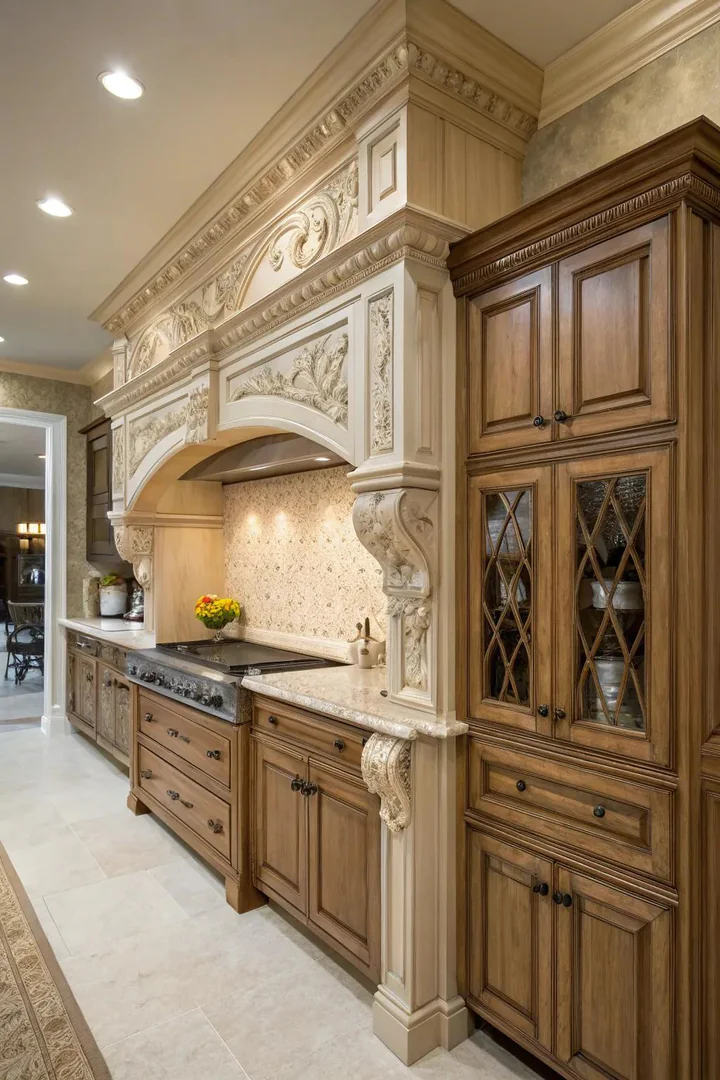
Adding decorative molding profiles — crown molding, panel molding, picture-frame molding, or dentil trim — to the edges and face of the bulkhead gives it the same finished, millwork-quality look as the cabinetry below, visually connecting the bulkhead to the cabinets and making the entire upper wall appear as one continuous piece of built-in furniture. Without molding, a bulkhead meets the ceiling and the cabinet tops with raw, abrupt edges; with molding, those transitions become elegant, finished joints.
Crown molding (from Metrie, Fypon, or a lumber yard) installed at the junction of the bulkhead and the ceiling closes the gap and creates a finished cornice line that matches the crown molding used elsewhere in the kitchen or home. Panel molding (thin rectangular frames created with small-profile trim) applied to the bulkhead face creates the look of raised or recessed panels that echo the cabinet door style below. Choose a molding profile and paint color that matches the existing cabinetry exactly — the bulkhead should look like it was built by the same cabinet maker as the rest of the kitchen. For coordinating bulkhead trim color with cabinet finishes, browse our kitchen cabinet color ideas guide.
11. Set Up Accent Lighting
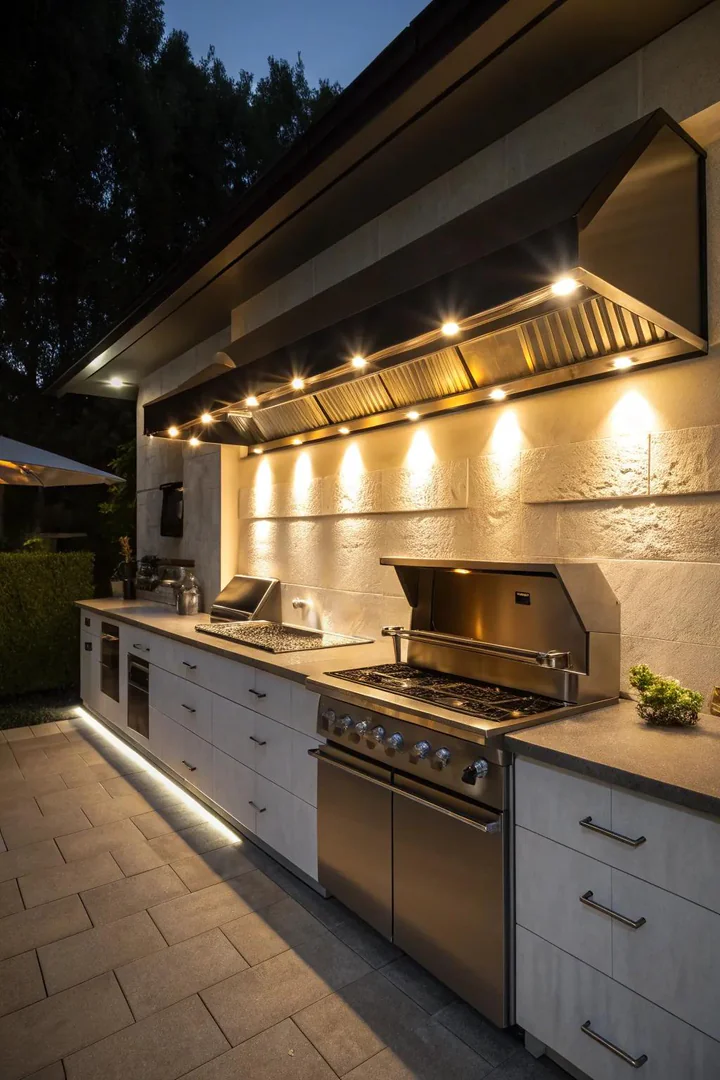
Accent lighting — directional spotlights, adjustable track heads, or miniature picture lights mounted on or in the bulkhead — highlights specific features (a backsplash, a piece of art, a display shelf, or a decorative plate collection) with focused beams that add drama, depth, and visual hierarchy to the kitchen. Unlike the even, diffused glow of recessed can lights, accent lights create bright spots and shadows that give the kitchen a layered, gallery-like lighting atmosphere.
Adjustable mini track lights (from WAC Lighting, Tech Lighting, or Juno) mounted on the underside of the bulkhead allow you to aim each light head at a specific target — a beautiful backsplash tile, a piece of framed art, or a decorative object on the cabinet top. Miniature LED picture lights (from Cocoweb or Battery-Operated Picture Lights) mounted above display niches or art pieces on the bulkhead face spotlight individual items with warm, focused beams. Wire all accent lights to a separate switch or dimmer from the general kitchen lighting so you can create a moody, gallery-like atmosphere by turning on only the accent lights and leaving the overhead lights off.
12. Present Curved Lines
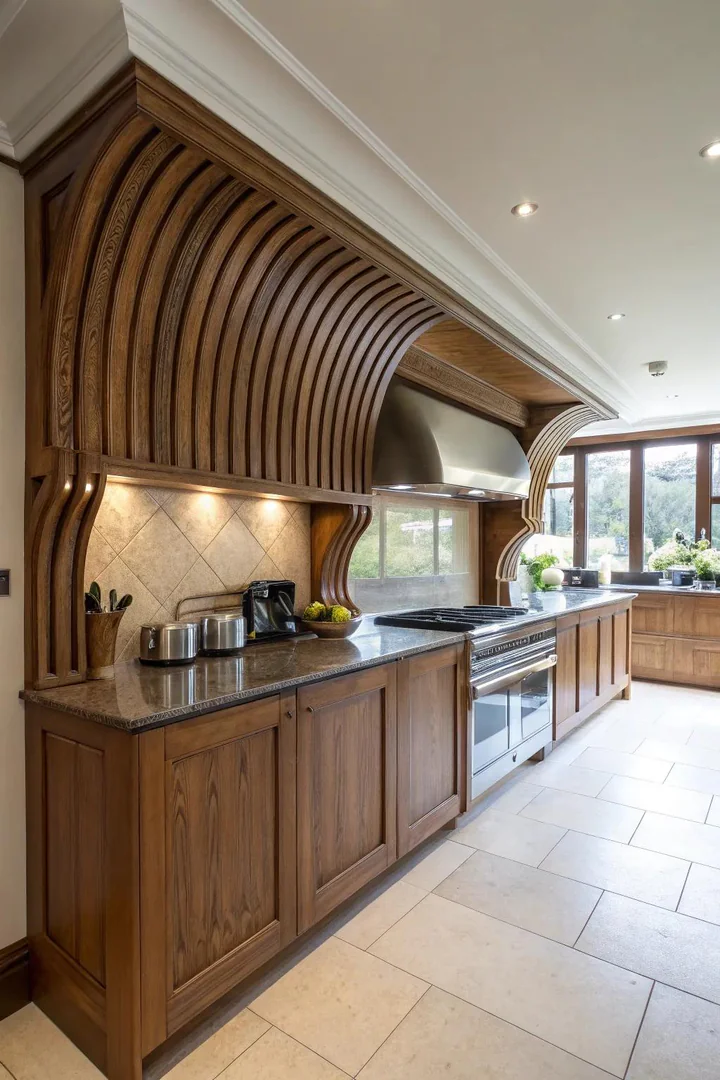
Shaping the bulkhead with curved profiles — arched undersides, rounded edges, coved transitions, or undulating wave forms — softens the hard, angular lines of a standard box-shaped soffit and introduces flowing, organic geometry that counterbalances the kitchen’s predominance of straight edges, square cabinets, and rectangular countertops. Curved bulkheads feel more spacious and welcoming than sharp-cornered boxes.
A coved transition (a concave curve connecting the bulkhead face to the ceiling, replacing the standard 90-degree angle) is the simplest curved treatment — it can be achieved with a prefabricated cove molding (from Orac Decor, Fypon, or a plaster molding supplier) or with flexible drywall bent over a curved frame. An arched underside (where the bottom face of the bulkhead curves upward at the ends like a shallow barrel vault) requires custom framing from curved plywood ribs but creates a dramatic, chapel-like effect above the kitchen. Curved profiles are more expensive to build than flat, squared soffits because they require custom framing and skilled drywall finishing — budget $50 to $100 per linear foot for the curved profile versus $20 to $40 for standard flat.
13. Choose a Coffered Design
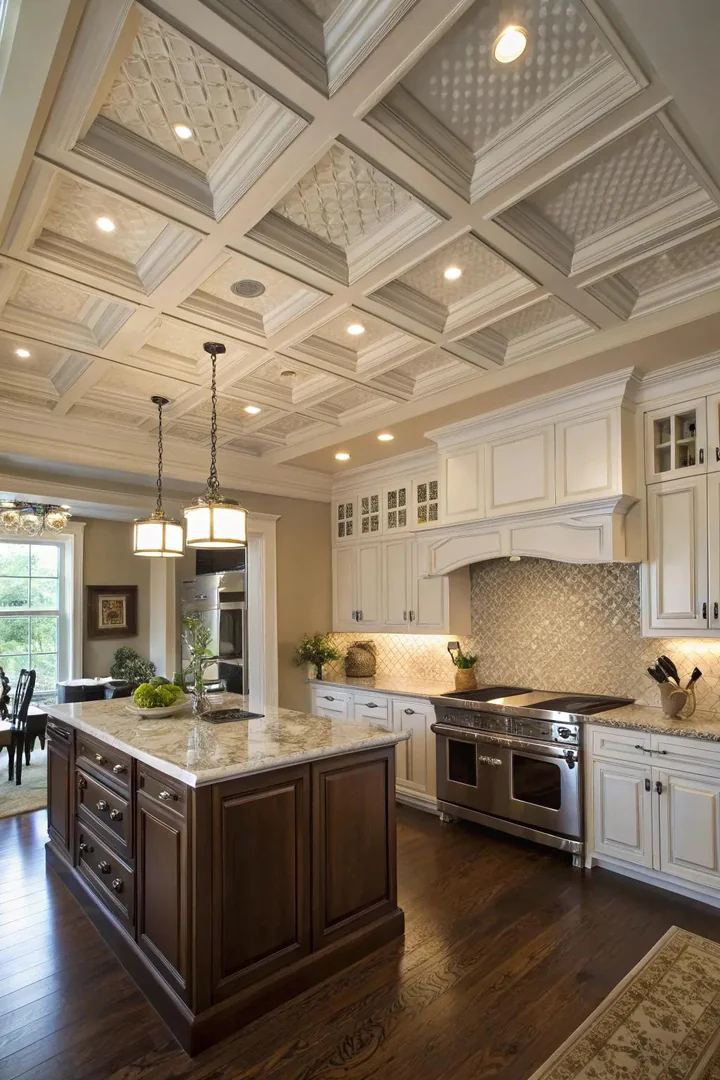
A coffered design — a grid of recessed panels created by intersecting beams on the underside or face of the bulkhead — adds classical architectural detail and visual depth that makes the bulkhead look like a deliberate, high-end ceiling treatment rather than a functional enclosure for ductwork. Coffered ceilings have been a hallmark of formal, traditional architecture for centuries, and applying that treatment to the bulkhead instantly raises the perceived quality of the kitchen.
Build the coffered grid from MDF or pine beams (2×4 or 1×4 lumber) attached to the bulkhead face in a grid pattern with 12-to-18-inch spacing, then fill the recessed panels between beams with flat drywall, beadboard, or a contrasting paint color. Prefabricated coffered ceiling kits (from Tilton Coffered Ceilings or Classic Coffers) simplify the construction with pre-made, snap-together beam components sized for standard soffit dimensions. Paint the beams and panels in the same color for a subtle textured effect, or paint the beams white and the recessed panels a slightly darker shade (or vice versa) for a more pronounced coffered look.
14. Integrate Intelligent Technology
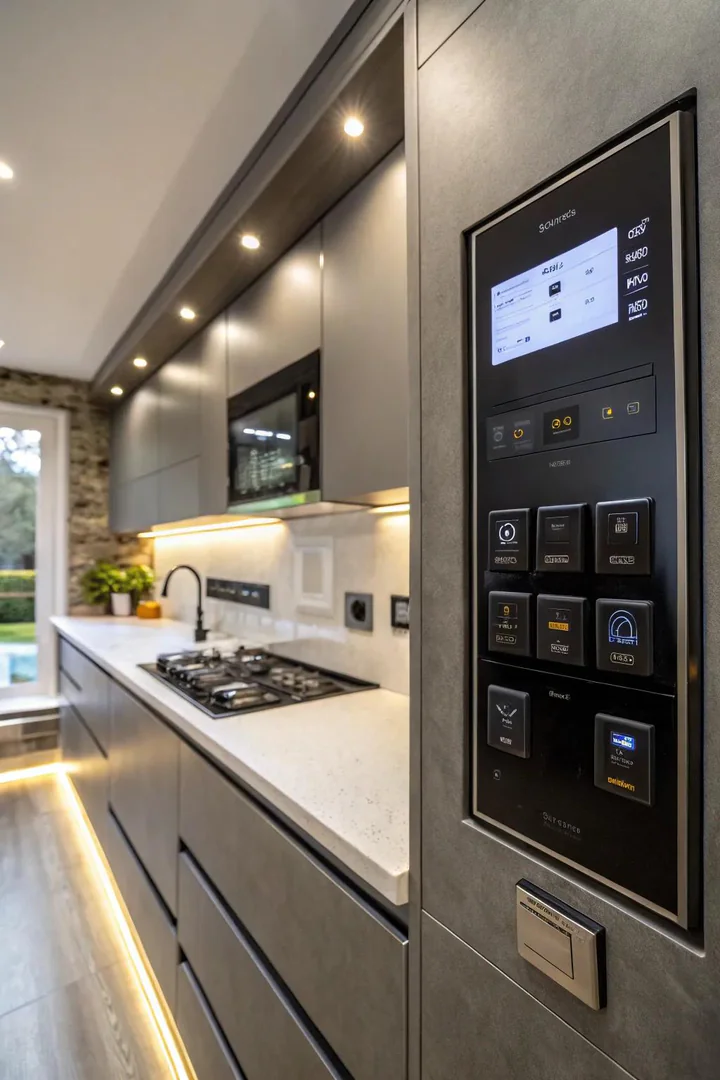
Embedding smart home technology — Wi-Fi-connected dimmable LED lights, motorized vent dampers, recessed speakers, motion sensors, and smart home control panels — inside the bulkhead takes advantage of the hidden cavity behind the drywall to house tech components that would otherwise require visible wall-mounted boxes, exposed wiring, or ceiling-surface installations. The bulkhead becomes a tech enclosure that keeps the kitchen’s smart infrastructure invisible.
Smart recessed lights (from Philips Hue, LIFX, or Lutron) installed in the bulkhead face provide color-tunable, voice-controlled, app-controlled, and schedule-automated lighting that adjusts from warm task lighting (3000K) during cooking to cool daylight (5000K) during cleaning to a dim amber glow (2200K) for evening ambiance. Flush-mount smart speakers (from Sonos In-Ceiling, Sonance, or Bowers & Wilkins) installed inside the bulkhead cavity provide room-filling music and voice assistant access (Alexa, Google Assistant) without visible speaker boxes on the countertop or shelves. Motion sensors (from Lutron or Leviton) mounted on the bulkhead underside trigger lights automatically when someone enters the kitchen.
15. Add Acoustic Panels
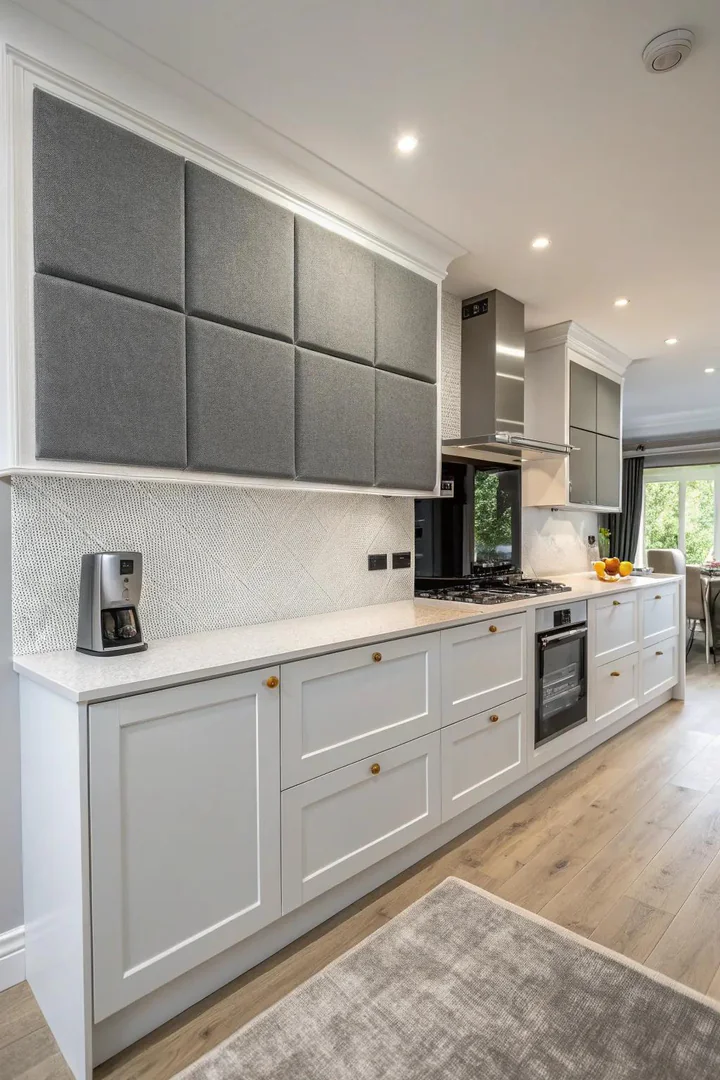
Installing acoustic panels — fabric-wrapped sound-absorbing tiles, perforated wood panels, or felt panels — on the bulkhead face reduces the echo, reverberation, and overall noise level in the kitchen, which is typically the loudest room in the house due to hard, reflective surfaces (stone counters, tile backsplashes, glass cabinets, metal appliances) that bounce sound around the space. Acoustic treatment on the bulkhead addresses noise from above without altering the kitchen’s functional surfaces below.
Fabric-wrapped acoustic panels (from Acoustimac, ATS Acoustics, or Primacoustic) in 1-inch or 2-inch thickness come in a wide range of fabric colors and textures that can be coordinated with the kitchen’s color palette. Felt panels (from FilzFelt or BuzziSpace) in geometric shapes (hexagons, triangles, rectangles) mount to the bulkhead face as decorative tiles that double as sound absorbers. Perforated wood acoustic panels (from Muffle, Decoustics, or BAUX) provide sound absorption behind a wood veneer surface that blends with natural-material kitchen designs. Install panels with construction adhesive, Z-clips, or French cleats for easy removal and repositioning.
16. Integrate Glass Components
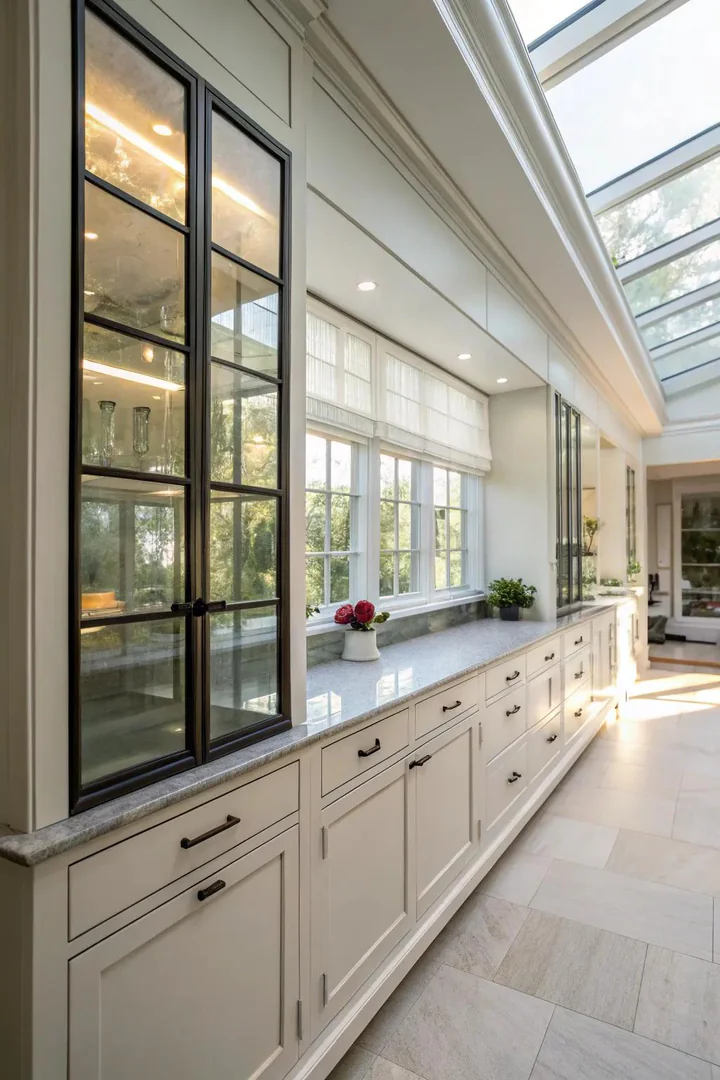
Replacing sections of the solid drywall bulkhead with glass panels — frosted, clear, textured, or stained glass — allows natural and artificial light to pass through the bulkhead from the ceiling above, reducing the visual weight of the soffit and maintaining a sense of openness and airiness that a solid, opaque bulkhead blocks. Glass-paneled bulkheads are especially effective in kitchens where the bulkhead blocks a skylight, a clerestory window, or a light well above.
Frosted or sandblasted glass panels (from a local glass fabricator or Dulles Glass and Mirror) provide light transmission while obscuring the view of the ductwork, pipes, and wiring hidden inside the bulkhead cavity. Textured glass (reeded, fluted, or seeded) adds visual interest while filtering the light. Stained glass panels (from a stained glass artist or studio) introduce color and artistry. Backlit glass panels (glass mounted over LED strip lights inside the bulkhead cavity) glow evenly and create a luminous, light-box effect that turns the bulkhead into a ceiling-level light fixture.
17. Incorporate a Touch of Color
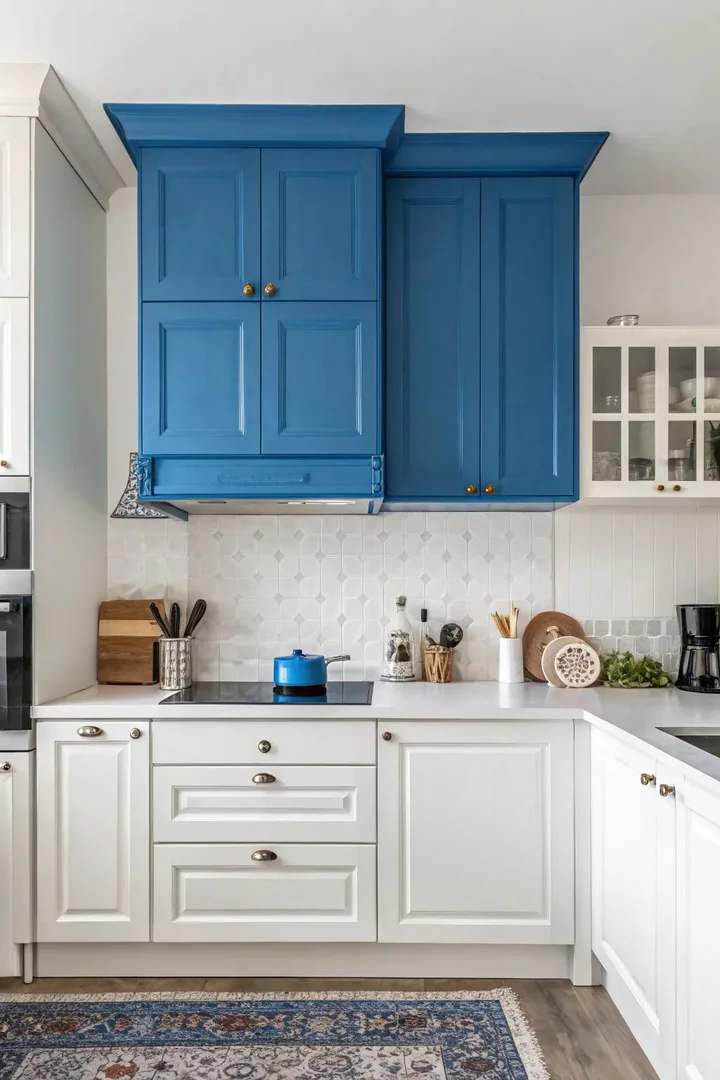
Painting the bulkhead a bold, contrasting color — deep navy, forest green, charcoal, terracotta, or a rich jewel tone — turns the soffit from a forgettable architectural element into the kitchen’s color accent and focal point. A colored bulkhead is the highest-impact, lowest-cost bulkhead treatment: a gallon of paint and a weekend afternoon can completely change the kitchen’s character and energy.
Choose a color that either complements or contrasts the kitchen’s dominant palette. In a white or neutral kitchen, a dark-colored bulkhead (Benjamin Moore Hale Navy HC-154, Sherwin-Williams Evergreen Fog SW 9130, or Farrow & Ball Railings No. 31) creates a dramatic, grounding band of color that anchors the upper zone. In a dark kitchen, a lighter or warmer bulkhead color (warm white, blush, sage, or pale blue) adds lightness above without competing with the dark cabinetry below. For guidance on pairing bulkhead colors with kitchen wall and cabinet palettes, visit our kitchen color ideas page.
18. Employ LED Strip Lighting
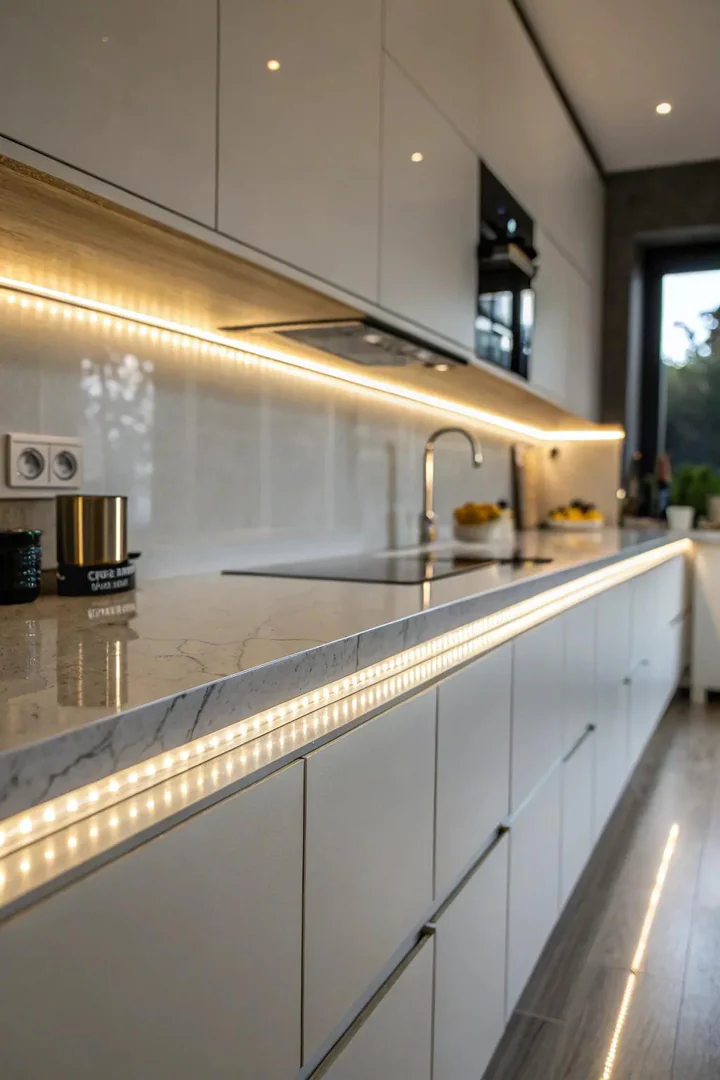
Installing LED strip lights — flexible, adhesive-backed strips of tiny LED diodes — along the underside, the top edge, or the face of the bulkhead creates a clean, continuous line of light that defines the bulkhead’s profile, provides indirect illumination, and adds a modern, architectural glow that no other light fixture can replicate. LED strips are thin (under 1/4 inch), flexible, dimmable, and available in warm white, cool white, and color-changing (RGB) versions.
Under-bulkhead installation: mount the LED strip in an aluminum channel (from Klus, HitLights, or Muzata) along the bottom edge of the bulkhead, angled toward the backsplash, to wash the wall and countertop with indirect task light. Top-of-bulkhead installation: mount the strip on the top surface of the bulkhead (hidden from view, aimed upward at the ceiling) to create a soft, indirect cove light that makes the bulkhead appear to float. Face-mounted installation: install the strip behind a frosted diffuser channel on the front face of the bulkhead for an even, glowing line of light. Use a high-CRI LED strip (CRI 90+, from HitLights or Philips Hue Lightstrip) for accurate color rendering on food, countertops, and backsplashes.
19. Incorporate Integrated Shelving
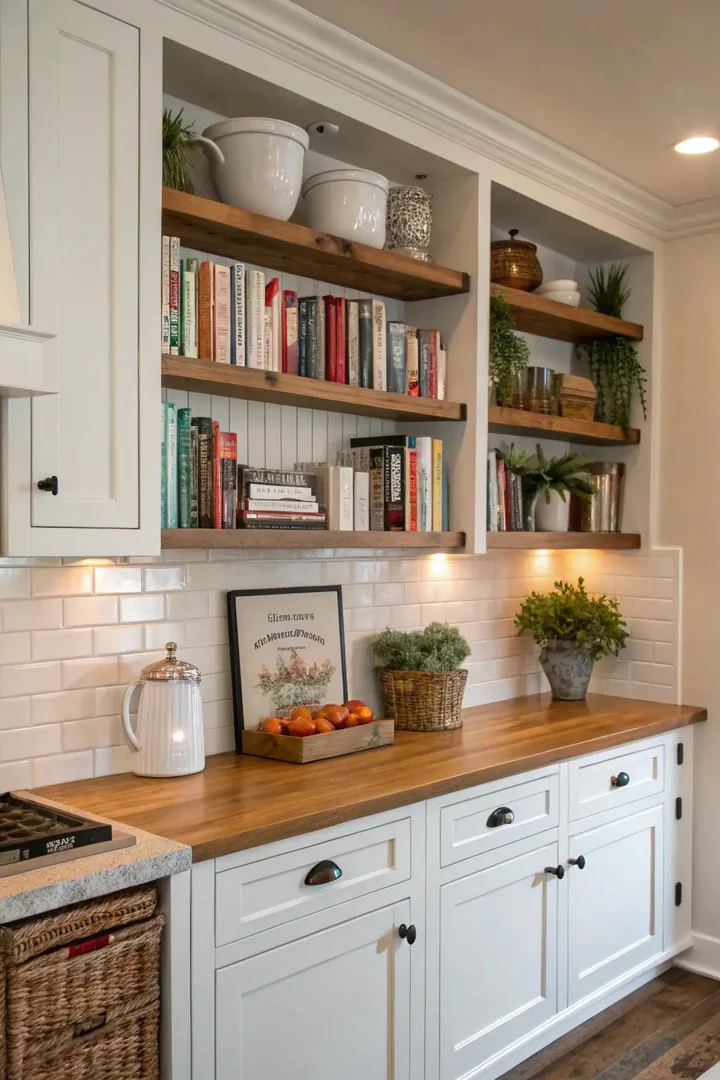
Cutting open sections of the bulkhead and framing them as built-in shelves or display niches turns the dead mass of the soffit into functional storage and display space for cookbooks, spice jars, decorative objects, wine bottles, and glassware. Built-in shelving in the bulkhead keeps displayed items at or above eye level and frees up counter and cabinet space below for everyday cooking tools and storage.
Frame shelf openings by cutting into the drywall face of the bulkhead, adding 2×4 framing around the opening, and finishing with drywall returns and trim. Size shelves to fit the items you plan to display — 6 to 8 inches deep for spice jars and small decorative objects, 10 to 12 inches deep for cookbooks and bottles. Paint the shelf interiors a contrasting color (dark gray, navy, or black) to add depth and make displayed items stand out. Add small LED puck lights (from WAC Lighting or GE) inside each shelf to illuminate the contents. Visit The Designers Company for more kitchen design and decor ideas.
How to Design a Kitchen Bulkhead
Assessing the Existing Bulkhead Structure
Before modifying a bulkhead, determine what is inside it — ductwork, plumbing, electrical wiring, structural beams, or a combination. Open a small inspection hole (a 4×4-inch square cut with a drywall saw) in the bulkhead face to see the contents before committing to a treatment plan. If the bulkhead houses HVAC ductwork, you cannot reduce its depth below the duct dimensions without relocating the ductwork. If it conceals plumbing or wiring, those components must remain accessible (building codes require access panels for certain plumbing connections). If it frames a structural beam, the beam cannot be removed — only the drywall enclosure can be modified or embellished.
Matching the Bulkhead to the Kitchen Style
The bulkhead treatment should match the kitchen’s overall design language. Traditional kitchens pair best with crown molding, coffered panels, and painted finishes that match the cabinetry. Modern kitchens suit flush, minimal treatments — LED strip lighting, glass panels, metal accents, and seamless, painted-to-match-the-ceiling surfaces. Farmhouse kitchens respond well to shiplap, tongue-and-groove wood, and natural material cladding. Industrial kitchens can handle exposed ductwork (removing the bulkhead entirely and leaving the infrastructure visible) or raw metal and concrete finishes.
Budgeting for Bulkhead Improvements
Bulkhead treatments range from under $100 (a gallon of bold paint) to $5,000+ (coffered paneling, glass inserts, or integrated smart lighting). Paint is the cheapest option. Molding and trim ($200 to $800 in materials plus labor) offer high visual impact at a moderate cost. Wood cladding ($300 to $1,500 depending on material and area) adds warmth and texture. LED strip lighting ($50 to $300 for the strips and channels, plus electrician labor for hard-wired installation) is one of the best cost-to-impact ratios. Glass panels, coffered designs, and smart technology installations sit at the top of the budget range but deliver the most dramatic and permanent results.
Kitchen Bulkhead Treatment Comparison
| Treatment | Cost Range | Difficulty | Best Kitchen Style |
|---|---|---|---|
| Bold paint color | $50-150 | DIY-easy | Any style |
| Crown molding/trim | $200-800 | DIY-moderate | Traditional, transitional |
| LED strip lighting | $50-300 | DIY-moderate | Modern, contemporary |
| Wood plank cladding | $300-1,500 | DIY-moderate | Farmhouse, rustic |
| Recessed can lights | $300-1,200 | Professional | Any style |
| Coffered panels | $800-3,000 | Professional | Traditional, formal |
| Glass panel inserts | $500-2,500 | Professional | Modern, transitional |
| Smart lighting system | $500-2,000 | Professional | Modern, contemporary |
Common Kitchen Bulkhead Mistakes to Avoid
Painting the bulkhead a different white than the ceiling. If you paint the bulkhead white to blend it with the ceiling but use a different white shade (warm white bulkhead against a cool white ceiling, or vice versa), the color mismatch is immediately visible and makes the bulkhead look like a poorly matched patch rather than a seamless extension of the ceiling. Always use the exact same paint color and sheen on both the bulkhead and the ceiling.
Ignoring the bulkhead during a kitchen remodel. Many homeowners invest thousands of dollars in new cabinets, countertops, and backsplashes but leave the bulkhead untreated — a plain, flat drywall box sitting above a beautifully designed kitchen. The bulkhead is part of the kitchen’s visual composition, and an untreated bulkhead drags down the perceived quality of everything below it. Include the bulkhead treatment in your remodel scope and budget from the beginning.
Blocking access to mechanical systems inside the bulkhead. Covering the bulkhead with permanent, hard-to-remove materials (tile, stone veneer, glued-on panels) without leaving an access panel makes future maintenance on the ductwork, plumbing, or wiring inside impossible without destroying the finish. Always install a discreet access panel (painted to match, held with magnetic catches or quarter-turn fasteners) at the location of any valve, junction, or service point inside the bulkhead cavity.
Overloading the bulkhead with too many treatments. Applying wood cladding, LED strip lighting, crown molding, metallic accents, and a bold paint color to the same bulkhead creates visual noise and competing focal points. Choose one primary treatment (the surface material or finish) and one secondary treatment (the lighting or trim detail), and let those two elements define the bulkhead’s character. For more kitchen styling tips and decor ideas, browse our kitchen decor ideas gallery.
Frequently Asked Questions
What is a kitchen bulkhead?
A kitchen bulkhead (also called a soffit or a fascia) is a boxed-in section of drywall that drops below the main ceiling line, typically located directly above the upper cabinets. Bulkheads exist to conceal mechanical systems — HVAC ductwork, plumbing pipes, electrical wiring, and structural beams — that run through the space between the cabinet tops and the ceiling. In some kitchens, the bulkhead is structural (framing an actual beam that supports the floor above); in others, it is purely a chase for ducts and pipes that could potentially be removed or reduced if the mechanical systems were rerouted.
Can I remove a kitchen bulkhead?
It depends on what is inside it. If the bulkhead is a non-structural chase that houses only ductwork or wiring (no load-bearing beam), it can often be removed by rerouting the ductwork through the attic or floor joists and relocating the wiring. If the bulkhead encloses a structural beam, the beam cannot be removed without a structural engineer’s assessment and an alternative support system — the drywall enclosure can be slimmed down or redesigned, but the beam stays. Hire a general contractor to open the bulkhead and assess its contents before committing to removal.
How much does it cost to update a kitchen bulkhead?
Simple cosmetic updates (paint, molding, LED strip lights) cost $50 to $500 in materials and can be done as DIY projects. Mid-range treatments (wood cladding, recessed lighting, built-in shelving) cost $500 to $2,000 including materials and professional labor. High-end treatments (coffered panels, glass inserts, smart lighting systems, curved profiles) cost $2,000 to $5,000+. Bulkhead removal (including ductwork rerouting and ceiling patching) costs $2,000 to $8,000 depending on what is inside and the complexity of the rerouting.
Should I paint the bulkhead the same color as the cabinets or the ceiling?
Both approaches work, and the best choice depends on the effect you want. Painting the bulkhead the same color as the ceiling makes the bulkhead visually recede and minimizes its presence — this works best when you want the bulkhead to disappear. Painting the bulkhead the same color as the cabinets makes the upper wall area look like a continuous built-in unit from countertop to ceiling — this works best when you want the cabinetry to feel taller and more substantial. A third option: painting the bulkhead a contrasting accent color that differs from both the ceiling and the cabinets makes it a deliberate design feature.
How do I add lighting to an existing bulkhead?
The easiest method is adhesive-backed LED strip lights mounted along the underside or top edge of the bulkhead — these require only a nearby outlet and take under an hour to install. For recessed can lights, hire an electrician to cut holes in the bulkhead face, run wiring through the cavity (the ductwork and pipes inside provide routing challenges but an experienced electrician can work around them), and install low-profile LED fixtures on a dedicated switch or dimmer. For accent lighting (spotlights, track heads, picture lights), mount the fixtures on the surface of the bulkhead face with screws and run the wiring through the cavity to a junction box.
Can I extend cabinets to the ceiling to eliminate the bulkhead?
In many kitchens, yes. If the bulkhead drops only 6 to 12 inches below the ceiling, you can order taller upper cabinets (42-inch or custom-height cabinets instead of standard 30- or 36-inch uppers) that extend from the counter all the way to the ceiling, covering the bulkhead entirely. The cabinets box around the bulkhead, hiding it behind the cabinet backs and tops. If the bulkhead extends significantly below the cabinet tops (more than 12 inches), the extended cabinets may not fully cover it without looking disproportionately tall. Consult your cabinet supplier or kitchen designer for custom sizing.
Conclusion
Kitchen bulkheads do not have to be eyesores. The 19 ideas above prove that a soffit — whether it is a shallow 8-inch band above the cabinets or a deep 18-inch box concealing major ductwork — can be finished, decorated, lit, and detailed to look like a deliberate, integrated part of the kitchen’s architectural design rather than a structural afterthought.
Start with the simplest approach that matches your budget and skill level: paint it to match the ceiling (free if you have leftover paint), add crown molding to match the cabinetry ($200 to $800), or install LED strip lights along the underside ($50 to $300). These three basic treatments solve the vast majority of bulkhead problems. For a more ambitious upgrade, explore coffered panels, glass inserts, wood cladding, or smart lighting systems that turn the bulkhead into the most interesting architectural feature in the room.

