
Kitchen Island with Sink & Seating Ideas: 7 Perfect Layouts
Kitchen island with sink and seating ideas combine a functional wash station (a primary or prep sink with a faucet, drain, and water supply) and a dining or socializing area (bar stools, counter stools, or bench seating) on a single freestanding island, creating a multitasking centerpiece where you can prep, rinse, wash, dry, eat, drink, socialize, and supervise homework all from the same piece of kitchen furniture.
The 7 kitchen island with sink and seating ideas below cover contrast sink finishes, double-sink layouts, black fixture coordination, mixed metal approaches, silver-toned hardware selections, dark accent coordination, and prep sink with bar seating configurations. Each idea includes specific sink, faucet, and hardware recommendations, layout measurements, seating arrangements, and design considerations for building an island that works as hard as it looks.
1. Comparison with a Dark Sink
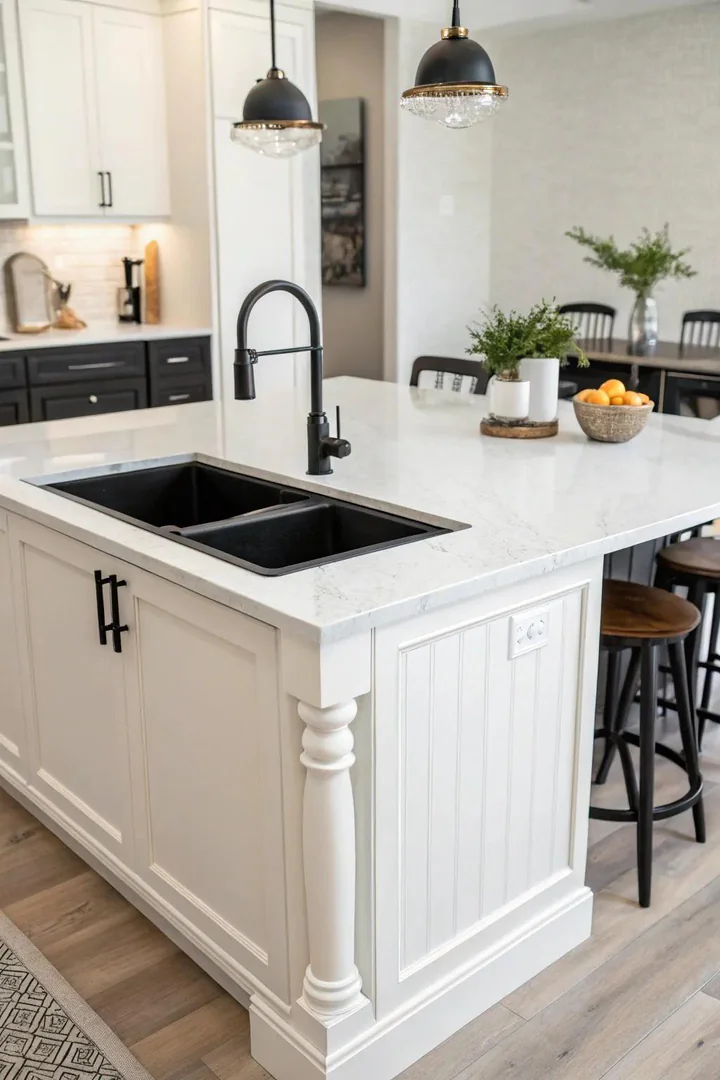
Installing a black or dark-finished sink — matte black granite composite, black fireclay, or black stainless steel — in a light-colored or white island countertop creates a high-contrast focal point that draws the eye and gives the island a strong visual anchor. The dark sink stands out against the light surface the way a dark piece of furniture stands out against a light wall, turning a functional fixture into a design statement.
Granite composite sinks (from Blanco Silgranit, Kraus Quarza, or Elkay Quartz Classic) in anthracite, coal black, or charcoal gray are the most popular black sink choice — they resist scratches, heat, and stains better than most sink materials and they maintain their matte black finish for years. Black fireclay sinks (from Bocchi Classico or Whitehaus Farmhaus) offer the apron-front farmhouse look in a deep black glaze that contrasts beautifully with white marble, white quartz, and butcher block countertops. Pair the black sink with a matching matte black faucet (from Delta Trinsic, Moen Align, or Kohler Purist in matte black) for a fully coordinated dark-fixture statement on the light island.
2. Add a Second Sink for Double the Convenience
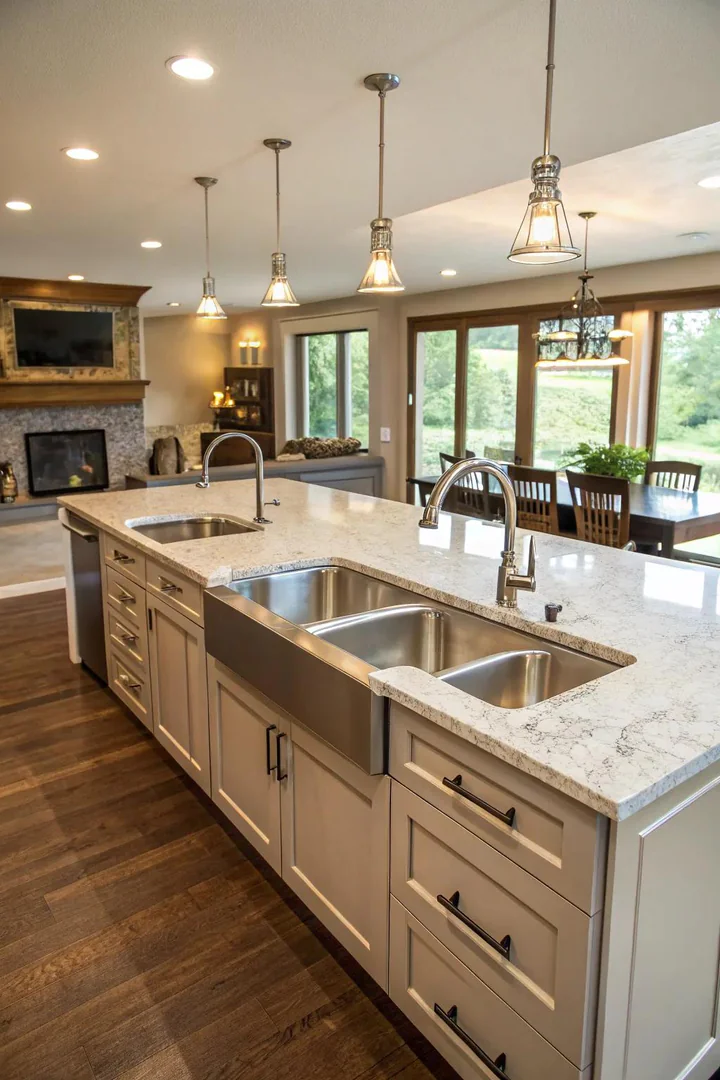
Adding a second sink to the island — a smaller prep sink (12 to 18 inches wide) positioned alongside or opposite the primary sink — gives two people simultaneous water access during meal prep and cleanup, eliminates the bottleneck of one person blocking the main sink while another waits, and creates distinct work zones (one for washing produce, one for washing dishes) that speed up the cooking workflow.
The prep sink should be smaller than the main sink — a single-bowl bar sink (15×15 inches) or a narrow trough sink (8×20 inches) — so it fits into the island layout without consuming counter space needed for the seating overhang. Brands like Kohler (Undertone series), Rohl (Allia Fireclay Bar Sink), and Blanco (Precis Mini) make compact prep sinks designed specifically for island installation. Position the prep sink on the cook’s side of the island (facing the stove) and the main sink on the opposite side, with the seating overhang extending from the end or the side of the island farthest from both sinks. Each sink needs its own drain line, water supply, and potentially its own garbage disposal. For layout guidance on positioning sinks within different island shapes, see our kitchen cabinet layout ideas guide.
3. Enhance with Black Fixtures
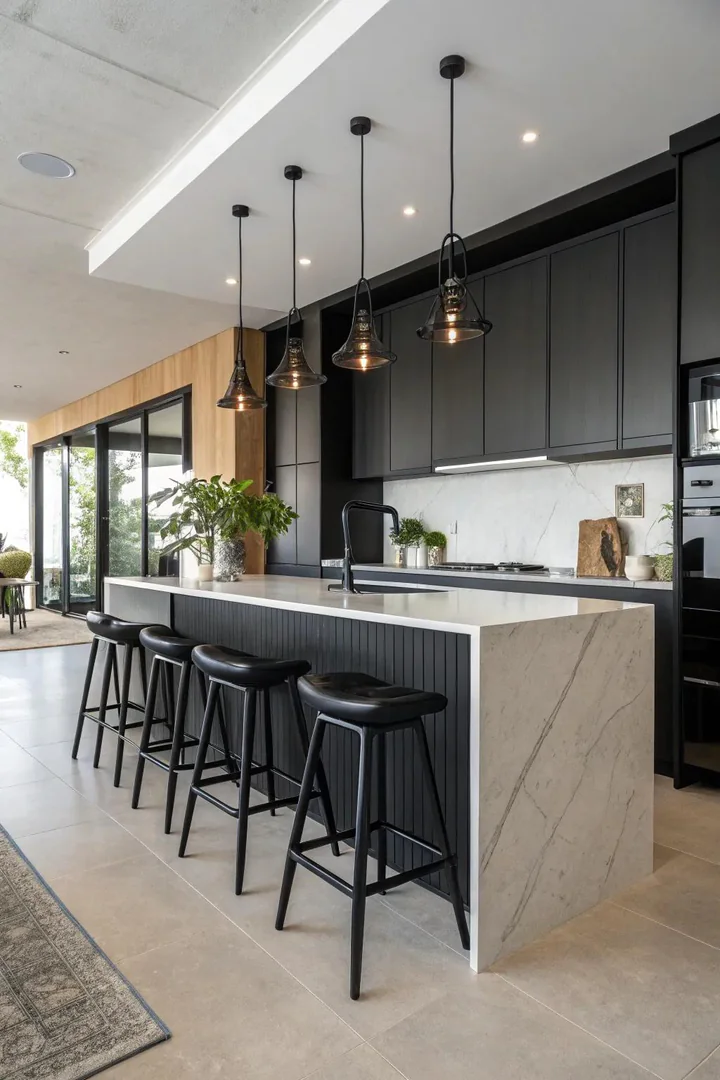
Coordinating every fixture on the island — the faucet, soap dispenser, cabinet pulls, bar stool legs or frames, pendant lights, and outlet covers — in a matching matte black finish creates a unified, intentional, high-contrast look that reads as designed rather than assembled. Matte black fixtures have become the dominant trend in kitchen hardware because the finish works with every countertop color, every cabinet finish, and every design style from farmhouse to ultra-modern.
Start with the faucet (the largest, most visible fixture on the island) in matte black — the Delta Trinsic (single-handle, pull-down sprayer), the Moen Align (minimalist, angular), and the Kohler Purist (bridge-style, two-handle) are top-selling matte black options. Then match the cabinet pulls (from Amerock, Top Knobs, or Rejuvenation in matte black), the soap dispenser (built-in, from the same brand as the faucet for a perfect finish match), and the bar stools (metal stools with matte black frames from West Elm, CB2, or Article). Finally, hang matte black pendant lights (from Rejuvenation, Schoolhouse, or West Elm) above the island to complete the coordinated black fixture package from countertop to ceiling.
4. Combine Metal Finishes
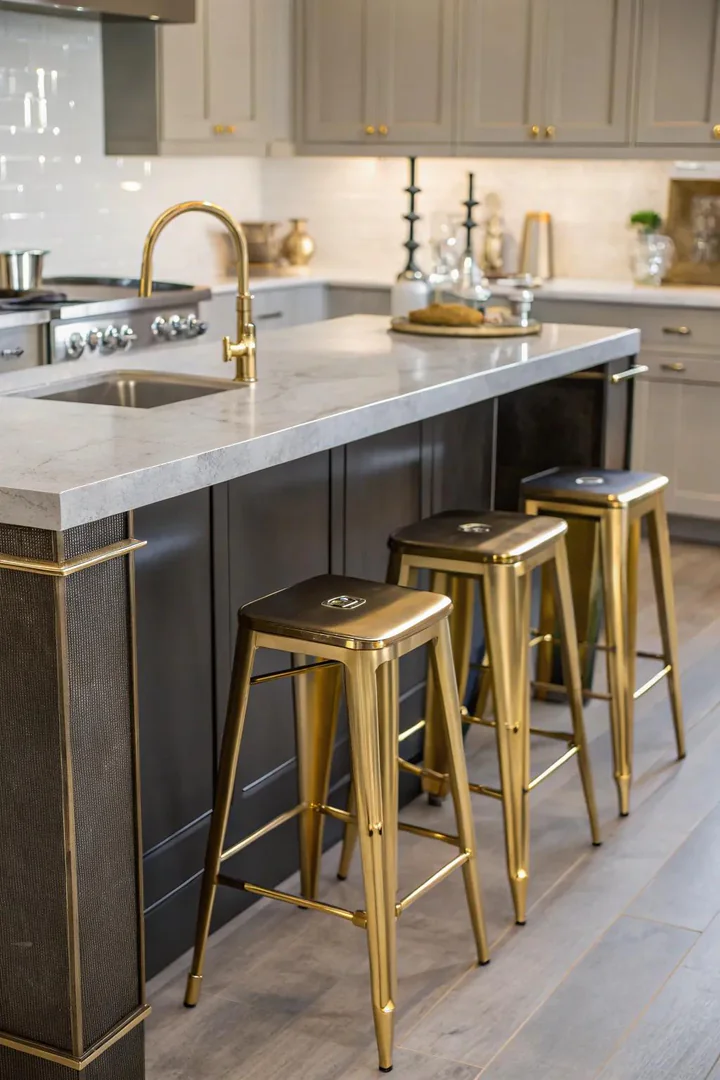
Intentionally mixing two or three different metal finishes on the island — such as a brushed gold faucet with matte black cabinet pulls and polished chrome bar stools, or a satin nickel faucet with brass pendant lights and oil-rubbed bronze pulls — creates a layered, collected, designer-quality look that feels richer and more sophisticated than a single-metal approach. Mixed metals signal confidence and intentionality when done correctly.
The rule for mixing metals successfully: pick one dominant metal (used on the largest or most visible fixture — usually the faucet or the pendant lights) and one or two accent metals (used on smaller fixtures like pulls, knobs, and stool frames). Keep the dominant metal to 60-70% of the visible hardware and the accent metals to 30-40%. Common successful combinations: brushed brass faucet + matte black pulls + brass-accented stools; polished nickel faucet + unlacquered brass pulls + chrome-framed stools; oil-rubbed bronze faucet + champagne bronze pendants + black stools. Avoid mixing more than three metals on one island — beyond three, the mix looks random rather than curated. For more ideas on coordinating hardware finishes with cabinet colors, browse our kitchen cabinet color ideas gallery.
5. Select Stylish Silver-Colored Hardware
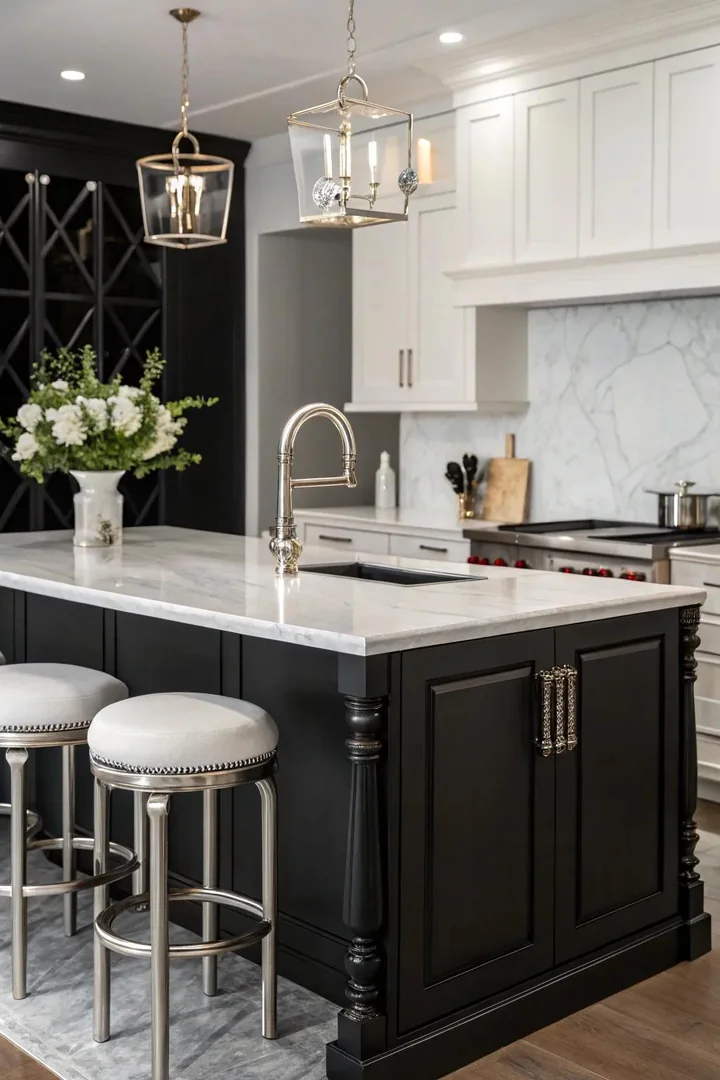
Silver-toned fixtures — polished chrome, brushed nickel, satin nickel, or stainless steel — maintain a clean, cool, contemporary look on a kitchen island with sink and seating that complements gray, white, blue, and green cabinet and countertop palettes. Silver finishes reflect light more than matte black or brass, which makes the island fixtures visually brighter and more prominent, especially under pendant lighting.
Polished chrome (mirror-finish, high-shine) suits ultra-modern and contemporary kitchens with glossy cabinets and quartz countertops. Brushed nickel (soft, muted sheen with visible brushing lines) works with transitional and mid-century modern kitchens. Satin nickel (smoother than brushed, slightly warmer) pairs well with painted cabinets and natural stone. Choose a faucet first (Grohe Ladylux, Hansgrohe Talis, or Moen Arbor in polished chrome or spot-resist stainless), then match the pulls, soap dispenser, and stool frames to the same silver family. Silver-toned fixtures show water spots and fingerprints more visibly than matte black — choose spot-resistant finishes (Moen Spot Resist, Delta SpotShield) for the faucet to reduce daily wiping.
6. Collaborate with Dark Accents
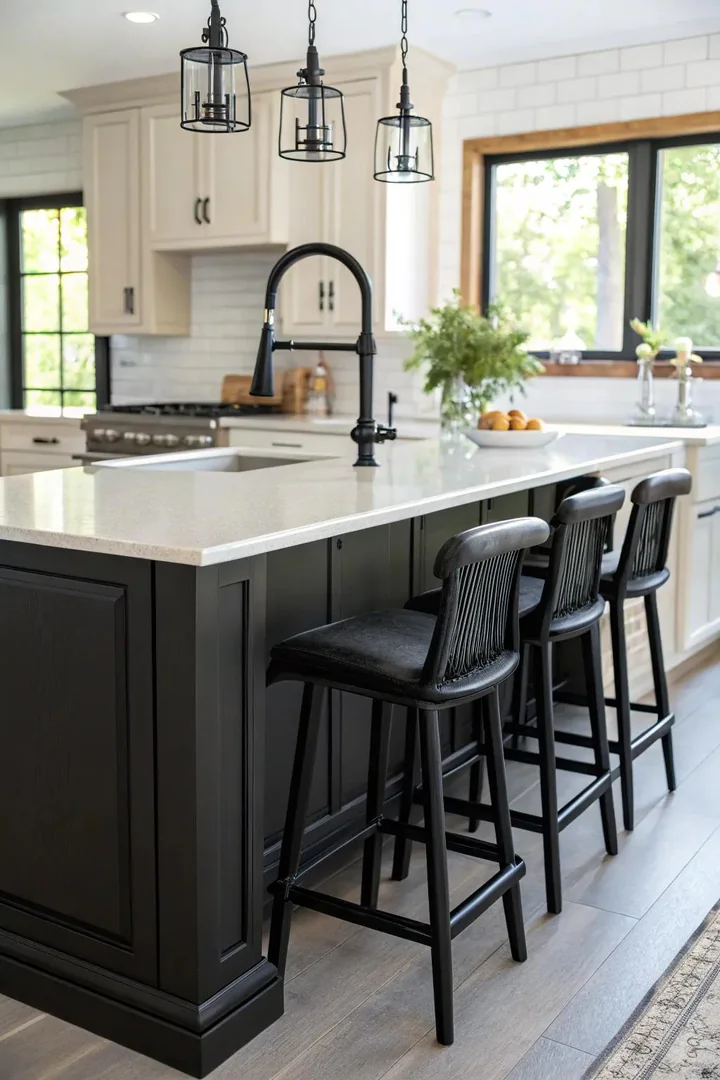
Using black as an accent color — not as the dominant finish, but as a recurring thread through the island’s faucet, window frames, light fixtures, range hood, and seating — ties the island into the broader kitchen design by creating visual continuity between the island and the surrounding elements. Black accents act as punctuation marks that connect different parts of the kitchen into a single, cohesive design story.
Identify 3 to 5 locations across the kitchen where black already appears or could be introduced: the range hood trim, the window frame or muntins, the door hardware, the open shelf brackets, and the pendant light cords or canopies. Then carry that same black into the island through the faucet finish, the cabinet hardware, the bar stool frames, and the under-counter trash pull handle. The goal is distributed repetition — black appears in enough locations (island and perimeter) that it reads as a deliberate design choice rather than a mismatched accent. For under-cabinet and pendant lighting that highlights these dark accents beautifully, visit our kitchen lighting ideas guide.
7. Think About a Prep Sink with Bar Seating
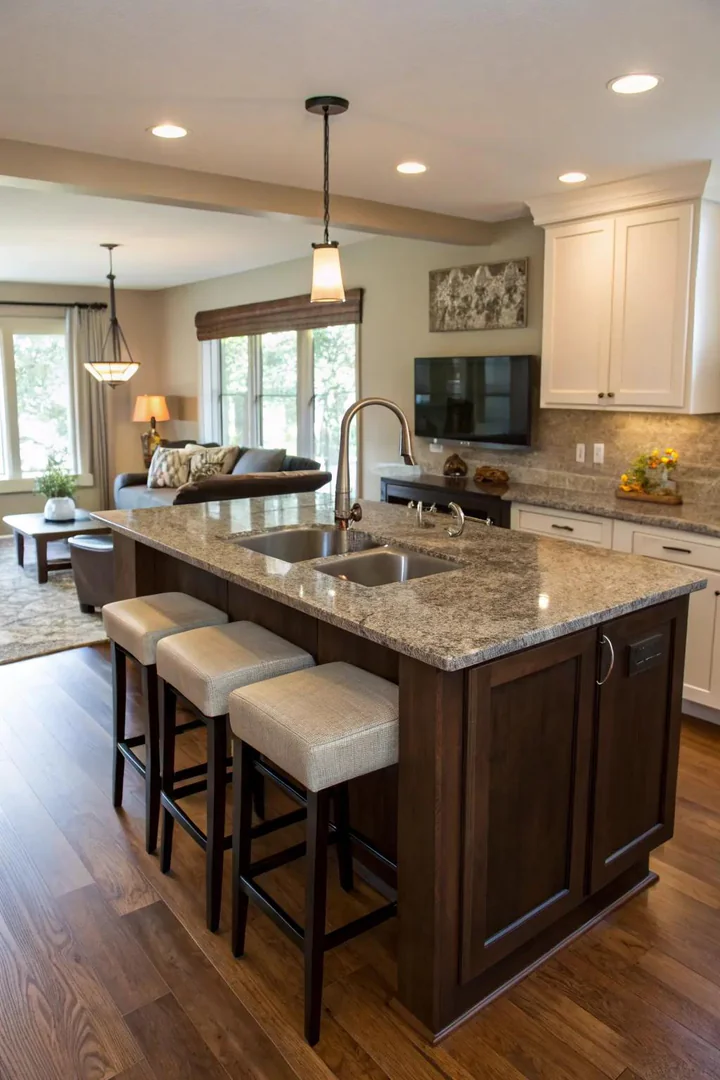
Pairing a small prep sink (12 to 18 inches wide) with bar-height seating (counter stools at a 36-inch-high countertop, or bar stools at a raised 42-inch bar) on the same island creates a dual-purpose station where the cook preps ingredients on one side while guests sit, drink, snack, and socialize on the other side. This layout turns the island into the social center of the kitchen — the cook faces the guests rather than facing the wall.
The prep sink belongs on the cook’s side (the side facing the stove and the main work area), and the seating overhang extends from the opposite side (the side facing the dining or living area). The minimum island length for this layout is 6 feet — enough for a 15-inch prep sink, 12 inches of counter space on each side of the sink, and a 36-inch seating overhang that seats 2 to 3 stools. A 36-inch counter height is standard for counter stools (24 to 26 inches tall); a raised 42-inch bar section requires bar stools (28 to 30 inches tall). The seating overhang should extend 12 to 15 inches from the island edge to provide knee clearance. Visit The Designers Company for more island layout and kitchen design ideas.
How to Plan a Kitchen Island with Sink and Seating
Determining Island Size and Proportions
The minimum island size for sink-plus-seating functionality is 4 feet wide by 6 feet long — anything smaller and the sink, the counter space, and the seating overhang compete for room. The ideal proportions are 4 to 4.5 feet wide (enough for a sink on one side and a seating overhang on the other) by 7 to 10 feet long (enough for the sink, prep space, and 3 to 4 stools). Leave at least 36 inches of clearance (42 inches is better) between the island and the perimeter counters, appliances, and walls on all sides for comfortable circulation, open cabinet doors, and pulled-out bar stools.
Planning the Plumbing Layout
Adding a sink to an island requires running water supply lines (hot and cold) and a drain line from the nearest existing plumbing connection (usually the perimeter sink) through the floor or subfloor to the island location. The drain line must be properly vented (either a traditional vent pipe through the roof or an air admittance valve under the island sink) to prevent slow draining and sewer gas backup. This plumbing work should be completed during the framing or rough-in phase of a kitchen remodel — running plumbing to an island after the floor is finished requires cutting into the finished floor, which is more expensive and disruptive.
Choosing the Right Sink Type for an Island
Undermount sinks (mounted beneath the countertop with a smooth, flush transition from counter to sink) are the most popular choice for islands because they allow you to sweep water and crumbs directly from the counter into the sink without a raised rim. Top-mount or drop-in sinks (set into a cutout with a visible rim) are easier and less expensive to install but the raised rim collects crumbs and water. Farmhouse or apron-front sinks (with the front face of the sink exposed on the island’s front panel) add a decorative, visible element to the island but require a custom cabinet opening. Single-bowl sinks provide maximum usable basin space; double-bowl sinks divide the space for washing and rinsing but each bowl is smaller.
Island Sink and Seating Layout Comparison
| Layout Type | Minimum Island Size | Seating Capacity | Best For |
|---|---|---|---|
| Sink on one side, seating opposite | 4×6 feet | 2-3 stools | Small to mid-size kitchens |
| Sink centered, seating on end | 4×7 feet | 2 stools | Narrow kitchens |
| Sink + prep sink, seating opposite | 4×8 feet | 3-4 stools | Serious home cooks |
| Sink on side, raised bar seating | 4.5×7 feet | 3-4 stools | Entertaining-focused kitchens |
| L-shaped island with sink wing | 6×8 feet (L shape) | 4-5 stools | Large, open-plan kitchens |
Common Kitchen Island Sink and Seating Mistakes to Avoid
Making the seating overhang too shallow. A seating overhang of less than 10 inches leaves no knee clearance for seated guests, making the stools uncomfortable and forcing guests to sit sideways or lean away from the counter. The minimum overhang for comfortable seating is 12 inches; 15 inches is ideal. This overhang is in addition to the countertop that extends over the island cabinetry, so plan the countertop fabrication accordingly.
Positioning the sink directly in front of the seating area. Placing the sink basin directly opposite the bar stools means seated guests look straight into a sink full of dirty dishes, soapy water, and food scraps — an unappealing view that discourages guests from sitting at the island during meal prep and cleanup. Offset the sink to one end of the island and the seating to the other end, or position the sink on the cook’s side (facing the stove) with the seating overhang on the opposite side so guests never look directly into the basin.
Forgetting electrical outlets on the island. Building codes in most jurisdictions (NEC Article 210.52) require at least one electrical outlet on a kitchen island, and many require two (one for each seating or work area). Plan outlet locations during the framing phase — adding outlets to a finished island requires cutting into the countertop or the island cabinet panels. Pop-up outlets (from Lew Electric or Hubbell) installed in the countertop surface provide power when needed and retract flush when not in use, keeping the countertop clean and uncluttered.
Choosing stools that are the wrong height. Counter-height stools (24 to 26 inches seat height) fit standard 36-inch countertops; bar-height stools (28 to 30 inches seat height) fit 42-inch raised bars. Using bar stools at a counter-height island — or counter stools at a bar-height section — leaves guests either hunched over the counter or perched with their legs dangling. Measure the countertop height first, then select stools 10 to 12 inches shorter than the counter surface.
Frequently Asked Questions
How big does a kitchen island need to be for a sink and seating?
The minimum recommended size is 4 feet wide by 6 feet long. A 4-foot width allows for a sink basin on one side and a 12-to-15-inch seating overhang on the other. A 6-foot length provides room for the sink (18 to 24 inches), counter space on each side of the sink (12 inches minimum), and a seating zone for 2 to 3 stools (each stool needs 24 inches of counter width). For 4 stools, extend the island to at least 8 feet long.
Should the island sink be the main sink or a prep sink?
Either works, depending on your kitchen layout and cooking habits. Making the island sink the main (primary) sink puts the most-used fixture at the center of the kitchen, giving the cook a direct view of the room while washing and prepping. Making the island sink a secondary prep sink keeps the main sink on the perimeter (under a window, in a traditional location) and adds a supplementary water source to the island for rinsing produce, filling pots, or washing hands. If your island is smaller (under 7 feet long), a compact prep sink preserves more counter space than a full-size primary sink.
What type of faucet works best on an island sink?
A pull-down or pull-out faucet with a single handle is the most practical choice for an island sink — the flexible hose extends the spray reach for filling large pots and rinsing the full basin, and the single handle operates easily with one wet hand. Avoid pot-filler faucets (wall-mounted, not compatible with island installation) and high-arc faucets taller than 16 inches (they block sightlines across the island for seated guests). Brands with the best island-specific faucet designs include Delta, Moen, Kohler, and Brizo.
How much does it cost to add a sink to a kitchen island?
The total cost to add a sink to a kitchen island during a remodel ranges from $1,500 to $5,000, including the sink ($200 to $800), the faucet ($150 to $600), the plumbing rough-in (running supply and drain lines to the island, $500 to $2,000), and the countertop cutout and undermount installation ($200 to $500). The biggest cost variable is the plumbing: if the island is close to existing plumbing lines, the rough-in is simpler and cheaper; if the plumbing must travel a long distance through the subfloor, costs increase significantly.
Can I add seating to an existing island that already has a sink?
Yes, if the island’s countertop extends far enough beyond the cabinet base to provide at least 12 inches of knee-clearance overhang on the seating side. If the current overhang is less than 12 inches, a countertop fabricator can extend the overhang by replacing the countertop slab with a larger one or by adding a cantilevered extension supported by corbels, steel L-brackets, or a recessed steel support bar. The cabinetry on the seating side should be recessed or angled to provide additional knee clearance below the overhang. For more on styling your island and surrounding decor, see our kitchen decor ideas gallery.
What is the best seating arrangement for an island with a sink?
The most popular and practical arrangement places 2 to 4 stools along the long side of the island opposite the sink, with the seating overhang extending 12 to 15 inches from the island edge. This gives seated guests a clear counter surface (no sink in their view) and lets the cook work at the sink while facing the guests. An alternative arrangement places stools on the short end of the island (a waterfall or peninsula extension) if the long side is fully occupied by the sink and work surface. Space stools 24 inches apart (center to center) for comfortable elbow room.
Conclusion
A kitchen island with both a sink and seating is one of the hardest-working pieces of furniture in the home — it handles food prep, dishwashing, casual dining, homework supervision, entertaining, and socializing, all from a single central location. The 7 ideas above show how the right combination of sink finish, faucet style, hardware coordination, and fixture selection can make this functional workhorse look as intentional and polished as the rest of the kitchen.
Start the planning process with three measurements: the island’s footprint (minimum 4×6 feet for sink-plus-seating), the seating overhang depth (minimum 12 inches), and the clearance between the island and the nearest perimeter counter (minimum 36 inches). From there, choose the sink type, the faucet finish, and the coordinating hardware that match your kitchen’s design direction — whether that is all-black contrast, mixed metals, cool silver tones, or distributed dark accents that tie the island into the surrounding space.

