
Ideas for Kitchen Peninsulas Attached to Walls: 17 Clever Layouts
Ideas for kitchen peninsulas attached to walls solve a layout problem that freestanding islands cannot: adding counter space, seating, and storage to galley, L-shaped, and U-shaped kitchens too narrow (under 42 inches of clearance) for a standalone island. A peninsula extends from an existing cabinet run or wall, requiring zero floor-clearance on the attached side, which means kitchens as narrow as 8 feet wide can gain a breakfast bar, extra prep surface, and closed storage underneath. Below are 17 peninsula configurations with dimensions, materials, and layout considerations, followed by a how-to planning guide, a comparison table, and FAQs on peninsula sizing, electrical requirements, and building permits.
1. Pendant Lighting Over the Peninsula
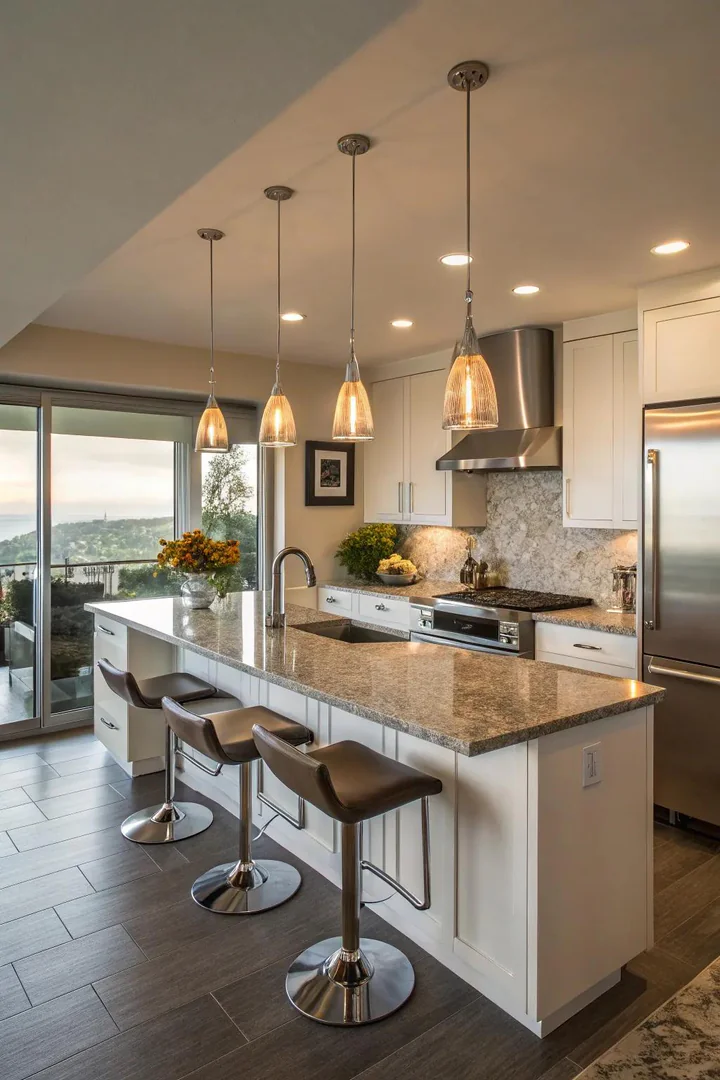
Hanging 2 or 3 pendant lights (spaced 24 to 30 inches apart, center-to-center) 30 to 36 inches above the peninsula countertop defines the peninsula as its own zone within the kitchen. West Elm Sculptural Glass Globe pendants ($149 each), Rejuvenation Baltimore pendants ($175 each), or Schoolhouse Electric Isaac pendants ($200 each) in brass, matte black, or polished nickel create a visual anchor that draws the eye toward the peninsula seating area.
Wire the pendant junction box centered over the peninsula’s countertop (not centered over the cabinet base) so the light falls on the eating and prep surface rather than the cabinet toe kick. A dimmer switch (Lutron Caseta, $60) shifts the pendants from task brightness during meal prep to ambient glow during dinner. Pendants with downward-facing shades direct concentrated light onto the countertop; open-globe or exposed-bulb pendants cast wider, softer light that illuminates both the countertop and the seated diners’ faces.
2. Blue-Painted Peninsula Base
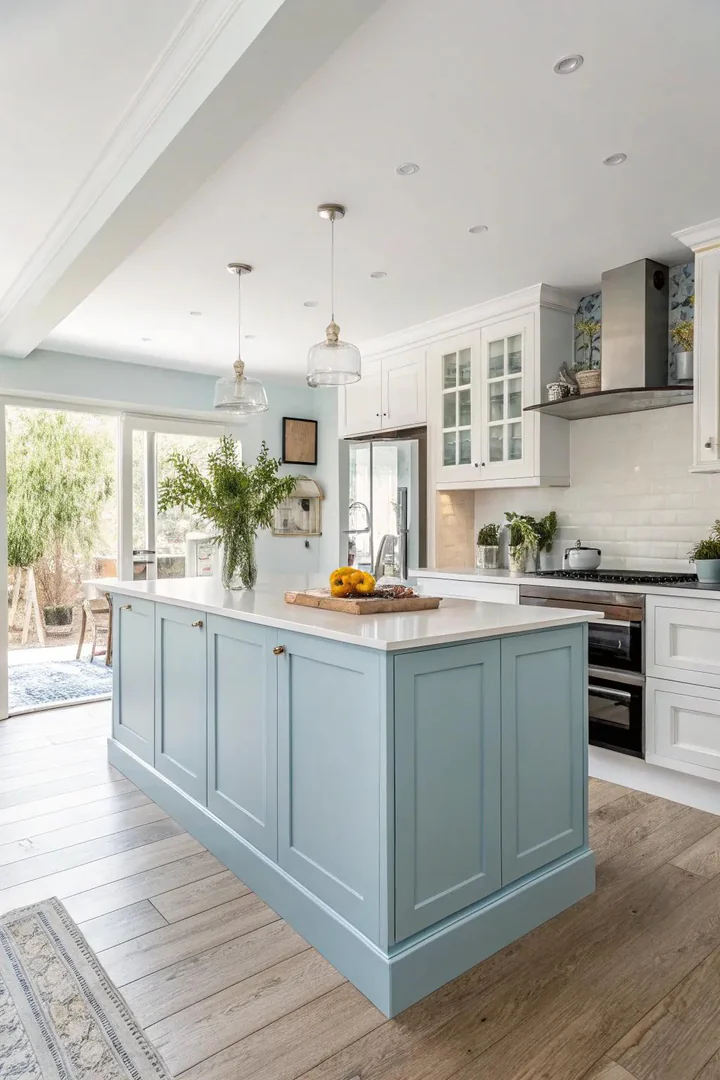
Painting the peninsula base cabinets in Benjamin Moore Hale Navy HC-155, Sherwin-Williams Indigo Batik SW 7602, or Farrow & Ball Stiffkey Blue No. 281 while keeping perimeter cabinets white or cream creates a two-tone kitchen where the peninsula reads as a furniture piece rather than a continuation of the wall cabinetry. A blue peninsula base against white upper cabinets follows the “heavier color below, lighter above” visual weight principle that grounds the room.
Sand the cabinet doors and face frames with 150-grit, prime with Zinsser BIN shellac-based primer ($25 per quart), and apply two coats of Benjamin Moore Advance ($55 per gallon) in satin finish. The peninsula base receives more knee contact, bag bumps, and stool scuffs than perimeter cabinets, so a satin or semi-gloss finish (easier to wipe clean) outperforms a matte finish. Two-tone cabinet painting costs $100 to $200 in paint and primer for the peninsula base alone.
3. Contrasting Color Peninsula Accent
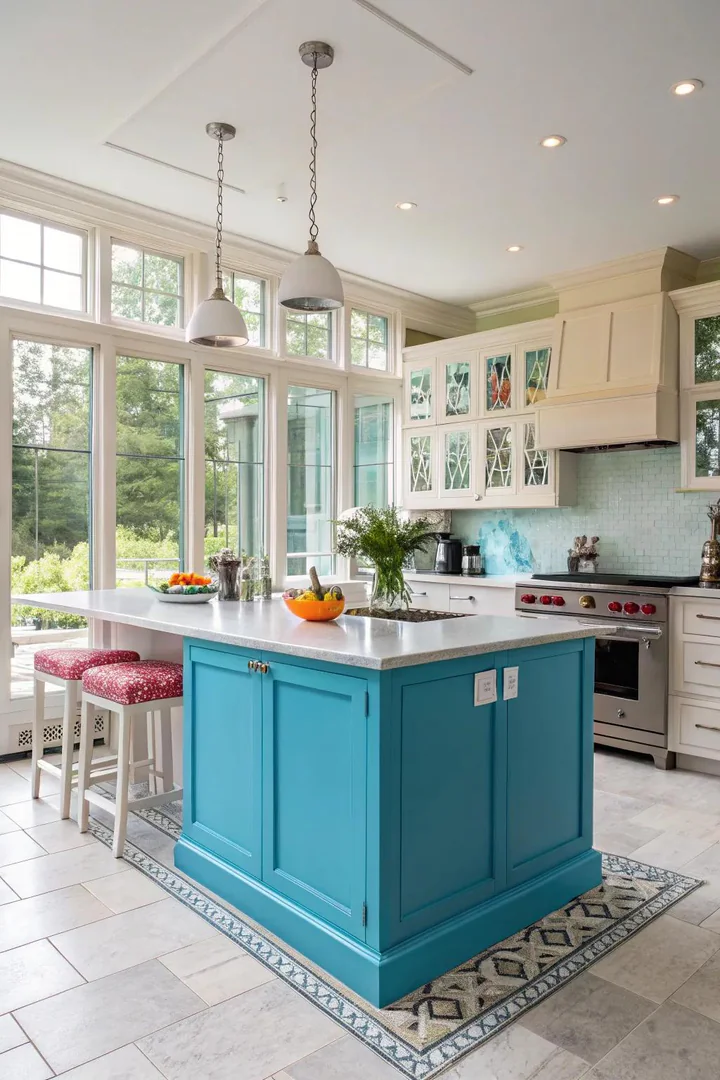
A peninsula in forest green (Benjamin Moore Essex Green HC-188), charcoal (Sherwin-Williams Iron Ore SW 7069), or terracotta (Farrow & Ball Red Earth No. 64) against neutral perimeter cabinets creates a focal-point color block. The peninsula’s position (projecting into the room, visible from multiple angles) makes the color statement more prominent than a painted island, which often faces away from the main sightline.
Limit the accent color to the peninsula base and keep the countertop neutral (white quartz, butcher block, or gray granite) to prevent the color from overwhelming the room. A brass or gold hardware set on the colored peninsula base (matching gold hardware ideas used throughout the kitchen) ties the accent piece into the room’s metal palette. A single accent color on the peninsula draws the eye without requiring a full kitchen repaint.
4. Shiplap-Clad Peninsula Base
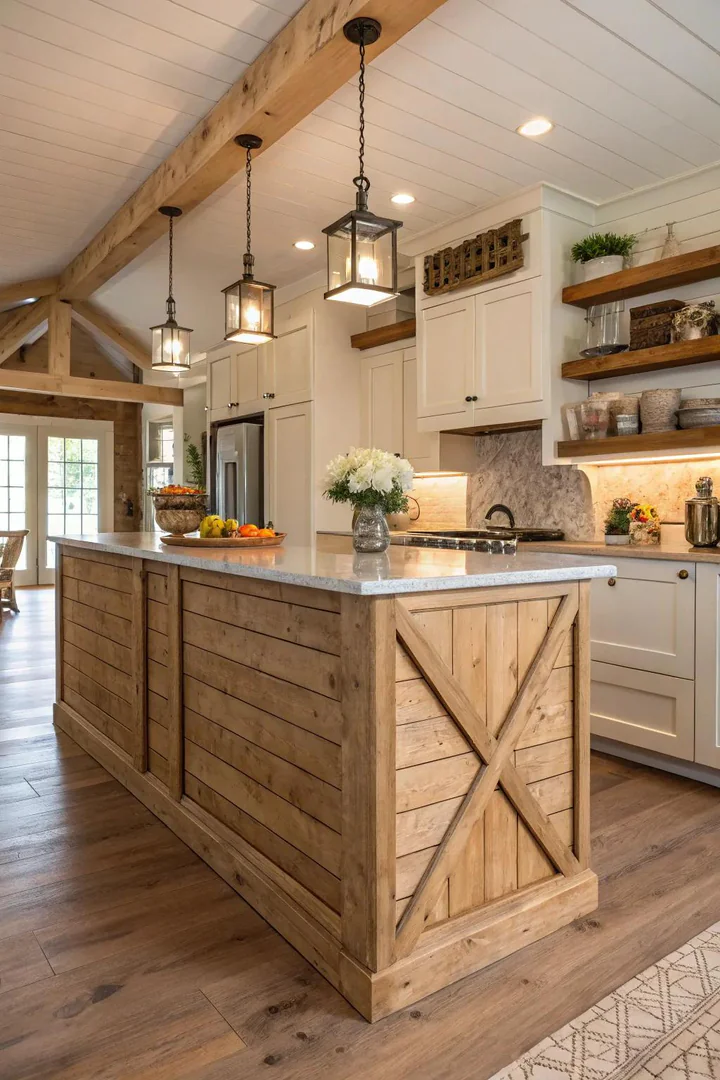
Applying 1/2-inch-by-6-inch shiplap boards ($2 to $4 per square foot from a lumber yard or Home Depot) to the exposed back and side panels of the peninsula base adds horizontal texture and farmhouse character. Weaber Shiplap ($25 per 14-square-foot pack from Home Depot) comes pre-primed and ready to paint. Attaching the boards horizontally with a nail gun (18-gauge brad nailer, $60 from RYOBI) and construction adhesive takes 2 to 3 hours for a standard 6-foot peninsula.
Paint the shiplap the same color as the cabinet doors for a monochromatic texture effect, or paint the shiplap white while leaving the cabinet doors in a contrasting color. Shiplap’s horizontal lines make a short peninsula appear longer and wider. Space each board with a 1/8-inch nickel gap (use a nickel as a spacer) for a clean, consistent shadow line. A shiplap-clad peninsula base costs $50 to $100 in materials and gives the kitchen a cottage or coastal farmhouse personality.
5. Board-and-Batten Peninsula Detail
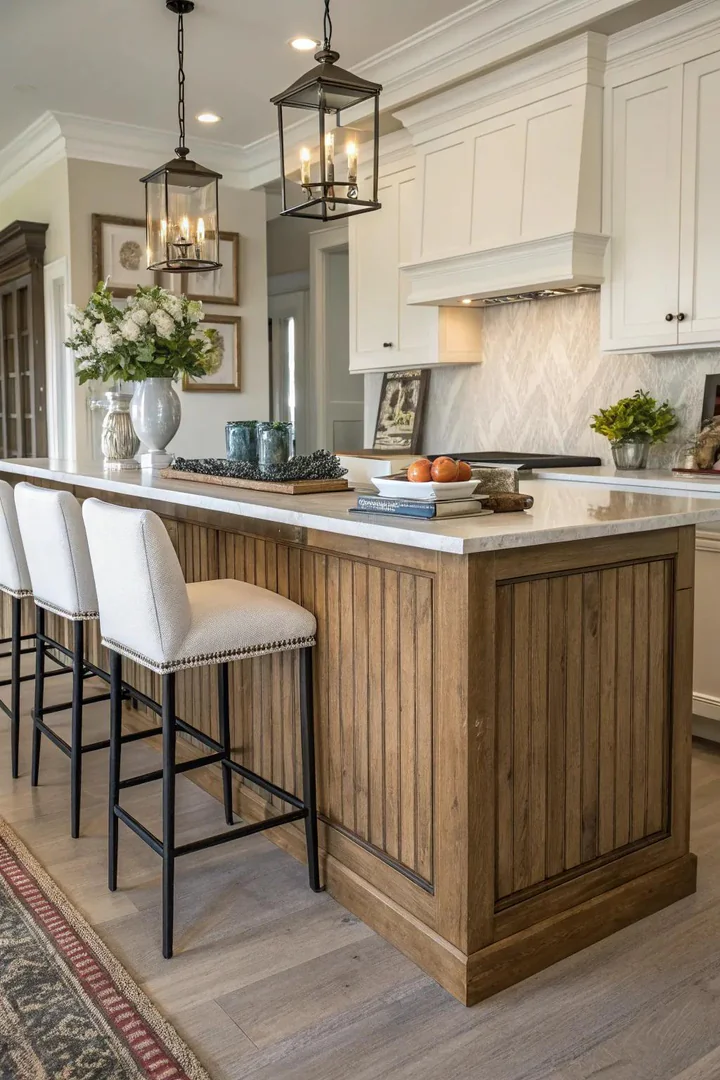
Vertical board-and-batten trim on the peninsula’s exposed panels creates a traditional, Craftsman-style detail using 1/4-inch plywood as the flat board and 1-by-2-inch or 1-by-3-inch pine strips as the battens. Space the battens 8 to 12 inches apart, attach with construction adhesive and pin nails, fill nail holes with wood filler, and paint. The vertical lines of board-and-batten make a low peninsula (34 to 36 inches tall) appear taller and more substantial.
Board-and-batten trim costs $30 to $60 in lumber for a 6-foot peninsula and takes 3 to 4 hours to measure, cut, install, fill, and paint. A router with a chamfer bit ($10) bevels the batten edges for a more refined finish. Board-and-batten suits traditional, Craftsman, transitional, and modern farmhouse kitchens. Painting the trim the same color as the cabinet doors creates a unified surface; painting the trim a shade darker or lighter adds depth without introducing a new color.
6. Built-In Wine Refrigerator
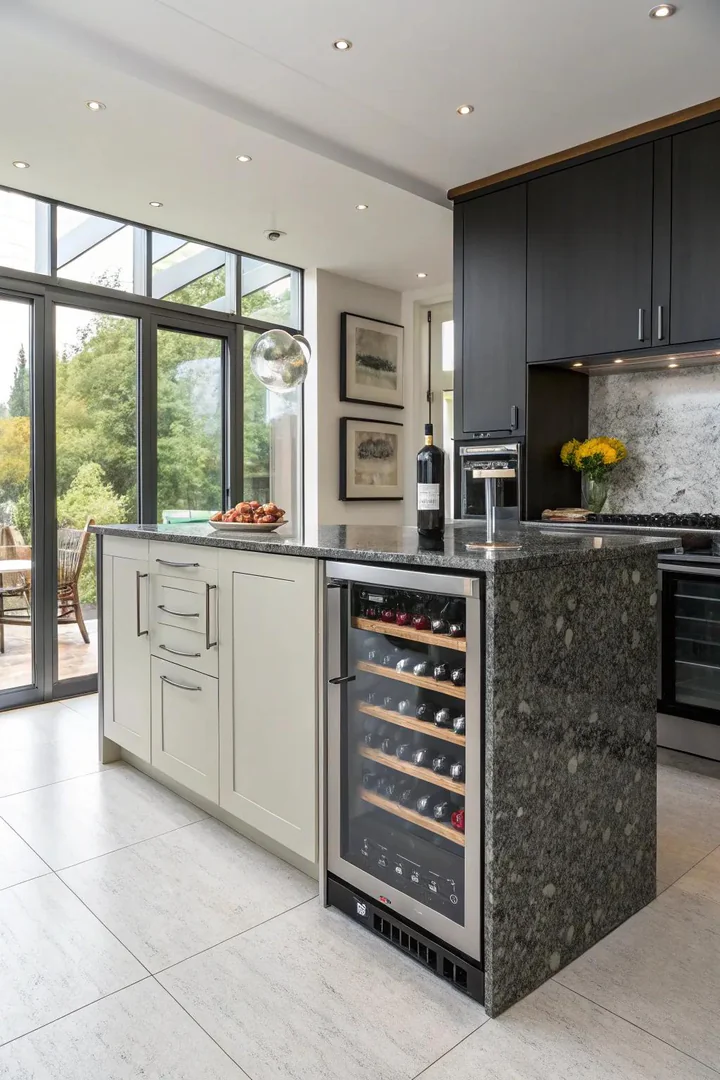
Installing an undercounter wine refrigerator into the peninsula base replaces one standard 24-inch cabinet bay with temperature-controlled wine storage. A NewAir 29-bottle dual-zone wine cooler ($350, 15 inches wide) fits a standard 15-inch cabinet opening. A Zephyr Presrv 24-inch dual-zone ($1,200, holds 45 bottles) fills a full 24-inch bay. Dual-zone models maintain separate temperatures for reds (55°F to 65°F) and whites (45°F to 55°F) in the same unit.
Position the wine cooler on the dining-room or living-room side of the peninsula so guests can access bottles without entering the active cooking zone. A built-in wine cooler requires a dedicated 115V electrical outlet behind or beside the unit (most peninsula bases include at least one outlet on the overhang side). Ventilation clearance (1 to 2 inches on the back and sides for front-venting models) must be maintained to prevent the compressor from overheating inside the enclosed cabinet bay.
7. Coastal-Themed Peninsula
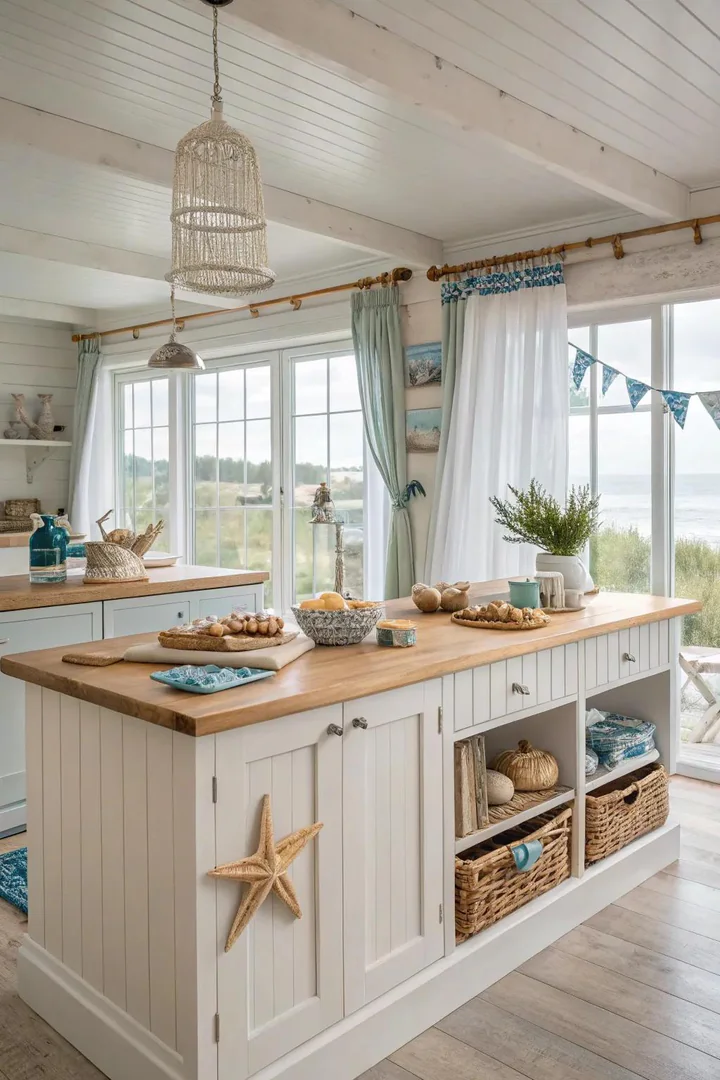
A coastal peninsula pairs white-painted shaker cabinets with a blue-gray quartz countertop (Caesarstone Airy Concrete 4044, $70 to $90 per square foot), brushed nickel cup pulls, and woven rattan bar stools (Serena & Lily Riviera Counter Stool, $400 each). Shiplap or beadboard paneling on the peninsula’s exposed back reinforces the coastal character. A white-and-blue palette (cabinet white + countertop blue-gray + backsplash white subway tile) captures a beach-house atmosphere without themed decor.
Natural materials define coastal style: jute or sisal bar stool seats, linen pendant shades, driftwood-toned floating shelves, and sea-glass jars on the countertop. Avoid literal beach motifs (shell-shaped knobs, anchor prints, starfish decals) that read as gift-shop rather than architectural. Coastal kitchens rely on natural light, so position the peninsula perpendicular to the window wall to avoid blocking daylight from the cooking zone. Explore window treatment ideas at kitchen windows over sink.
8. Peninsula with Built-In Microwave Drawer
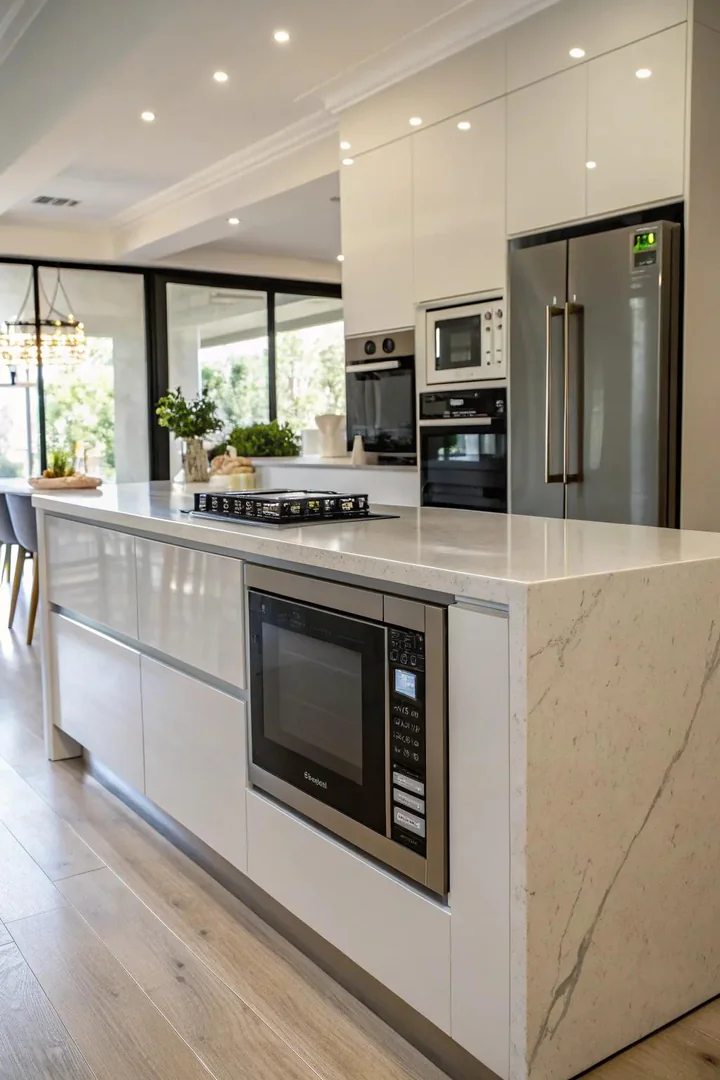
A microwave drawer installed in the peninsula base (Sharp 24-inch Microwave Drawer SMD2489ES, $1,100, or Bosch 800 Series HMD8451UC, $1,300) removes the microwave from the countertop and frees 2 to 3 square feet of prep surface. A microwave drawer opens from the top (pull the drawer toward you) rather than swinging a door outward, eliminating the door-swing clearance that countertop and over-the-range microwaves require.
Position the microwave drawer on the cooking side of the peninsula (not the seating side) so the cook can reheat, defrost, and warm without walking around the peninsula. A dedicated 20-amp circuit with a grounded outlet behind the microwave drawer bay is required by electrical code. The drawer mechanism sits flush with the cabinet face, maintaining the peninsula’s clean cabinet line without the visual bulk of a countertop microwave. A trim kit ($50 to $150 from the microwave manufacturer) finishes the edges where the drawer meets the surrounding cabinet panels.
9. Wine Rack Storage in the Peninsula
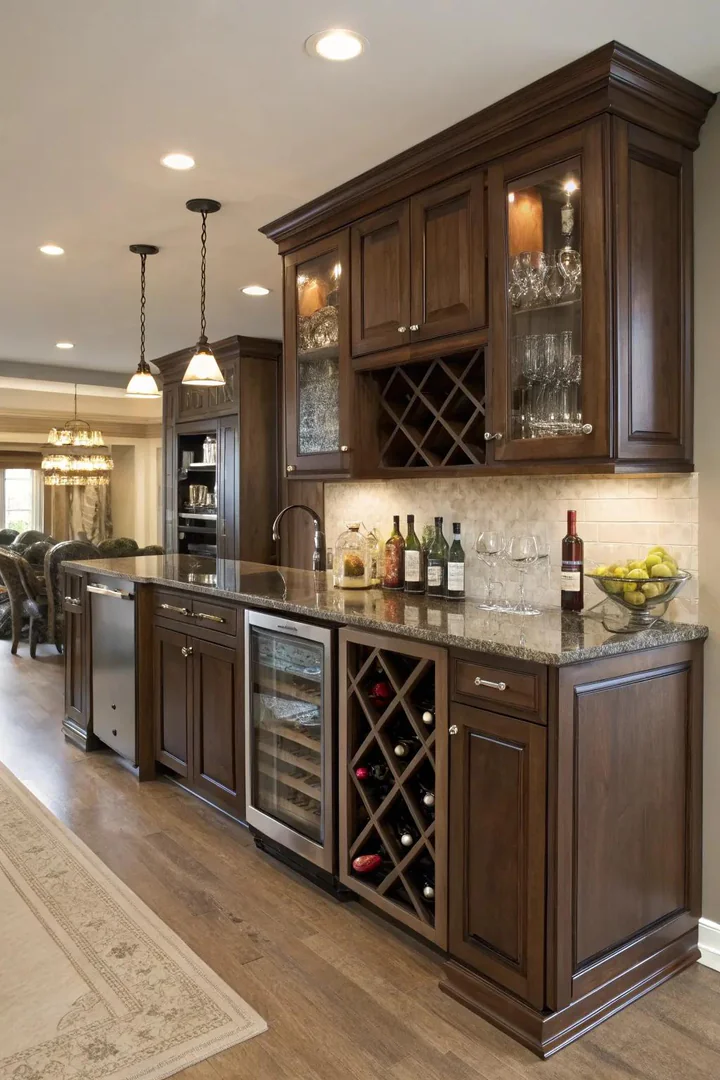
Building a wine rack insert into one bay of the peninsula base stores 12 to 24 bottles in a compact, visible display. A Rev-A-Shelf wine bottle holder ($30 to $50 per rack) fits inside a standard 15-inch or 18-inch base cabinet opening and holds bottles horizontally (proper storage position for corked wines). Custom-built X-shaped wine cubbies from 1-by-4-inch pine ($15 in lumber) create a classic cellar-style display in a 24-inch-wide cabinet bay.
Position wine storage on the dining-room side of the peninsula for easy access during meals and entertaining. A wine rack in the peninsula base keeps bottles at room temperature (not refrigerated), which suits everyday reds and whites consumed within weeks of purchase. Fine wines requiring long-term storage (months to years) need a temperature-controlled wine cooler rather than an ambient rack. A wine rack insert plus a wine cooler in adjacent peninsula bays creates a full beverage station within 48 inches of cabinet width.
10. Peninsula Breakfast Bar with Seating
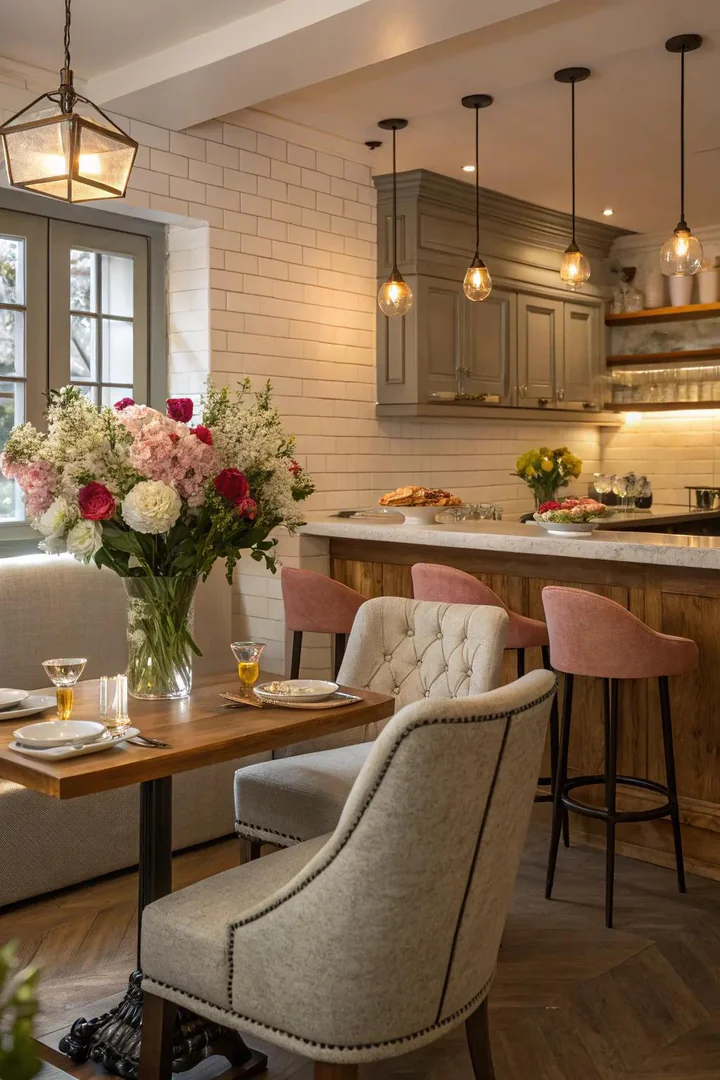
Extending the peninsula countertop 10 to 12 inches beyond the cabinet base on the seating side creates a breakfast bar that seats 2 to 4 people. Allow 24 inches of countertop width per seated person (a 6-foot peninsula seats 3 comfortably). Support the overhang with metal L-brackets ($8 for a 2-pack), wood corbels ($20 each from Ekena Millwork), or a hidden steel support bar ($40 from Federal Brace) rated for the overhang weight plus the leaning weight of seated adults.
Counter-height peninsulas (36 inches tall) pair with 24-inch counter stools; bar-height peninsulas (42 inches tall) pair with 30-inch bar stools. Backless stools tuck completely under the overhang when not in use, preserving the kitchen’s floor space. Stools with backs provide more comfort for longer meals but project 6 to 8 inches beyond the overhang when pushed in. A 42-inch clearance between the peninsula seating side and the nearest wall or appliance allows comfortable seated access without blocking the walking path.
11. Cookbook and Display Shelf Peninsula
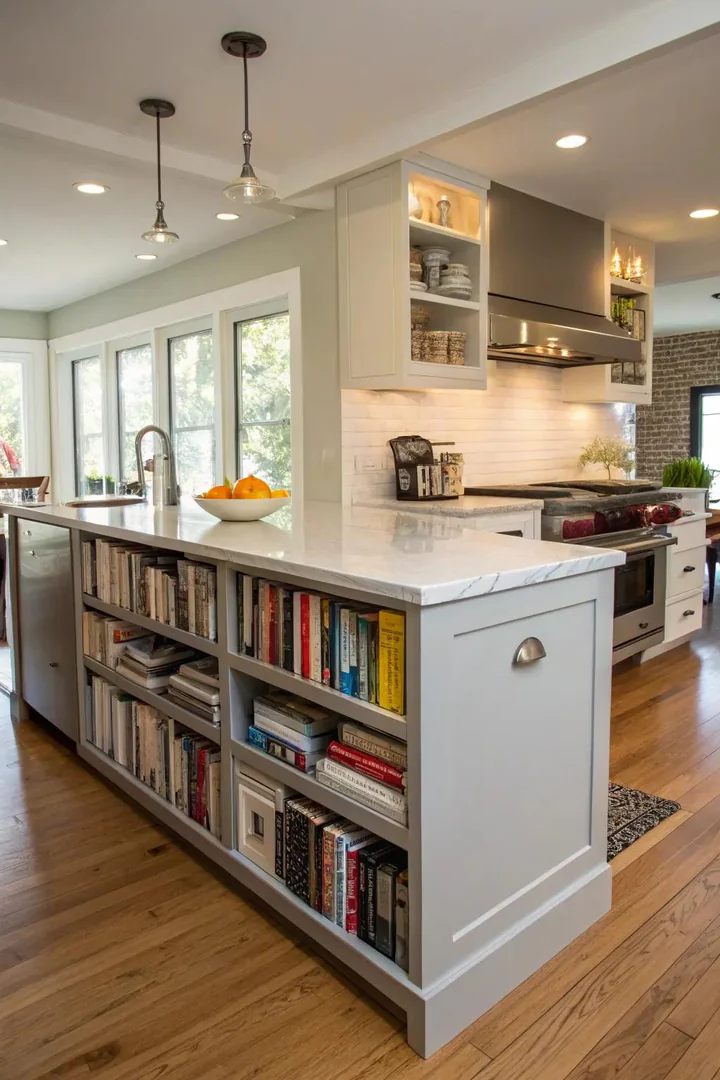
Building open shelving into the dining-room side of the peninsula base creates a built-in bookcase for cookbooks, decorative objects, and kitchen accessories. Two or three open shelves (12 inches deep, 10 to 14 inches tall per shelf) framed with 3/4-inch plywood and trimmed with 1-by-2-inch face frame stock produce a furniture-quality display case. Paint the shelf interior the same color as the cabinets, or paint a contrasting color (navy, forest green, matte black) for visual depth.
Cookbooks stacked horizontally with a small decorative object on top (a ceramic bowl, a potted succulent, a brass bookend) create a styled, living-room-quality display on the peninsula’s public-facing side. Open shelves on the dining side and closed cabinets on the cooking side give the peninsula dual personality: organized storage for the cook, curated display for the family and guests. Shelf depth of 12 inches accommodates standard cookbooks (most measure 8 to 10 inches deep) with room for a small styling object in front.
12. Extended Countertop Overhang
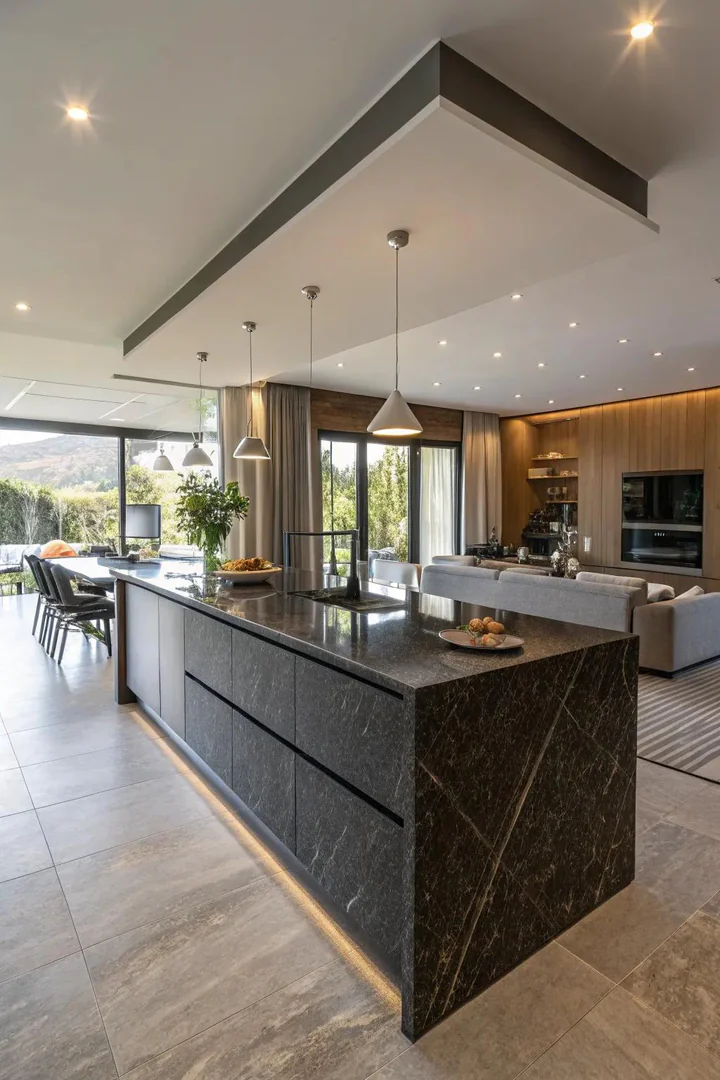
A waterfall-edge countertop that cascades from the peninsula top down the end panel to the floor creates a dramatic, uninterrupted slab of stone or quartz. A waterfall edge requires a mitered joint where the horizontal countertop meets the vertical panel, which a fabricator cuts and bonds with color-matched epoxy. Calacatta quartz or marble with bold veining produces the most dramatic waterfall effect because the vein pattern flows continuously from the countertop surface down the vertical face.
A waterfall end costs $300 to $800 more than a standard finished end panel (depending on material and slab size) because the fabricator must book-match or vein-match the horizontal and vertical pieces from the same slab. The waterfall conceals the cabinet end panel completely, eliminating the need for a decorative end panel or trim. Waterfall edges suit modern, contemporary, and transitional kitchens where clean geometric lines and unbroken material surfaces define the design language.
13. U-Shaped Peninsula Layout
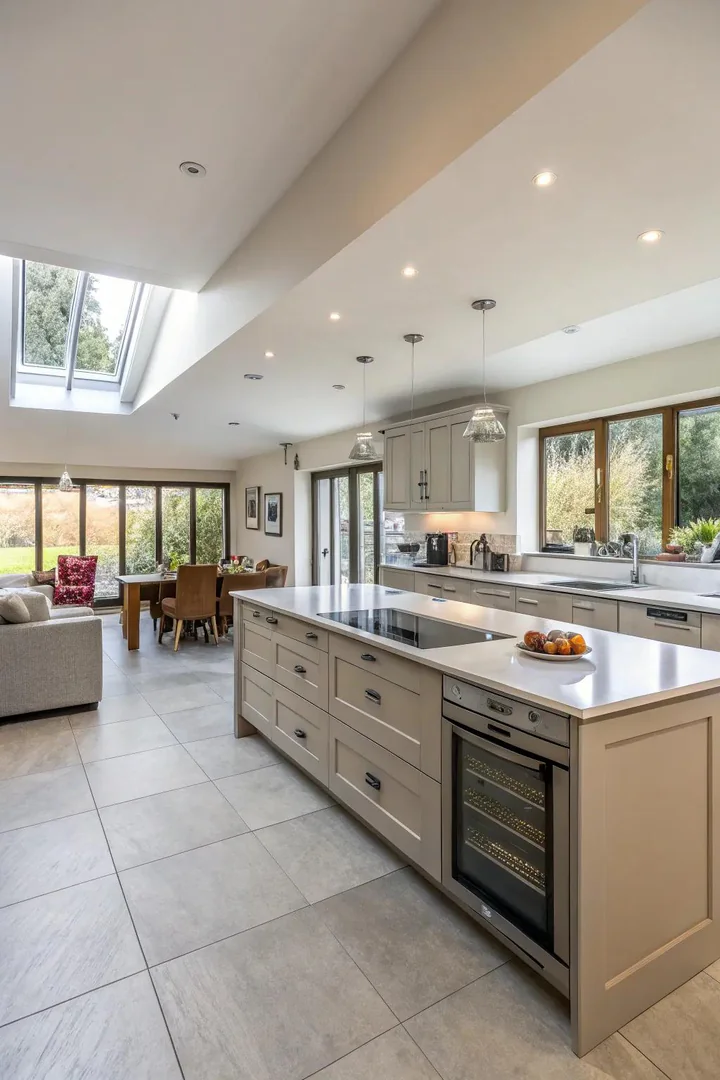
A U-shaped kitchen with a peninsula closing the fourth side (instead of a wall) creates an open-plan layout where the peninsula serves as the visual and functional border between the kitchen and the adjacent living or dining area. The U-shaped peninsula layout provides 3 continuous walls of counter and cabinet space plus the peninsula’s additional 4 to 8 linear feet, totaling 20 to 30 linear feet of combined counter and storage surface in a compact footprint.
The peninsula’s countertop height (36 inches for counter height or 42 inches for bar height) determines whether the adjacent room has a clear sightline into the kitchen. A 42-inch bar-height peninsula partially screens the cooking mess (dirty dishes, cutting boards, prep scraps) from the dining area while maintaining conversation flow. A 36-inch counter-height peninsula maintains a fully open sightline between rooms. Both heights work with stools on the dining side for casual seating and meals.
14. Personalized Peninsula with Open Display
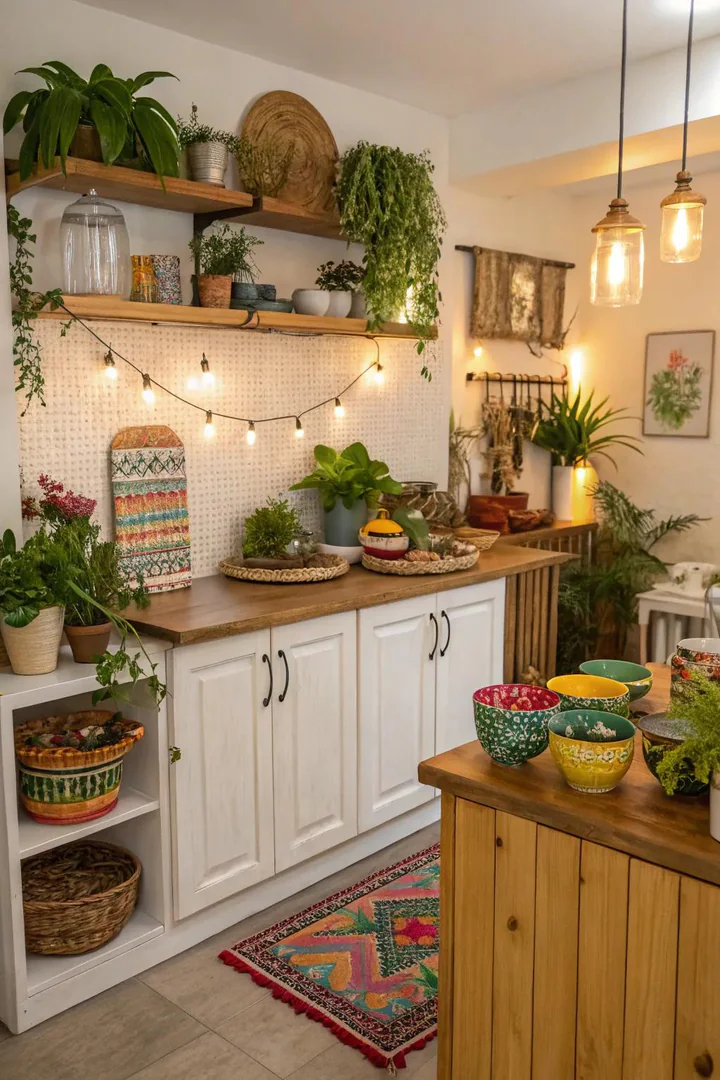
The dining-room side of the peninsula offers a flat display surface (countertop edge), open shelves, and cabinet-top space for personal objects: family photos in simple frames, a collection of ceramic vases, a hand-thrown pottery bowl from a local artist, or a curated stack of vintage cookbooks. Personal objects on the peninsula’s public side soften the kitchen-as-workspace appearance and connect the cooking zone to the home’s personality.
Group display objects in odd numbers (3 or 5 objects per cluster) at varying heights for visual rhythm. A tall object (vase, candlestick), a medium object (framed photo, small sculpture), and a low object (decorative bowl, small potted plant) create a triangle silhouette that reads as intentional rather than cluttered. Rotate personal objects seasonally or when the arrangement feels stale. A peninsula styled with personal objects functions as a console table or sideboard that happens to include kitchen storage and prep surface below.
15. Peninsula as a Zone Divider
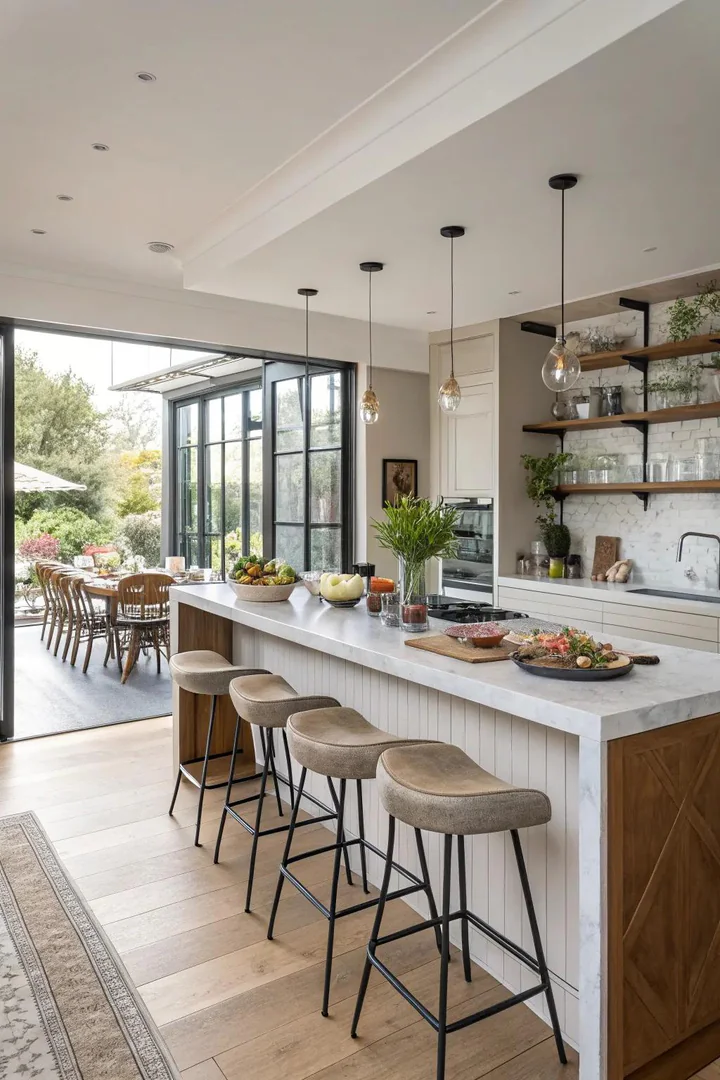
A peninsula projecting 4 to 8 feet from the wall physically separates the kitchen from the living room, dining room, or hallway without a full wall. A peninsula divider maintains the open-plan sightline and conversational connection between rooms while creating a clear boundary: “this side is kitchen, that side is living room.” The peninsula’s countertop height and material provide the visual and tactile cue that marks the zone transition.
A peninsula zone divider works best when the countertop material or color differs from the perimeter kitchen countertops. A butcher-block peninsula top against quartz perimeter counters, or a marble peninsula top against concrete perimeter counters, creates a material distinction that reinforces the zone-dividing function. The peninsula’s seating side (facing the living room) should align with the adjacent room’s furniture arrangement so seated guests face the living room rather than staring at the refrigerator. Browse more layout strategies at kitchen countertop ideas.
16. Contrasting Seating for Visual Interest
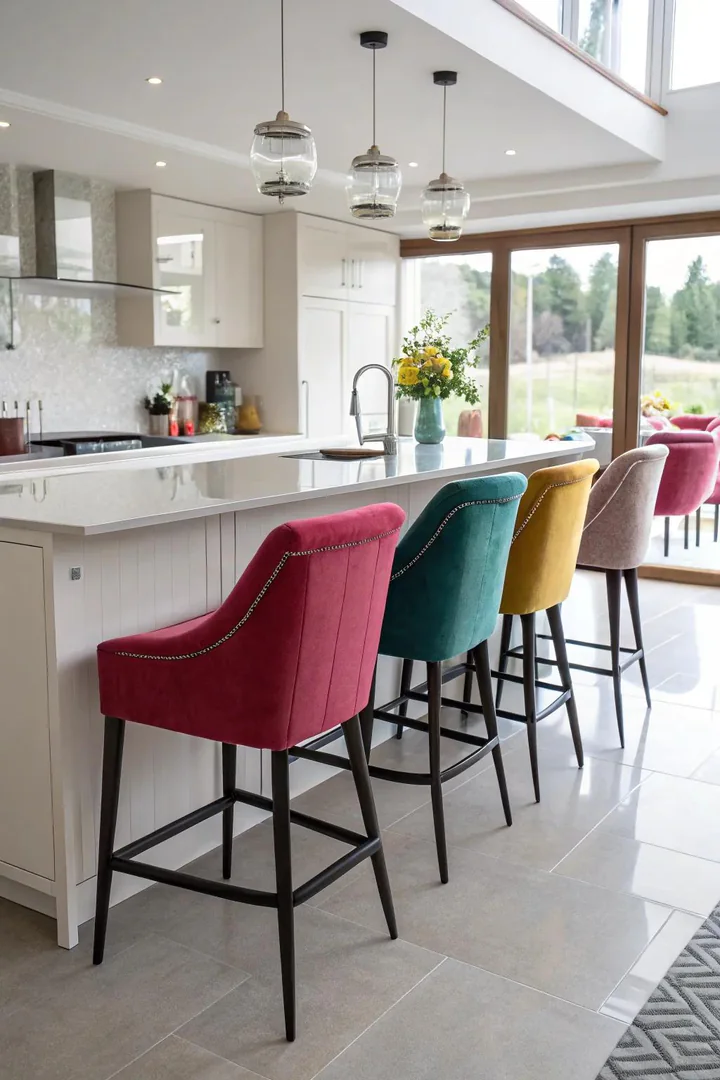
Choosing bar stools in a material or color that contrasts with the peninsula and cabinets creates a layered, collected look. Black metal stools (Target Threshold Tully Metal Counter Stool, $60 each) against white cabinets; natural rattan stools (World Market Lana Rattan Counter Stool, $150 each) against dark-painted cabinets; upholstered velvet stools (Article Sede Counter Stool, $250 each) against wood or stone surfaces. Contrasting stools introduce a new material layer without modifying the built-in cabinetry.
Match the stool’s metal finish (legs, frame, footrest) to the kitchen’s hardware metal. Brass stool legs with brass cabinet pulls; matte black stool legs with matte black cabinet pulls. Mixing stool metals and hardware metals creates visual noise that competes with the peninsula’s material story. Select stools with a low profile and a footrest bar for comfort during meals. Test the stool height against the peninsula countertop before purchasing: the seat-to-countertop gap should measure 10 to 12 inches for comfortable dining posture.
17. Monochromatic Peninsula Design
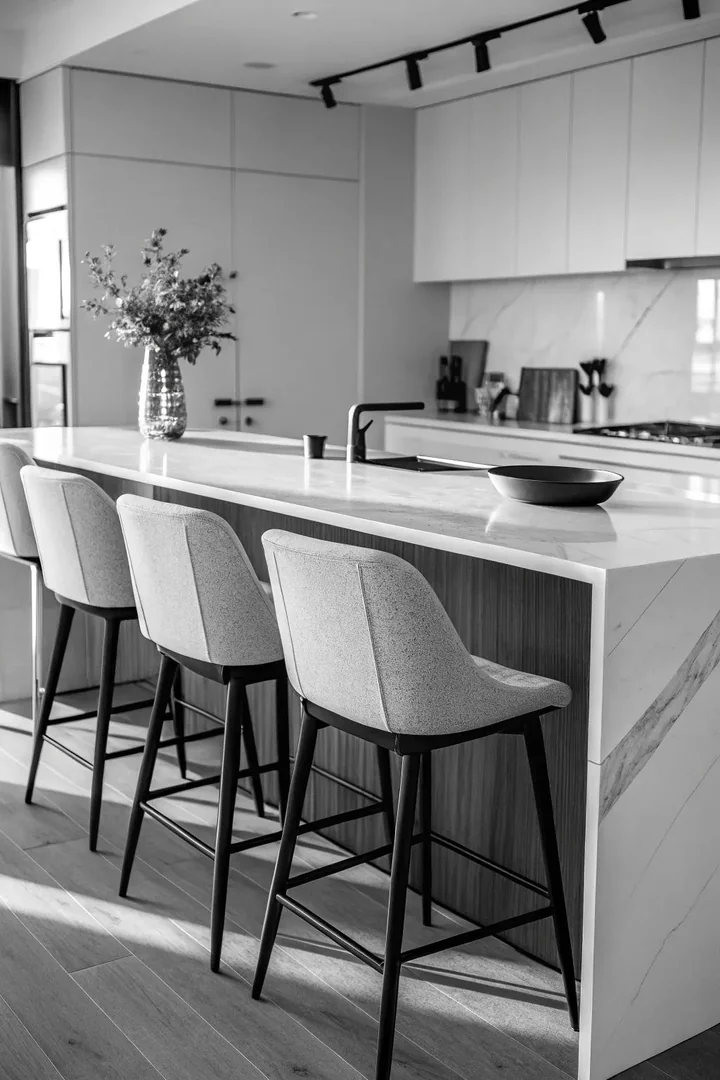
Painting the peninsula cabinets, perimeter cabinets, walls, and trim in the same color family (all white, all gray, all greige, all navy) creates a monochromatic envelope where the kitchen’s forms, textures, and materials produce visual interest rather than color contrast. Benjamin Moore White Dove OC-17 (a warm off-white) on cabinets, walls, and trim with a white quartz countertop and white subway tile backsplash produces a cloud-like, all-white kitchen that reads as calm and spacious.
Monochromatic kitchens rely on texture variation for visual depth: matte cabinet paint, polished stone countertop, glossy tile backsplash, brushed metal hardware, woven textile stool seats. Without texture variation, a monochromatic kitchen reads as flat and institutional. Add one warm accent material (a butcher-block cutting board, a brass pendant light, a wooden stool) to prevent the single-color envelope from reading as cold. A monochromatic peninsula design suits small kitchens because eliminating color contrast removes visual boundaries that make a room feel smaller. Find more cozy kitchen ideas that warm up single-color palettes.
How to Plan a Kitchen Peninsula Layout
1. Measure Available Floor Space and Clearances
A peninsula requires a minimum 42-inch clearance between the peninsula’s cooking side and the opposite wall, appliance, or cabinet run (48 inches is preferred for two-cook kitchens). Measure the wall where the peninsula will attach and the perpendicular distance into the room. A 6-foot peninsula projecting from an 8-foot wall into a room that measures 12 feet wide leaves a 6-foot open walkway, which is comfortable for traffic and seating on the bar side.
2. Choose Between Counter Height and Bar Height
A 36-inch counter-height peninsula matches standard kitchen countertop height and pairs with 24-inch counter stools. A 42-inch bar-height peninsula raises the eating surface above the working countertop level, partially screening kitchen clutter from the dining side. Bar height requires a raised countertop section or a two-level countertop with a step-up at the seating edge. Counter height keeps the entire peninsula surface at one level, simplifying prep and serving.
3. Plan Electrical and Plumbing Before Cabinet Installation
A peninsula with a sink, dishwasher, or cooktop requires plumbing rough-in (supply lines and drain) inside the floor or through the attached wall before the cabinet base is installed. Electrical outlets on the peninsula (code requires outlets every 24 inches along a countertop in most jurisdictions) must be roughed in before the drywall and cabinet installation. Planning these utilities at the framing stage costs 1/5 of what it costs to retrofit them after the kitchen is finished.
4. Select a Countertop Material That Handles the Peninsula’s Double Duty
The peninsula surface serves as both a prep counter (knife work, food prep, appliance staging) and a dining surface (eating, homework, laptop work). Choose a material that handles both roles: quartz (stain-proof, scratch-resistant, easy to clean), granite (heat-resistant, durable, natural), or solid surface (repairable, non-porous). Avoid materials that scratch or stain easily (marble, butcher block) on a peninsula where dining-side use (kids, keys, bags) adds wear beyond normal cooking prep.
Kitchen Peninsula Layout Comparison
| Layout | Peninsula Length | Seats | Min Room Width | Best For |
|---|---|---|---|---|
| Galley + peninsula | 4–6 ft | 2–3 | 10 ft | Narrow kitchens |
| L-shape + peninsula | 5–8 ft | 2–4 | 11 ft | Open-plan separation |
| U-shape + peninsula | 6–10 ft | 3–5 | 12 ft | Maximum storage |
| One-wall + peninsula | 4–6 ft | 2–3 | 9 ft | Studio/apartment |
Frequently Asked Questions
What is the difference between a kitchen peninsula and an island?
A peninsula attaches to an existing wall or cabinet run on one end, requiring open floor space on only three sides. An island stands freestanding with open floor space on all four sides. A peninsula fits kitchens as narrow as 8 to 10 feet wide because the attached side contributes zero clearance requirement. An island requires a minimum 42 to 48 inches of clearance on all four sides, which means the kitchen must measure at least 12 to 13 feet in the island’s direction to accommodate a 3-foot island plus clearance.
How wide should a kitchen peninsula be for comfortable seating?
The peninsula countertop should measure at least 12 inches deep on the overhang (seating) side beyond the cabinet base. Allow 24 inches of countertop width per seated person. A 6-foot-wide peninsula with a 12-inch overhang seats 3 adults comfortably. The total countertop depth (cabinet base depth plus overhang) typically measures 36 to 42 inches, providing 24 inches of usable prep surface on the cooking side and 12 inches of knee space on the seating side.
Does a kitchen peninsula require a building permit?
A peninsula that consists only of cabinets, countertop, and seating (no plumbing, no gas, no electrical modifications) typically does not require a building permit. A peninsula that includes a sink (plumbing), cooktop (gas line), dishwasher (plumbing and electrical), or new electrical circuits requires permits in most jurisdictions. Check with the local building department before starting construction. Permit requirements vary by municipality; some cities require permits for any kitchen modification over $500 in value.
Can you add a peninsula to an existing kitchen without a full remodel?
A peninsula can be retrofitted into an existing kitchen by extending the countertop and adding matching base cabinets perpendicular to the existing cabinet run. Stock base cabinets from IKEA SEKTION ($120 to $300 per cabinet) or Hampton Bay from Home Depot ($100 to $250 per cabinet) in matching door style and finish connect to the existing run with screws through the shared side panel. A new countertop section (cut to match the existing material) covers the top. Retrofitting a peninsula costs $1,000 to $3,000 for cabinets, countertop, and installation.
What countertop overhang is safe without additional support?
Most countertop materials support a 6-inch unsupported overhang without brackets or corbels. Overhangs of 8 to 12 inches require metal L-brackets, wood corbels, or a hidden steel support bar spaced every 24 to 36 inches along the overhang. Overhangs beyond 12 inches require a knee wall, steel legs, or a structural support post. Quartz and granite fabricators include overhang support specifications with the countertop template; follow their recommendations for the specific slab thickness and material. Visit The Designers Company for the full kitchen layout and design library.

