
Wainscoting Kitchen Island Ideas: 22 Classic Looks That Wow Guests
Wainscoting kitchen island ideas give you a way to add architectural detail, visual texture, and period character to the largest flat surface in your kitchen — the island’s front and side panels. Without wainscoting, a kitchen island is a plain box wrapped in flat panels or drywall. With wainscoting, the same island gains the depth, shadow lines, and craftsmanship of a built-in furniture piece that anchors the room’s design.
The 22 wainscoting styles below cover every aesthetic from crisp white raised panels to reclaimed barn wood, brushed metal inlays, and three-dimensional sculpted surfaces. Each idea includes material options, typical costs, and installation guidance so you can match the wainscoting to your kitchen’s style and your budget.
1. Timeless White Sophistication

White raised-panel wainscoting is the most traditional and widely used island treatment — flat stile-and-rail frames with a raised center panel, painted in the same white as the kitchen cabinetry. Benjamin Moore’s Simply White (OC-117), Sherwin-Williams’ Extra White (SW 7006), and Farrow & Ball’s All White (No. 2005) are the three most-specified whites for kitchen wainscoting because they read as clean and bright under both natural and artificial light without the yellow cast that cream-based whites develop over time.
The raised-panel profile creates shadow lines that give the island visual depth and architectural weight — the center panel sits about 3/8 inch above the frame, casting a subtle shadow along each rail and stile. Use MDF (medium-density fiberboard) rather than solid wood for the panels if you are painting them white — MDF takes paint more smoothly than wood, does not show grain through the paint, and is less expensive. A four-panel wainscoting treatment on a standard 8-foot island costs $300 to $600 in materials (MDF panels, paint, adhesive, and trim) plus $200 to $400 in labor if you hire a finish carpenter.
2. Charming Wooden Aesthetic
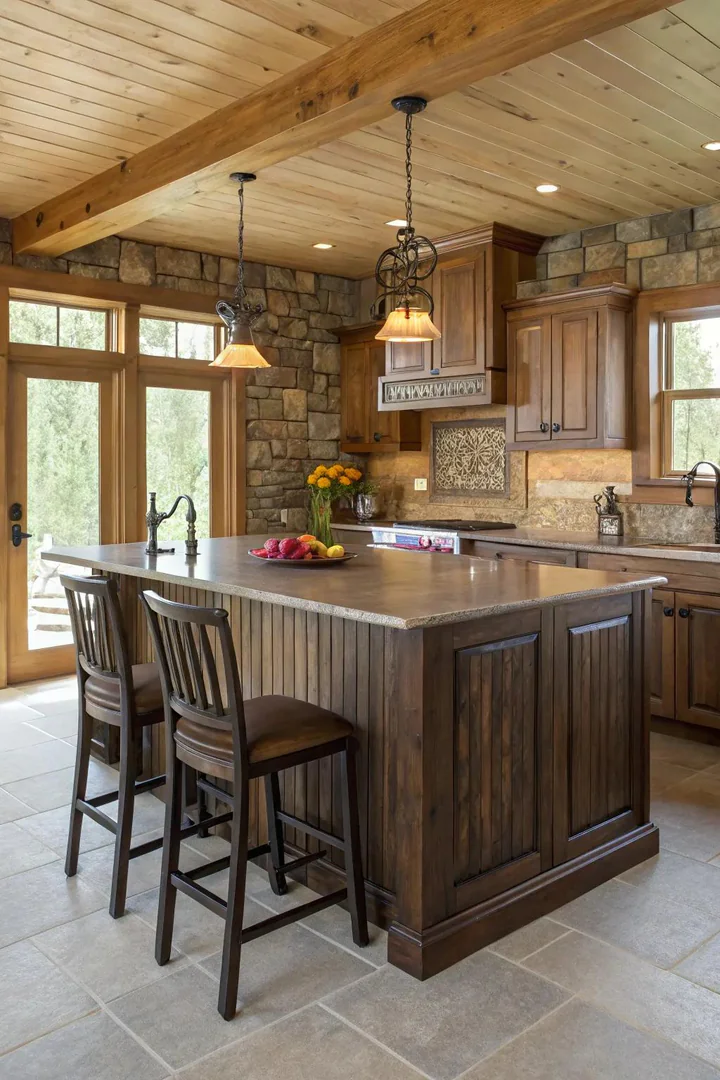
Natural wood wainscoting — tongue-and-groove planks, shiplap boards, or reclaimed barn wood — brings warmth, texture, and organic character to a kitchen island in a way that painted MDF cannot replicate. Cedar, pine, and oak are the most common species for kitchen wainscoting: cedar resists moisture naturally, pine takes stain well and costs less ($2 to $4 per board foot), and oak provides a harder surface that resists dents and scratches from kitchen traffic.
Apply a clear matte polyurethane (Minwax Polycrylic or General Finishes High Performance) to seal the wood against moisture and food splashes without adding a plastic-looking sheen. For a more rustic look, use reclaimed wood planks with their original patina, nail holes, and weathered grain intact — companies like Stikwood, Plank & Mill, and E&S Reclaimed sell pre-finished peel-and-stick reclaimed wood panels that install directly onto the island’s flat panels with adhesive backing, requiring no nails, no sanding, and no finishing. A natural wood wainscoting treatment suits farmhouse kitchen cabinet styles and rustic kitchens where the wood grain adds to the room’s handmade, lived-in character.
3. Contemporary Simplicity
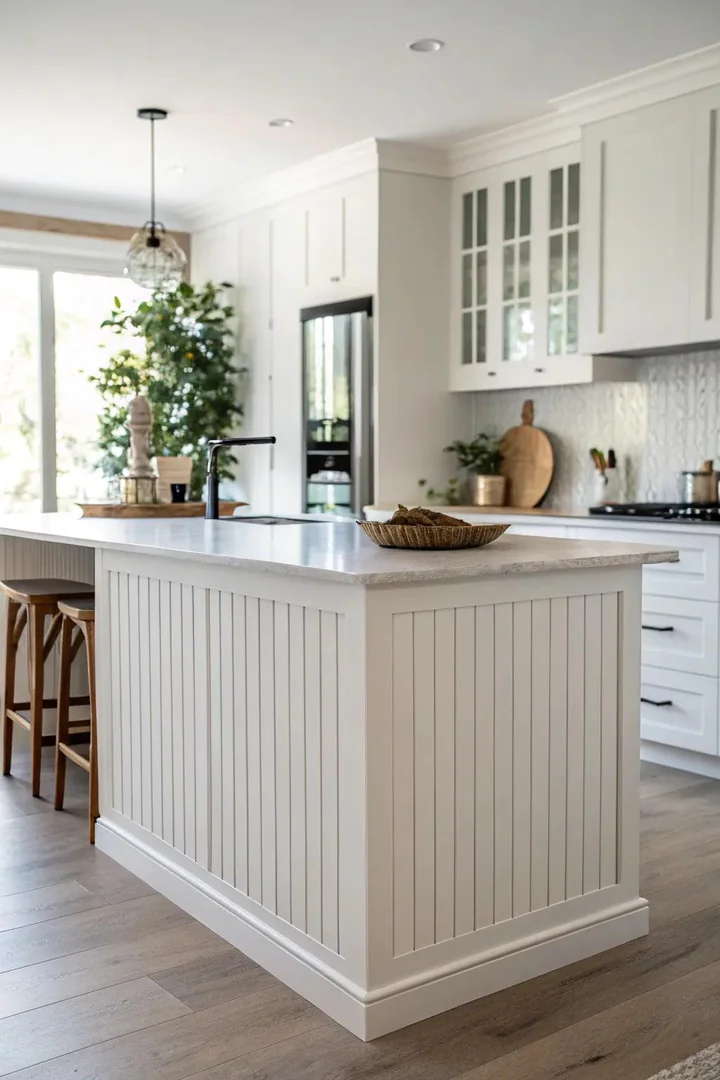
Modern minimalist wainscoting strips the profile down to its simplest form — flat panels with flush, square-edged frames and no raised center panel, no molding curves, and no decorative profiles. The panels create a subtle grid of recessed rectangles on the island’s face that reads as clean and architectural without the ornamental detail of traditional raised-panel wainscoting. The flat-panel style works in contemporary, Scandinavian, and transitional kitchens where ornate millwork would look out of place.
Use 1/4-inch MDF or plywood panels glued to the island face with construction adhesive (Liquid Nails or Loctite PL Premium), framed by flat 1×2 or 1×3 poplar strips mitered at the corners. The total profile depth is less than half an inch, keeping the island’s footprint slim and the lines sharp. Paint the panels and frames in the same flat or eggshell sheen as the island base color — the subtle shadow between the frame and the panel provides enough visual interest without additional color contrast.
4. Vibrant Color Declaration
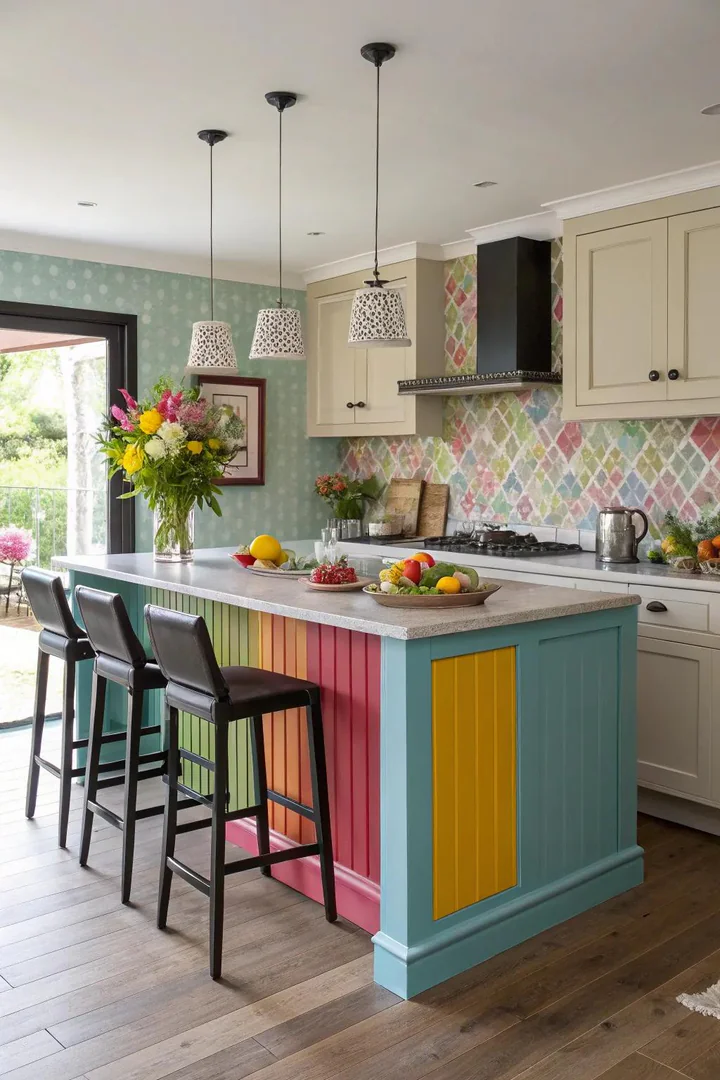
Painting the island wainscoting in a bold, saturated color — navy blue, forest green, deep charcoal, or rich burgundy — turns the island into the kitchen’s visual anchor and gives the room a focal point that the perimeter cabinetry orbits. Benjamin Moore’s Hale Navy (HC-154), Sherwin-Williams’ Pewter Green (SW 6208), and Farrow & Ball’s Railings (No. 31) are three of the most popular bold colors for kitchen islands because they pair well with white or light-toned perimeter cabinets.
The bold color works because the wainscoting’s panel profile adds dimension and shadow that prevent the dark paint from looking flat or heavy. A navy wainscoted island in a white kitchen feels grounded and intentional, not stark. Use a satin or semi-gloss sheen on the wainscoting (rather than flat or matte) so the surface resists kitchen grease and wipes clean — bold colors show fingerprints and food splashes more readily than whites, so a washable sheen is practical, not just aesthetic. For guidance on choosing island and cabinet colors that work together, see our kitchen cabinet color ideas guide.
5. Combine and Vary Materials
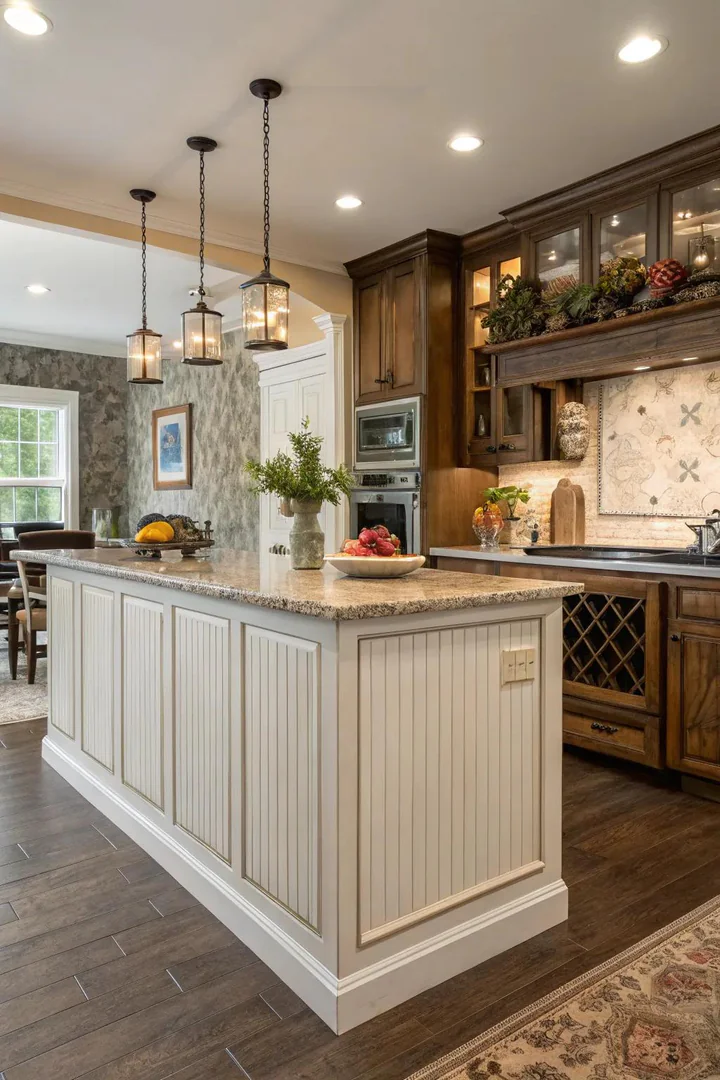
Combining two or more materials in the island’s wainscoting — wood panels below with a stone or tile inlay above, or painted MDF frames with a grasscloth or wallpaper center panel — creates a layered, custom look that a single material cannot achieve. The material break typically occurs at the chair-rail line (about 32 to 36 inches above the floor), with the more durable material on the lower section where it absorbs kicks and scuffs and the more decorative material on the upper section where it catches the eye.
Popular combinations include shiplap below + beadboard above (two wood textures that read differently), painted MDF frames below + natural wood center panels above (contrast between smooth paint and visible grain), and tongue-and-groove planks below + subway tile above (the tile wraps from the island up to the countertop edge, creating a waterproof transition zone). Keep the material palette to two — three materials on a single island face starts to look busy rather than layered.
6. Country Style Elegance
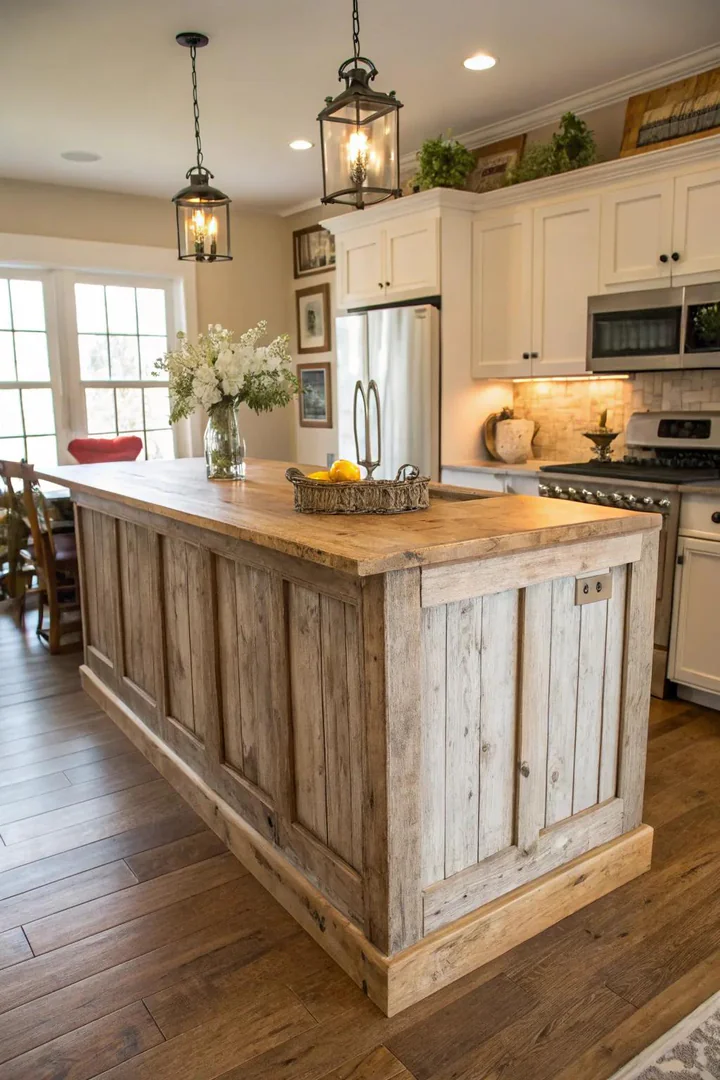
Distressed wainscoting — beadboard or V-groove planks with a chippy paint finish, sanded edges, and visible nail holes — gives the island a farmhouse character that looks like it has been part of the kitchen for decades. The distressed finish works by applying two colors of paint (a base coat in a contrasting color and a top coat in white or cream), then sanding through the top coat at the edges, corners, and high spots where natural wear would occur over time.
For an authentic aged look, use Annie Sloan Chalk Paint or Fusion Mineral Paint, which sand and distress more easily than standard latex paints. Apply the paint with a brush (not a roller) to leave subtle brush strokes that mimic hand-applied finishes. Seal the distressed surface with a clear wax (Annie Sloan Clear Wax) or a matte polyurethane to protect the finish without adding unwanted sheen. The distressed farmhouse wainscoting pairs naturally with butcher block countertops, apron-front sinks, and open shelving.
7. Geometric Designs
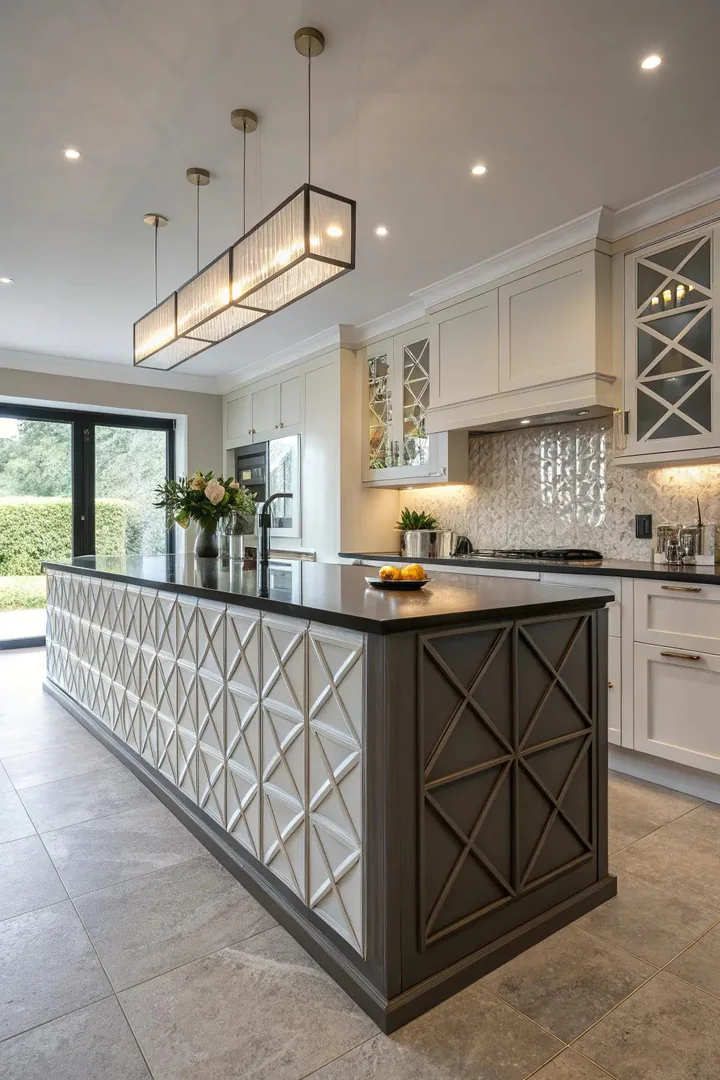
Geometric wainscoting replaces the traditional rectangular panel grid with diamond shapes, chevrons, hexagons, or overlapping circles created by arranging flat wood strips in non-rectilinear patterns on the island face. The strips (typically 1/4-inch x 1-1/2-inch lattice or screen molding) are cut at precise angles with a miter saw and glued to the island panel in the desired pattern, creating a three-dimensional surface that catches light differently depending on the viewing angle.
Herringbone and chevron are the most popular geometric patterns for island wainscoting because they are visually striking but relatively simple to cut and install — both patterns use identical 45-degree cuts repeated across the panel. Diamond patterns require more precise alignment but create a bolder visual effect. Paint the geometric pattern in the same color as the base panel (so the pattern reads as a texture rather than a color contrast) or in a contrasting color (so the pattern reads as a graphic element). Geometric wainscoting suits modern, transitional, and mid-century kitchens.
8. Classic Appeal
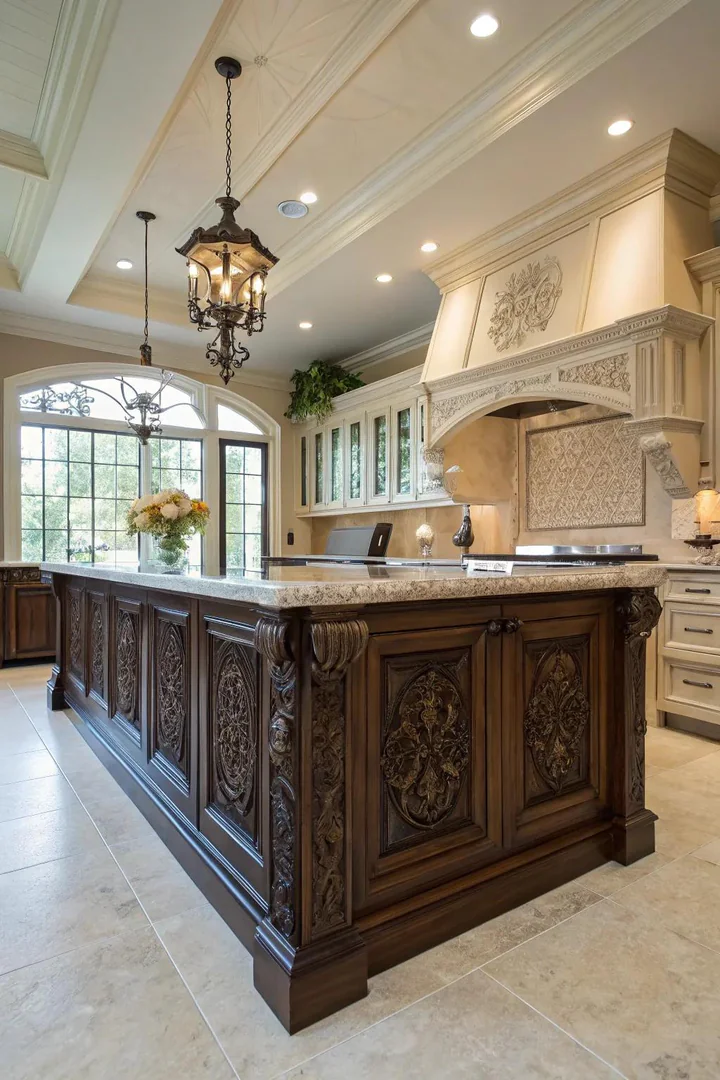
Traditional ornate wainscoting uses raised panels with profiled edges (ogee, cove, or bead-and-cove profiles), applied molding, and a chair-rail cap to create the rich, layered millwork found in Colonial, Georgian, and Federal-style kitchens. The profile depth — typically 5/8 to 3/4 inch — creates pronounced shadow lines that give the island face the look of custom furniture rather than flat cabinetry.
Order pre-made raised panel kits from Wainscot Solutions, New England Classic, or Elite Trimworks — these companies produce MDF panel systems in standard island dimensions that ship flat and install with adhesive and brad nails. A full traditional panel treatment (panels, chair rail, baseboard, and corner molding) costs $500 to $1,200 for a standard 8-foot island depending on the profile complexity and the number of panels. The ornate style works best in kitchens with crown molding, paneled cabinet doors, and other traditional millwork details that the island wainscoting can reference.
9. Differing Textures
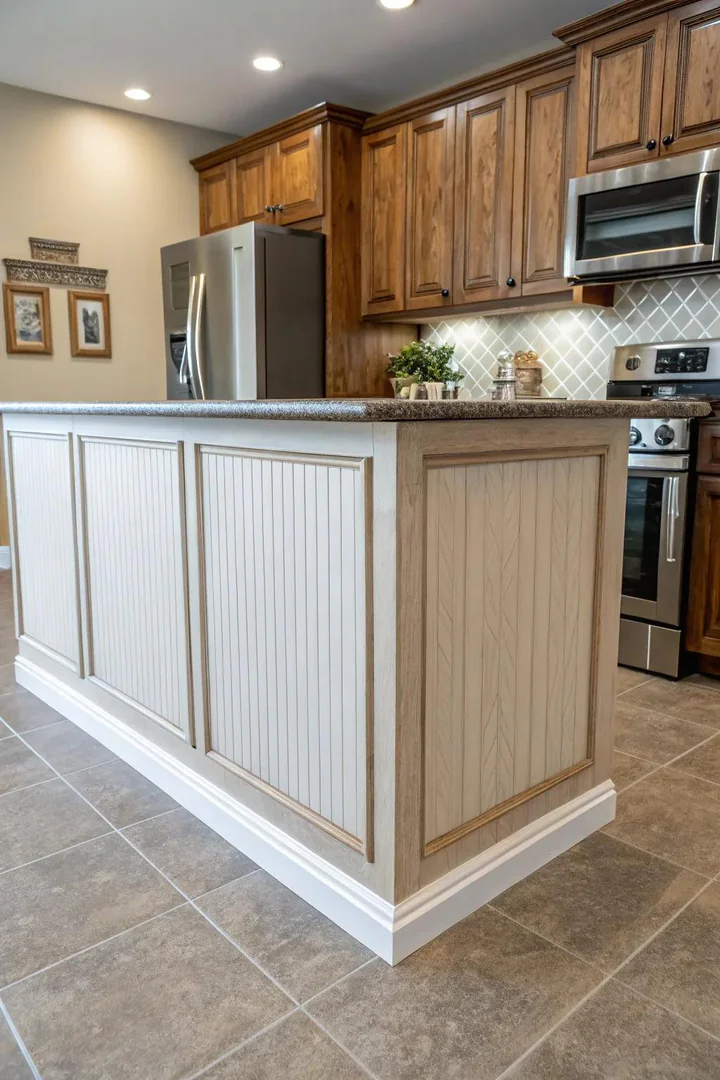
Combining smooth and rough textures on the same island face — smooth painted frames with rough-sawn wood center panels, or polished tile inlays within brushed-finish metal surrounds — creates visual depth through tactile contrast rather than color contrast. The eye perceives the two surfaces as separate planes even when they are the same color, which gives the island face a dimensional quality that a single uniform texture cannot produce.
The most accessible version of this technique uses smooth MDF stile-and-rail frames with a textured center panel — rough-sawn cedar, brushed oak, wire-brushed walnut, or even concrete board (James Hardie fiber cement) cut to fit inside the frame. Paint both the frame and the panel in the same color (white, grey, or navy work well) so the texture difference, not the color, provides the contrast. The rough panel catches light at different angles and creates micro-shadows across its surface, while the smooth frame reads as crisp and clean.
10. Metal Accents
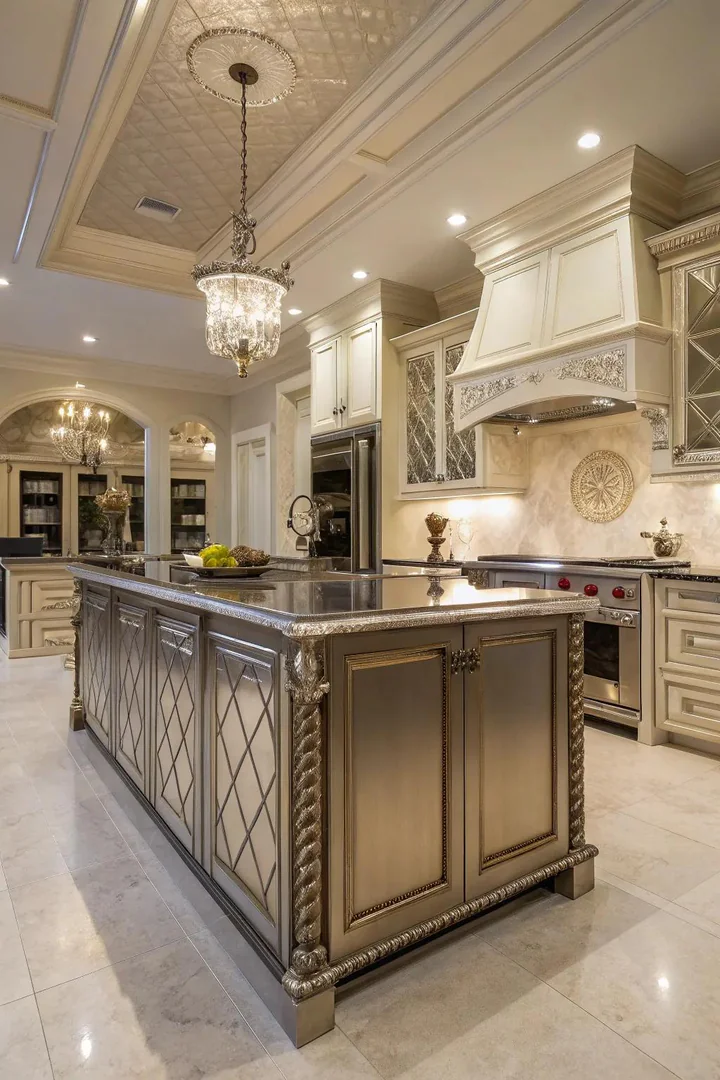
Metal accents within the wainscoting — brass inlay strips between panels, brushed-nickel frame edges, copper sheet center panels, or zinc-plated decorative nailheads along the frame joints — add a metallic shimmer that painted wood alone cannot provide. The metal can be structural (flat bar stock used as the stile-and-rail frame) or decorative (thin metal sheet or foil applied over a wood or MDF substrate).
For a practical approach, use metallic peel-and-stick film (d-c-fix, Con-Tact Brand, or Duck Brand) applied to the center panels of an existing wainscoting frame — the film comes in brushed stainless, brushed gold, and hammered copper finishes that look surprisingly realistic from a normal viewing distance. For a more permanent and higher-end result, have a metal fabricator cut thin-gauge sheets (22 to 26 gauge) of brass, copper, or zinc to panel dimensions and fasten them to the island face with construction adhesive and decorative rivets. Metallic wainscoting pairs well with dark cabinets and stone countertops in kitchens aiming for a glamorous, high-contrast look.
11. Beachy Atmosphere
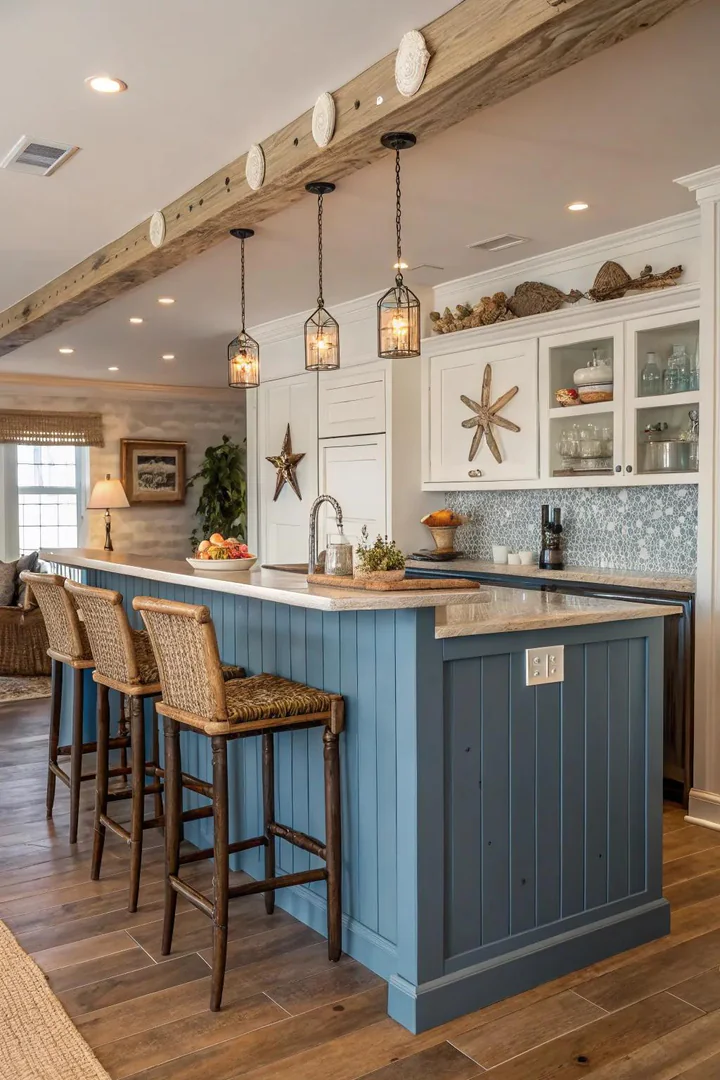
Coastal-themed wainscoting uses horizontal beadboard or V-groove planks painted in soft coastal colors — seafoam green, pale blue, sandy beige, or weathered grey — to evoke the look of a New England beach cottage or a coastal Carolina kitchen. The horizontal orientation of the planks (rather than vertical) references the horizontal lines of shiplap siding on waterfront homes and creates a relaxed, informal mood that suits open kitchens with views of water, sand, or garden.
Benjamin Moore’s Palladian Blue (HC-144), Sherwin-Williams’ Sea Salt (SW 6204), and Farrow & Ball’s Light Blue (No. 22) are coastal wainscoting staples that pair naturally with white countertops, brass hardware, and natural fiber accents (jute rugs, rattan bar stools, woven pendant lights). The beadboard panels are inexpensive ($15 to $25 per 4×8 sheet from Home Depot or Lowe’s) and install with adhesive and brad nails in an afternoon. Seal the surface with a semi-gloss polyurethane to protect against kitchen moisture.
12. Impact of Art Deco
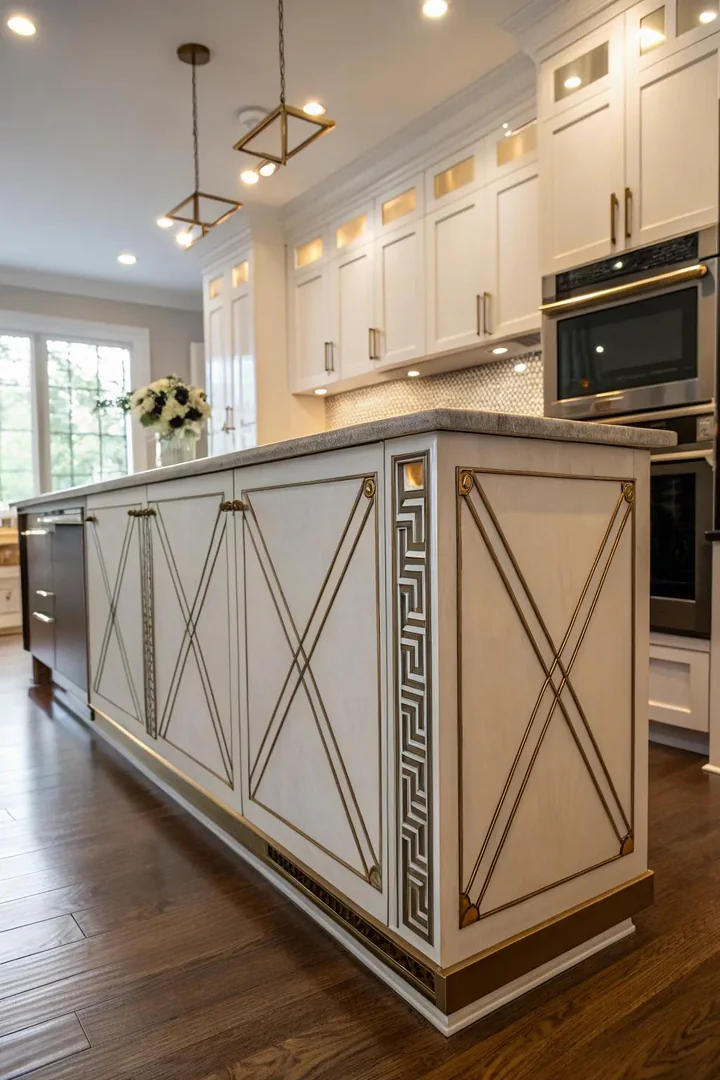
Art Deco wainscoting draws from the geometric, fan-shaped, and sunburst motifs of 1920s and 1930s architecture — arched panels, stepped profiles, and radial patterns that create a theatrical, glamorous effect on the island face. The key Art Deco elements are symmetry, repetition, and metallic accents: panels arranged in a perfectly symmetrical grid, each panel repeating an identical geometric motif, with gold, brass, or chrome trim highlighting the pattern edges.
Build the Art Deco profile by layering flat MDF strips in stepped, receding layers — each layer slightly smaller than the one below it, creating a stepped pyramid effect within each panel. Paint the layered panels in a rich color (black, emerald, or navy) with metallic gold or brass paint applied to the strip edges for contrast. The stepped profile and metallic highlights give the island a jewel-box quality that suits high-end kitchens with marble countertops, statement pendant lights, and lacquered cabinetry.
13. Subtle Elegance
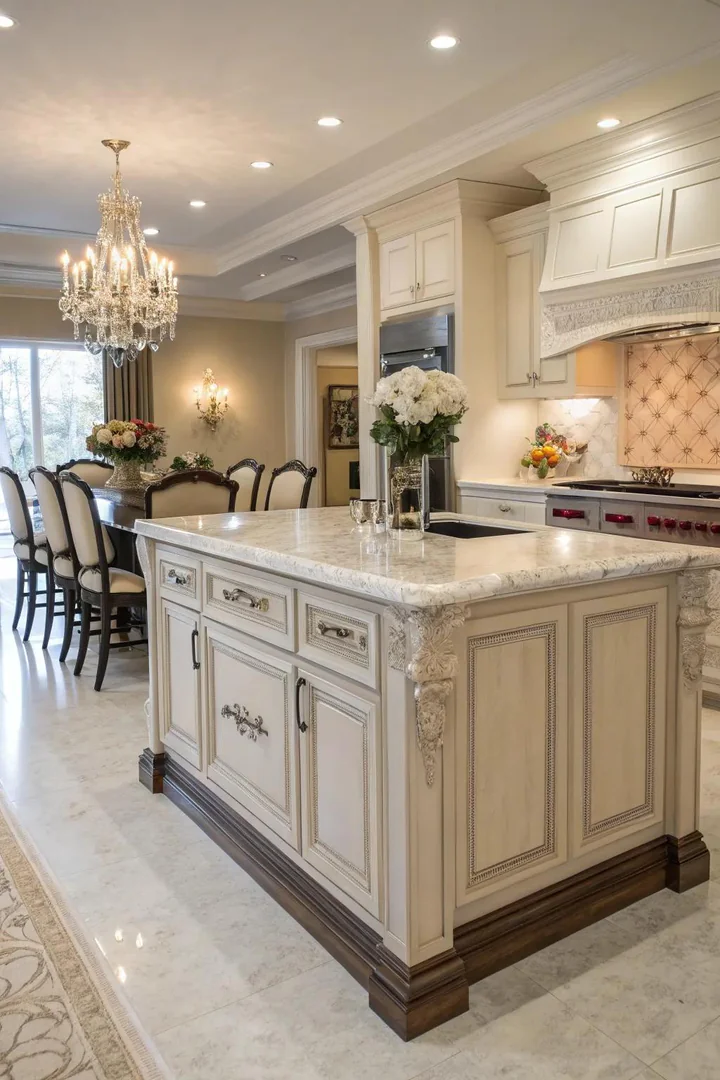
Understated luxury wainscoting uses high-quality materials and precise craftsmanship with minimal visual fuss — flat panels in flawless paint with hairline-thin shadow gaps, perfectly flush joints, and no visible fasteners. The quality is in the execution, not the ornamentation: every edge is sharp, every gap is uniform, every surface is sanded to 220-grit smoothness before three coats of sprayed lacquer.
This approach works best when the island is a neutral color (warm white, soft grey, or greige) and the material quality speaks through the finish rather than through decorative profiles. Spray application (using an HVLP sprayer or a professional cabinet finisher) produces a smoother, more even finish than brush or roller and eliminates brush marks and roller stipple. The cost premium for spray-finished wainscoting ($300 to $600 for professional spraying) is visible in the final result — the surface looks factory-finished rather than hand-painted, which is the hallmark of understated quality. For inspiration on luxury island finishes, see our luxury marble kitchen guide.
14. Diverse Collection
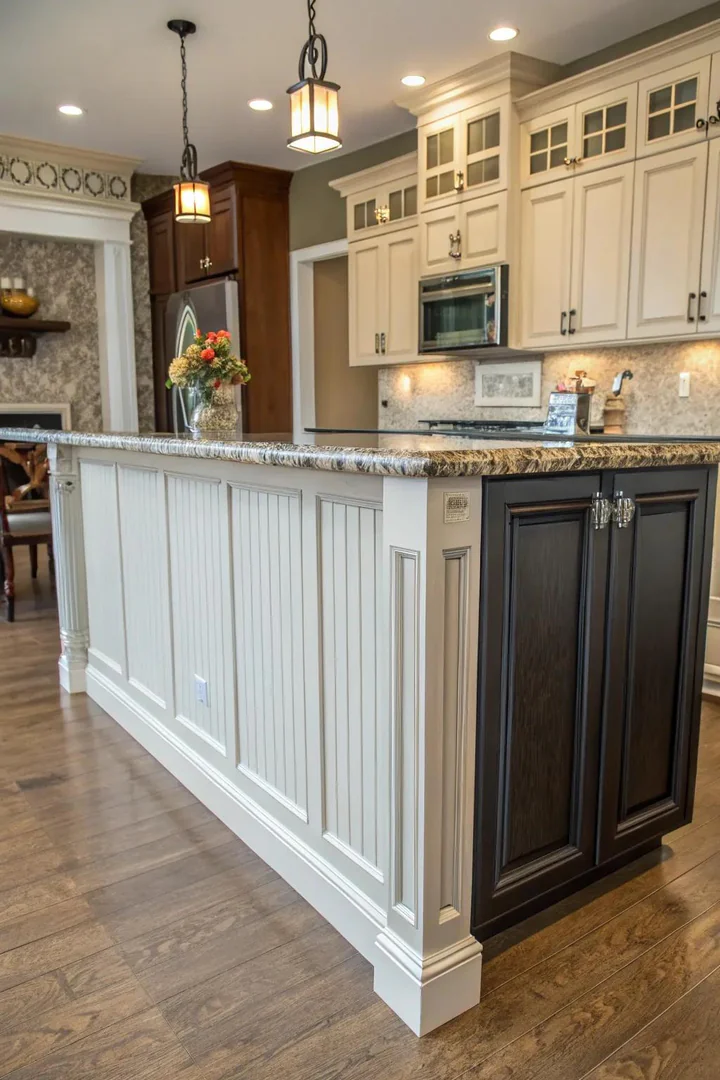
An eclectic wainscoting treatment uses different panel styles on different faces of the island — raised panels on the front, beadboard on the sides, and flat panels on the back — or different materials and finishes within a single face to create a collected, one-of-a-kind look that defies a single style category. This approach works in kitchens that already mix styles (a modern range in a farmhouse kitchen, or industrial bar stools at a traditional island) where strict consistency would feel forced.
The key to making eclectic wainscoting look intentional rather than random is to use a unifying element across all the different treatments — the same paint color on every panel regardless of profile, the same wood species regardless of finish, or the same trim size and proportion regardless of the panel interior. The unifying element ties the variations together so the island reads as “curated” rather than “leftover scraps.” Limit the eclectic mix to two or three variations — more than three starts to look chaotic.
15. Industrial Periphery
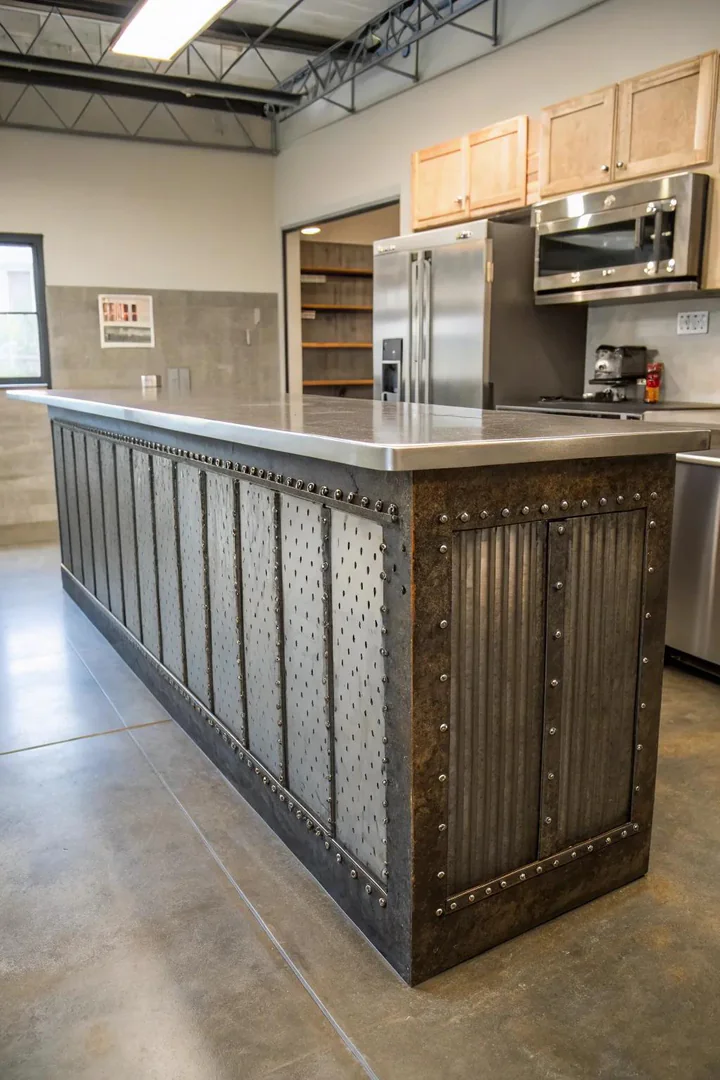
Industrial wainscoting uses materials and finishes from commercial and factory architecture — corrugated metal panels, blackened steel flat bar, riveted steel sheets, or raw concrete board — applied to the island face with exposed fasteners and unfinished edges. The aesthetic celebrates the material’s raw, manufactured character rather than hiding it behind paint and trim.
Corrugated metal roofing panels (available at Home Depot and local metal suppliers for $15 to $25 per sheet) cut to island-panel dimensions and fastened with exposed screws or rivets create a bold industrial wainscoting treatment for under $100 in materials. Flat bar steel (1/8 inch thick by 1-1/2 inches wide) welded or bolted into a frame around the corrugated panel adds structure and a finished edge. Seal the steel with a clear matte lacquer or a paste wax (Renaissance Wax) to prevent rust without adding shine. Industrial wainscoting suits loft-style kitchens with exposed ductwork, concrete floors, and stainless steel countertops.
16. One-Color Enchantment
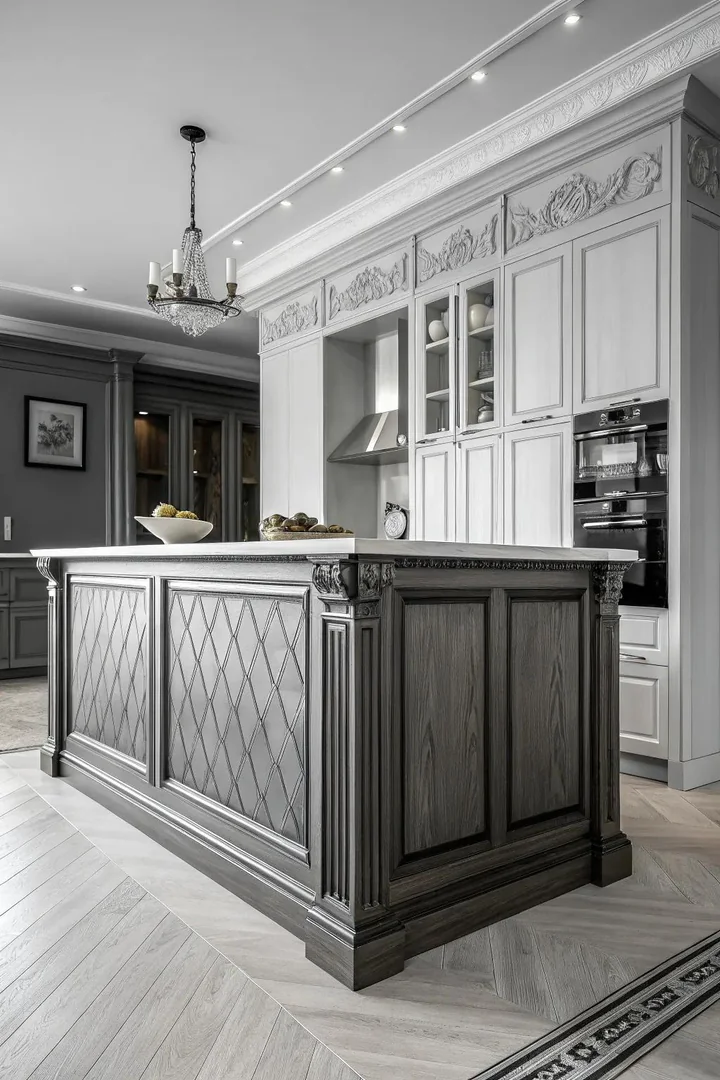
Painting the island wainscoting, the island base, the countertop edge, and even the bar stools in a single color creates a monochrome effect that makes the island read as a solid sculptural object rather than an assembly of separate parts. The wainscoting profile provides the visual interest that the single color removes — shadow lines, panel recesses, and frame edges become the only variables on the surface, which amplifies their visual impact.
Black, white, and warm grey are the three most effective monochrome island colors because they are neutral enough to absorb the shadow variations without the shadows reading as stains or defects. A fully black island with black wainscoting (Benjamin Moore’s Black (2132-10) in semi-gloss) looks dramatic and grounded in a white kitchen. A fully white island with white wainscoting disappears into a white kitchen’s background, letting the countertop and the objects on the island provide all the color and contrast.
17. Tactile Pleasure
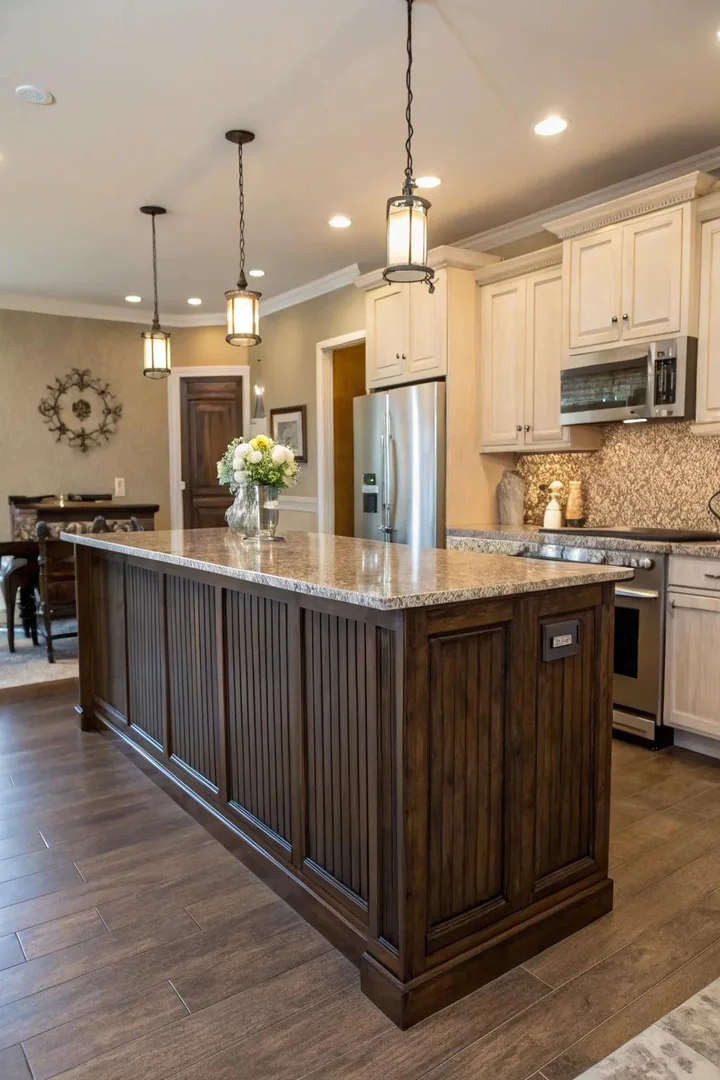
Textural wainscoting prioritizes the feel of the surface as much as its visual appearance — rough-sawn planks with visible saw marks, hand-scraped wood with uneven ridges, rattan cane webbing stretched across a frame, or woven bamboo panels with a natural fibrous surface. These textures invite touch and create a sensory experience that smooth painted surfaces do not provide.
Rattan cane webbing (available by the roll from Cane & Basket Supply or Amazon) stretched across a wooden frame and stapled on the back is a trending option that adds a bohemian, organic texture to the island for under $50 per panel. The cane webbing allows air circulation (useful if the island has open shelving or a warm appliance inside) and introduces a natural material that pairs well with warm wood tones, terracotta, and greenery. Seal the cane with a clear matte spray (Krylon UV-Resistant Clear or Rust-Oleum Clear Coat) to protect it from kitchen splashes.
18. Classic Comeback
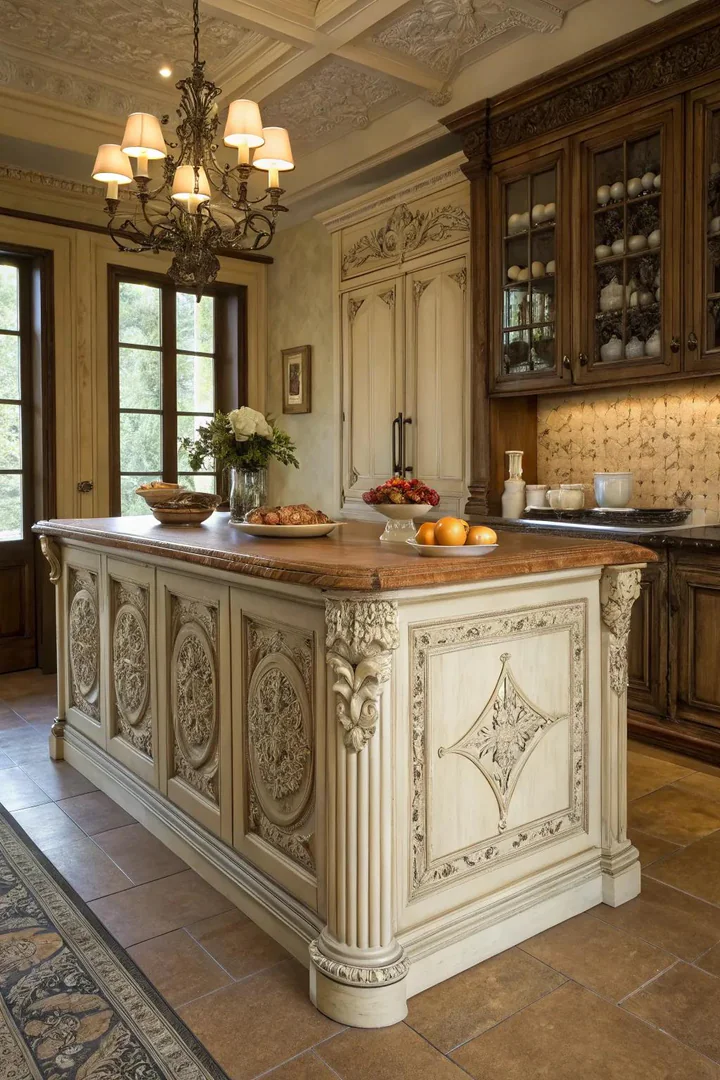
Vintage-revival wainscoting recreates the panel profiles, molding shapes, and paint colors of a specific historical period — Victorian, Craftsman, Colonial Revival, or mid-century — using modern materials and construction techniques. The panel proportions (tall and narrow for Victorian, wide and low for Craftsman) and the molding profiles (ornate ogee for Victorian, simple square-edge for Craftsman) are the defining details that place the wainscoting in a specific era.
Research the architectural period of your home (or the period you want the kitchen to reference) and match the wainscoting proportions to that era’s standards. A Victorian kitchen island uses tall, narrow panels (12 to 16 inches wide by 30 to 36 inches tall) with ornate crown and base molding. A Craftsman kitchen island uses wider, shorter panels (24 to 30 inches wide by 24 to 28 inches tall) with square-edge flat-stock frames and no curved profiles. Matching the wainscoting to the home’s architectural DNA makes the island look like an original feature rather than an addition.
19. Modern Divergence
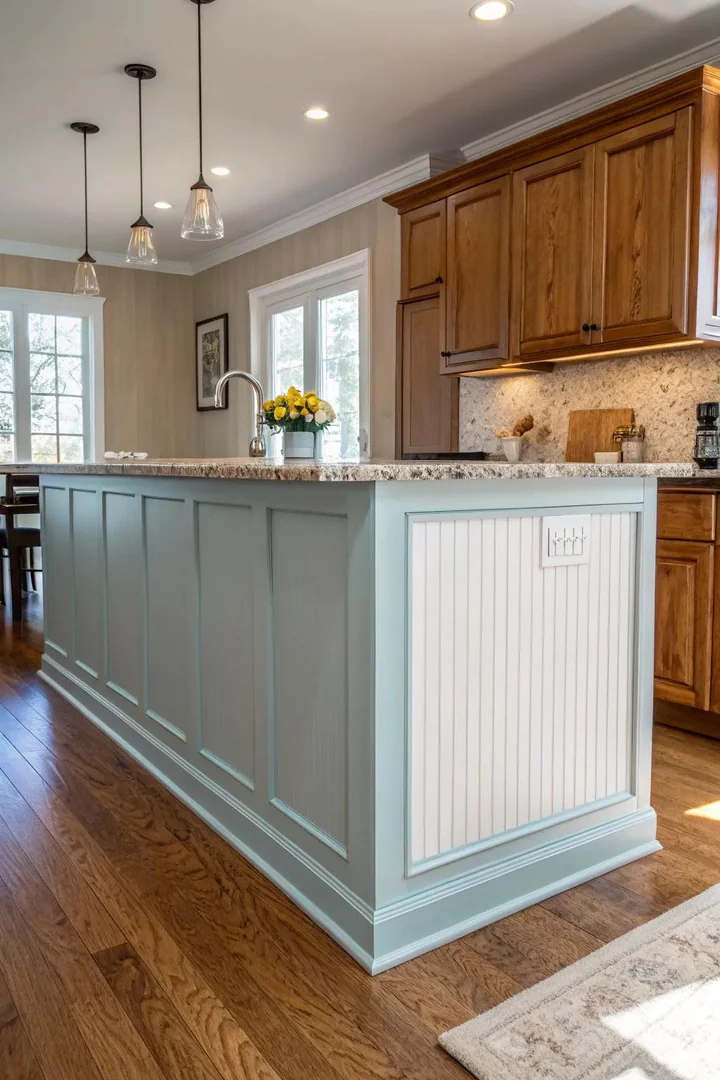
Contemporary contrast wainscoting uses two strongly opposing colors — black frame with white panels, navy frame with brass-painted panels, or charcoal frame with natural wood panels — to create a high-impact graphic effect on the island face. The color break follows the panel structure: the frame is one color and the inset panel is another, turning the traditional wainscoting grid into a bold pattern of contrasting rectangles.
The two-color approach requires cleaner application than a single color because any bleed between the frame and the panel is highly visible against the contrasting background. Use painter’s tape (FrogTape or ScotchBlue Ultra Sharp Lines) along the frame-panel joint, and apply the lighter color first, then tape and apply the darker color. Alternatively, paint the frames and panels separately before assembling them — this eliminates the need for taping and produces the cleanest color break. For more ideas on choosing contrasting kitchen color combinations, our guide covers paint pairings for islands, cabinets, and walls.
20. Three-Dimensional Features
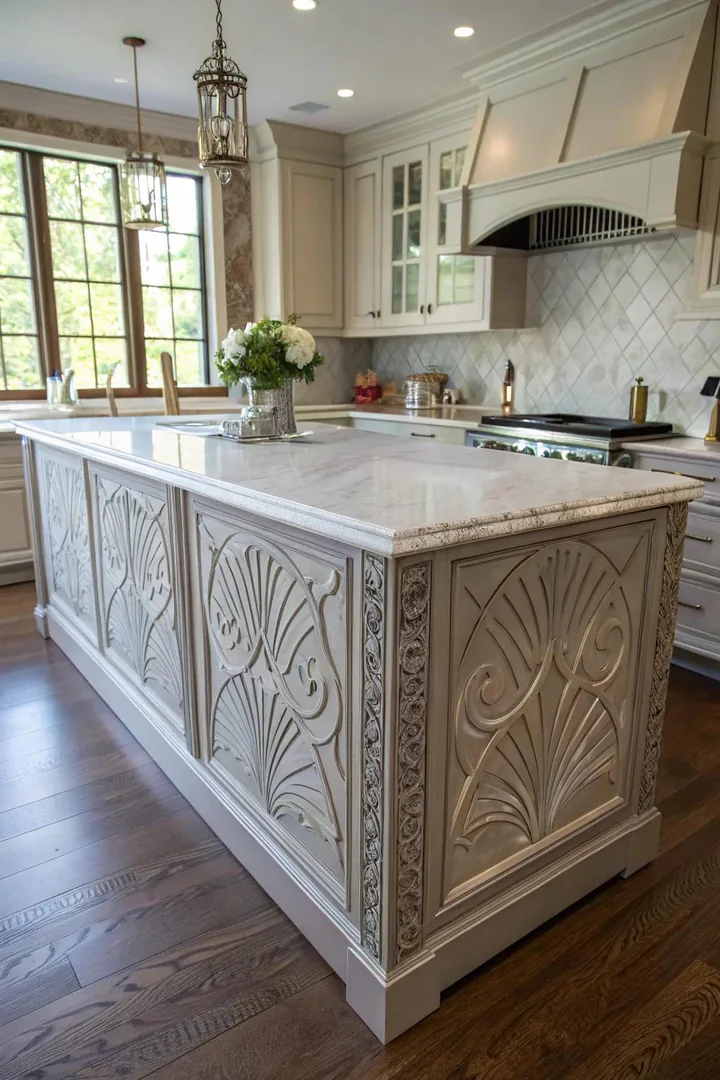
Sculptural wainscoting extends the panel surface outward from the island face by one to three inches, creating three-dimensional shapes — fluted columns, wave-like undulations, stacked geometric blocks, or carved organic forms — that cast dramatic shadows and give the island the presence of a piece of sculptural furniture. CNC-routed MDF panels (available from custom CNC shops and some home improvement stores) can produce virtually any three-dimensional pattern from a digital file.
Fluted panels — vertical half-round ridges repeating at regular intervals across the surface — are the most popular sculptural treatment because they are readily available (DERA Designs, Lowe’s, and Amazon sell pre-made fluted MDF panels for $30 to $80 per 4×8 sheet), easy to cut and install, and visually striking without being overwhelming. The fluted surface catches side light and creates alternating stripes of light and shadow that change throughout the day as the light source moves. Paint the fluted panels in a single matte color to let the light and shadow do the visual work.
21. Experiment with Proportions
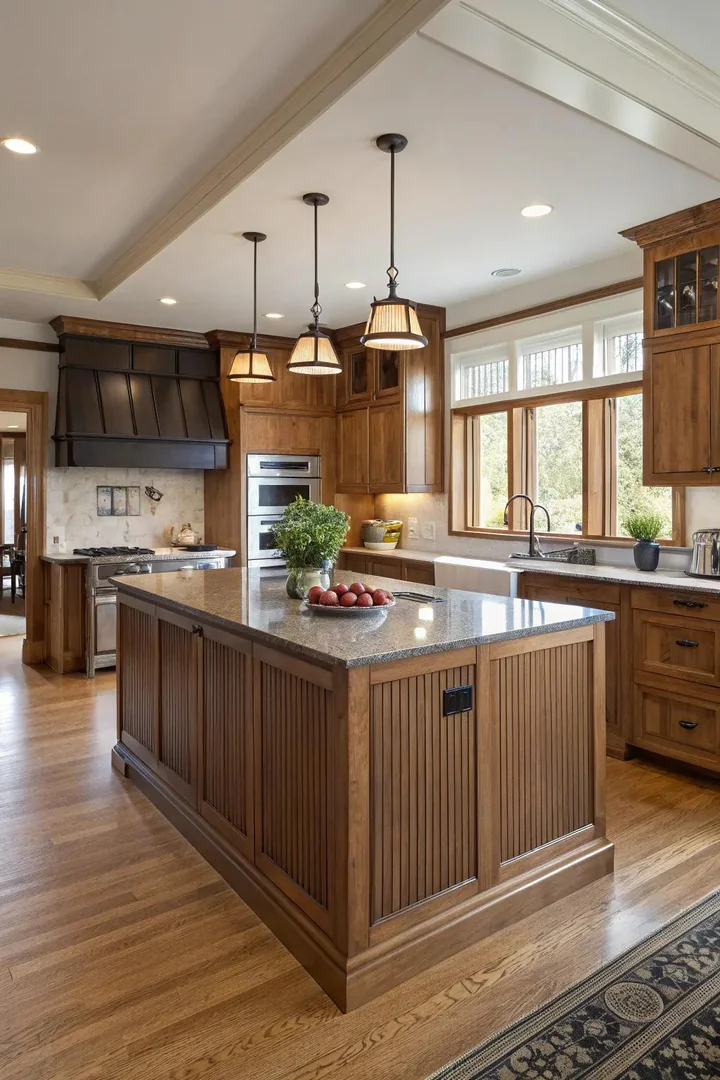
Varying the panel proportions across the island face — wide panels alternating with narrow panels, tall panels next to short panels, or a single oversized panel flanked by multiple smaller panels — creates a rhythm and visual hierarchy that a uniform grid of identically sized panels does not provide. The proportional variation draws the eye along the island’s length and can emphasize specific areas (a wider center panel draws attention to the middle of the island).
The golden ratio (1:1.618) provides a natural starting point for panel proportions that look balanced without mathematical rigidity — a panel 12 inches wide pairs with a panel roughly 19 inches wide, or a panel 16 inches tall pairs with a panel 26 inches tall. Alternate wide and narrow panels in an A-B-A-B pattern, or use a single wide center panel flanked by progressively narrower panels on each side for a symmetrical composition. The proportional variation costs nothing extra — it is a design decision, not a material upgrade.
22. Creative Touch
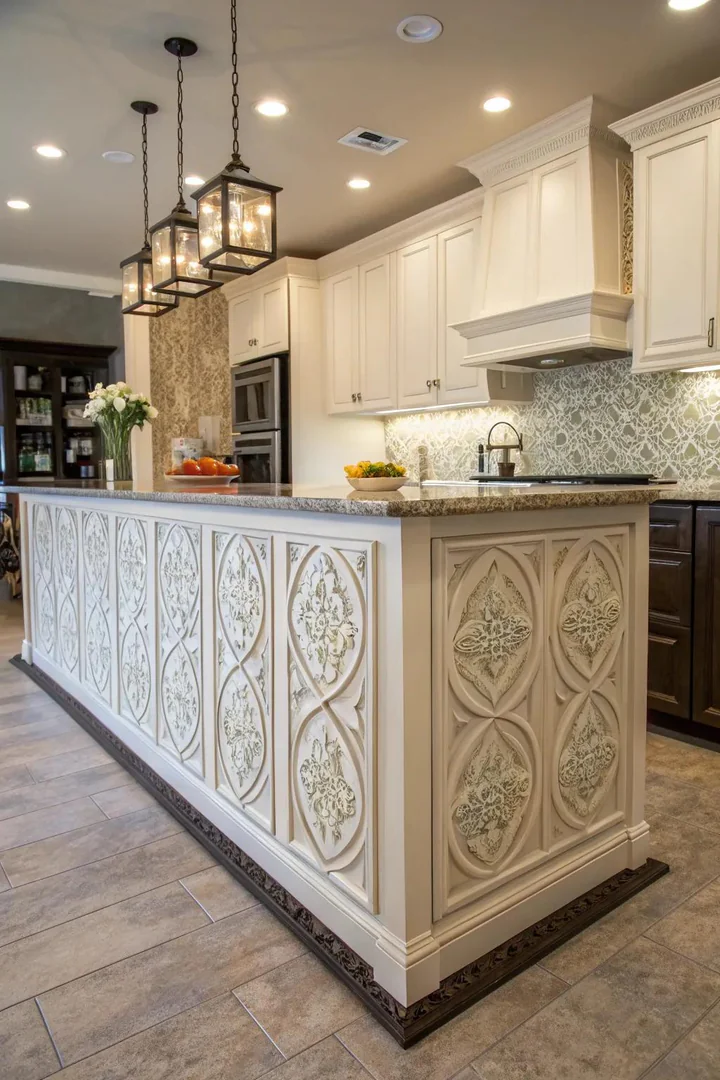
Artistic wainscoting treats the island face as a canvas for personal expression — hand-painted murals inside the panel frames, mosaic tile inlays, decoupage with vintage botanical prints, or stenciled patterns in metallic paint. The wainscoting frame provides a built-in border that contains and showcases the artwork, giving it a gallery-like presentation on the island’s surface.
Stenciling is the most accessible artistic technique for DIY homeowners — purchase a large-format stencil (Royal Design Studio, Cutting Edge Stencils, or Stencil Revolution) in a pattern that suits the kitchen’s style (Moroccan tile patterns for bohemian kitchens, damask for traditional, geometric for modern) and apply it with a stencil brush or a small foam roller using a contrasting paint color. The stenciled pattern fills the center panel while the frame remains solid, creating a contained decorative element that adds personality without overwhelming the room.
How to Install Wainscoting on a Kitchen Island
Preparing the Island Surface
Sand the existing island panels with 120-grit sandpaper to create a rough surface that adhesive and paint can grip. If the island is laminate or melamine, use a liquid deglosser (Klean-Strip Easy Liquid Sander Deglosser) instead of sandpaper — it chemically etches the slick surface without the dust. Clean the sanded surface with a tack cloth to remove all dust, then apply a bonding primer (Zinsser B-I-N or KILZ Adhesion) that sticks to slick surfaces and provides a base for the wainscoting adhesive and paint.
Attaching Panels and Trim
Apply construction adhesive (Liquid Nails Heavy Duty or Loctite PL Premium) in a zigzag pattern on the back of each panel, press the panel firmly against the island surface, and secure it with 1-1/4 inch brad nails from a pneumatic or cordless brad nailer (Ryobi, DeWalt, or Milwaukee all produce affordable cordless brad nailers). Fill the brad nail holes with wood filler (DAP Plastic Wood-X), sand smooth after drying, and prime the filled spots before painting. Attach the stile and rail frames around the panels with the same adhesive-and-brad-nail method.
Finishing and Sealing
Apply two coats of a high-quality cabinet-grade paint (Benjamin Moore Advance or Sherwin-Williams Emerald Urethane Trim Enamel) in a semi-gloss or satin sheen for maximum durability and washability. Allow 24 hours between coats and 72 hours of cure time before placing items against the painted surface. For natural wood wainscoting, apply three coats of water-based polyurethane (General Finishes High Performance or Minwax Polycrylic) in a satin sheen, sanding lightly with 320-grit between coats.
Wainscoting Materials Comparison
| Material | Best For | Cost per Panel | Durability |
|---|---|---|---|
| MDF (painted) | Smooth painted finishes | $5 – $15 | Good (avoid water exposure) |
| Solid wood (oak, maple) | Stained natural finishes | $15 – $40 | Excellent |
| Beadboard panels | Farmhouse and coastal styles | $15 – $25 per sheet | Good |
| Reclaimed wood | Rustic and character-rich looks | $8 – $20 per sq ft | Varies by condition |
| PVC/vinyl | High-moisture areas | $10 – $30 | Excellent (waterproof) |
| Fluted MDF | Sculptural 3D effect | $30 – $80 per sheet | Good (avoid water exposure) |
Common Wainscoting Installation Mistakes
Skipping the primer on slick surfaces. Wainscoting adhesive and paint will peel off laminate, melamine, or factory-finished island panels within months if you do not prime first. A bonding primer (Zinsser B-I-N or KILZ Adhesion) creates a mechanical bond between the slick surface and the wainscoting materials — skip it and the entire installation can delaminate.
Using the wrong adhesive. Standard wood glue (Titebond, Elmer’s) does not bond reliably to painted, laminate, or primed surfaces. Use a construction adhesive formulated for paneling and trim (Liquid Nails Heavy Duty or Loctite PL Premium) that bonds to multiple surface types and fills small gaps between the panel and the island face.
Ignoring the toe kick. The wainscoting should stop above the toe kick (the recessed base at the bottom of the island) and not extend down to the floor. If the wainscoting covers the toe kick, it eliminates the shadow line at the base and makes the island look like it is sitting directly on the floor rather than floating above it. Leave a 3-1/2 to 4-inch gap at the base for the toe kick.
Mismatched proportions between the island and the panels. Panels that are too narrow on a wide island look busy and over-detailed. Panels that are too wide on a short island look chunky and unfinished. Scale the panel width to the island length — a general rule is four to six panels on a standard 8-foot island, creating panels that are 14 to 20 inches wide each.
Frequently Asked Questions
How much does it cost to add wainscoting to a kitchen island?
Materials cost $200 to $800 for a standard 8-foot island, depending on the material (MDF is cheapest, solid hardwood is most expensive) and the profile complexity (flat panels cost less than raised panels). Professional installation adds $200 to $600 in labor. Total cost ranges from $400 for a basic DIY beadboard installation to $1,400 for a professionally installed raised-panel treatment in solid wood.
Can I add wainscoting to an existing island?
Yes. Most wainscoting systems (pre-made panel kits, beadboard sheets, individual planks) attach directly to the island’s existing flat panels with construction adhesive and brad nails. No structural modification is required — the wainscoting is a cosmetic overlay that adds 1/4 to 3/4 inch of thickness to the island face.
What is the best paint for kitchen island wainscoting?
Benjamin Moore Advance (alkyd formula in a water-based carrier) and Sherwin-Williams Emerald Urethane Trim Enamel are the two most recommended paints for kitchen wainscoting. Both produce a hard, durable finish that resists chipping, staining, and yellowing, and both self-level for a smooth factory-like appearance. Use semi-gloss or satin sheen for maximum washability.
Should wainscoting match the kitchen cabinets?
Not necessarily. Matching the wainscoting to the cabinets creates a unified, built-in look. Contrasting the wainscoting with the cabinets (a navy island in a white kitchen, for example) makes the island a distinct design element. Both approaches work — the choice depends on whether you want the island to blend in or stand out. Visit The Designers Company for more kitchen island design guides and remodeling inspiration.
How do I protect wainscoting from kitchen moisture?
Seal painted wainscoting with two coats of cabinet-grade paint in a semi-gloss or satin sheen — these sheens repel moisture and wipe clean. For natural wood wainscoting, apply three coats of water-based polyurethane. For MDF (which swells when wet), ensure all edges and cut surfaces are sealed with primer and paint before installation — any exposed raw MDF edge will absorb moisture and swell permanently.
What style of wainscoting works in a modern kitchen?
Flat-panel (recessed or Shaker-style), fluted, and geometric wainscoting all work in modern kitchens. Avoid ornate raised panels with curved molding profiles — these read as traditional. For a modern island, keep the panel profile flat or sculptural (fluted, chevron, or herringbone) and use a single color in a matte or satin finish. The goal is clean lines and intentional shadow, not decorative ornamentation.
Conclusion
Wainscoting turns a flat kitchen island panel into an architectural feature with depth, texture, and style. The material options range from $15 beadboard sheets to $40-per-square-foot reclaimed hardwood, and the profile options range from flat minimalist panels to three-dimensional sculptural surfaces. Choose the material and profile that match your kitchen’s aesthetic, your budget, and your skill level — beadboard and flat panels are straightforward DIY projects, while raised panels and sculptural treatments benefit from professional installation.
Start with the island’s most visible face (the side that faces the room) and add wainscoting to the remaining sides later if you want to extend the treatment. Prep the surface, prime it, attach the panels with adhesive and brads, fill the nail holes, and apply two coats of cabinet-grade paint. The entire project takes a weekend for a DIY installation and costs less than most single kitchen upgrades — a high-impact improvement for a modest investment.

