
Polymer Clay Kitchen Magnet Ideas: 11 Adorable DIY Projects
Polymer clay kitchen magnets are one of the few craft projects that produce a finished product you will actually use every day. Unlike a painting that hangs on the wall or a candle that burns down, a clay magnet lives on your refrigerator door where you see it every time you reach for milk, pin up a grocery list, or display a child’s drawing. The material itself is forgiving enough for first-time crafters yet capable of remarkable detail in experienced hands — the same Sculpey or FIMO clay that a beginner uses to make a simple fruit shape is the same clay that professional miniaturists use to sculpt realistic food models indistinguishable from photographs.
The 11 polymer clay magnet ideas below cover a range of skill levels, styles, and themes — from simple geometric shapes that a ten-year-old can master to detailed miniature food sculptures that take patience and practice. Each project includes the clay type, tools, and techniques you need to recreate it at home, along with tips for getting a clean finish, strong magnet attachment, and colors that last.
1. Small Garden Landscape
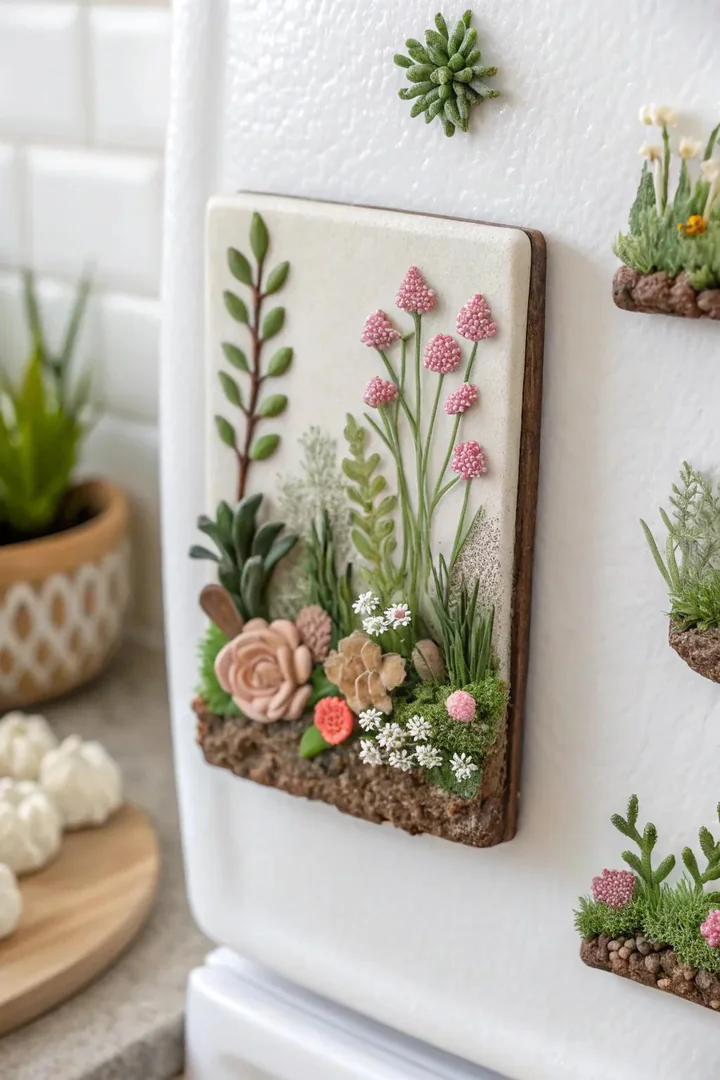
A miniature garden scene — tiny succulents, a micro terracotta pot, a winding stone path, and a small fence — brings a bit of the outdoors onto your refrigerator door. Start with a flat oval or circle base (about two inches across) rolled from Sculpey III or FIMO Soft in an earthy brown or green. Build the garden elements directly on the base: roll thin green snakes for stems, press small flat circles for leaves, and use a needle tool to score texture into the soil surface. Tiny flowers are just flattened balls of colored clay pressed onto the stem tips with a dot of liquid Sculpey as adhesive.
The charm of a garden scene magnet is in the small details — a miniature watering can made from a teardrop shape with a thin rolled handle, or a row of tiny carrots (orange cones with green leaf tops) peeking out of the soil. Bake the assembled scene at 275°F for 15 to 20 minutes on a ceramic tile, let it cool completely, then glue a neodymium disc magnet (10mm diameter, 2mm thick) to the back with E6000 adhesive. The neodymium magnet holds the scene firmly even through a layer of paper or a photo.
2. Enormous Tiny Figures
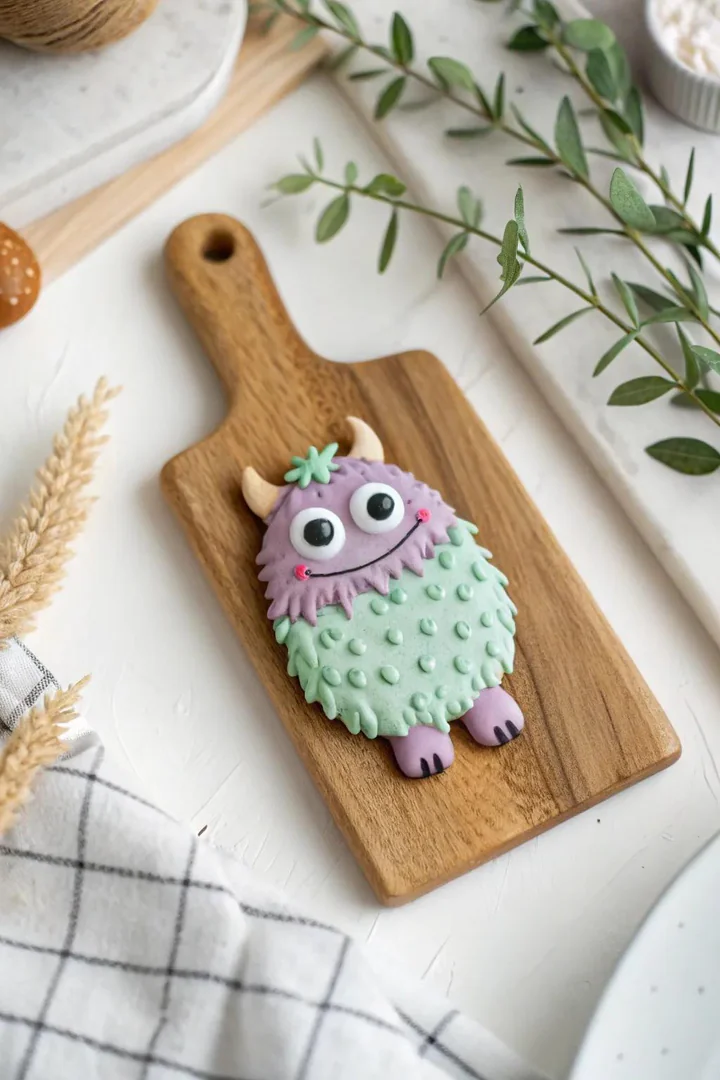
Oversized monster magnets — round-bodied creatures with big googly eyes, tiny teeth, and stubby arms — add a playful, slightly silly personality to the refrigerator that appeals to both kids and adults. The monster form is one of the most forgiving shapes in polymer clay because imperfections (uneven eyes, lopsided mouths, lumpy bodies) actually make the character look more endearing and handmade. Use Sculpey Premo in bright, saturated colors — neon green, hot pink, electric blue — and roll the body into a fat oval or sphere about one and a half inches tall.
Add personality with simple details: press two white clay balls for eyes with tiny black pupils dotted on with a pin head, score a wide grinning mouth with a blade tool and fill it with a thin strip of white clay teeth, and attach small cone-shaped horns or pointed ears to the top of the head. Each monster should look different — varied colors, different eye sizes, unique mouth expressions — so a collection of four or five on the fridge creates a cast of characters rather than identical copies. These make excellent handmade gifts for families with young children.
3. Playful Rainbow Patterns
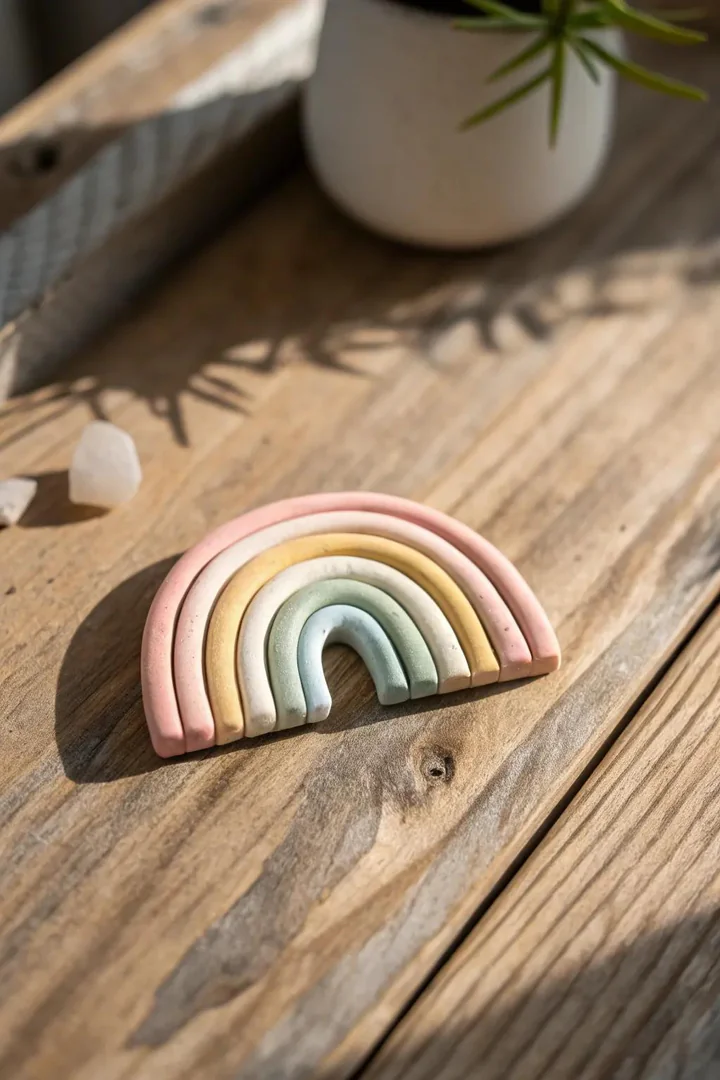
Rainbow magnets — arched bands of color in the classic red-orange-yellow-green-blue-violet sequence — are one of the simplest polymer clay projects and one of the most visually striking on a white or stainless-steel refrigerator. Roll six thin snakes of clay (each about three inches long and the thickness of a pencil lead), arrange them in a curve from shortest (inner violet) to longest (outer red), and press them gently together so they adhere without losing their individual color bands. A small white cloud shape at each base of the arch finishes the design.
For a more modern take, use a muted rainbow palette — dusty rose instead of red, marigold instead of orange, sage instead of green, slate blue instead of bright blue — which produces a Scandinavian-inspired magnet that fits neutral kitchens better than a primary-color rainbow. Roll the arch on a sheet of parchment paper, bake it flat, and attach the magnet to the back of the cloud base where it will sit against the fridge. The rainbow shape is also a popular DIY clay kitchen decor motif that works on shelves, windowsills, and hooks as well as the refrigerator.
4. Pieces of Abstract Art
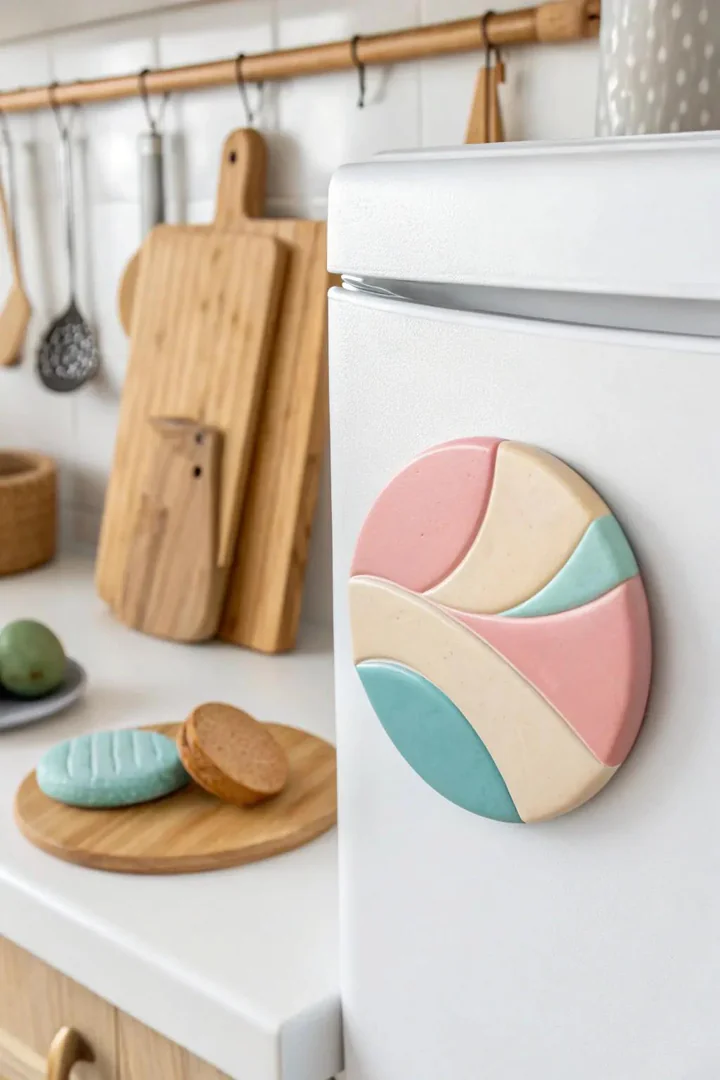
Abstract polymer clay magnets use the terrazzo, marble-swirl, and color-block techniques that have become popular in ceramic jewelry and stationery design — irregular chunks of color pressed into a contrasting base, or two colors partially mixed and sliced to reveal the swirl pattern inside. These magnets look sophisticated enough for an adult kitchen and require no sculpting skill — the beauty comes from the color combination and the randomness of the pattern rather than precise shaping.
For a terrazzo effect, chop small pieces of three or four clay colors and press them into a sheet of white or black clay, then roll flat and cut into circles, squares, or organic blob shapes with a cookie cutter or blade. For a marble swirl, partially blend two contrasting colors (black and white, navy and gold, terracotta and cream) by twisting and folding the clay three or four times — stop before the colors fully mix so the swirl pattern remains visible. These abstract magnets work in sets of three to five, displayed in a cluster on the fridge as a mini gallery wall.
5. Adorable Animated Characters
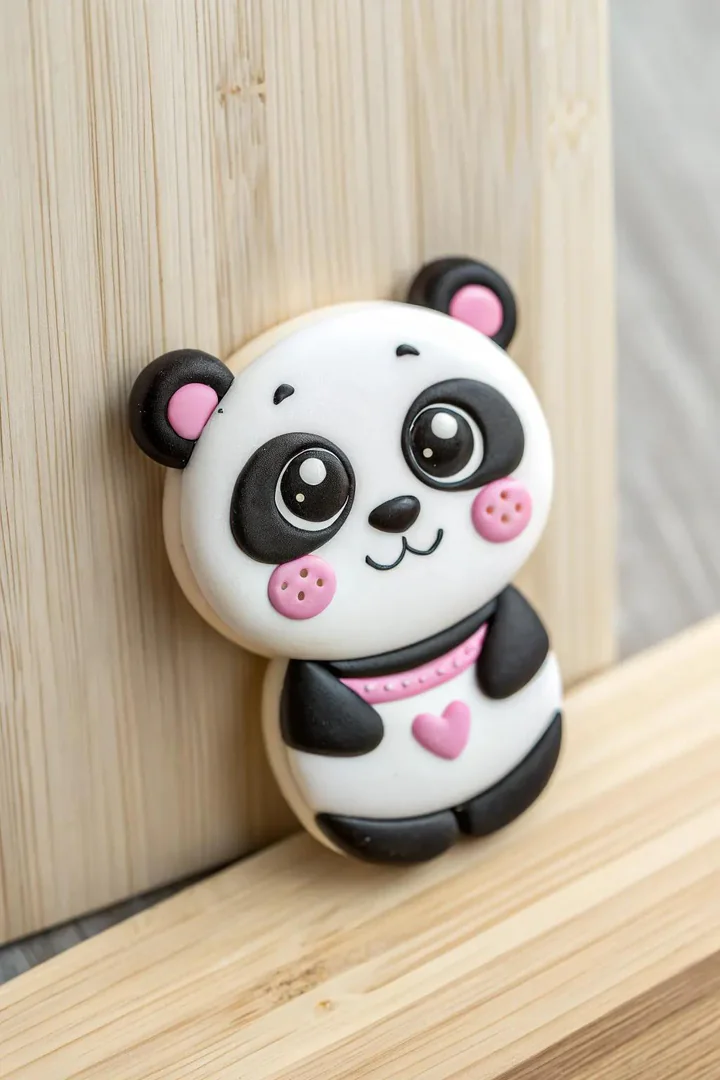
Kawaii-style cartoon character magnets — round-bodied pandas, cats, bears, and bunnies with oversized heads and tiny dot eyes — tap into the Japanese cute-character tradition that has influenced everything from stationery to kitchen accessories. The kawaii proportions (head as large as or larger than the body, eyes set low on the face, minimal facial features) are simple to sculpt in polymer clay because the shapes are basic circles, ovals, and teardrops assembled together.
Start with a flattened circle of white Sculpey Premo for the face and add two small black ovals for ears (panda), two pointed triangles for ears (cat), or two long teardrops for ears (bunny). The eyes are tiny black dots pressed into the lower third of the face with the tip of a mechanical pencil lead. A small pink triangle for the nose and two pink circles for cheeks complete the expression. Bake, cool, and seal with a thin coat of Sculpey Glaze (satin finish) to protect the surface from kitchen grease and moisture. A set of four animals — panda, cat, bear, bunny — makes a matching collection that children and adults both enjoy.
6. New Fruit Magnets
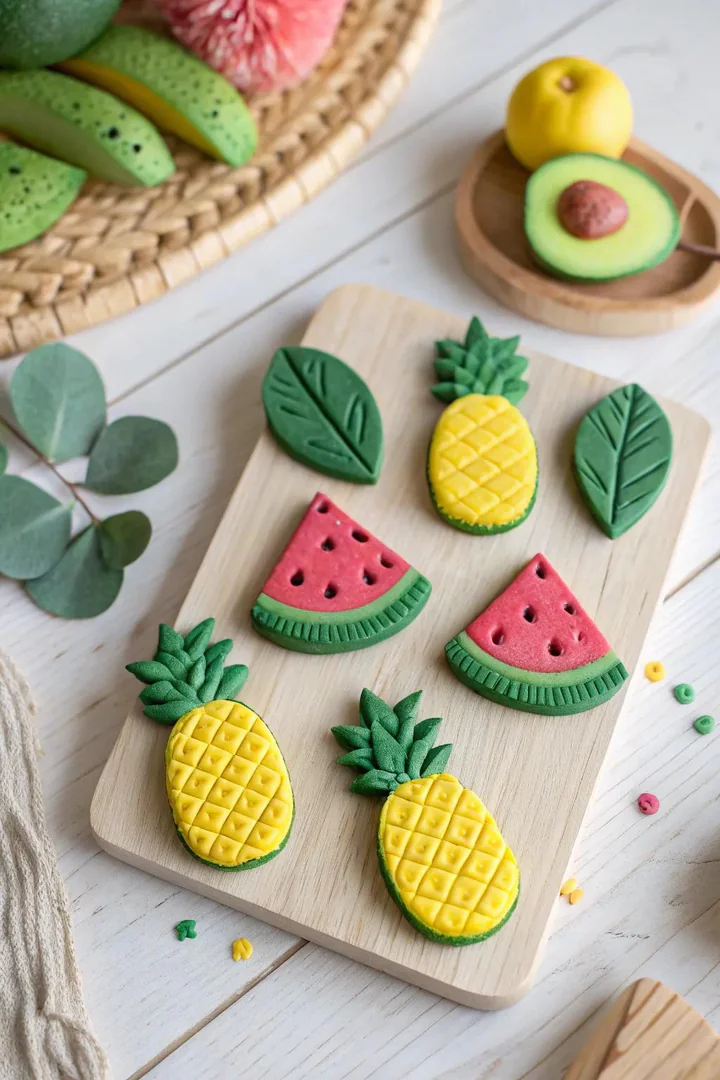
Fruit-shaped magnets — sliced lemons, halved strawberries, whole bananas, miniature watermelon wedges — are the most kitchen-appropriate clay magnet theme because they reference the room’s primary function while adding bright, natural color to the fridge. A lemon slice is one of the easiest fruit shapes to make: roll a circle of pale yellow clay, press a smaller circle of white clay inside it, and use a needle tool to score the segment lines radiating from the center. A tiny ring of darker yellow around the outer edge creates the rind.
Build a full fruit set — lemon, strawberry, watermelon, orange, avocado — so the magnets form a cohesive collection rather than a single random fruit. For the most realistic look, use Premo Sculpey (which holds detail better than Sculpey III) and mix custom colors rather than using clay straight from the package. A strawberry, for example, looks more realistic in a custom red-orange mix with hand-dotted yellow seeds than in the bright primary red that comes in the standard pack. Fruit magnets pair naturally with a fruit basket display on the counter, extending the fruit theme from the table to the fridge.
7. Adorable Sea Turtle
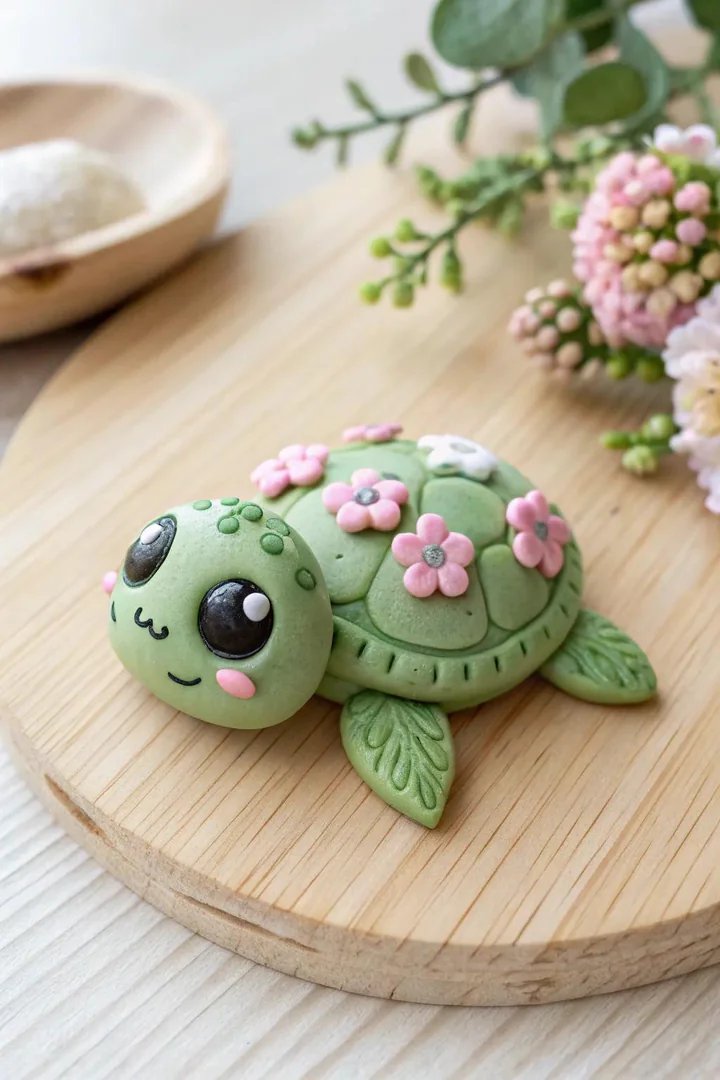
A kawaii sea turtle magnet combines the cute-character proportions (big head, small body, dot eyes) with an ocean theme that works in coastal, beach-house, and nature-inspired kitchens. The shell is the most detailed part: flatten a dome of green clay and score a hexagonal pattern across the surface with a needle tool, then fill each hexagon with a slightly different shade of green or teal to create the patchwork shell pattern that real sea turtles display.
The flippers are simple flattened teardrops attached at the sides and bottom of the shell, and the head is a small round shape with two tiny black eyes and a curved smile scored with a blade tool. Use FIMO Effect in translucent green or Premo Sculpey in sea green for the shell to give it a slight translucency that mimics real turtle shell. After baking, apply a coat of gloss glaze to the shell only (leave the head and flippers matte) to create a wet, shiny look that suggests the turtle just came out of the water.
8. Fun with Halloween Pumpkins
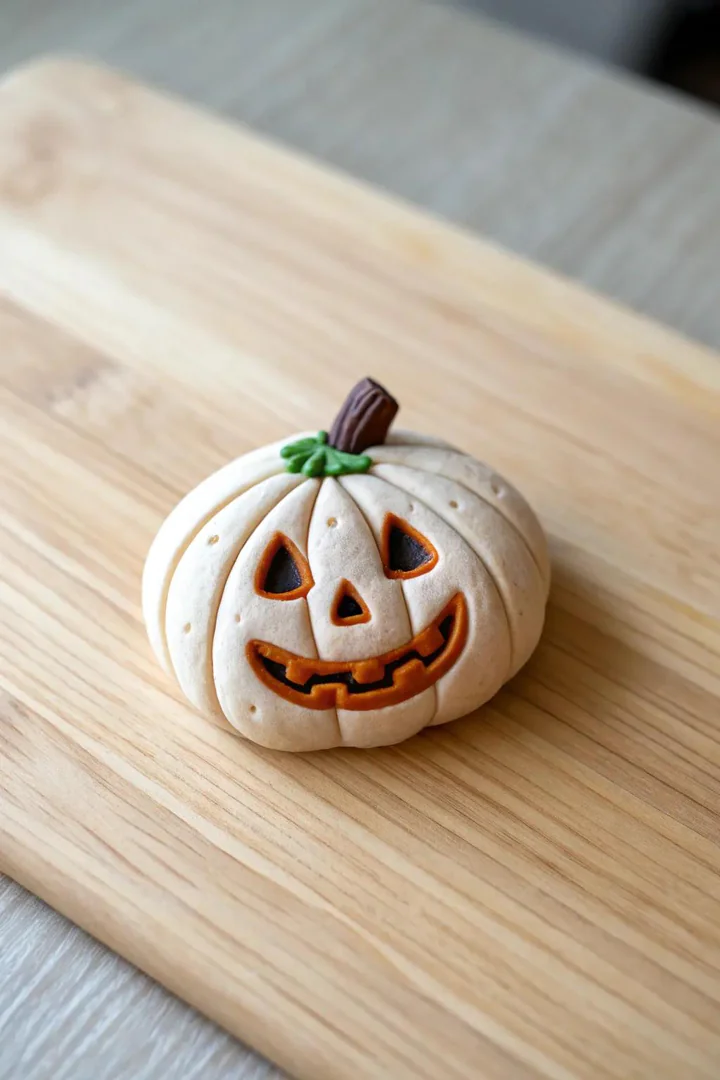
Seasonal magnets let you rotate your refrigerator decor the same way you rotate throw pillows and table runners — swapping summer fruit magnets for fall pumpkins, winter snowflakes, and spring flowers. A polymer clay jack-o’-lantern magnet is a satisfying October project: roll a ball of orange Sculpey, press vertical grooves around the sides with a rounded tool (a knitting needle works well) to create the pumpkin segments, and flatten the back slightly so it sits flat against the fridge.
Carve a face into the front with a small blade or X-Acto knife — triangle eyes, a triangle nose, and a jagged grinning mouth — and fill the carved areas with a thin layer of yellow or glow-in-the-dark clay to create the lit-lantern effect. Add a small brown clay stem at the top and a curling green tendril vine. For a non-scary version (better for young kids), skip the carved face and just add two black dot eyes and a simple curved smile for a friendly pumpkin character. Make a set of three in different sizes — small, medium, and large — for a grouped display.
9. Vintage Vinyl Albums
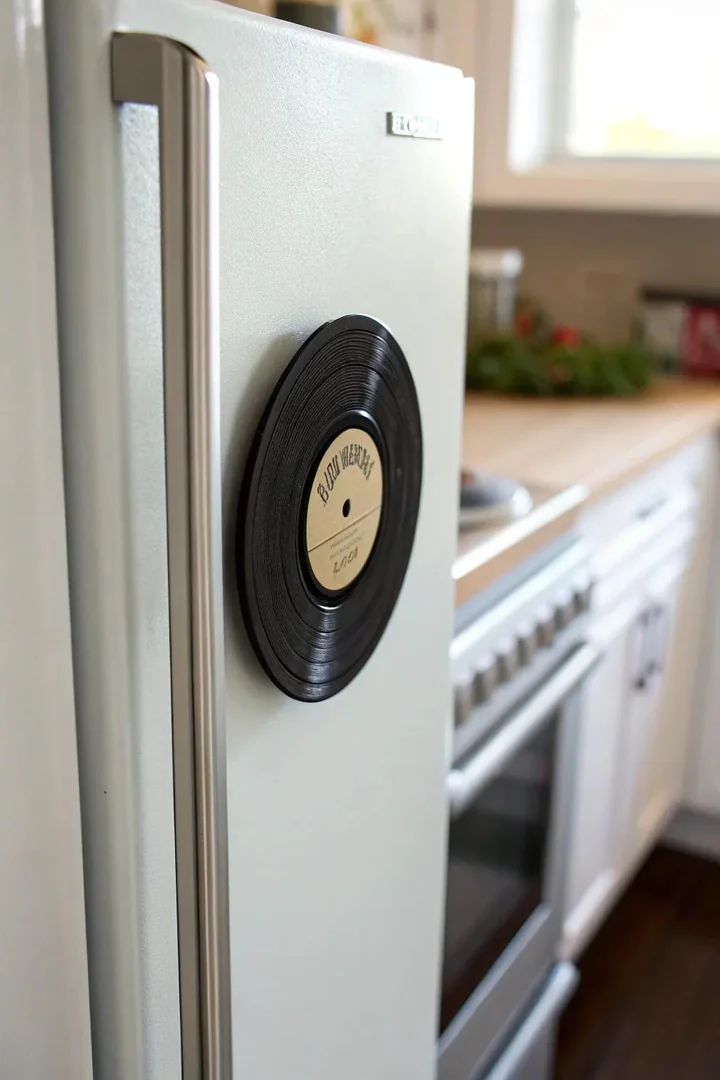
Miniature vinyl record magnets appeal to music lovers and retro-decor enthusiasts — the recognizable black disc with concentric grooves and a colorful center label is an iconic shape that reads immediately even at a one-and-a-half-inch diameter. Roll a flat circle of black Sculpey Premo and use a compass or a round cookie cutter for a clean edge. Score concentric grooves across the surface with the tip of a needle tool, working from the outer edge inward, to replicate the spiral groove pattern of a real record.
Press a small circle of colored clay (red, yellow, blue, or any color your favorite label used) into the center and poke a tiny hole through it with a pin to represent the spindle hole. For extra detail, stamp or write a tiny label name on the center circle using alphabet stamps or the tip of a fine pen (pressing into the soft clay before baking). A set of four or five records in different center-label colors creates a miniature record collection on the fridge that makes a great gift for anyone who collects vinyl or appreciates mid-century aesthetics.
10. Festive Cookie Magnets
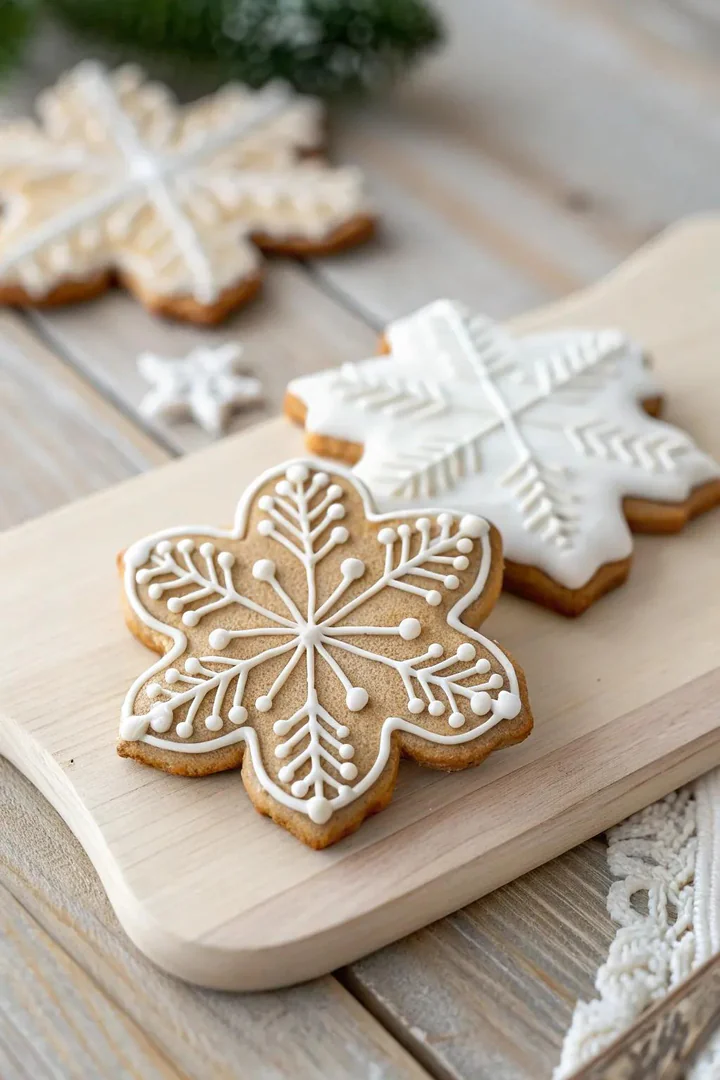
Holiday cookie magnets — snowflakes, gingerbread people, stars, candy canes, and Christmas trees — bring the warmth of holiday baking to the refrigerator year-round or during the December season. The cookie-magnet technique mimics real sugar cookies: roll a sheet of tan or golden-brown clay (mix Sculpey Premo in ecru with a touch of raw sienna for a realistic baked-cookie color), cut shapes with miniature cookie cutters, and decorate the surface with thin lines of white clay piped to look like royal icing.
For the icing effect, roll very thin snakes of white clay (the thinner, the more realistic) and press them onto the cookie surface in the same patterns you would pipe with a pastry bag — border outlines, zigzag drizzles, dot accents, and swirl designs. After baking, the white clay lines stand slightly proud of the tan cookie surface, creating a dimensional effect that looks remarkably like real iced cookies. Seal with a satin glaze to give the “icing” a slight sheen. These magnets are ideal for gifting — bake a batch of six in a small box lined with tissue paper for a handmade holiday present.
11. Small Breakfast Treats
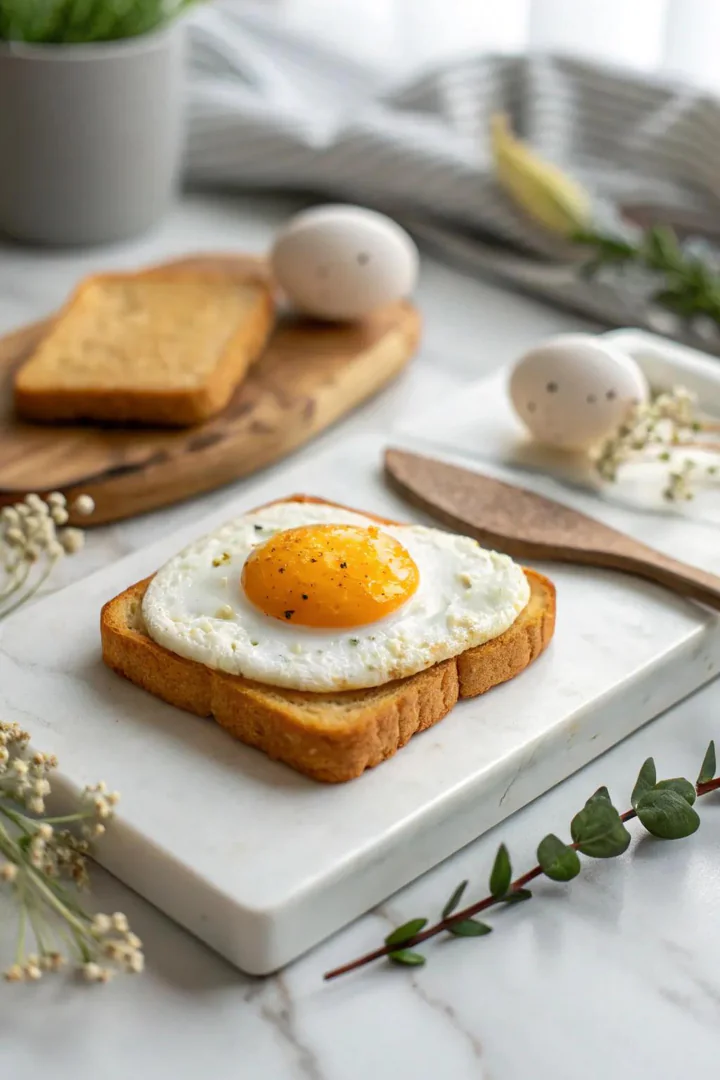
Miniature breakfast food magnets — a tiny fried egg, a croissant, a slice of toast, a stack of pancakes, a strip of bacon — celebrate the most comforting meal of the day in polymer clay form. The fried egg is a classic beginner project: flatten a blob of white clay into an irregular round shape (real fried eggs are never perfectly circular), press a ball of yellow clay into the center for the yolk, and add a slight dome to the yolk by not pressing it fully flat. The contrast between the flat white and the raised yellow yolk creates a miniature that looks surprisingly realistic.
A croissant requires more shaping: roll a triangle of golden-brown clay, curl it from the wide end toward the point (mimicking how real croissant dough is rolled), and score curved lines across the surface with a blade to represent the layered pastry. Brush the surface with a tiny amount of yellow chalk pastel powder before baking to create the golden-brown color gradient of a freshly baked croissant. A full breakfast set — egg, croissant, toast, pancakes, bacon, and a tiny coffee mug — displayed together on the fridge turns the appliance into a cheerful miniature diner scene.
Getting Started with Polymer Clay Magnets
Essential Tools and Supplies
You need four things to make polymer clay magnets: the clay itself, a few shaping tools, an oven, and magnets. For clay, start with Sculpey Premo (best color accuracy and strength after baking) or FIMO Soft (easier to condition, slightly firmer after baking). A basic tool set includes a craft knife or X-Acto blade, a needle tool (a thick sewing needle in a cork handle works), a small roller (an acrylic rolling pin or a smooth glass jar), and a ceramic tile to work on and bake on. For magnets, use neodymium disc magnets (10mm x 2mm from Amazon or a craft supply store) — they are far stronger than ceramic magnets and hold through paper and photos without slipping.
Choosing the Right Clay
Sculpey III is the softest and easiest to condition but is brittle after baking in thin sections — it works for chunky shapes but cracks in detailed, thin pieces. Sculpey Premo is firmer to condition but much stronger after baking, holds fine detail, and comes in accurate colors — it is the best all-purpose choice. FIMO Professional is the firmest to condition but produces the strongest, most detailed finished pieces — serious miniaturists and jewelry makers prefer it. For a first project, start with Premo in a multi-pack (12 or 24 colors) so you have a full palette without mixing.
Baking and Finishing Tips
Bake polymer clay at the temperature printed on the package (usually 275°F for Sculpey, 230°F for FIMO) on a ceramic tile or a parchment-lined baking sheet. Use an oven thermometer to verify the temperature — most home ovens fluctuate by 25°F or more, and overbaking causes darkening and burning while underbaking produces weak, crumbly pieces. Bake for the full recommended time (15 to 30 minutes depending on thickness) and let the piece cool completely in the oven before handling. After cooling, sand any rough edges with 400-grit sandpaper, seal with Sculpey Glaze or a thin coat of water-based polyurethane, and attach the magnet with E6000 or Gorilla Super Glue Gel.
Polymer Clay Magnet Techniques Comparison
| Technique | Skill Level | Best For | Time per Magnet |
|---|---|---|---|
| Flat cutout shapes | Beginner | Abstract, geometric, simple icons | 10–15 minutes |
| Terrazzo / marble swirl | Beginner | Modern, abstract, adult aesthetic | 10–20 minutes |
| Kawaii characters | Beginner to intermediate | Animals, monsters, cartoon faces | 15–25 minutes |
| Rainbow / color blend | Beginner | Colorful arches, gradient effects | 10–15 minutes |
| Miniature food | Intermediate to advanced | Fruit, breakfast, cookies, baked goods | 20–45 minutes |
| Detailed scene | Advanced | Gardens, landscapes, dioramas | 30–60 minutes |
Common Polymer Clay Mistakes to Avoid
Not conditioning the clay enough. Polymer clay straight from the package is stiff and crumbly — it needs to be kneaded and rolled until it is soft, smooth, and pliable before shaping. Under-conditioned clay cracks during shaping and breaks after baking. Condition each color for two to three minutes (longer for firm brands like FIMO Professional) until it bends without cracking at the fold.
Baking at the wrong temperature. Too hot and the clay scorches, darkens, and releases fumes. Too cold and the clay never fully cures, leaving it weak and chalky. Use an oven thermometer (Taylor or OXO, about $7) placed next to the clay during baking — do not trust the oven’s built-in thermostat, which can be off by 25°F or more in either direction.
Using weak magnets. Ceramic disc magnets from the dollar store are not strong enough to hold a polymer clay magnet (which weighs more than a paper fridge magnet) against a refrigerator door. Use neodymium rare-earth magnets — a 10mm x 2mm neodymium disc holds several ounces of weight and keeps the magnet firmly in place even when bumped. The cost difference is minimal (about $0.15 per magnet in bulk) and the performance difference is dramatic.
Skipping the sealant. Unsealed polymer clay absorbs kitchen grease, dust, and moisture over time, which dulls the colors and creates a tacky surface. A thin coat of Sculpey Glaze, Varathane water-based polyurethane, or PYM II spray sealant protects the surface and keeps the colors bright. Apply sealant after the piece has fully cooled — warm clay and wet sealant do not mix well. For more kitchen decor ideas that incorporate handmade crafts and personal touches, our guide covers wall art, shelf styling, and countertop accessories.
Frequently Asked Questions
What type of polymer clay is best for kitchen magnets?
Sculpey Premo is the best all-purpose choice for kitchen magnets. It conditions smoothly, holds fine detail, bakes to a strong and slightly flexible finish, and comes in a wide range of accurate colors. FIMO Soft is a good alternative if you prefer a slightly firmer clay that holds its shape better during sculpting. Avoid Sculpey III for thin or detailed magnets — it is too brittle after baking.
How do I attach the magnet to the clay?
Glue a neodymium disc magnet to the flat back of the baked and cooled clay piece using E6000 adhesive or Gorilla Super Glue Gel. Press the magnet firmly into a small dollop of glue and let it cure for 24 hours before placing the magnet on the fridge. For extra security, press the magnet into a shallow indent in the raw clay before baking so it sits flush with the surface, then glue it in after baking.
Can polymer clay magnets go in the dishwasher?
No. Polymer clay magnets should not be submerged in water or placed in the dishwasher. The clay itself is waterproof after baking, but the magnet adhesive can weaken in hot water, and the sealant can cloud or peel. Clean polymer clay magnets with a damp cloth and mild soap if needed — they rarely get dirty enough to require more than a quick wipe.
How strong do the magnets need to be?
A 10mm x 2mm neodymium disc magnet provides enough holding force (about 1 to 1.5 pounds) to keep a polymer clay magnet on the fridge and hold a few sheets of paper underneath it. For larger or heavier clay pieces (three inches or more), use a 12mm x 3mm neodymium disc or stack two 10mm discs for additional strength. Ceramic magnets are too weak for anything heavier than a flat paper magnet.
How long do polymer clay magnets last?
Properly baked and sealed polymer clay magnets last for years without cracking, fading, or losing their shape. The most common failure point is the magnet adhesive — if the magnet falls off, simply re-glue it with fresh E6000 and cure for 24 hours. Keep the magnets out of direct sunlight for extended periods, as UV exposure can gradually fade some clay colors (reds and yellows are most susceptible). Visit The Designers Company for more DIY craft ideas and kitchen decor inspiration.
Can children make polymer clay magnets safely?
Yes, with adult supervision for the baking step. Polymer clay is non-toxic and safe for children to handle and shape. Children aged six and up can condition, shape, and decorate the clay independently. An adult should handle the oven, the craft knife, and the E6000 glue (which should be used in a ventilated area). Sculpey III is the best clay for young children because it is the softest and easiest to condition with small hands.
Conclusion
Polymer clay kitchen magnets are one of the most satisfying small craft projects because you finish with a functional, displayable object in under an hour. The material is inexpensive (a multi-pack of Sculpey Premo costs less than $20), the tools are minimal (a blade, a needle, and an oven you already own), and the results — from miniature breakfast foods to abstract terrazzo discs to kawaii animal faces — look far more polished than the time and skill invested.
Start with the simplest shapes (rainbow arches, flat abstract cutouts, or basic fruit slices) to learn how the clay handles, and work up to detailed miniatures and character sculptures as your confidence grows. Use Premo or FIMO for durability, neodymium magnets for hold strength, and a sealant coat for longevity. A set of five or six handmade magnets on the refrigerator adds more personality to the kitchen than any store-bought accessory — and every one of them started as a block of clay and twenty minutes of your time.

