Deck Inlay Ideas: 14 Stunning Ways to Transform Your Outdoor Space
A deck inlay is a pattern cut into the decking surface using contrasting board colours, widths, or grain directions to create a built-in design that stays visible for the full life of the deck. The best deck inlay ideas pair two tones of composite or hardwood in geometric patterns, from herringbone and chevron to sunburst and mosaic, that turn a flat deck floor into a statement feature. Below are 14 deck inlay ideas with material specs, cutting angles, and installation details for each pattern.
1. Classic Single-Width Border

A single contrasting board running around the perimeter of the deck creates a picture-frame border that separates the field boards from the fascia. Use a darker tone for the border (for example, Trex Transcend in Spiced Rum against a Rope Swing field, or TimberTech Azek Vintage in Mahogany against Coastline) to define the edge without any miter cuts or complex joinery. Run the border board perpendicular to the field boards for a clean 90-degree transition, and support the direction change with doubled joists or blocking underneath spaced 12 inches on centre.
A single-width border adds $2 to $4 per linear foot in material cost and about 1 hour of extra framing per 100 square feet of deck. The visual payoff is high relative to the effort: even a basic rectangular deck looks finished and intentional with a contrasting border, while a deck with no border reads as a platform rather than a designed outdoor room. Miter the corners at 45 degrees for a polished look, and pre-drill all screw holes within 2 inches of board ends to prevent splitting.
2. Pinstripe Accent Boards
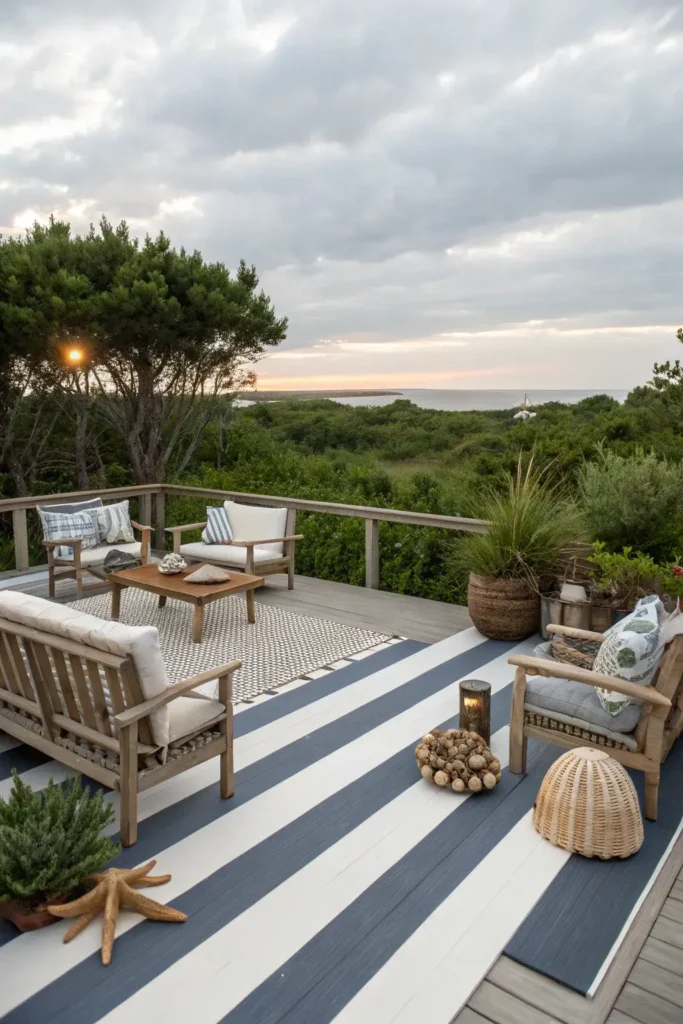
Swapping every fifth or sixth field board with a contrasting colour creates thin pinstripes that run the full length of the deck. Fiberon Concordia and MoistureShield Vision both offer two-tone composite collections with boards designed to mix in the same joist spacing without shimming. The stripe boards install on the same 16-inch on-centre joists as the field, so the only extra cost is the contrasting boards themselves ($1 to $3 per linear foot more than matching).
Space the stripes evenly for a formal rail-car look, or cluster two stripes together with a 3-board gap for a bolder band effect. Avoid random stripe placement because it reads as a mistake rather than a pattern. Keep the stripe colour at least two shades darker or lighter than the field for clear contrast in full sun and shade: a subtle one-shade difference disappears at a distance and looks like an installation error. Stagger the stripe board end joints by at least 24 inches from the adjacent field board joints for structural strength.
3. Angled Diagonal Layout
Running all field boards at a 45-degree angle to the house wall turns a standard rectangular deck into a space that looks wider and more interesting from every angle. A diagonal layout requires 10 to 15 percent more board material than a straight run because each board along the deck edges must be miter-cut to meet the fascia, and the offcuts are often too short to reuse. Set the joist spacing at 12 inches on centre (not the standard 16 inches) for composite boards laid diagonally, because the angled span between joists is longer than a perpendicular span.
Mark the 45-degree start line by measuring equal distances from the house corner along each edge and snapping a chalk line between the two points. Start the first full board on that line and work outward in both directions. Every board end gets a 45-degree miter cut to meet the border or fascia, so a 12-inch sliding miter saw ($250 to $500 from DeWalt or Makita) is the right tool for clean, repeatable angle cuts. Add a contrasting straight border around the diagonal field to frame the angle change and hide any uneven cuts at the edges.
4. Herringbone Centre Panel
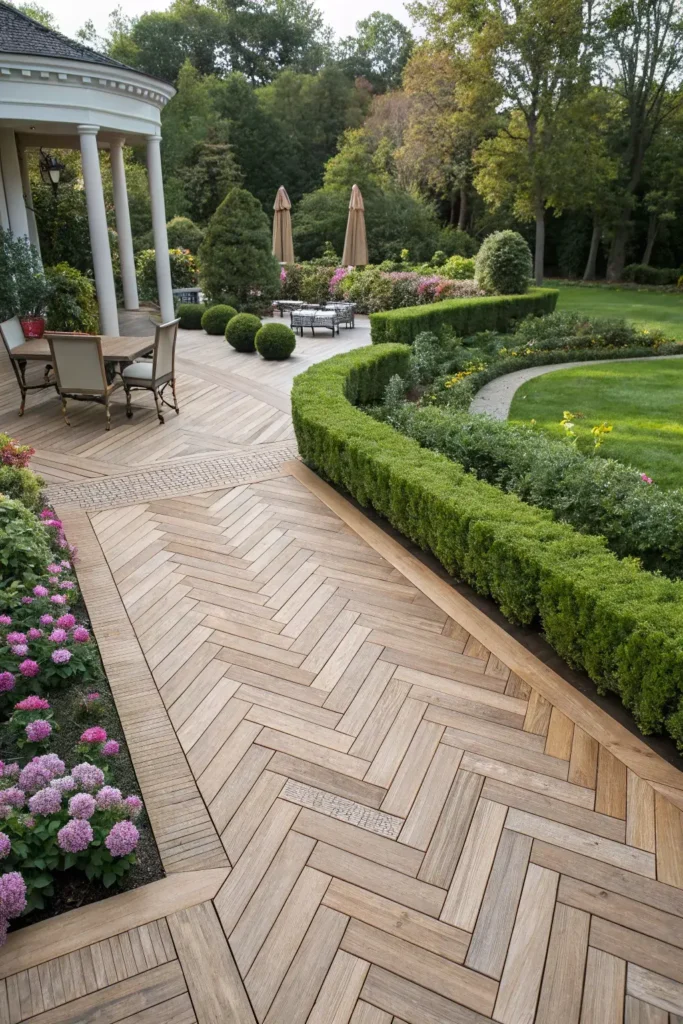
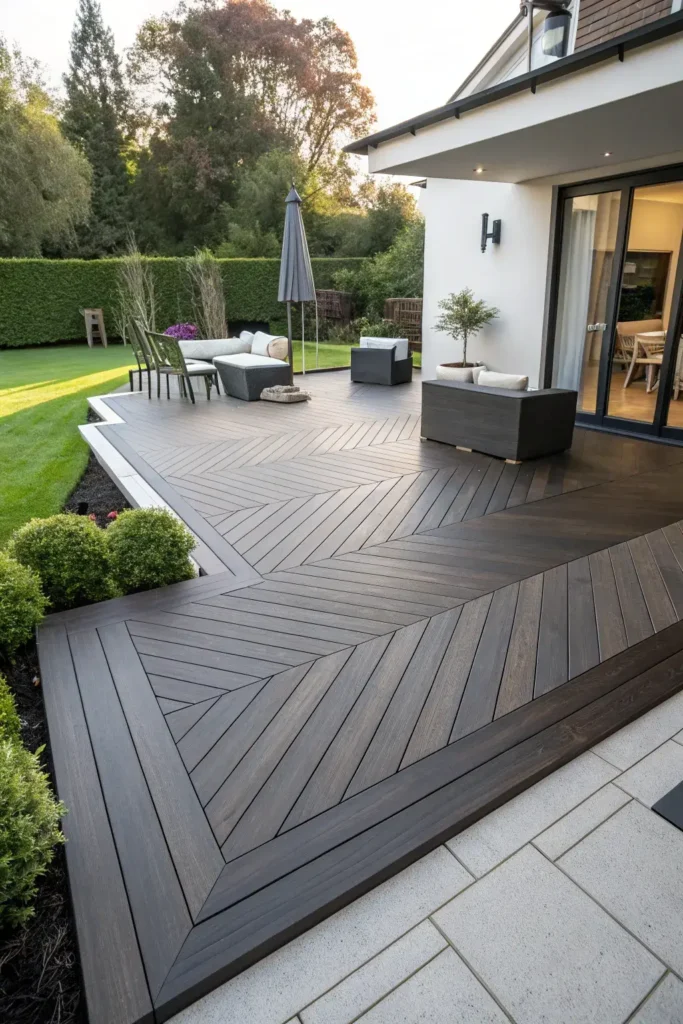
A herringbone inlay in the centre of the deck (typically a 4 x 4-foot or 4 x 6-foot panel) creates a focal point under the dining table or at the top of the stairs. Each board in the herringbone is cut to the same length (12 to 18 inches for composite, up to 24 inches for hardwood) and laid at alternating 45-degree angles to form a zigzag pattern. Use boards 1 inch narrower than the field boards (3.5-inch face on a 5.5-inch field) to emphasise the weave pattern, and keep the herringbone panel bordered by a double-width frame board in a third contrasting colour.
A herringbone panel requires solid blocking or a plywood sub-deck underneath because the short board segments need continuous fastener support at irregular angles. Camo Edge Fasteners ($60 to $80 per 350-count box) or hidden clip systems work well here because face screws in a tight herringbone pattern look cluttered and draw attention away from the design. Budget 3 to 5 hours of labour for a 4 x 6-foot herringbone panel by an experienced carpenter, and dry-lay the entire pattern on the ground beside the deck before committing to permanent fasteners.
5. Geometric Tile Patchwork
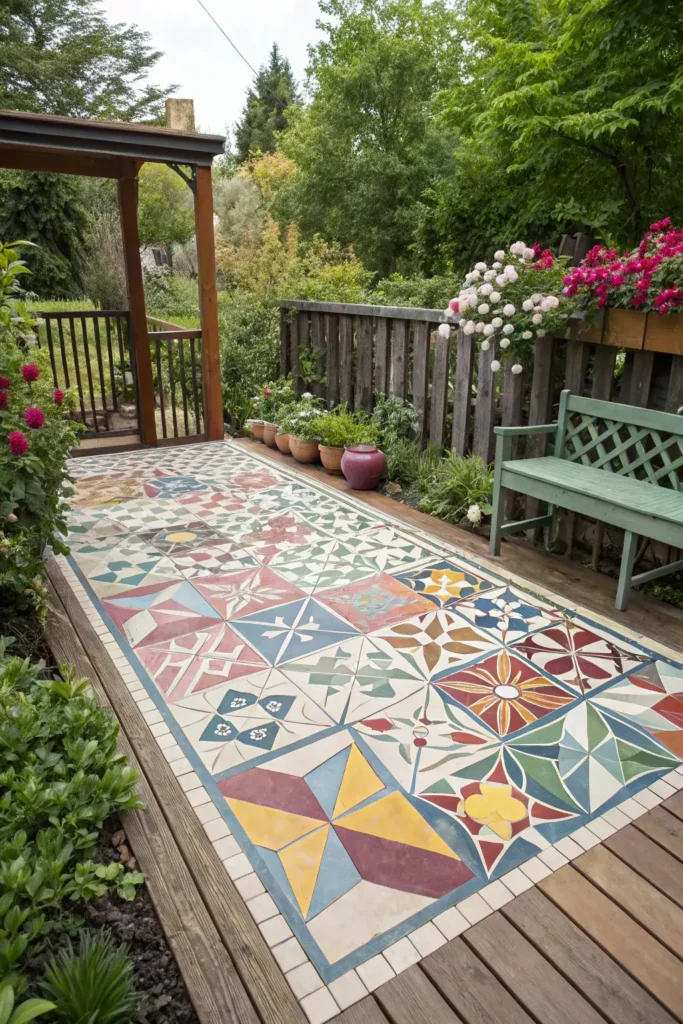
A tile-style patchwork divides the deck surface into square or rectangular modules (typically 2 x 2 or 3 x 3 feet) with each module running its boards in a different direction, straight, diagonal, or perpendicular, to create a quilt-like surface. Ipe and cumaru hardwoods work best for patchwork inlays because their tight grain and dark colour make the direction changes easy to read from standing height. Each module sits on its own joist sub-frame, and the frames bolt together with Simpson Strong-Tie angle brackets ($2 to $4 each) for a rigid connection.
Plan the module layout on paper first, numbering each square and marking the board direction with an arrow, then build each module as a separate unit on sawhorses before dropping it into position on the deck frame. A thin reveal strip (1/4-inch gap or a contrasting metal T-channel from Schluter Reno-T, $3 to $5 per linear foot) between modules sharpens the grid lines and hides any minor spacing errors. Patchwork decks use 15 to 25 percent more material than a straight-run deck, so order accordingly and keep at least 10 percent overage on hand for re-cuts.
6. Transition Board Dividers
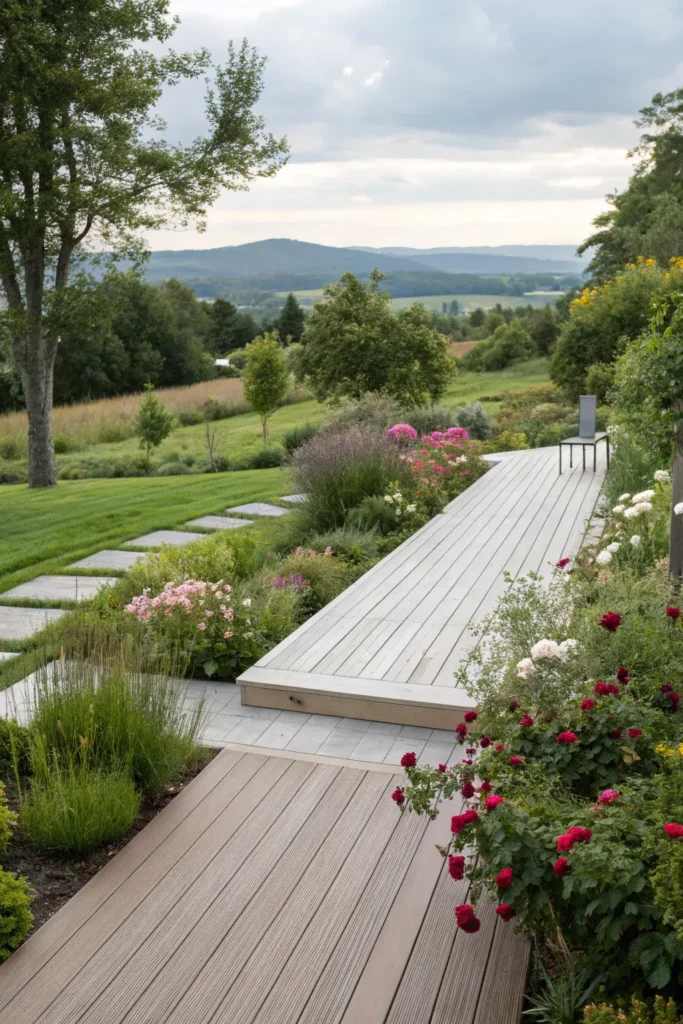
A single contrasting board running across the width of the deck at every direction change, level change, or zone boundary creates a clean divider that organises the deck into rooms without walls. Transition boards work especially well on multi-level decks where the upper and lower sections meet at a step: a dark Azek Vintage Dark Hickory board laid flat at the nosing separates the two zones and signals the level change underfoot. On a single-level deck, run a transition board across the midpoint to divide a dining zone from a lounge zone.
Support each transition board with a doubled joist or a 2×8 blocking piece running perpendicular to the main joists underneath, because the transition board runs cross-grain to the field and needs its own fastener line. Add a front porch border detail at the house-side edge of the deck for a consistent look from inside looking out. Use the same board colour for all transition strips on a multi-zone deck to keep the palette unified: mixing three or four contrast colours in the dividers creates visual noise that fights the pattern rather than framing it.
7. Custom Logo or Monogram
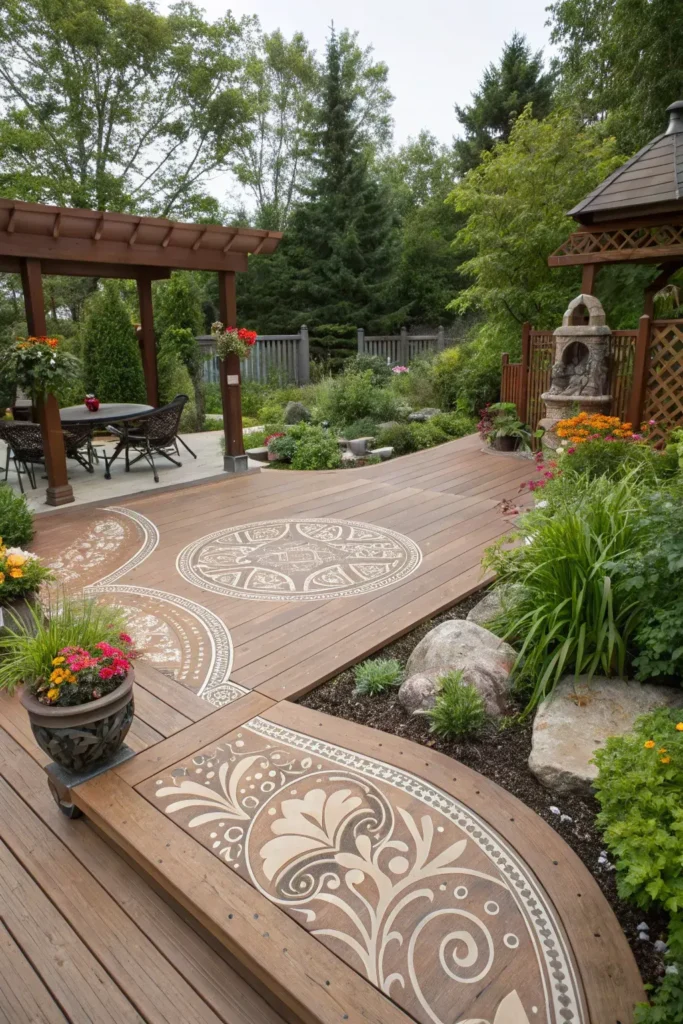
A CNC-routed or hand-cut logo, family monogram, or compass rose inlaid into the deck surface turns the floor into a one-of-a-kind feature. Ipe and mahogany are the best carving woods for deck inlays because their density holds fine detail without chipping, and the dark grain contrasts sharply against a lighter field board. A CNC router ($5,000 to $15,000 for a 4 x 4-foot bed machine, or $200 to $500 per custom panel through a local sign shop) cuts the design into a pre-assembled panel that drops into a framed opening in the deck surface.
For a simpler DIY version, print the design full-size on paper, trace it onto a contrasting board with a pencil, and cut the outline with a jigsaw fitted with a fine-tooth blade (14 to 20 TPI). Glue and pin-nail the cut piece into a matching cutout in the field board, then sand the joint flush with 120-grit sandpaper. Seal the inlay with Penofin penetrating oil or Ipe Oil ($30 to $50 per quart) to lock the colour contrast and prevent the lighter wood from greying faster than the darker piece.
8. Leaf and Vine Motifs
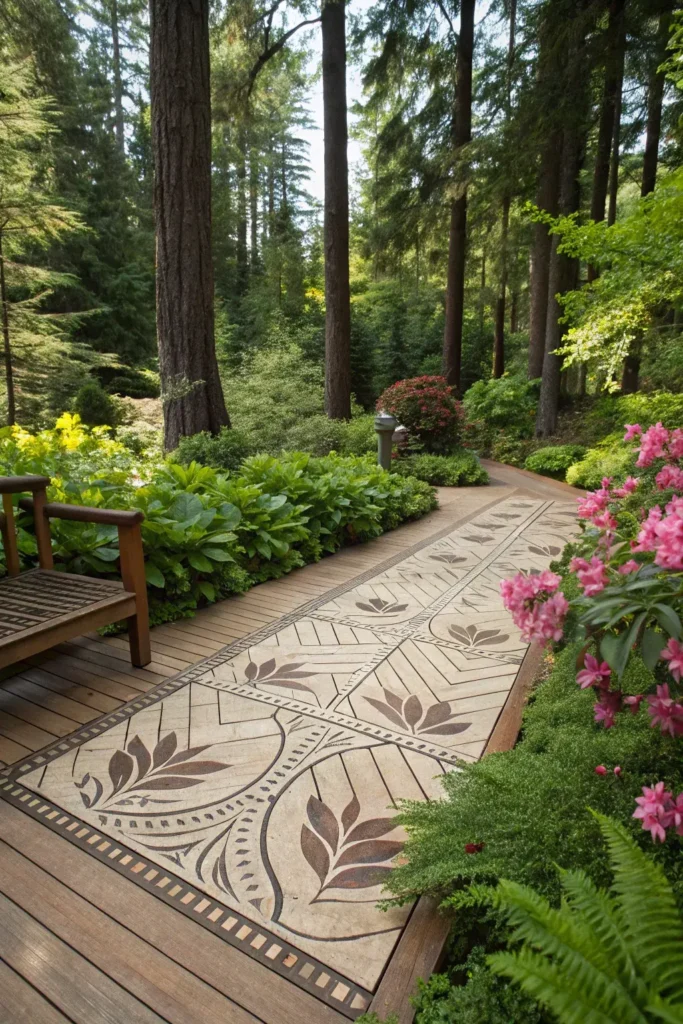
A leaf or vine pattern carved or inlaid into the deck boards near the railing or along a planter edge ties the deck visually to the surrounding garden. Tigerwood and padauk make striking leaf inlays because their natural reddish-orange tones stand out against a grey or brown composite field. Cut each leaf shape from a template (trace a real leaf or download a vector file) and rout a matching pocket 1/4-inch deep into the field board with a palm router ($100 to $200 from Bosch or DeWalt) fitted with a 1/4-inch straight bit.
Glue the inlay piece into the pocket with waterproof Titebond III ($8 per 16-ounce bottle), clamp it flat, and sand the surface flush after 24 hours. Scatter three to five leaf inlays along one edge of the deck rather than covering the entire surface, because a few well-placed accents read as intentional art while too many look busy. A vine motif uses a thin contrasting strip (1/4-inch wide, routed into a winding channel across two or three boards) connecting the leaf shapes for a flowing, organic line.
9. Bold Geometric Diamonds
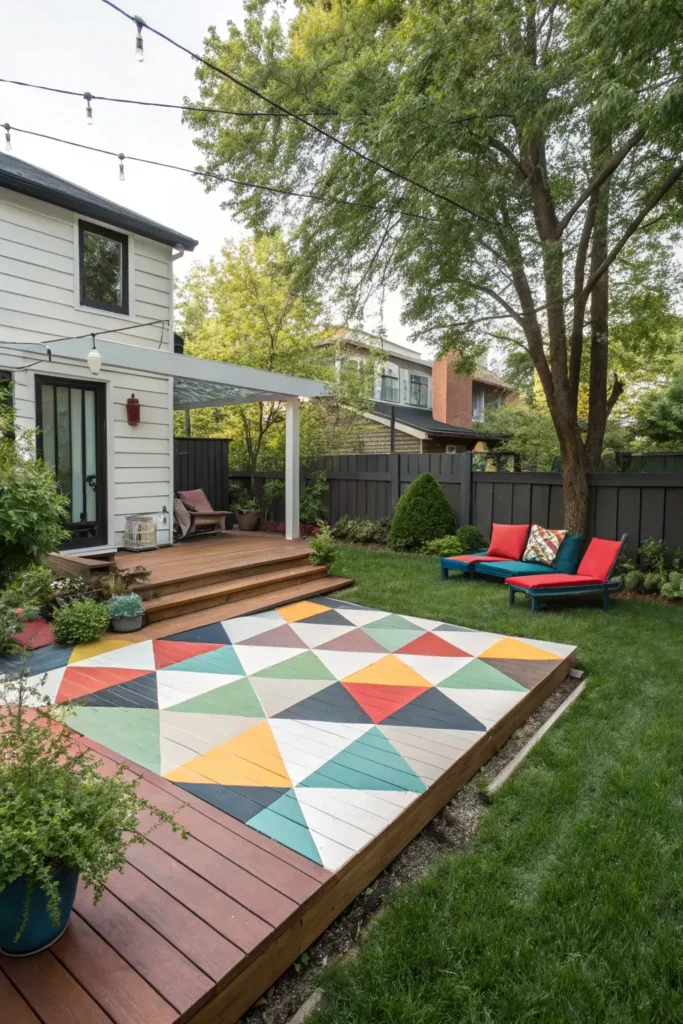
A large diamond pattern (3 x 3 feet or 4 x 4 feet) set into the centre of the deck creates a medallion effect that works as a table centrepiece or a standalone floor feature at the top of a staircase. Cut four equal-length boards at 45-degree miters and join them point-to-point to form each diamond, using biscuit joints or Domino tenons ($40 per 500-count from Festool) at the miters for precise joint registration. A contrasting diamond set inside a matching-colour field, or a matching diamond set inside a contrasting border, both produce sharp results.
Frame the diamond with a 2-inch border strip in a third colour for maximum definition, and support the entire panel with solid blocking underneath because the miter joints sit at odd angles to the joist layout. A tiki hut deck with a compass-rose diamond at the entry makes a strong first impression that carries the design intent from the ground up. Pre-assemble the diamond on a flat workbench, check it with a framing square at all four corners, and transport the finished panel to the deck for drop-in installation.
10. Sunburst Radiating Pattern
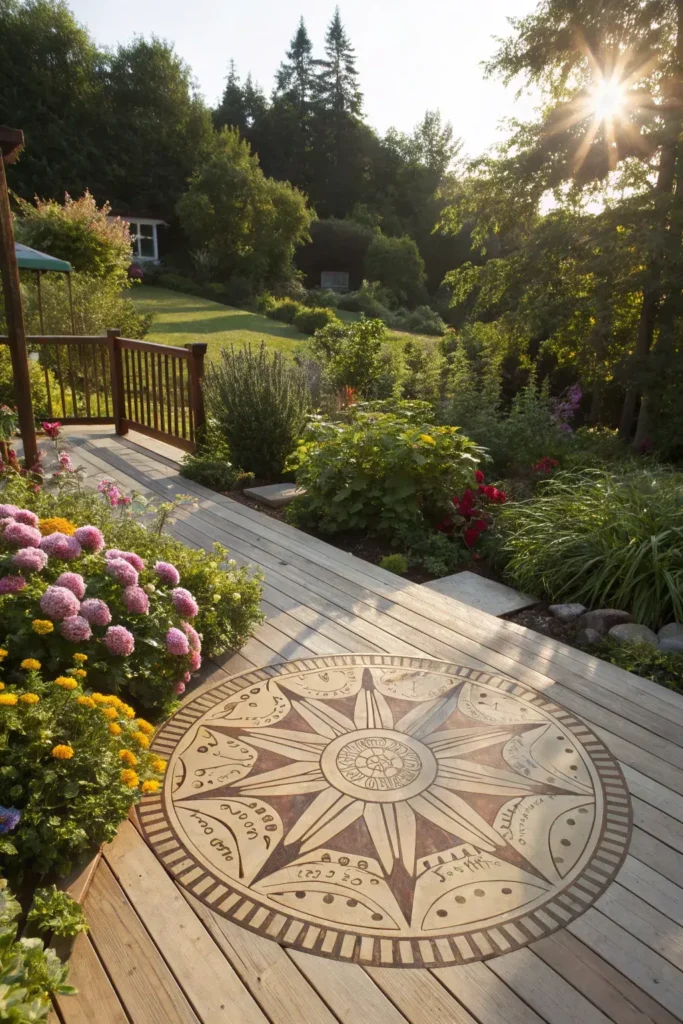
A sunburst pattern radiates boards outward from a centre point like the spokes of a wheel, creating a circular or semicircular focal point on a round deck, a landing, or a bay-window bump-out. Each board tapers from wide at the outer edge to narrow at the centre point, and the taper angle depends on the number of spokes: 12 spokes require a 30-degree taper, 16 spokes a 22.5-degree taper, and 24 spokes a 15-degree taper. Use a table saw with the fence set to the taper angle and a featherboard for consistent, safe cuts on each spoke.
The centre point of the sunburst needs a hub, either a round metal medallion ($30 to $80 from deck-hardware suppliers), a turned hardwood plug (3 to 4 inches in diameter), or a small mosaic tile inset. Support the spoke boards with radial blocking underneath, fanning out from the centre like wagon-wheel spokes, with each blocking piece running directly under a board joint. Alternate two contrasting spoke colours (dark/light/dark/light) for a pinwheel effect, or use a single colour with the grain direction doing all the visual work.
11. Mosaic Tile Insert
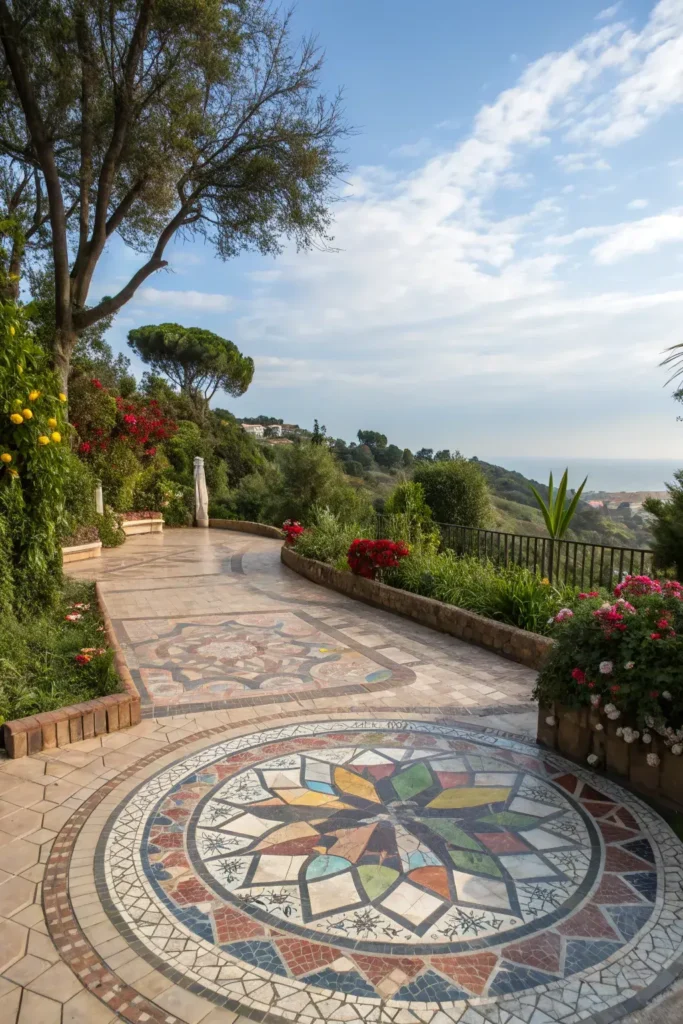
A recessed panel in the deck surface filled with outdoor-rated mosaic tiles adds colour and detail that wood or composite alone cannot match. Cut a 2 x 2-foot or 2 x 3-foot opening in the deck field, frame it with a pressure-treated 2×4 ledger on all four sides, and drop in a 3/4-inch exterior-grade plywood backer screwed to the ledger. Set the mosaic tiles onto the plywood with Mapei Kerabond thinset ($15 per 25-pound bag) and grout with Mapei Keracolor U unsanded grout ($12 per 10-pound bag) in a complementary colour.
Use porcelain or natural stone mosaic sheets ($8 to $25 per square foot from Floor and Decor or The Tile Shop) rated for exterior freeze-thaw exposure (look for the snowflake symbol on the box). Set the plywood backer 1/4 inch below the surrounding deck surface so the tile and thinset sit flush with the field boards after installation. Seal the grout with Aqua Mix Sealer’s Choice Gold ($20 per quart) once a year to prevent moisture penetration and staining. A mosaic insert near the grill or outdoor kitchen area serves as both a decorative feature and a heat-resistant hot-plate landing zone.
12. Wave and Curve Patterns
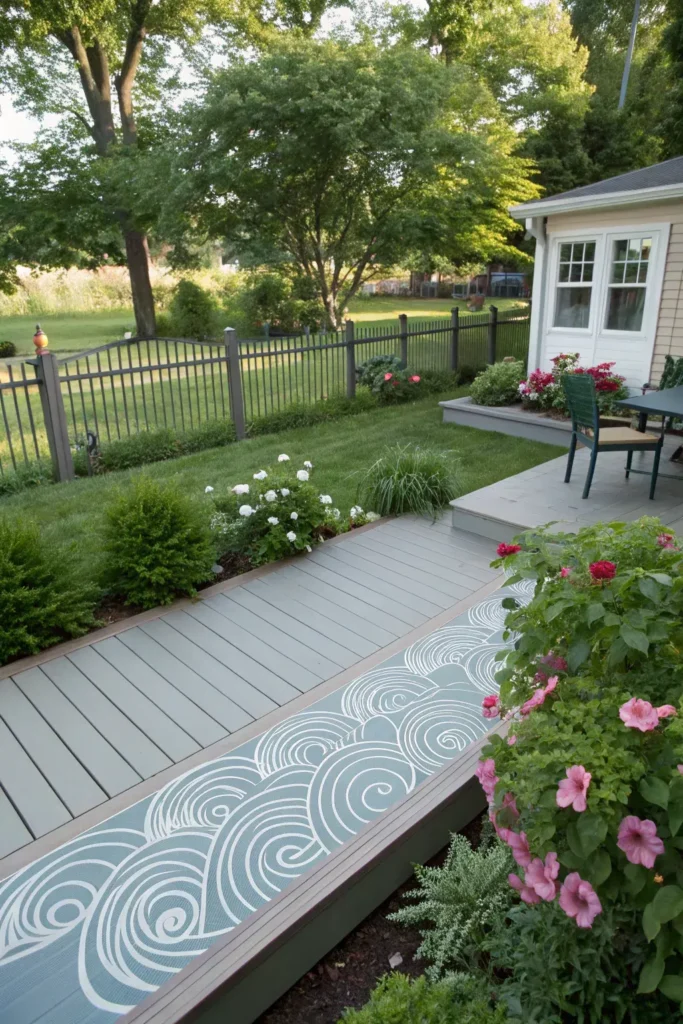
A curved or wave-shaped inlay strip running through straight field boards adds organic movement to the deck surface and works especially well on waterfront properties and pool decks. Cut the wave shape from a contrasting board (3/4-inch thick, 5.5 inches wide) by tracing a plywood template with the wave profile drawn using a flexible spline or a bent piece of PVC pipe. A bandsaw ($300 to $800 from Rikon or Laguna) with a 1/2-inch 6-TPI blade makes the smoothest curved cuts in decking material.
Rout a matching wave channel into the field boards using a pattern-following router bit ($25 to $40) riding against the same template, then glue and clamp the wave strip into the channel. Sand the surface flush and seal both the inlay and the surrounding field with the same finish to prevent differential weathering. A single wave strip running the full length of a 20-foot deck is more striking than multiple short wave segments, so use the longest boards available (16- to 20-foot lengths in composite, or scarfed hardwood joints hidden inside the curve troughs) to keep the line unbroken.
13. Basket Weave Panel
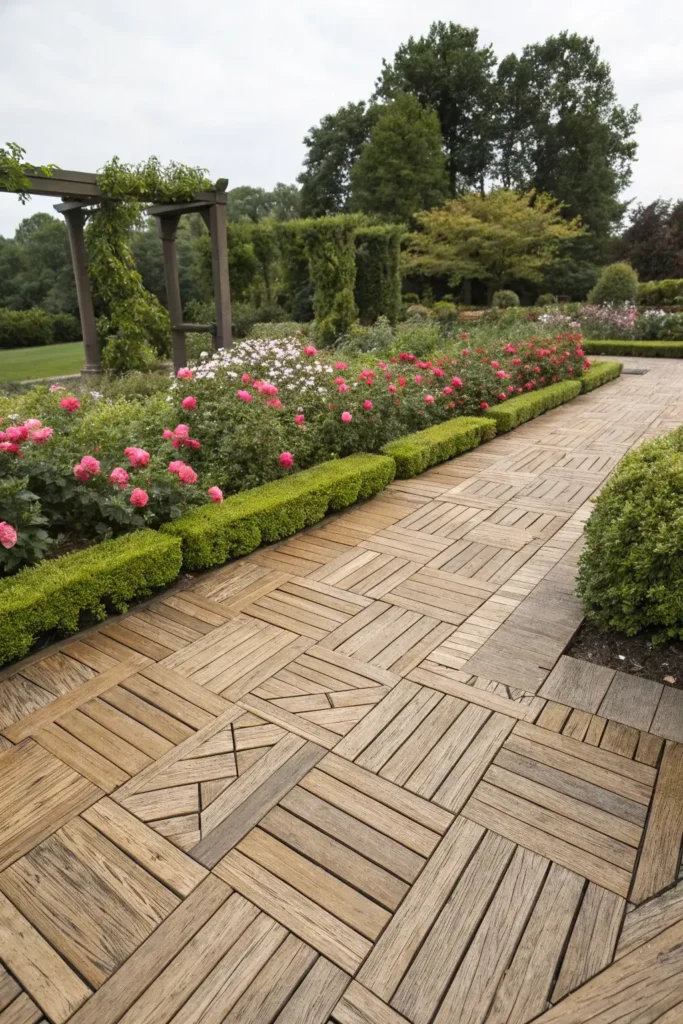
A basket weave pattern alternates pairs of short boards running horizontally with pairs running vertically inside a square grid, creating a woven-mat look that catches light differently from each viewing angle. Cut all boards to the same length (equal to the width of two boards plus one gap, typically 11.5 to 12 inches for 5.5-inch-wide composite) and assemble each square module on a flat surface before screwing it to the joist frame. A two-tone basket weave (dark boards running one way, light boards the other) sharpens the woven illusion.
Support the basket weave with a grid of blocking underneath: run 2×6 blocking in both directions at the module boundaries (every 12 inches) so every board end has a fastener point. Small decks benefit most from a full-surface basket weave because the tight pattern makes the space look larger, like floor tile in a small bathroom. Use hidden fastener clips ($80 to $120 per 100-count box) instead of face screws to keep the woven surface smooth and screw-free: face screws at a 12-inch grid look like polka dots and compete with the basket pattern.
14. Minimalist Linear Accent
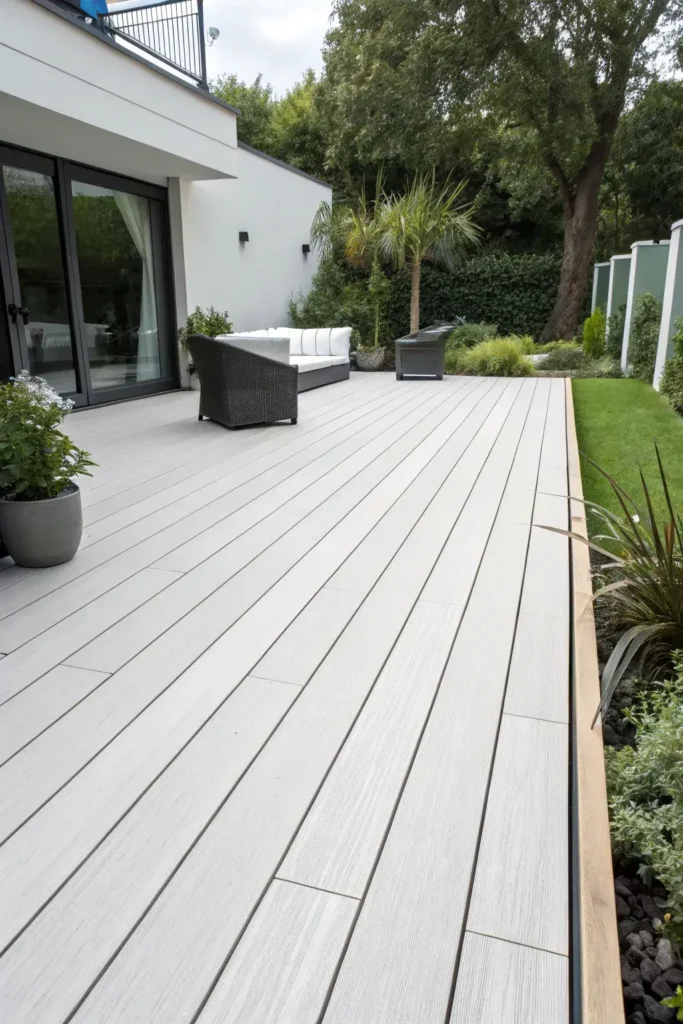
A single thin accent strip (1 to 2 inches wide) routed into the deck surface and filled with a contrasting material, aluminium flat bar, epoxy resin, or a narrow hardwood strip, delivers a modern, clean-lined inlay with less material waste and less labour than any other pattern on this list. Aluminium flat bar (1/8-inch thick, 1-inch wide, about $1 to $2 per linear foot from metal suppliers) sits in a routed channel and catches light in a way that wood cannot match, while tinted epoxy resin ($30 to $50 per quart from TotalBoat or Pro Marine) fills a routed groove and can glow in the dark when mixed with phosphorescent powder ($15 per 4-ounce jar).
Run the linear accent parallel to the long axis of the deck, offset 12 to 18 inches from one edge, for a single racing-stripe effect. Two parallel lines spaced 6 to 8 inches apart create a runway or lane marker that subtly guides foot traffic. A porch floor with a similar linear border ties the deck and the house entry together when both use the same accent material and colour. Rout the channel 1/4-inch deep with a straight bit matched to the strip width, dry-fit the material, then set it permanently with construction adhesive or epoxy and sand flush.
How to Plan and Install a Deck Inlay
1. Choose the Inlay Location and Size
Decide where the inlay will sit (centre of the deck, top of the stairs, under the dining table, or along a border) and measure the available area. A centre medallion typically covers 10 to 15 percent of the total deck surface, while a border covers the outermost 12 to 18 inches. Sketch the design on graph paper at 1-inch-per-square scale and mark the joist positions underneath to confirm the pattern aligns with the framing.
2. Select Materials and Colours
Pick two or three board colours with at least two shades of contrast between them. Order 15 to 20 percent more material than the pattern requires to account for miter waste and re-cuts. For mixed-material inlays (wood plus metal or tile), confirm that all materials have the same finished thickness or plan the sub-frame depth to bring them flush.
3. Build the Sub-Frame and Blocking
Add doubled joists, cross-blocking, or a plywood backer underneath the inlay area so every board end and every miter joint has a fastener point within 1 inch. Diagonal, herringbone, and sunburst patterns need blocking at angles that the standard parallel-joist frame does not provide, so plan the blocking layout before installing any field boards.
4. Dry-Lay, Fasten, and Finish
Dry-lay the entire inlay pattern on a flat surface (garage floor, driveway, or a sheet of plywood on sawhorses) and check all joints for tight fits before carrying the pieces to the deck. Fasten with hidden clips or pre-drilled face screws, working from the centre of the inlay outward. Seal all cut ends with end-grain sealer ($10 to $15 per quart) to prevent moisture uptake, and apply a coat of penetrating deck oil or stain to the finished inlay within 48 hours of installation. Visit The Designers Company for more deck pattern and outdoor flooring guides.
Deck Inlay Material Comparison
| Material | Cost per Sq Ft | Workability | Durability | Best Pattern Use |
|---|---|---|---|---|
| Composite (PVC-capped) | $5 – $12 | Easy to cut, no grain matching | 25-year fade/stain warranty | Borders, pinstripes, basket weave |
| Ipe Hardwood | $8 – $15 | Hard to cut, dulls blades fast | 40+ years, Class A fire rating | Herringbone, logo, mosaic frame |
| Cedar | $3 – $6 | Easy to cut, takes stain well | 15 – 20 years with annual seal | Leaf motifs, wave curves |
| Tigerwood | $6 – $10 | Medium difficulty, dramatic grain | 25 – 30 years | Accent strips, leaf inlays |
| Aluminium Flat Bar | $1 – $3 per lin ft | No cutting needed for straight runs | Lifetime, no maintenance | Linear accents, racing stripes |
| Porcelain Mosaic Tile | $8 – $25 | Requires thinset and grout skill | Freeze-thaw rated, 30+ years | Centre medallion, accent panel |
Frequently Asked Questions
Can I add an inlay to an existing deck?
Yes. Remove the field boards in the inlay area, add blocking underneath to support the new pattern, and install the inlay boards on the exposed joist frame. A retrofit inlay costs more in labour than building one into a new deck because the existing boards must be removed without damaging the joists, but the result looks the same. Budget 1 to 2 extra hours of deconstruction time for a 4 x 4-foot retrofit panel.
What is the easiest deck inlay for a DIY builder?
A single-width contrasting border (item 1 above) is the simplest inlay because it requires only straight cuts and one direction change at the corners. Pinstripe accent boards (item 2) are the next easiest because the stripe boards install on the same joists as the field with no extra framing. Both patterns can be completed by a confident DIYer with a miter saw and a drill in one weekend.
Do inlays weaken the deck structure?
No, as long as the sub-frame provides continuous support under every inlay board. Direction changes (diagonal, herringbone, sunburst) need extra blocking at the new angles, but the blocking actually stiffens the frame beyond what a standard parallel-joist layout provides. Always check that every board end within the inlay sits within 1 inch of a fastener point on the framing.
How do I prevent colour fading in a two-tone inlay?
Capped composite boards (from Trex, TimberTech, or Fiberon) come with 25-year fade warranties and need no additional sealing. Natural hardwood inlays need an annual coat of UV-blocking penetrating oil (Penofin Ultra Premium, $45 per quart, or TWP 1500, $50 per gallon) applied before the wood greys. Recoat every 12 months for hardwood, or whenever a water-drop test shows absorption in under 30 seconds.
What tools do I need for deck inlay work?
A 12-inch sliding miter saw handles all angle cuts, a jigsaw or bandsaw handles curves, a palm router with a 1/4-inch straight bit cuts channels for linear inlays, and a drill/driver with a countersink bit handles all fastening. Add a framing square, a chalk line, and a tape measure, and that toolkit covers every pattern in this guide.