
Basement Kitchen Ideas: 18 Stylish Options to Upgrade Your Home
A basement kitchen converts underused square footage below grade into a fully functional cooking, entertaining, and guest-hosting space without adding onto the home’s footprint. Building codes in most US jurisdictions allow a basement kitchen when the space has a ceiling height of at least 7 feet (6 feet 8 inches under beams), a window or egress point, and connections to existing plumbing drain, water supply, and a dedicated 20-amp electrical circuit for kitchen appliances.
Basement kitchens work hardest as in-law suite kitchenettes, home theater snack bars, rental-unit cooking areas, and entertaining zones for game rooms and wet bars. The main design challenge below grade is limited natural light, which every layout decision, cabinet color, countertop material, and lighting fixture must address head-on.
The 18 basement kitchen ideas below cover full layouts, material pairings, and design tricks that solve the low-light, low-ceiling constraints that make below-grade kitchens different from main-floor rooms. Browse The Designers Company for more kitchen layout, lighting, and renovation inspiration.
1. One-Wall Galley Layout

A one-wall layout lines the refrigerator, sink, range, and all cabinetry along a single 10-to-16-foot wall, leaving the rest of the basement floor open for seating, storage, or a media area. IKEA’s KNOXHULT and SUNNERSTA modular kitchen systems and Home Depot’s Hampton Bay stock cabinets both fit one-wall basement installations for under $3,000 in materials, including countertop and sink.
Run 36-inch-tall base cabinets under a laminate or butcher-block countertop, then stack 12-inch-deep wall cabinets or open shelving above. A single 30-inch base cabinet holds a compact 24-inch range, while a 36-inch cabinet beside it houses the sink. Place the refrigerator at one end of the run and the microwave in an upper cabinet at the opposite end to distribute the workflow across the full wall.
One-wall layouts suit basements under 200 square feet where a two-wall or L-shape configuration would choke the walking path. The open floor area opposite the kitchen wall provides room for a freestanding island, a pub-height table, or a row of bar stools without any structural modification to the room.
2. Colorful Cabinet Fronts
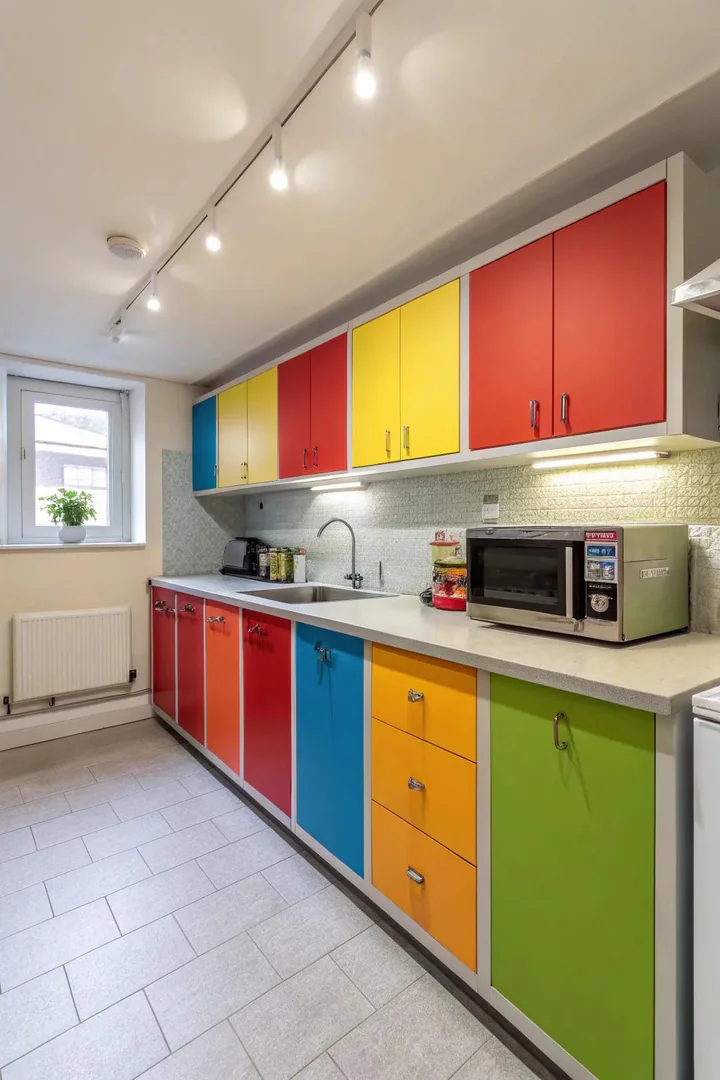
Colored cabinets inject energy into a basement kitchen that limited natural light would otherwise make feel dull and cave-like. Benjamin Moore’s Cushing Green (HC-125), Farrow and Ball’s Hague Blue (No. 30), and Sherwin-Williams’ Urbane Bronze (SW 7048) all perform well on cabinet fronts in low-light environments because their deep pigment reads as intentional and moody rather than washed out.
Pair colored base cabinets with white or cream upper cabinets to maintain brightness at eye level. A two-tone scheme, sage green lowers with white uppers, prevents the room from feeling heavy while still delivering the color impact a monochrome white kitchen lacks. Match the cabinet hardware to a warm metal, aged brass cup pulls from Amerock or satin gold bar pulls from Top Knobs, to add warmth against the colored paint.
Semi-gloss or satin paint finishes reflect more ambient light than matte finishes and wipe clean from cooking splatter with a damp cloth. Prime cabinets with Zinsser BIN shellac-based primer before applying two coats of Benjamin Moore Advance or Sherwin-Williams Emerald Urethane Trim Enamel for a factory-smooth, self-leveling finish that resists chipping in high-traffic kitchen areas.
3. Corner Kitchenette
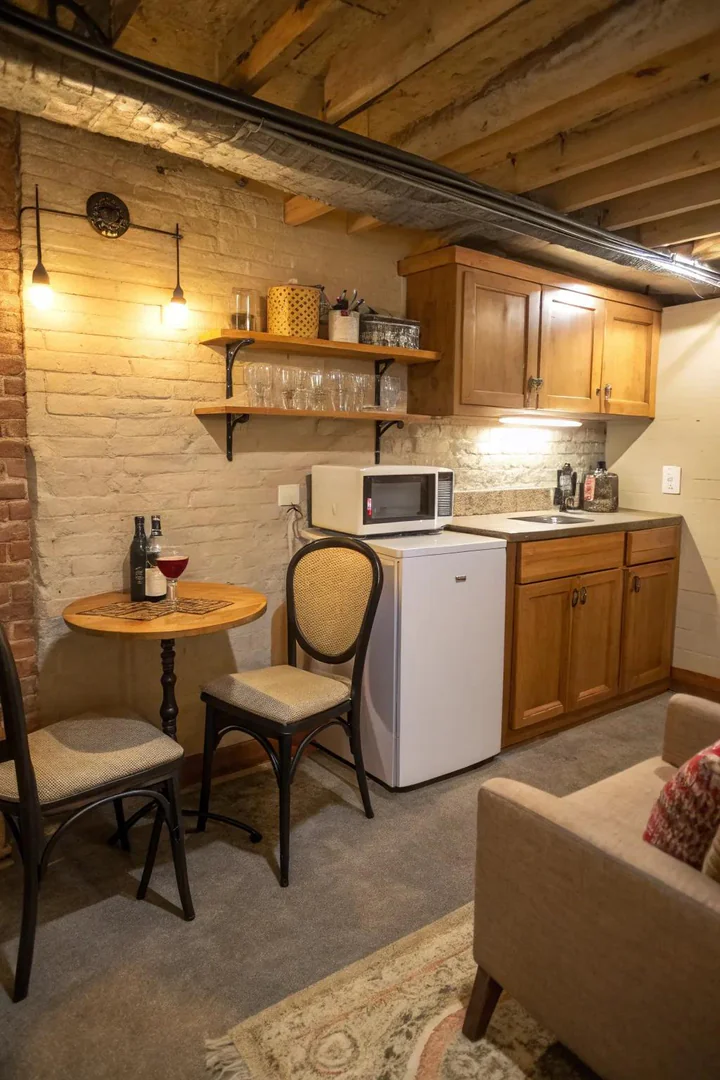
A corner kitchenette tucks the cooking zone into an L-shaped footprint that occupies two adjacent walls totaling 8 to 12 linear feet. The compact L-shape provides a natural work triangle between the sink at the corner, the range on one arm, and the refrigerator on the other, keeping all three stations within two or three steps of each other.
IKEA’s METOD system, configured as a corner kitchen, delivers a complete kitchenette with base cabinets, a corner sink base, a countertop, and wall cabinets for under $2,500. Pair the cabinet system with a 24-inch compact range from GE or Avanti, a 24-inch bottom-freezer refrigerator from Danby, and a stainless steel drop-in sink from Kraus or Elkay for a fully operational kitchen in less than 50 square feet of floor space.
Corner kitchenettes suit studio-style basement apartments, guest suites, and accessory dwelling units (ADUs) where local zoning requires a kitchen but the overall square footage limits the layout to the smallest workable configuration. Run LED strip lights under the wall cabinets on both arms of the L to eliminate the shadow pockets that corner installations create where the two walls meet.
4. Exposed Brick Feature Wall
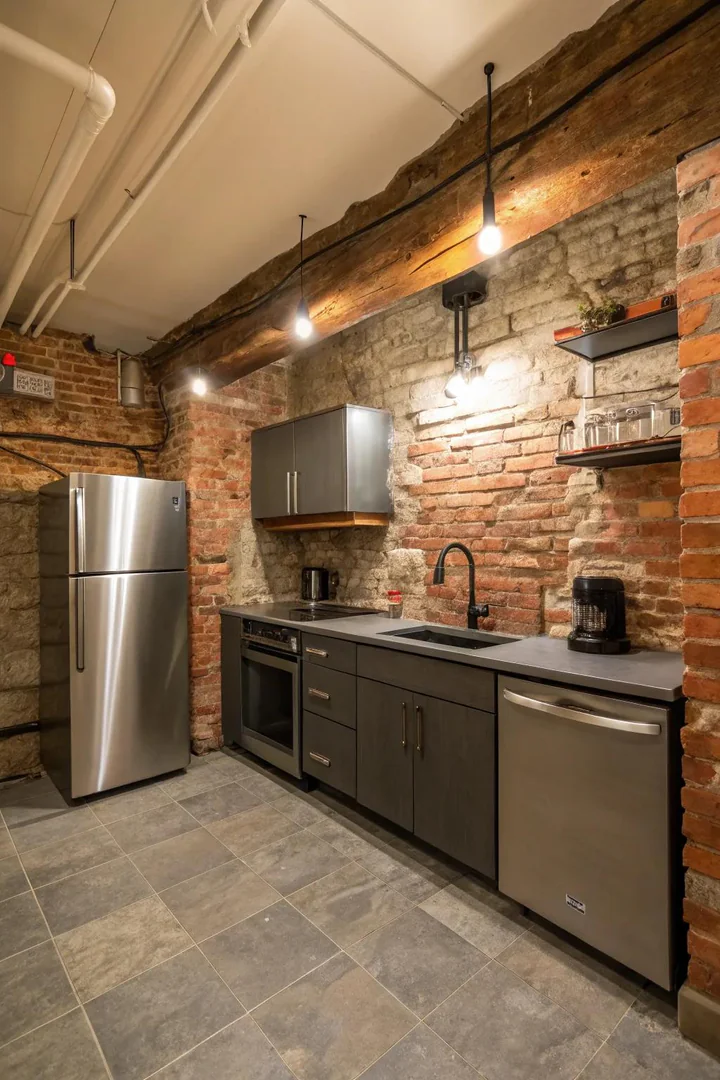
Many older basements have original clay brick or concrete block foundation walls that become a textural feature when cleaned, sealed, and left exposed behind the kitchen countertop. Wire-brush the mortar joints with a stiff nylon brush, apply a clear matte sealant like Ghostshield Siloxa-Tek 8500, and leave the raw brick as a backdrop for open shelving, a magnetic knife strip, or a floating wood shelf holding spice jars and oils.
Exposed brick absorbs light rather than reflecting it, so compensate with under-cabinet LED strips rated at 800 or more lumens per fixture and warm-white (2700K to 3000K) pendant lights hung above the counter. Wall sconces in industrial cage or gooseneck styles mounted directly on the brick with masonry anchors add both task light and a design element that echoes the raw, honest material.
Pair exposed brick with dark butcher-block countertops in walnut or acacia, matte black cabinet hardware, and open iron pipe shelving for a cohesive industrial-loft aesthetic. The warm red and brown tones of natural clay brick balance the cool gray light that small basement windows admit during the day.
5. Light and Bright Palette
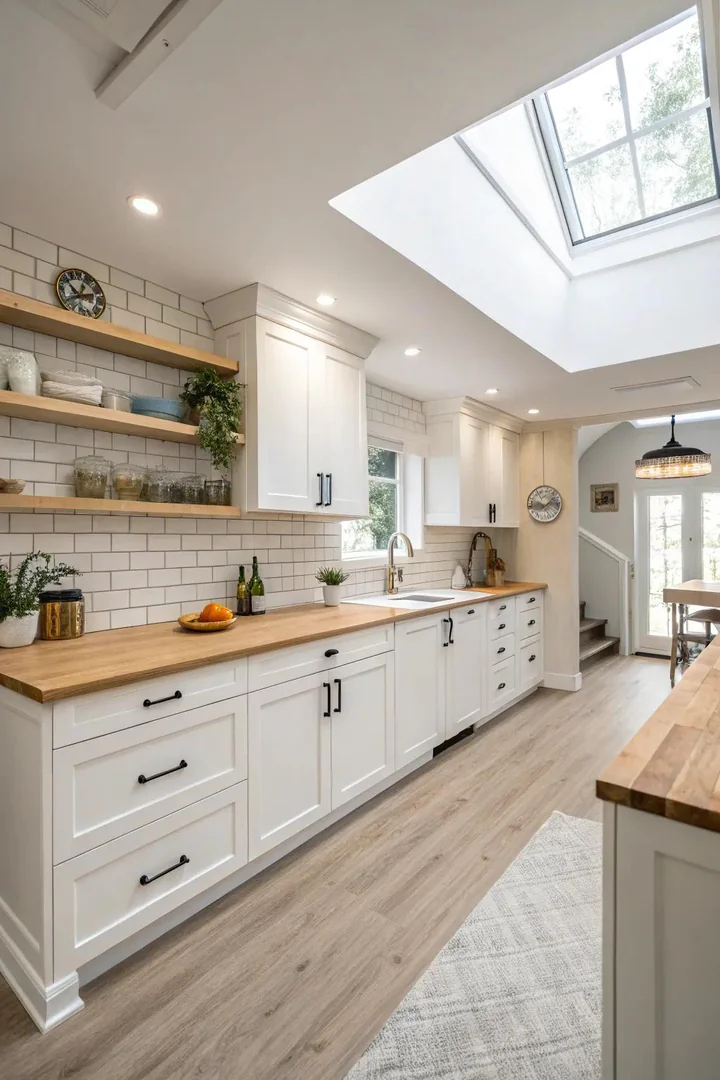
White flat-panel or shaker cabinets, a white quartz countertop, and a white subway tile backsplash reflect the maximum amount of artificial light in a windowless or single-window basement kitchen. Caesarstone’s Pure White (1141) and Silestone’s Blanco Maple both offer budget-friendly engineered quartz surfaces that bounce recessed can light across the room without the maintenance demands of white marble.
Add recessed 4-inch LED wafer lights on 4-foot centers across the ceiling, one fixture for every 20 to 25 square feet of floor area. A 10-by-12-foot basement kitchen needs five or six recessed lights at 800 lumens each to reach the 50 foot-candles recommended for kitchen task lighting. Supplement the ceiling cans with under-cabinet LED strips and a pendant or two above an island or peninsula.
Break the all-white palette with a single warm accent: a butcher-block end-grain cutting board, a set of terracotta canisters, brass bar pulls, or a woven rattan pendant shade. The single warm element prevents the white kitchen from reading as clinical and gives the eye a resting point amid the reflective surfaces.
6. Vertical Storage Solutions
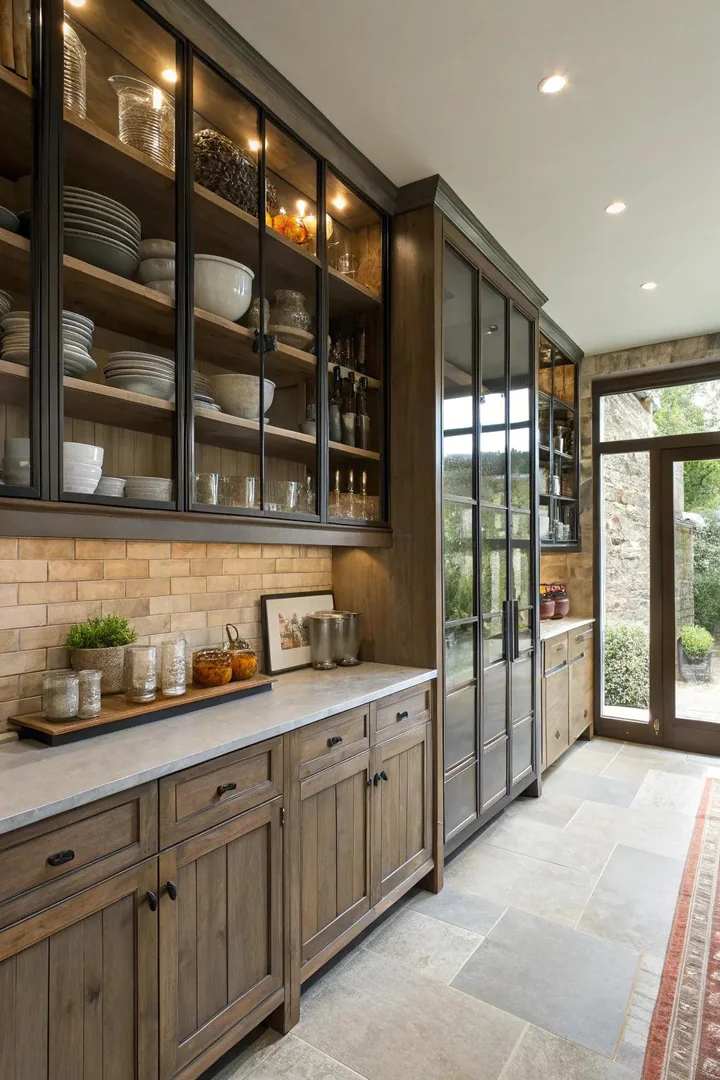
Basements often have 7-foot or 8-foot ceilings that limit upper cabinet height, so stacking storage vertically becomes the main strategy for squeezing capacity out of limited wall space. Floor-to-ceiling open shelving built from 3/4-inch birch plywood on steel shelf brackets from?”Amazon’s Industrial Shelf Bracket line reaches every usable inch from countertop to ceiling and costs under $200 in materials for an 8-foot-wide wall.
A tall 84-inch pantry cabinet from IKEA’s SEKTION system or Home Depot’s Hampton Bay line stores dry goods, small appliances, and cleaning supplies behind a single door, keeping visual clutter off the countertop. Place the tall cabinet at the end of a run of base cabinets rather than in the center of the wall to avoid breaking the horizontal countertop line.
Magnetic knife strips, wall-mounted spice racks, and ceiling-hung pot racks from Enclume or Cuisinart free up drawer and cabinet space for items that cannot hang. Attach the pot rack to ceiling joists with lag bolts rather than toggle bolts to support the weight of cast-iron skillets and heavy stockpots safely.
7. Compact Kitchen Island
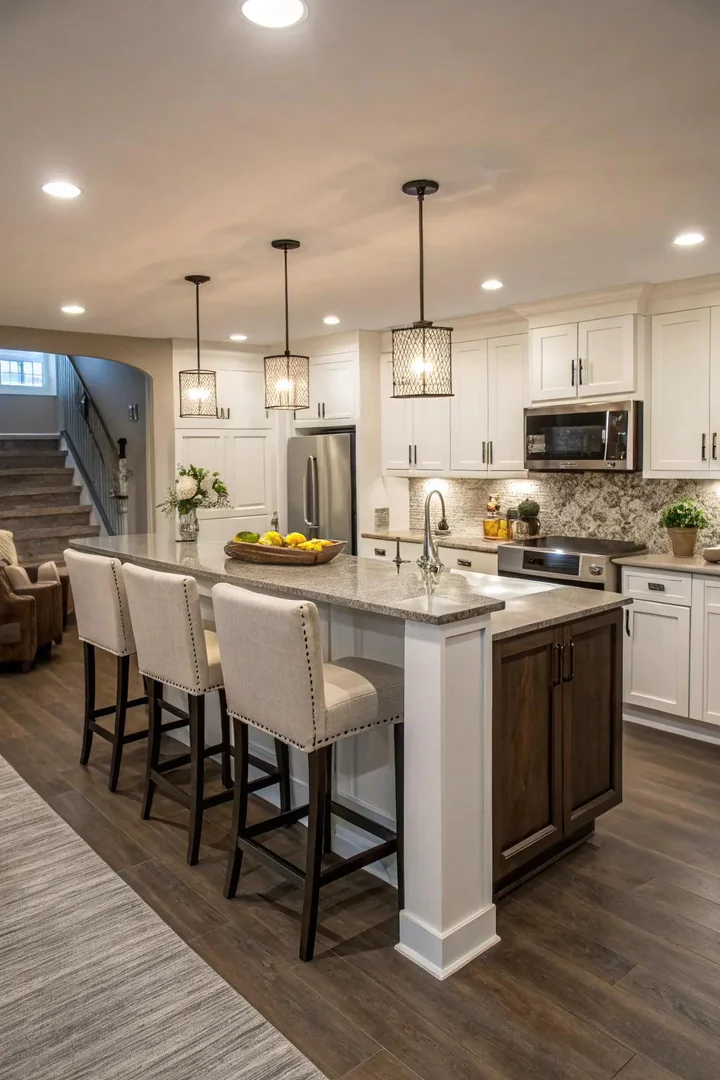
A freestanding island measuring 36 by 24 inches or 48 by 30 inches adds prep surface, storage shelves, and a casual eating ledge to a basement kitchen without permanent construction. IKEA’s STENSTORP and VADHOLMA rolling kitchen islands both come with a butcher-block top, two open shelves, a towel bar, and locking casters that allow the island to be moved aside when the floor space is needed for entertaining.
Leave at least 36 inches of clearance on all sides of the island for comfortable walking and cabinet-door clearance. A 48-inch-wide island fits comfortably in a basement kitchen that measures at least 10 by 12 feet, while a 36-inch cart-style island works in rooms as small as 8 by 10 feet. Add two backless stools at a 36-inch-high island for a breakfast bar that seats two without blocking the walkway.
A butcher-block island top doubles as a cutting surface and a serving platter staging area during parties. Oil the end-grain wood monthly with food-grade mineral oil from Howard Products to prevent drying and cracking in the low-humidity environment that basement heating systems create.
8. Mixed Material Surfaces
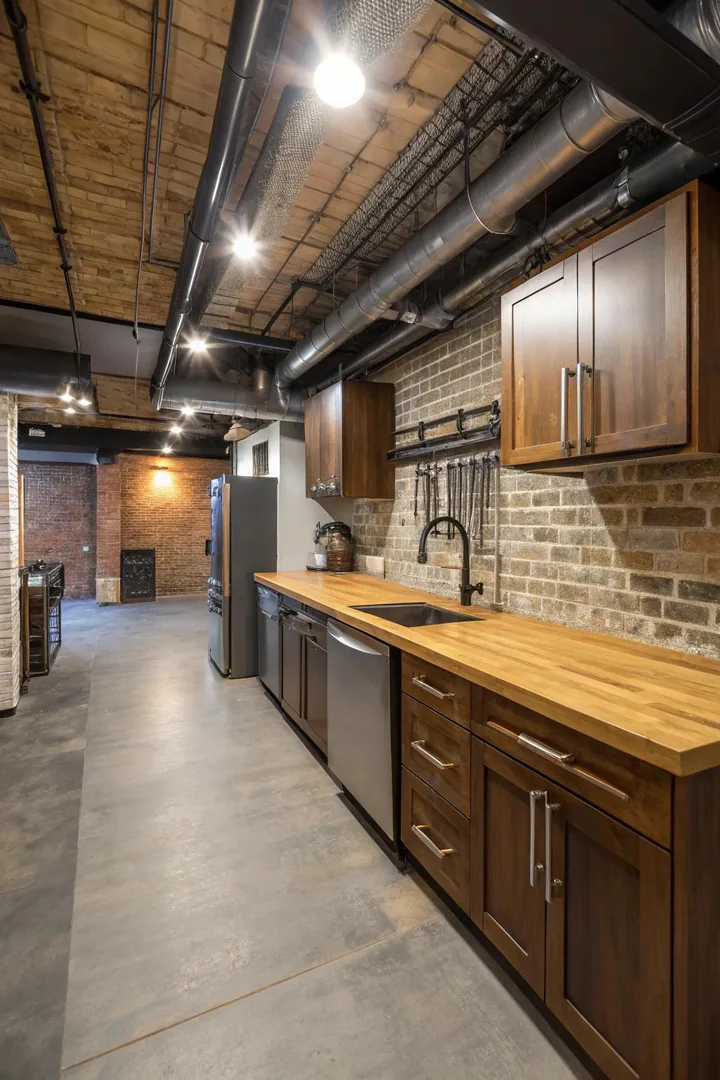
Combining two or three surface materials, such as dark-stained wood cabinets with a poured concrete countertop and a white ceramic subway tile backsplash, adds visual depth that a single-material kitchen lacks. The layered textures give the eye multiple stopping points and prevent the below-grade space from feeling flat or monotonous under artificial light.
Concrete countertops from Z Counterform’s DIY kit or professionally poured by a local fabricator deliver an industrial surface that pairs with both modern flat-panel and rustic shaker cabinets. Seal the concrete with a food-safe penetrating sealer like Cheng Concrete Countertop Sealer to prevent staining from coffee, wine, and cooking oils. The matte gray surface contrasts warm wood-grain cabinet fronts and adds a textural element that polished quartz or granite does not provide.
Limit the material palette to three dominant surfaces: one for cabinets, one for countertops, and one for the backsplash. Adding a fourth or fifth material, such as a different floor tile and a contrasting island top, risks visual clutter in a basement kitchen where the lower ceiling already compresses the space.
9. Basement Snack Bar Station
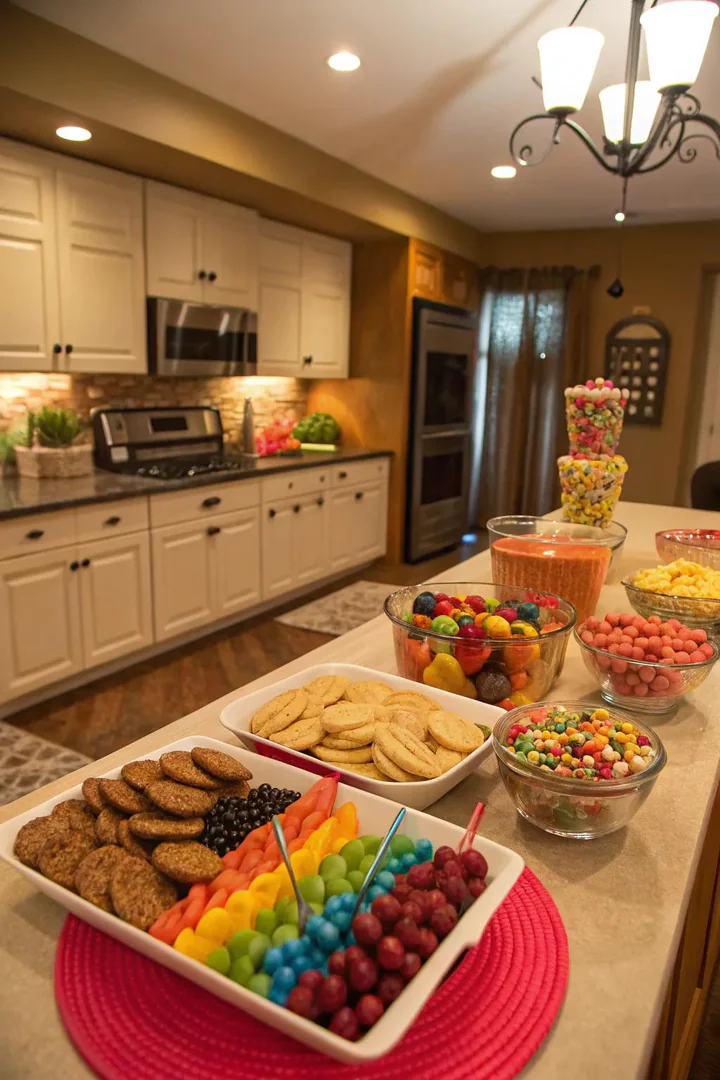
A snack bar station occupies as little as 4 linear feet of wall and serves a home theater, game room, or teen hangout without the plumbing demands of a full kitchen. Mount a compact 24-inch upper cabinet and an open shelf above a 24-inch-wide base cabinet that holds a Danby or Magic Chef 2.6-cubic-foot mini fridge. Set a countertop microwave on the base cabinet surface beside the fridge.
Skip the sink and dishwasher entirely if the basement lacks a floor drain or convenient access to the main drain stack. A sink installation in a basement without gravity drainage requires a sewage ejector pump like the Saniflo Sanibest Pro, adding $800 to $1,500 in materials and labor. A sinkless snack station avoids that cost and still delivers cold drinks, microwaved snacks, and dry-food storage for a media room.
Stock the open shelving with popcorn bowls, snack baskets, a coffee maker, and a set of glasses. Add a small butcher-block cutting board on the countertop for slicing fruit, cheese, and charcuterie without needing to run upstairs to the main kitchen during movie nights or game days.
10. Open Shelving Display
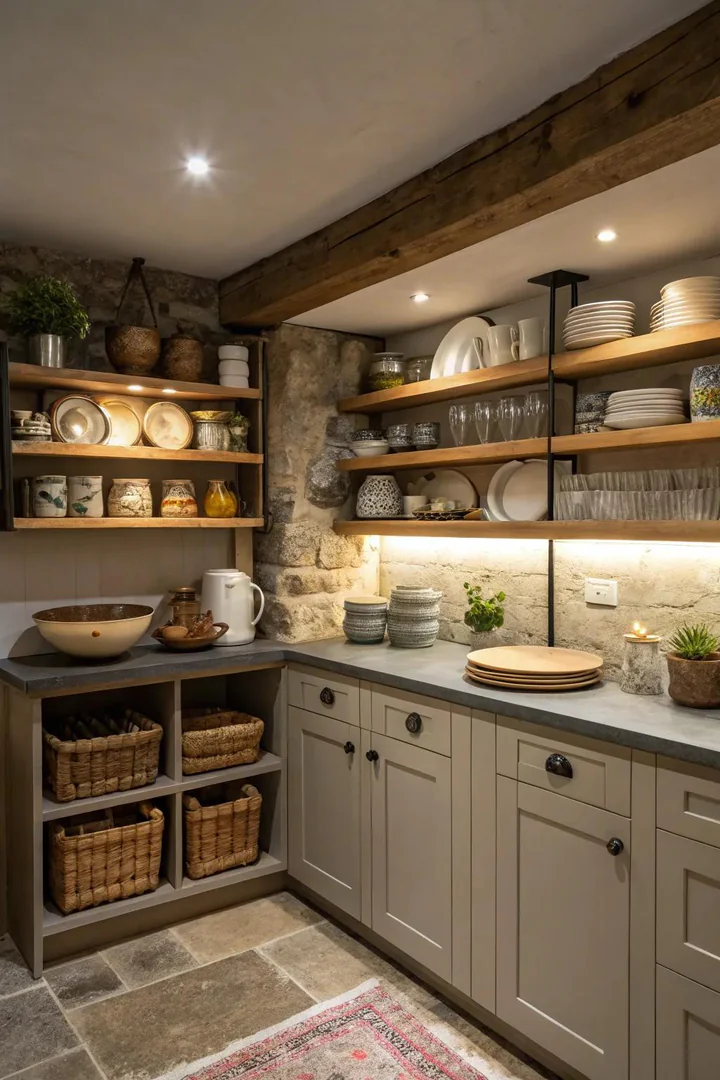
Replacing upper cabinets with floating wood shelves opens the wall visually and makes a low-ceiling basement kitchen feel taller and less boxed in. Solid wood floating shelves in white oak, walnut, or maple from Shelfology or Pottery Barn mount on concealed heavy-duty steel rod brackets that support 50 to 75 pounds per shelf without visible hardware.
Arrange the shelves with daily-use items, plates, bowls, mugs, and glasses, on the lower shelf at eye level, and decorative objects, small plants, cookbooks, and canisters, on the upper shelf. Limit open shelving to 6 to 8 linear feet and keep the remaining wall cabinets closed-door for items that collect dust or look cluttered when exposed.
Open shelves in a basement kitchen collect airborne dust and cooking grease faster than in a well-ventilated main-floor kitchen. Wipe exposed shelving and displayed items monthly with a damp microfiber cloth and a drop of dish soap. Install a recirculating range hood with a charcoal filter above the cooktop to capture grease particles before they settle on open shelf surfaces.
11. Built-In Wine Fridge
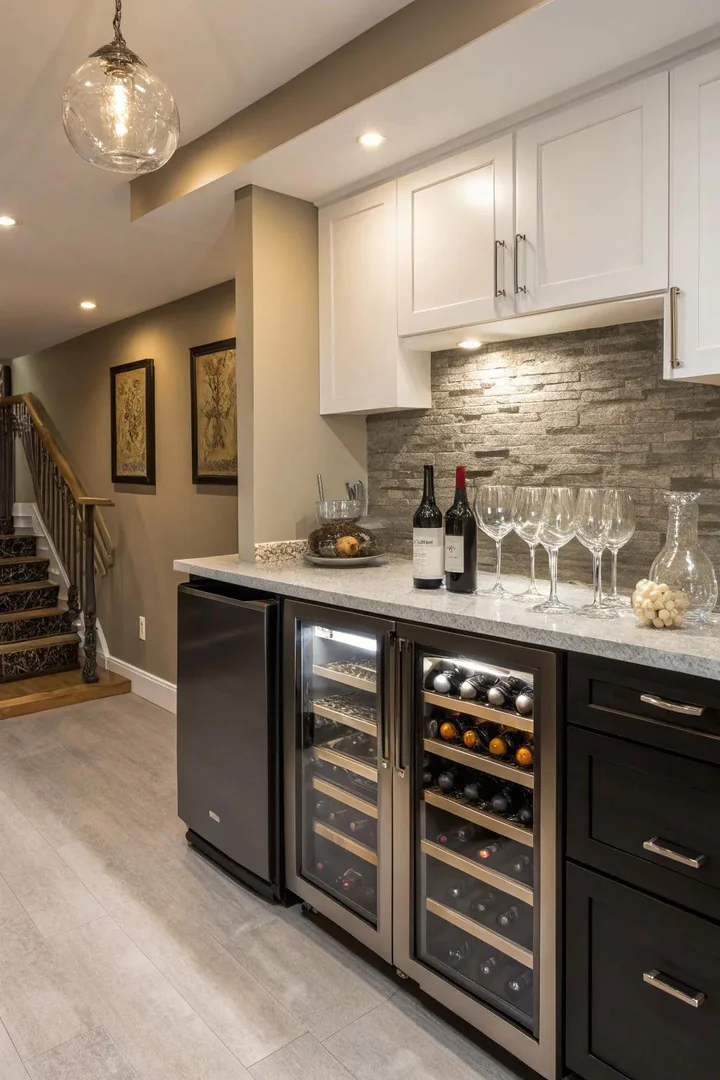
A basement maintains a naturally cool, stable temperature year-round, making it an ideal location for a built-in wine refrigerator. A 15-inch under-counter wine cooler from NewAir, KingsBottle, or Kalamera fits into a standard 15-inch base cabinet opening and holds 28 to 32 bottles at 55°F, the serving temperature for reds, or in dual-zone models that store whites at 45°F and reds at 55°F simultaneously.
Position the wine fridge at the end of a base cabinet run beside the countertop edge, not beside the oven or range, as radiant heat from cooking appliances forces the compressor to work harder and shortens its lifespan. Leave 1/2-inch clearance on each side and 2 inches behind the unit for ventilation airflow. Front-venting models from Zephyr and Marvel vent through the toe-kick area and install flush inside cabinetry without side or rear clearance.
Pair the wine fridge with a tile backsplash in natural stone or zellige behind the wine zone to create a dedicated tasting area. Add two stemware racks mounted under an upper cabinet and a small marble cheese board on the adjacent countertop for a built-in wine-and-cheese station that makes the basement kitchen the entertaining anchor of the home.
12. Art-Accented Walls
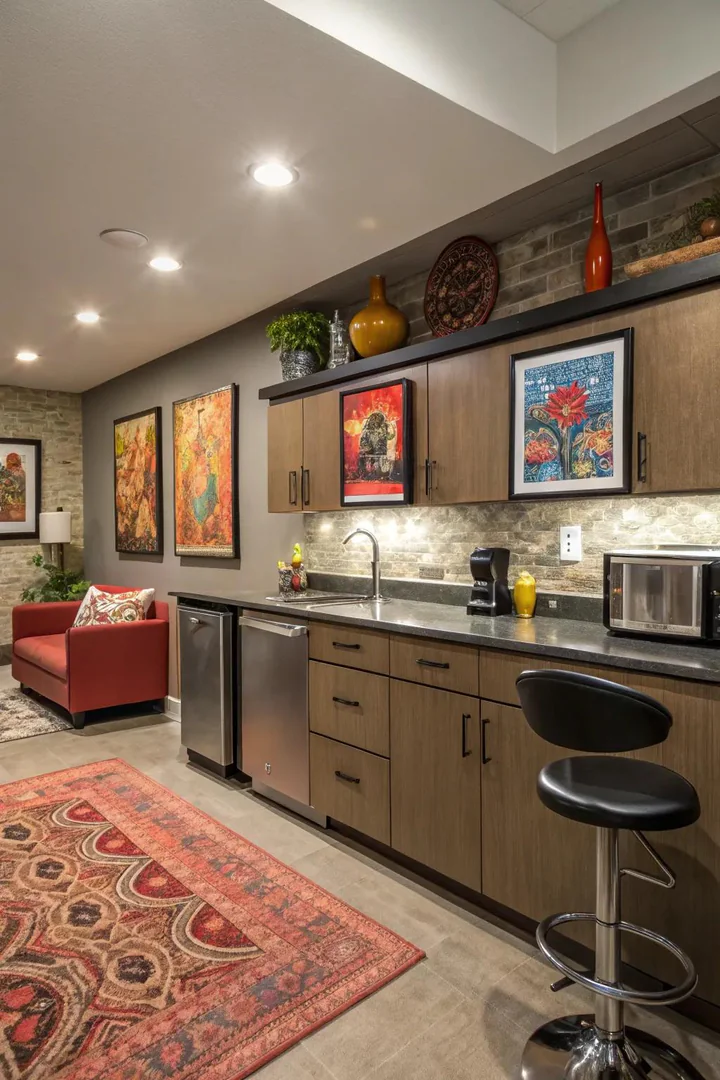
Hanging framed prints, canvas art, or a gallery wall on the blank wall opposite the kitchen counter adds visual personality that a finished basement often lacks. Choose frames in a consistent finish, all black, all natural wood, or all brass, and arrange them in a grid, salon-style cluster, or a single horizontal row at 57 inches above the floor (standard gallery hanging height).
Kitchen-appropriate art includes food photography prints from vendors like Minted and Juniper Print Shop, vintage botanical illustrations, wine label reproductions, or typographic prints with kitchen-themed words. Avoid original watercolors or unglazed prints in a kitchen zone, as cooking steam and grease can damage unprotected paper surfaces over time. Use prints behind glass or canvas wraps that wipe clean.
A picture light or two battery-operated LED art lights from Cocoweb or Wireless Lighting mounted above the frames add directed illumination that draws the eye to the artwork and doubles as ambient lighting in the kitchen zone. Picture lights fill the vertical wall space with warm light and reduce the cave-like feeling that an unadorned basement wall creates.
13. Coastal-Inspired Design
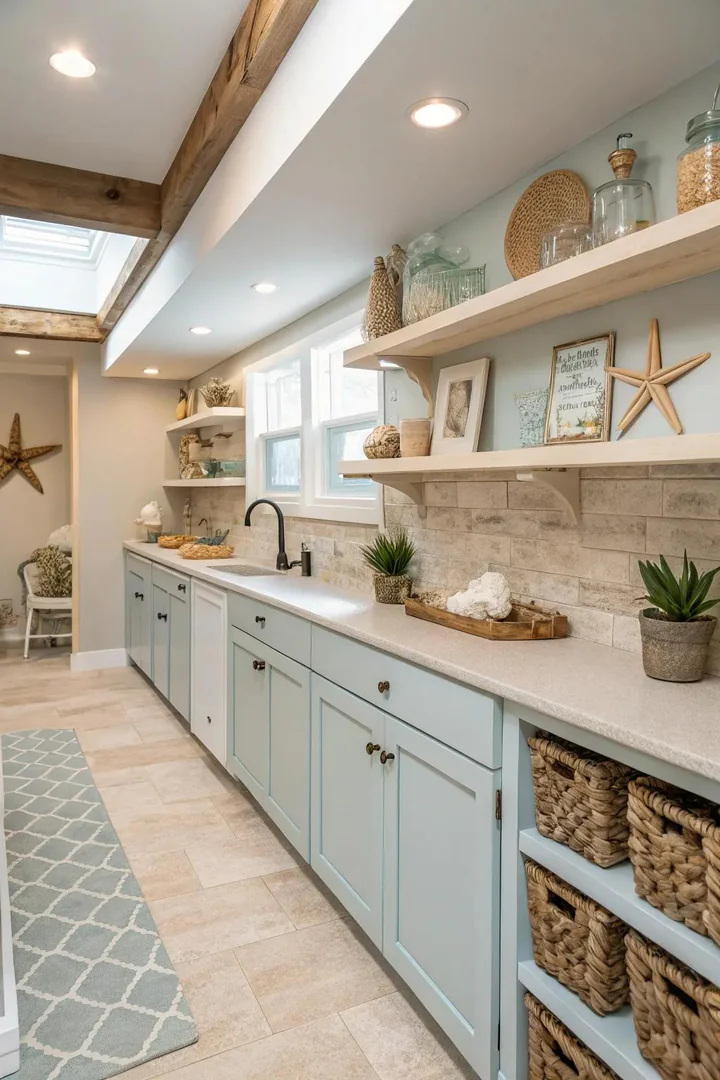
A coastal color palette of soft blues, sandy tans, bright white, and weathered gray brightens a basement kitchen without natural ocean light by mimicking the reflected-sky tones a beachfront room would have. Paint base cabinets in Benjamin Moore’s Breath of Fresh Air (806) or Sherwin-Williams’ Sea Salt (SW 6204), and keep countertops in white quartz or Corian’s Glacier White for maximum light bounce.
Woven rattan pendant shades, rope-wrapped cabinet pulls, and a driftwood-framed mirror on the accent wall build the coastal vocabulary through texture rather than color alone. Seagrass bar stools from Serena and Lily or Target’s Threshold line provide casual, beach-house seating at an island or peninsula without the visual weight of upholstered dining chairs.
A coastal basement kitchen suits pool houses, lake homes, and any below-grade space where the homeowner wants to create a vacation-retreat atmosphere that feels separate from the main floor’s design. Add a few small potted succulents or air plants on open shelves, as low-light succulents like Haworthia and snake plants thrive in the indirect light conditions a basement window provides.
14. Peninsula Counter Extension
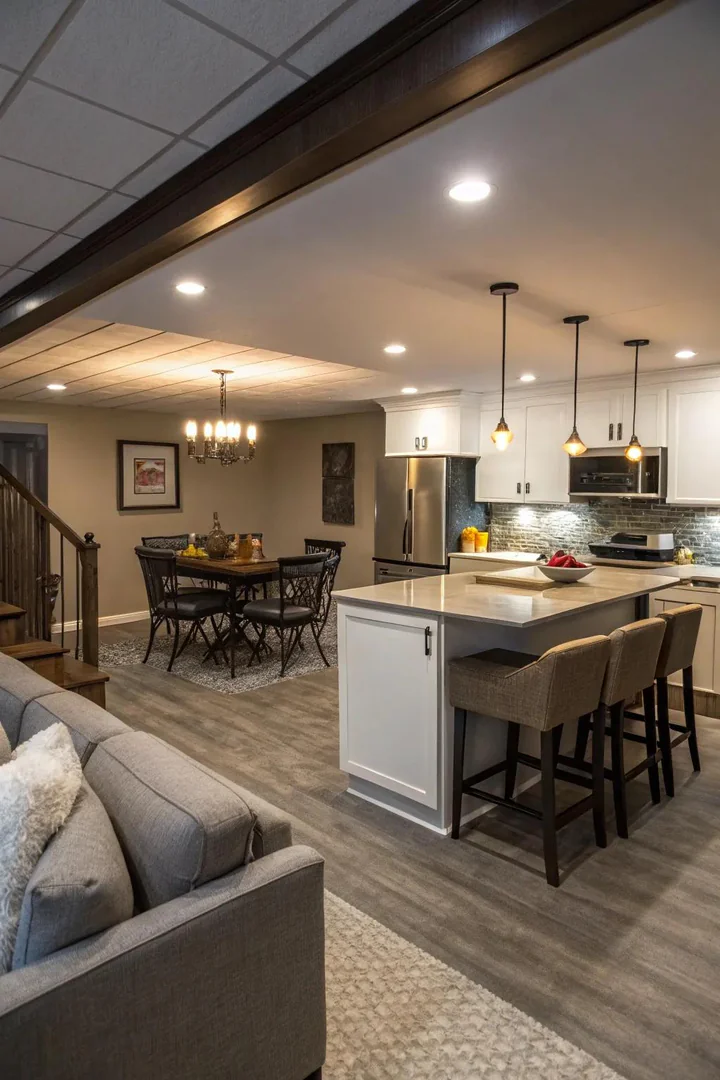
A peninsula extends perpendicularly from the end of a base cabinet run, creating a three-sided counter that provides extra prep surface, storage in the base cabinets below, and bar-stool seating along the outward-facing side. The peninsula serves as a room divider between the kitchen zone and the adjacent living or media area without fully closing off the open floor plan.
Build the peninsula from the same cabinet system as the main run: two or three 24-inch-deep base cabinets topped with a countertop that extends 12 inches beyond the cabinet face on the seating side. The 12-inch overhang provides knee clearance for 24-inch or 26-inch counter-height stools. Reinforce the overhang with steel L-brackets screwed into the underside of the countertop and the cabinet face frame.
A peninsula works better than a freestanding island in basement kitchens narrower than 10 feet because the three-sided configuration anchors to the wall and avoids the tight clearance problem a centered island creates. Add pendant lights above the peninsula seating area, hung 30 to 36 inches above the counter surface, to define the eating zone as a separate space from the cooking side.
15. Glass-Front Cabinet Doors
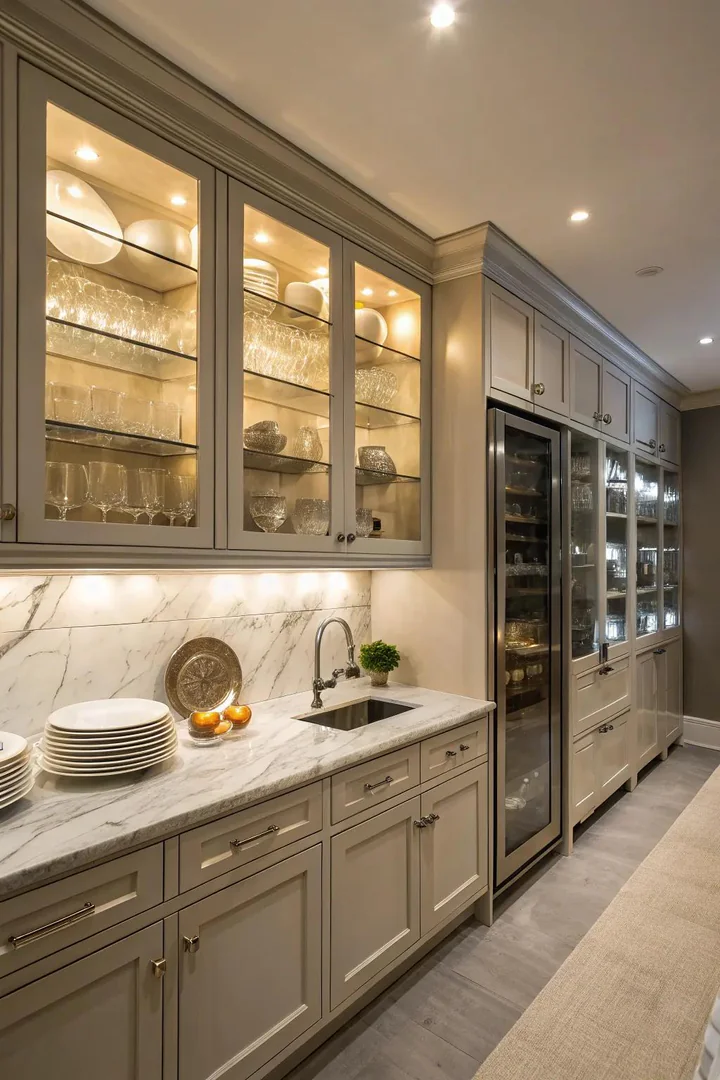
Replacing solid upper cabinet doors with clear glass or seeded glass inserts opens the cabinet face visually and lets interior cabinet lighting shine through, adding another layer of illumination to a below-grade kitchen. IKEA’s JUTIS glass doors fit SEKTION wall cabinets directly, while custom cabinet shops can retrofit existing doors by routing the center panel and inserting tempered glass.
Install LED puck lights or adhesive-backed LED strip lights inside each glass-front cabinet to backlight the displayed items. Arrange matching sets of glassware, white dinnerware, and clear storage jars on the interior shelves for a curated, store-display look. Avoid filling glass-front cabinets with mismatched plastic containers, cereal boxes, or crowded stacks that undermine the clean visual the glass doors create.
Glass-front doors suit the upper cabinets in the dining or entertaining zone of the basement kitchen, while solid-door cabinets near the cooktop and sink hide the less photogenic items, cleaning supplies, mixing bowls, and pantry staples. The combination of glass and solid doors creates visual variation along the wall without requiring two different cabinet styles.
16. Two-Tone Light and Dark Cabinets
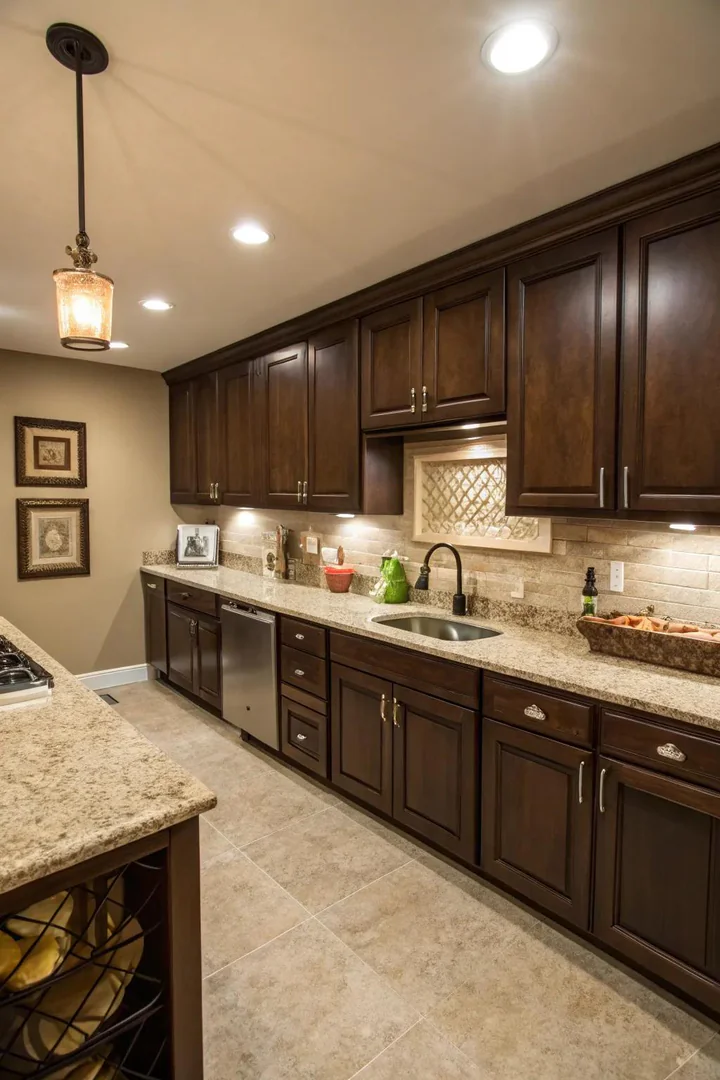
A two-tone cabinet scheme uses dark-colored base cabinets, charcoal gray, navy blue, or espresso brown, with white or cream upper cabinets. The dark lowers ground the room and hide scuff marks and splatter, while the light uppers reflect ceiling light downward and prevent the low ceiling from feeling oppressive.
Benjamin Moore’s Wrought Iron (2124-10) for the lowers and Simply White (OC-17) for the uppers creates a high-contrast tuxedo scheme. Sherwin-Williams’ Naval (SW 6244) lowers with Alabaster (SW 7008) uppers delivers a softer, navy-and-cream version. Choose a countertop that bridges both tones: Cambria’s Brittanicca Gold quartz features gray and gold veining on a white base that ties dark lowers to light uppers.
Pair two-tone cabinets with hardware in a single metal finish, brushed brass or matte black, across both upper and lower doors to unify the scheme. A continuous backsplash tile from countertop to the underside of the upper cabinets further connects the two cabinet colors by providing a shared neutral backdrop between them.
17. No Upper Cabinets Design
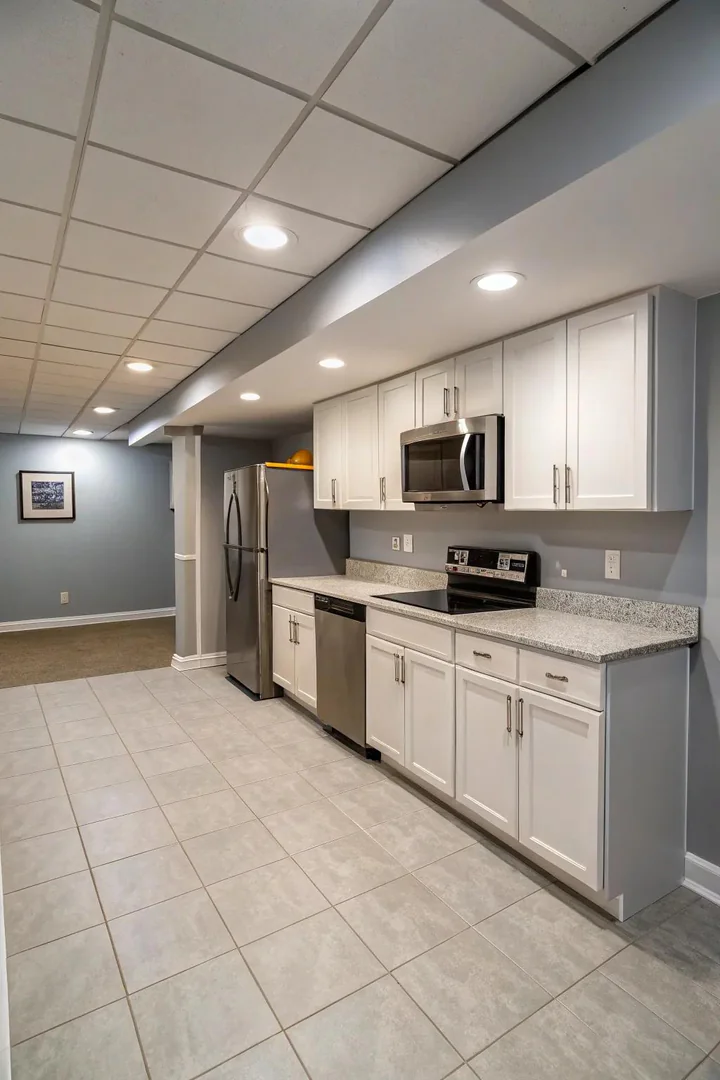
Removing upper cabinets entirely and replacing them with open floating shelves or a bare accent wall makes a 7-foot basement ceiling feel taller by eliminating the visual barrier that wall cabinets create 18 inches below the ceiling line. The exposed wall space above the countertop opens sightlines across the room and lets a full-height backsplash tile or painted accent wall become the kitchen’s primary design feature.
Compensate for the lost upper-cabinet storage by maximizing base cabinet depth and adding a tall pantry cabinet at the end of the run. Pull-out drawer organizers from Rev-A-Shelf, lazy Susan turntables in blind corner cabinets, and under-sink organizer racks reclaim storage capacity in the base cabinets that upper cabinets would have provided above.
Run the backsplash tile from countertop to ceiling on the wall behind the sink and range to create a full-height tiled feature. A white or light-toned tile, ceramic subway, zellige, or large-format porcelain, reflects light upward and draws the eye toward the ceiling, reinforcing the sense of vertical space that the absent upper cabinets opened up.
18. Built-In Breakfast Nook
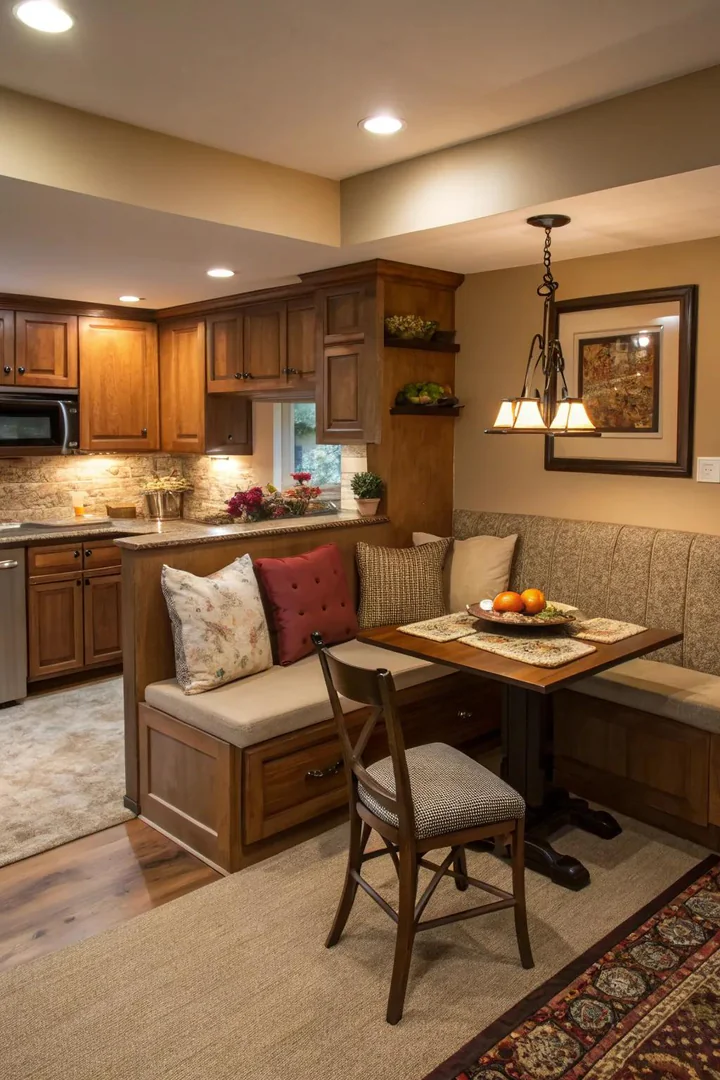
A built-in banquette breakfast nook in the corner of a basement kitchen provides seating for four to six people without taking the floor space that a freestanding table and chairs demand. Build the L-shaped bench from 3/4-inch plywood with a hinged seat lid that opens to reveal storage bins for table linens, board games, and extra kitchen supplies. Top the bench with a 4-inch-thick upholstered cushion in a wipeable performance fabric from Sunbrella or Crypton.
Pair the banquette with a pedestal table or a wall-mounted drop-leaf table that folds flat when the seating area converts back to open floor space. A 36-by-48-inch rectangular table seats four comfortably against the L-shaped bench and two chairs on the open side. Homeowners designing an eat-in kitchen layout can adapt the same banquette concept to a main-floor kitchen nook beside a window.
Hang a pendant light or a pair of sconces directly above the table to define the dining zone as a distinct space within the open basement floor plan. A pendant at 30 inches above the table surface provides enough brightness for eating and conversation without glare, and a dimmer switch lets the fixture drop to a low ambient glow during movie nights when the breakfast nook doubles as overflow seating for the media room.
How to Plan a Basement Kitchen Build-Out
1. Check Local Building Codes and Permits
Contact the local building department to confirm the zoning and permit requirements for adding a kitchen below grade. Most jurisdictions require a building permit for any new plumbing, electrical, or gas connections. Check minimum ceiling height (7 feet in most IRC-compliant areas), egress window requirements (at least one operable window with 5.7 square feet of opening in sleeping areas), and fire separation ratings between the basement and the floor above. A permit application typically costs $200 to $500 and includes one or two inspections during construction.
2. Map the Plumbing and Electrical Connections
Locate the existing basement drain stack, water supply lines, and electrical panel. Position the sink and dishwasher as close to the drain stack as possible to minimize the length of new drain pipe runs and to maintain the 1/4-inch-per-foot slope required for gravity drainage. A basement kitchen needs a minimum of two dedicated 20-amp circuits for countertop receptacles, one 20-amp circuit for the dishwasher, and one 40-amp or 50-amp circuit for an electric range. A gas range requires a gas line run by a licensed plumber.
3. Address Moisture and Waterproofing
Basements carry higher humidity and a greater risk of water intrusion than above-grade floors. Apply a crystalline waterproofing coating like Xypex or Drylok to the foundation walls before framing. Install a sump pump if the basement lacks one, and route a floor drain near the kitchen area to handle any appliance leaks or pipe bursts. Use moisture-resistant drywall (green board or purple board) on basement walls and a vinyl plank floor like LifeProof or COREtec that tolerates occasional water contact without warping or delaminating.
4. Frame, Rough-In, and Finish the Space
Frame the kitchen walls with pressure-treated bottom plates on the concrete slab and standard 2×4 studs above. Run the plumbing rough-in (drain, supply, and vent lines) and electrical rough-in (circuits, switch legs, and recessed light housings) before closing the walls with drywall. Schedule the building inspector for a rough-in inspection before hanging drywall. After drywall, taping, and painting, install the cabinets, countertop, backsplash tile, and flooring before connecting the plumbing fixtures and appliances.
5. Install Lighting, Ventilation, and Appliances
Wire recessed LED wafer lights across the kitchen ceiling on 4-foot centers, pendant fixtures above the island or peninsula, and under-cabinet LED strips along the backsplash zone. Install a recirculating range hood with a charcoal filter above the cooktop, as running a ducted exhaust vent from a basement through the exterior wall or roof is often impractical or code-prohibited. Connect the range, refrigerator, dishwasher, and garbage disposal to their respective circuits and test all plumbing connections for leaks before loading the cabinets and declaring the project complete.
Basement Kitchen Layout Comparison
| Layout | Min. Room Size | Counter Space | Seating | Cost Range | Best For |
|---|---|---|---|---|---|
| One-Wall | 8 x 10 ft | 8 – 12 lin. ft | Bar stools opposite | $3,000 – $8,000 | Studios, small suites |
| L-Shape Corner | 8 x 10 ft | 12 – 16 lin. ft | Stools at peninsula | $4,000 – $12,000 | ADUs, guest suites |
| Galley (Two-Wall) | 8 x 12 ft | 16 – 20 lin. ft | None (narrow aisle) | $5,000 – $15,000 | Rental units, in-law suites |
| Peninsula | 10 x 12 ft | 14 – 18 lin. ft | 2 – 3 stools at bar | $5,000 – $15,000 | Entertaining basements |
| Island | 12 x 14 ft | 18 – 24 lin. ft | 3 – 4 stools at island | $8,000 – $25,000 | Large open basements |
| Snack Station | 4 lin. ft wall | 4 lin. ft | None (counter only) | $500 – $2,000 | Media rooms, game rooms |
Frequently Asked Questions
How much does a basement kitchen cost to build?
A basic basement kitchenette with stock cabinets, laminate countertops, and a compact appliance set costs $3,000 to $8,000 in materials and $2,000 to $5,000 in labor. A mid-range basement kitchen with semi-custom cabinets, quartz countertops, a tile backsplash, and full-size appliances runs $10,000 to $25,000 total. Plumbing rough-in adds $1,500 to $4,000 if no drain or supply lines exist near the planned kitchen location, and a sewage ejector pump adds another $800 to $1,500 if the basement lacks gravity drainage.
Do I need a permit to add a kitchen in my basement?
Most municipalities require a building permit for new plumbing, gas, and electrical work, all of which a basement kitchen involves. Running plumbing or wiring without a permit can result in fines, forced removal of the work, and complications during a future home sale when the unpermitted kitchen appears during inspection. Contact the local building department before starting any construction to confirm the specific permit, inspection, and zoning requirements in your area.
What is the minimum ceiling height for a basement kitchen?
The International Residential Code (IRC) requires a minimum ceiling height of 7 feet in habitable rooms, with allowances for beams, ducts, and soffits that drop to 6 feet 4 inches over limited areas. Many finished basements fall between 7 and 8 feet. Kitchens with ceilings at exactly 7 feet should avoid bulky range hoods, deep soffits, and thick under-cabinet light fixtures that bring the effective working clearance below a comfortable level.
How do I ventilate a basement kitchen without an exterior wall duct?
A recirculating range hood with replaceable charcoal filters captures grease and odors without venting to the outside. Broan’s BCSQ130SS and Zephyr’s Breeze II both offer under-cabinet recirculating hoods rated at 250 to 400 CFM. Replace the charcoal filter every three to six months, and run a dehumidifier in the basement to manage the moisture that cooking adds to the below-grade air. A ducted exhaust system remains the best option when a path to an exterior wall or rim joist is available.
Can I add a full-size range and oven in a basement kitchen?
A standard 30-inch freestanding range from GE, Frigidaire, or Samsung fits a basement kitchen when the electrical or gas supply supports it. Electric ranges need a dedicated 40-amp or 50-amp 240-volt circuit, while gas ranges need a gas supply line with a shutoff valve and a 120-volt outlet for the igniter and clock. Confirm the ceiling height allows the range hood to mount at least 24 inches (for electric) or 30 inches (for gas) above the cooktop surface per manufacturer specifications.
What flooring works best in a basement kitchen?
Luxury vinyl plank (LVP) from LifeProof, COREtec, or Shaw Floorté resists water, installs over concrete without a plywood subfloor, and handles temperature fluctuations from basement heating cycles. Porcelain tile rated for floor use provides a waterproof, permanent surface that never needs replacement. Avoid solid hardwood and engineered hardwood in basements, as the higher below-grade humidity causes expansion, cupping, and potential mold growth between the wood and the concrete slab.
Conclusion
A basement kitchen turns idle lower-level square footage into an entertaining hub, a rental income source, or a self-contained guest suite that adds both function and resale value to the home. The layout, cabinet color, lighting plan, and material choices all work together to overcome the below-grade limitations of low ceilings, limited windows, and higher humidity.
Start with the layout that fits the room’s dimensions and the intended use, then layer in light-reflective surfaces, warm accent materials, and enough lumens from recessed cans, pendants, and under-cabinet strips to make the space feel bright and inviting. Readers exploring blue kitchen cabinets with gold hardware can carry the same color-and-metal pairing into a basement kitchen to create a moody, jewel-toned entertaining space that feels deliberately designed rather than afterthought.

