
Awkward Kitchen Corner Ideas: 20 Clever Ways That Solve Problems
Every kitchen has at least one awkward corner — the dead zone where two cabinet runs meet at a right angle, the narrow gap between the refrigerator and the wall, or the oddly shaped nook below a window that does not fit a standard cabinet. These corners waste square footage in kitchens where every inch of counter and storage space matters. The 20 ideas below show how to turn each of these problem areas into functional, organized space using pull-out hardware, custom cabinetry, open shelving, and creative repurposing.
Awkward kitchen corner ideas range from simple hardware upgrades (a $50 pull-out shelf insert) to full custom builds (a corner pantry or a built-in banquette). The right solution depends on the corner’s dimensions, the kitchen’s layout, and whether you need more storage, more counter space, or a completely different function like a desk nook or a breakfast bar. Measure the corner first, then match it to the idea that fits.
1. Pull-Out Shelves That Swing

Swinging pull-out shelves — also called blind corner pull-outs — attach to the inside of a blind corner base cabinet and swing outward on a pivot mechanism when you open the cabinet door, bringing the contents of the deep, hard-to-reach back corner directly to you. Rev-A-Shelf, Hafele, and Vauth-Sagel all produce swing-out shelf systems that retrofit into existing 36-inch or 42-inch blind corner cabinets without replacing the cabinet box. The Rev-A-Shelf 5PSP series is one of the most popular, holding up to 35 pounds per shelf on chrome-plated wire trays.
Installation takes about 90 minutes with a drill, a level, and the supplied mounting hardware. The shelves mount to the cabinet floor and the door, using the door’s swing as the pivot that pushes the rear shelf forward and to the side as the front shelf clears the cabinet opening. The result is full visual and physical access to a corner that previously required kneeling on the floor and reaching blindly into the back of the cabinet — a daily annoyance that a $150 to $300 pull-out kit eliminates permanently.
2. Glass-Door Cabinets with Angled Design
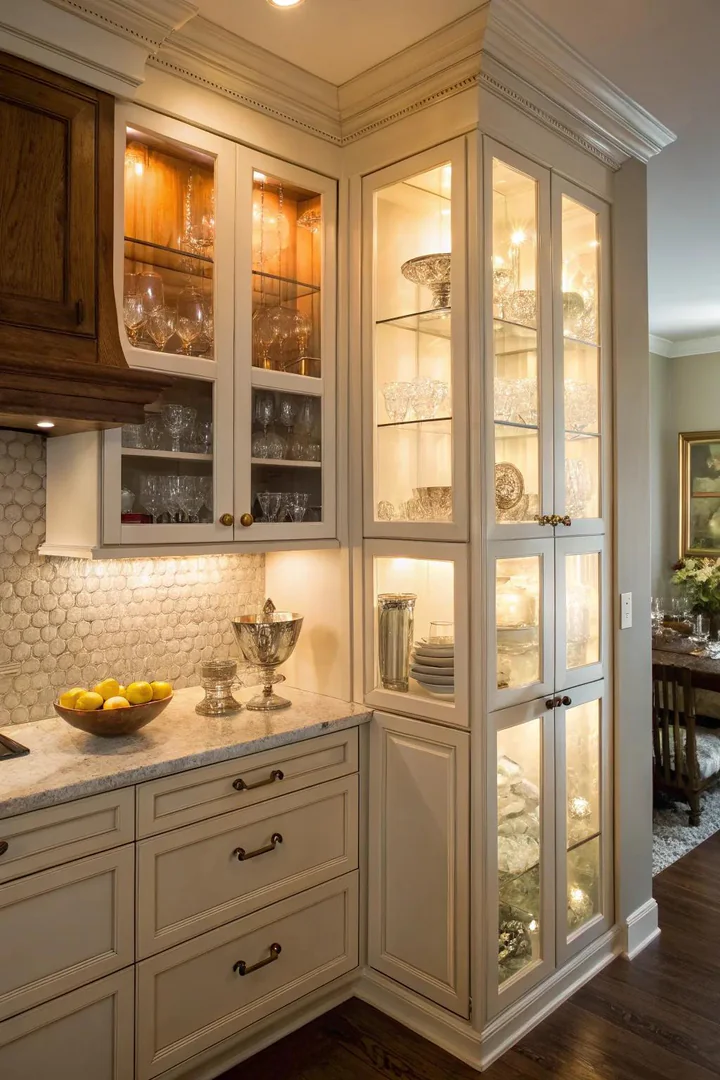
An angled corner wall cabinet with glass doors sits at a 45-degree diagonal across the corner where two upper cabinet runs meet, creating a display-worthy showcase for dishes, glassware, or decorative items that would otherwise hide behind solid doors in a standard corner cabinet. KraftMaid, Merillat, and Diamond NOW all offer diagonal corner wall cabinets (typically 24 inches wide on the diagonal face) with single or double glass doors and adjustable interior shelves.
The glass doors make the corner cabinet a visual feature rather than a storage afterthought — the interior is visible from across the room, so it works best when you stock it with attractive, coordinated items (matching white dinner plates, clear glassware, or a collection of ceramic bowls) rather than mismatched everyday dishes. Add battery-operated LED puck lights inside the cabinet to illuminate the contents without running wiring — brands like Brilliant Evolution and GE produce stick-on puck lights with warm-white LEDs that last 100+ hours per set of batteries.
3. Drawers in the Corner
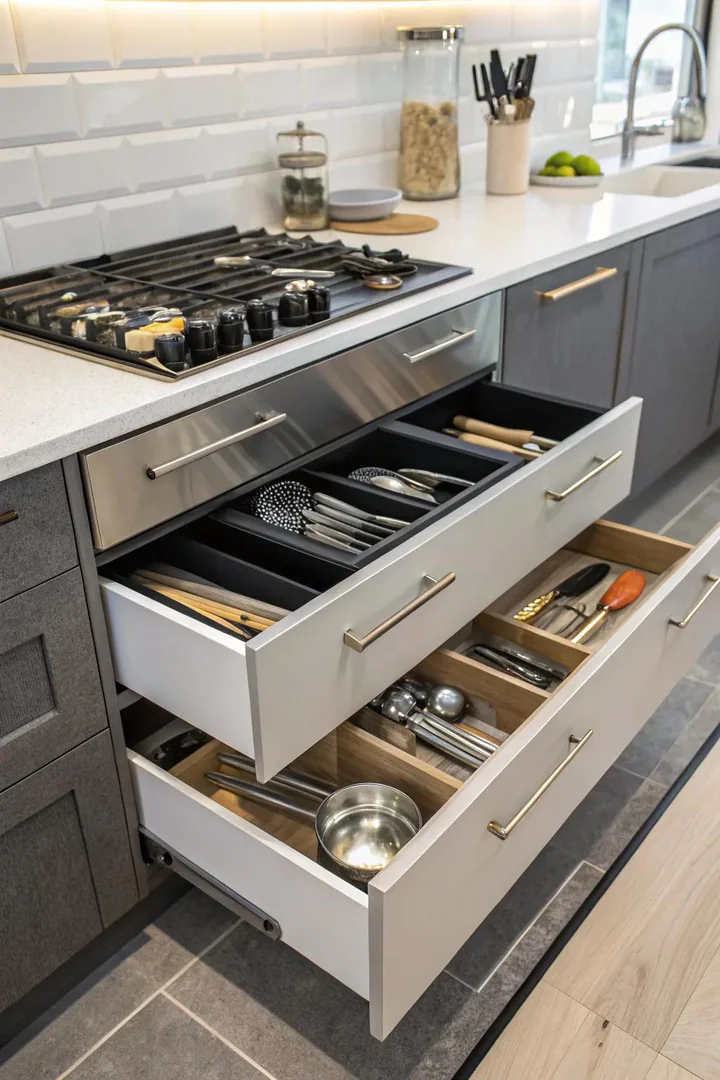
Corner drawers are L-shaped or pie-shaped drawers that follow the 90-degree angle of the corner rather than running straight like standard rectangular drawers, using the full depth and width of the corner base cabinet instead of leaving the back half empty. Blum and Grass produce full-extension undermount drawer slides that support the unusual drawer shapes, and custom cabinet makers can build the L-shaped drawer box from 3/4-inch Baltic birch plywood with dovetail joints for durability.
The front face of a corner drawer is typically angled at 45 degrees across the corner, with two drawer fronts meeting at a mitered joint that opens as a single unit. Inside, the L-shaped drawer provides roughly 30 to 40 percent more usable storage than a standard lazy Susan in the same corner, and the contents are fully visible from above when the drawer is open — no reaching or spinning required. Corner drawers are a premium custom option ($500 to $1,200 per drawer installed) but they solve the corner access problem more completely than any hardware insert.
4. Decorative Open Shelves
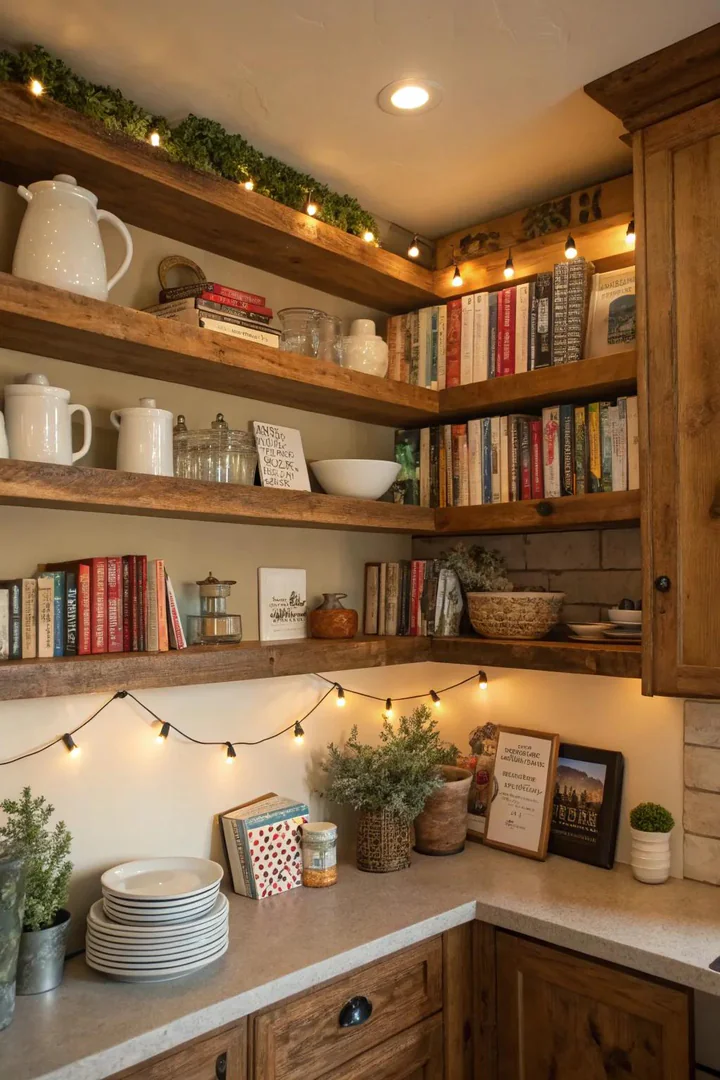
Open corner shelves — floating shelves mounted directly to the wall surfaces on both sides of the corner — turn an awkward corner into a display area for cookbooks, potted herbs, ceramic jars, or decorative objects that add personality to the kitchen without taking up counter or cabinet space. Floating shelf brackets from brands like Shelfology and Cascade Iron Co. support shelves up to 36 inches long and hold 50+ pounds per bracket when anchored into wall studs.
The key to making open corner shelves look intentional is consistency: use the same shelf material, depth, and bracket style on both walls, and space them evenly (12 to 14 inches apart vertically). Stagger the shelf lengths so they do not collide at the corner — one wall’s shelves can be 24 inches, the other wall’s shelves 18 inches, meeting at the corner with a clean gap or a mitered joint. Keep the items on the shelves curated and edited (five to seven objects per shelf) rather than packed, so the corner reads as a design feature rather than overflow storage.
5. Installation of Corner Pantry
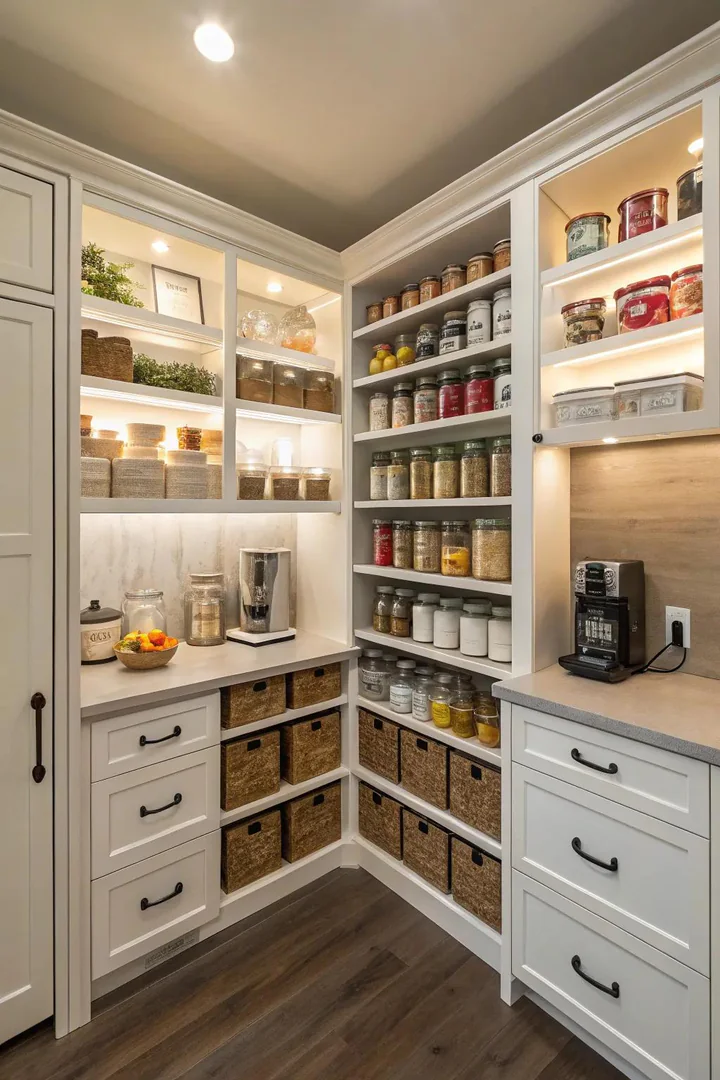
A corner pantry cabinet — a tall unit (84 to 96 inches high) that fits diagonally or flush into the corner — provides floor-to-ceiling food storage in a space that would otherwise hold a single base cabinet and a single upper cabinet with wasted dead space behind both. ClosetMaid, Rev-A-Shelf, and IKEA all produce corner pantry solutions: IKEA’s SEKTION corner base cabinet paired with a tall extension creates a full-height pantry for under $600 in cabinet cost before installation.
For maximum capacity, outfit the interior with adjustable wire shelving (ClosetMaid or Elfa), door-mounted racks for spices and small bottles, and pull-out baskets on full-extension slides for produce and snacks. A corner pantry with properly organized interior fittings can hold 50 to 70 percent more food than the same corner footprint filled with standard base and upper cabinets, and every item is visible and accessible without digging to the back of a deep shelf. For more ideas on maximizing food and supply storage in tight kitchens, see our small kitchen storage ideas guide.
6. Appliances for Corners
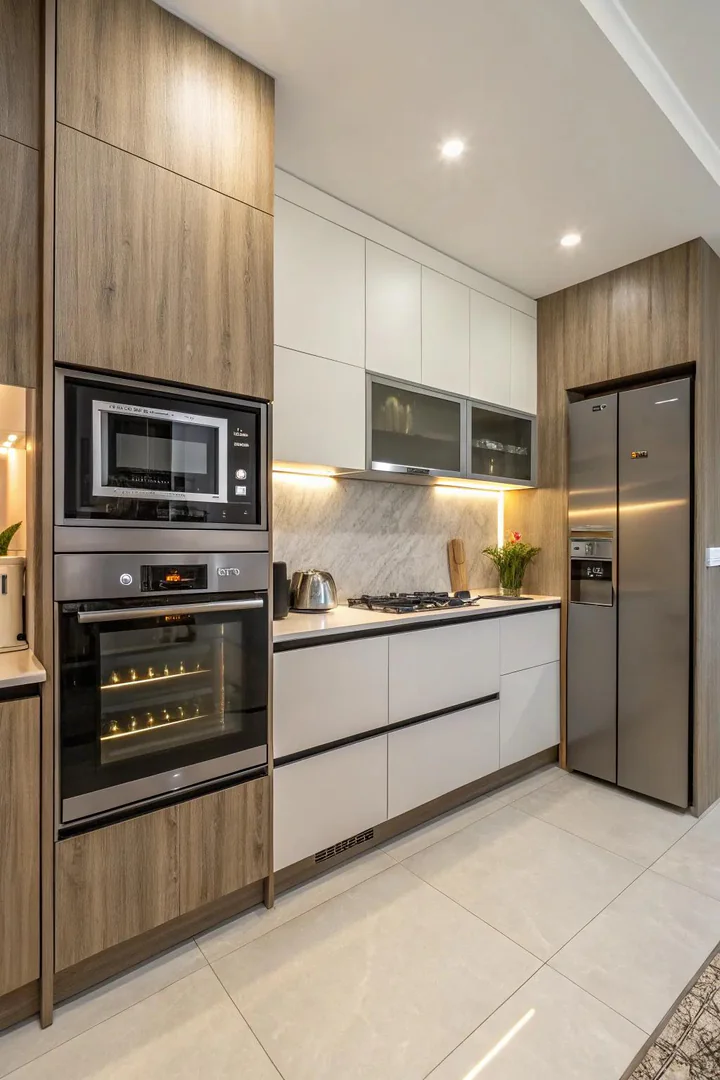
An awkward corner is an ideal spot for countertop appliances that need a permanent home but eat up prime prep space when placed on the main countertop — a KitchenAid stand mixer, a Breville espresso machine, a Cuisinart food processor, or an Instant Pot. Place the appliance in the corner with its back angled toward the wall junction, and install an outlet inside the corner (or on the backsplash just above the counter) so the power cord does not run across the countertop.
For a cleaner look, build an appliance garage — a countertop-height cabinet with a tambour door, a lift-up door, or a pocket door that rolls into the side wall — that hides the appliance when not in use but allows you to pull it forward and plug it in when you need it. Rev-A-Shelf produces a corner appliance lift (the RAS-ML series) that raises a heavy mixer from inside a base cabinet to counter height on a spring-assisted platform, storing it out of sight and bringing it to working position with a single pull.
7. Sink in the Corner
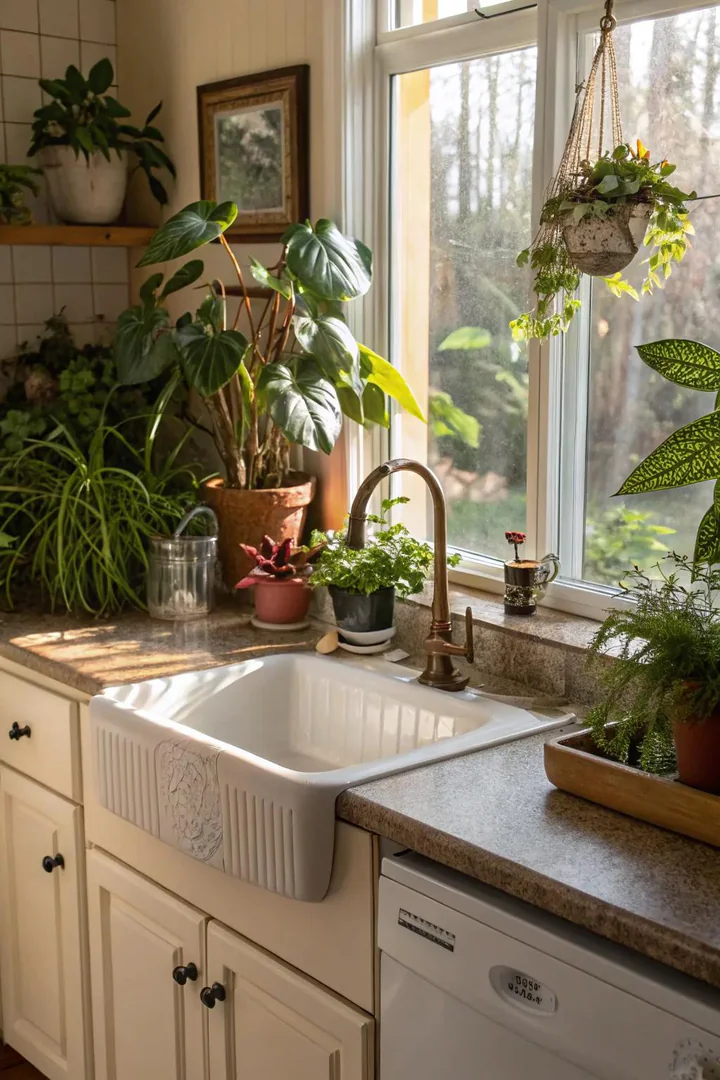
A corner sink installation places the sink basin at the 45-degree diagonal where two countertop runs meet, turning the awkward corner into the kitchen’s primary water station. Elkay, Kraus, and Blanco produce corner-specific sink basins (D-shaped or butterfly-shaped) designed to fit the diagonal countertop section, and a standard undermount or drop-in sink can also work if the diagonal countertop section is wide enough (at least 24 inches across the face).
The advantage of a corner sink is that it opens up the straight countertop runs on both sides for uninterrupted prep space, and it positions the cook facing into the room (or toward a window, if the corner is on an exterior wall) rather than staring at a flat wall. The trade-off is that the cabinet below a corner sink is large and deep, making the space under the sink harder to organize — use a pull-out trash can, a Lazy Susan, or tiered under-sink organizers from brands like SimpleHouseware or YouCopia to keep the under-sink storage accessible.
8. Design a Workspace Corner
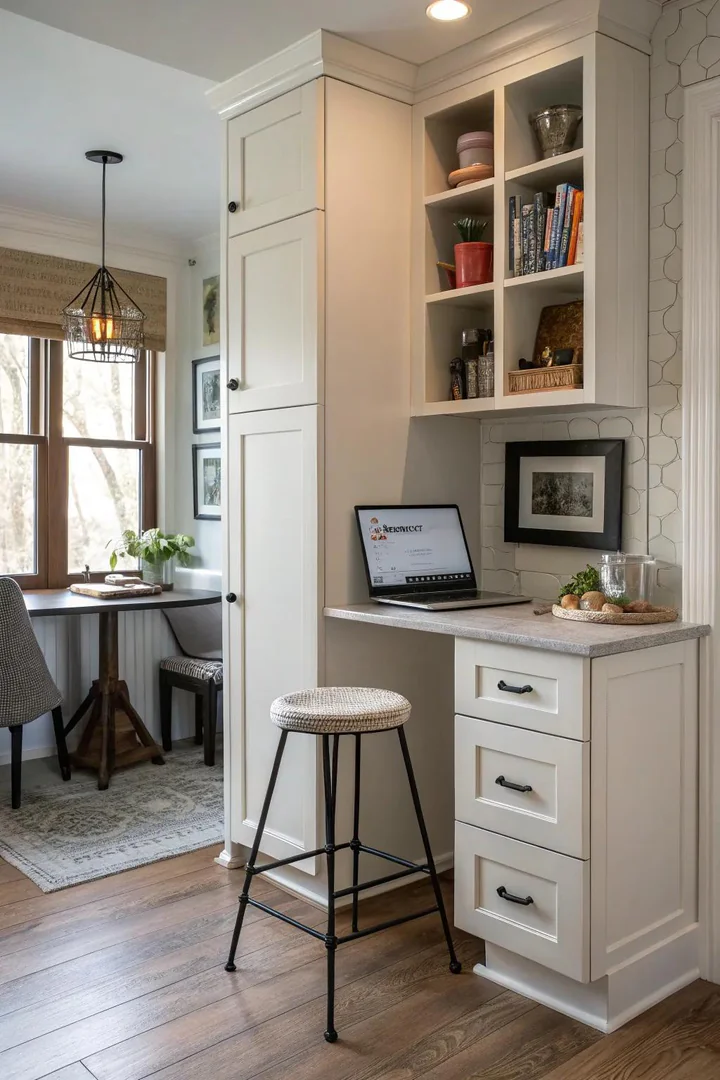
Converting an awkward corner into a built-in desk nook gives you a dedicated spot for meal planning, managing household paperwork, charging devices, and supervising homework while cooking — a function that a standard kitchen cabinet cannot provide. The desk surface can match the kitchen countertop material (quartz, butcher block, or laminate) and sit at standard desk height (29 to 30 inches), with upper shelves or a small bulletin board above for organizing recipes, calendars, and notes.
The desk nook needs a minimum of 30 inches of width and 20 inches of depth to be functional, plus an outlet and a USB charging station mounted on the wall or under the desk surface. Add a small drawer underneath the desk for pens, notepads, and charging cables. If space allows, include a lower file drawer or a set of cubbies for mail sorting. The desk nook works best in corners that are too narrow for a standard base cabinet but wide enough for a person to sit or stand comfortably.
9. Integrated Banquette Seating
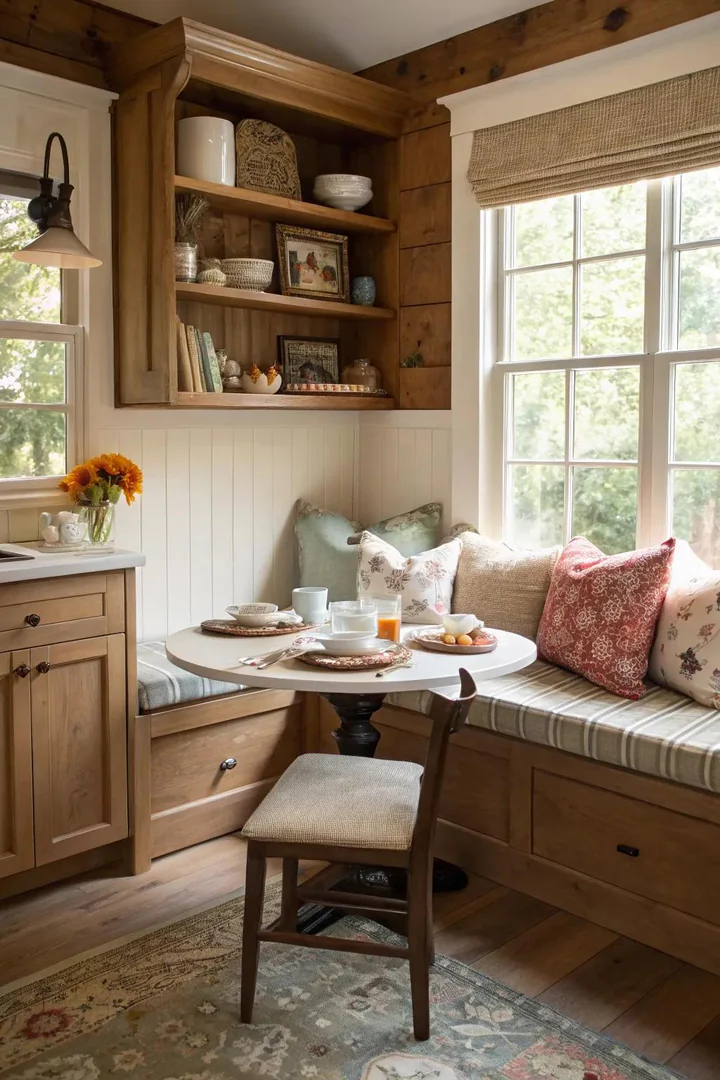
A built-in banquette — an L-shaped bench with a padded cushion, built against the two walls of the corner — turns an unused kitchen corner into a dining area that seats four to six people in less floor space than a freestanding table with chairs. The bench seat is typically 18 inches deep and 18 inches high, with a hinged top that lifts to reveal storage inside the bench box for table linens, seasonal items, or seldom-used kitchen equipment.
Pair the banquette with a pedestal table or a wall-mounted drop-leaf table that folds flat when not in use, keeping the floor space clear for kitchen traffic when you are not eating. Upholster the bench cushion in a performance fabric — Crypton, Sunbrella, or vinyl — that resists food stains and wipes clean with a damp cloth. A banquette corner transforms dead space into the kitchen’s most social area, and the built-in bench provides storage capacity equivalent to two to three base cabinet drawers.
10. Include a Tiny Island
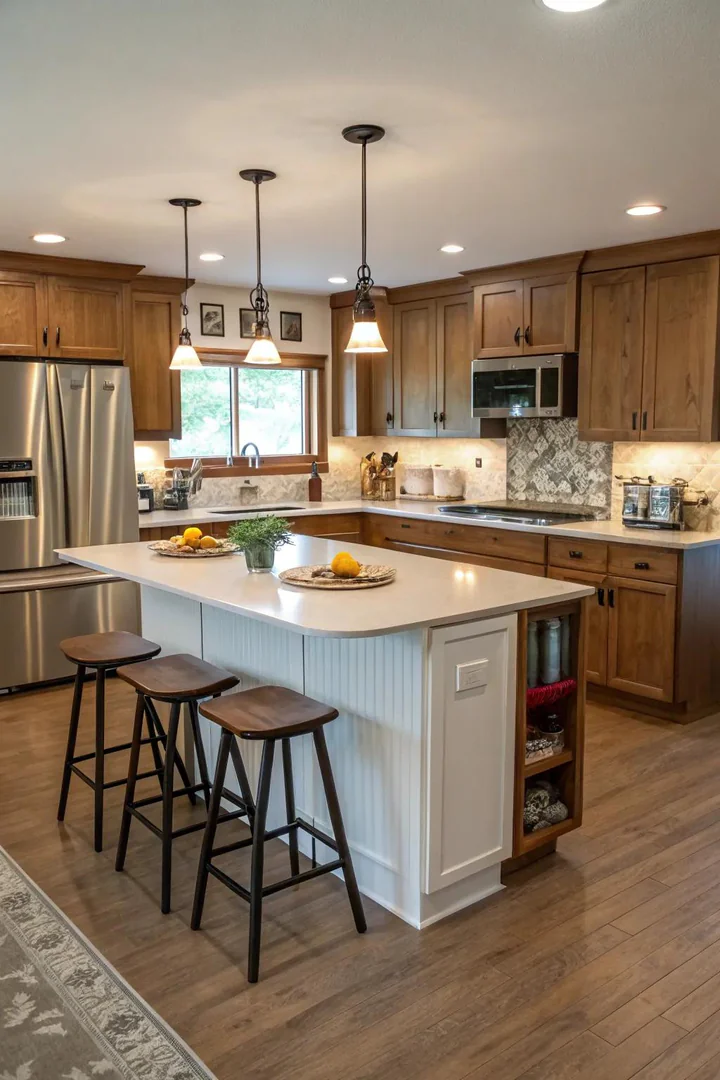
A small rolling island or butcher block cart — 24 to 36 inches wide, 18 to 24 inches deep — fits into an awkward corner and provides a portable prep surface, extra storage, and a serving station that can be rolled to wherever you need it. IKEA’s BEKVÄM kitchen cart ($70), the Origami folding kitchen cart ($100), and the John Boos Cucina Elegante ($400+) are all compact enough to tuck into a corner when not in use and sturdy enough to support chopping, mixing, and plating.
Lock the wheels when the cart is in the corner so it stays put during daily use, and unlock them when you want to pull the cart to the stove or the dining table for serving. A butcher block top gives you an additional cutting surface, and the shelves or drawers below provide storage for frequently used tools. For more ideas on placing a small island or kitchen peninsula attached to a wall in a compact layout, our guide covers options that work in tight floor plans.
11. Cutting Board Slot
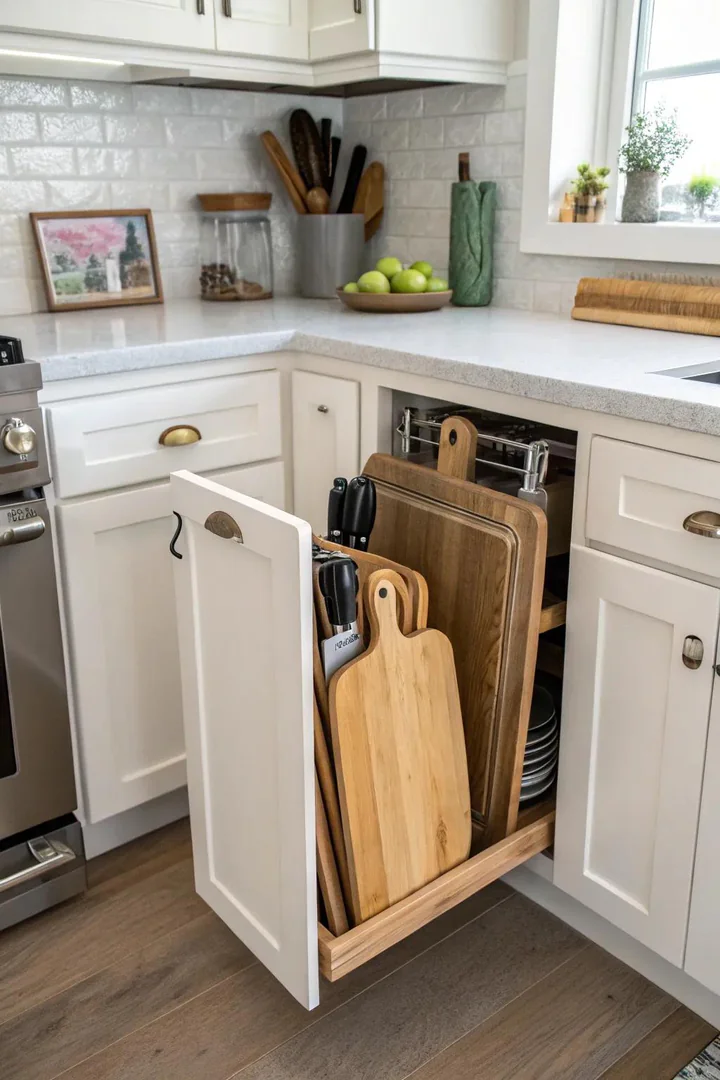
A narrow vertical slot built into a corner base cabinet — three to four inches wide, running the full height of the cabinet interior — stores cutting boards, baking sheets, muffin tins, and cooling racks on edge rather than stacked flat, which makes each item individually accessible without lifting a pile. Rev-A-Shelf’s 447 series tray divider and Omega National’s tray divider inserts fit inside standard base cabinets and create three to six vertical slots using chrome or wood dividers screwed to the cabinet floor.
The narrow corner space that is too slim for a standard cabinet door (the filler strip between the corner cabinet and the adjacent run) is the ideal location for a tray divider because the slot only needs three to four inches of width — exactly the dimension that fillers typically waste. Retrofit a tray slot into an existing filler strip by removing the filler, building a narrow cabinet box to fit the opening, and installing a slim door with a pull handle. The result is a purpose-built storage slot that uses the narrowest, most commonly wasted space in the kitchen.
12. Set Up a Hutch
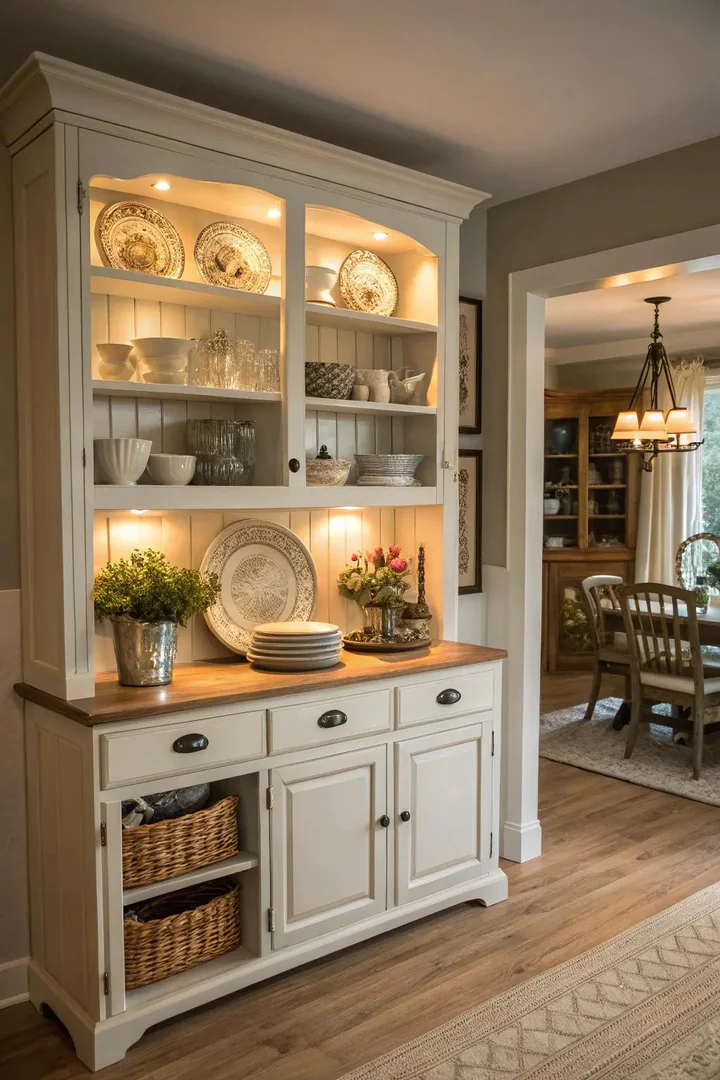
A freestanding corner hutch — a tall, narrow piece of furniture with closed storage below and open or glass-door shelving above — adds storage and display space to a corner without any built-in construction or cabinet modification. Pottery Barn, Crate & Barrel, and Wayfair all sell kitchen hutches in widths from 28 to 42 inches that fit into most corners, and antique or vintage hutches from estate sales add character that new cabinetry cannot replicate.
A hutch works best in kitchens with a farmhouse, cottage, or traditional aesthetic where freestanding furniture pieces are part of the design language. Use the lower closed section for storing large serving pieces, table linens, or small appliances, and the upper open shelves for displaying dishes, pottery, or decorative objects. Anchor the hutch to the wall with an anti-tip bracket (included with most new hutches, or available separately from furniture safety hardware brands) — tall, narrow furniture in a kitchen with foot traffic needs to be secured against tipping.
13. Suspended Baskets for Fruits and Vegetables
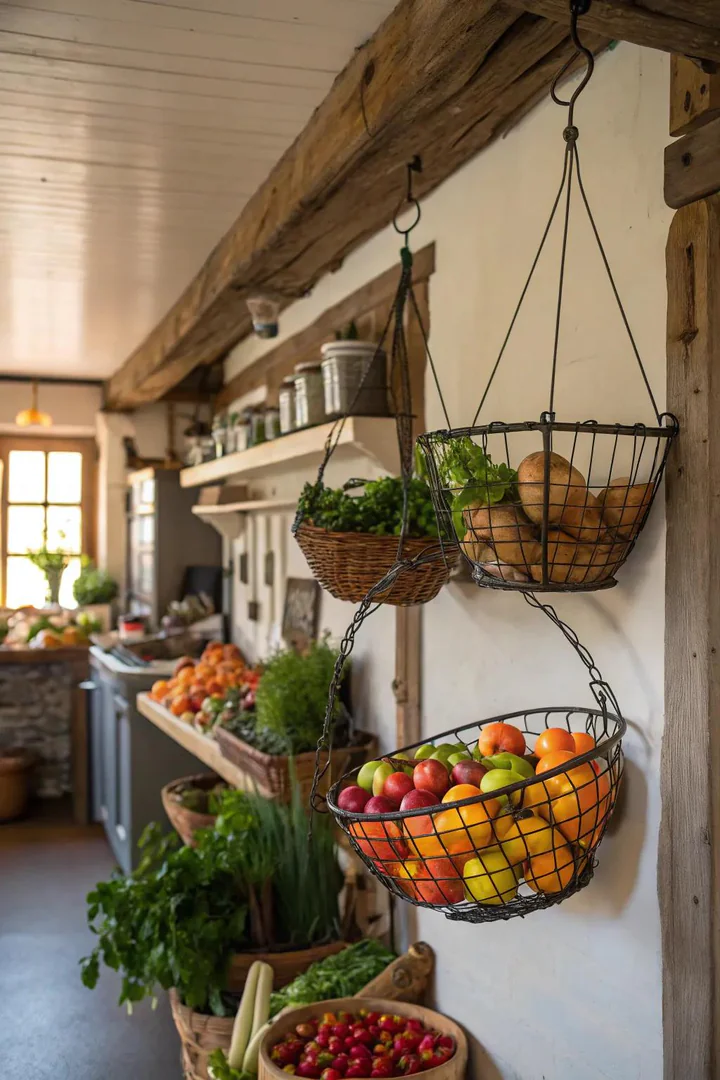
Hanging wire or woven baskets — tiered in a vertical stack from a ceiling hook, a wall bracket, or an under-cabinet mount — store fruit, vegetables, onions, garlic, and bread in a corner where there is no counter space for a fruit bowl. A three-tier hanging basket from brands like Saratoga Home, Mkono, or Kenney takes up zero counter or cabinet space and keeps produce visible and ventilated so it ripens evenly and does not spoil hidden in a drawer.
Mount the hanging basket from a ceiling hook rated for the combined weight of the basket and its contents (most produce baskets weigh 10 to 20 pounds fully loaded). Use a swag hook screwed into a ceiling joist, not just drywall — a toggle bolt in drywall alone will eventually pull out under the swinging weight. Position the bottom basket at eye level or slightly above so you can see and reach the contents without stretching. Hanging baskets work especially well in corners near the stove or the prep area where you need quick access to onions, garlic, and fresh herbs during cooking.
14. Utilize Space Above Cabinets
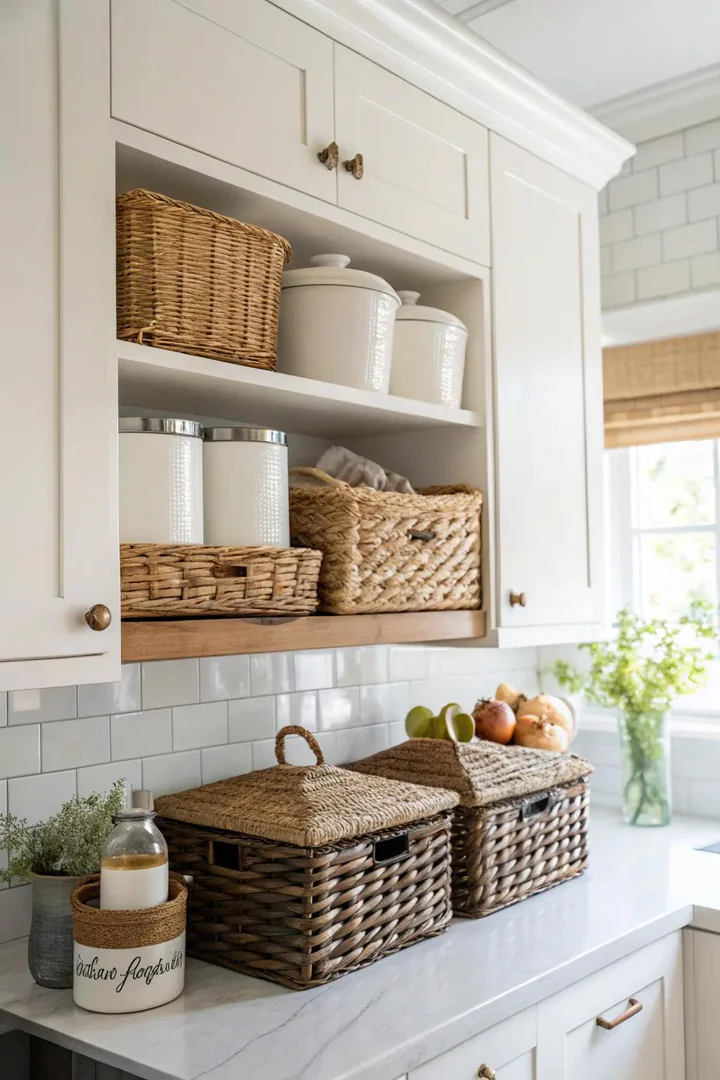
The gap between the top of the upper cabinets and the ceiling — typically 12 to 18 inches in kitchens with standard 8-foot ceilings — is dead space in every kitchen, and the corner above the cabinets is especially awkward because it is visible from most angles in the room but hard to reach. Use this space intentionally: store attractive baskets (woven seagrass or rattan from West Elm, Target, or HomeGoods) filled with seldom-used items like holiday platters, oversized serving bowls, or bulk paper goods.
Alternatively, treat the above-cabinet space as a display shelf for decorative objects — large pottery, artificial greenery, vintage signs, or a collection of antique kitchen tools. Keep the arrangement simple (three to five large objects are better than twenty small ones) and dust the items quarterly since the top of the cabinets collects grease and kitchen dust quickly. If you prefer a clean look with no above-cabinet gap, extend the cabinets to the ceiling or install crown molding with a fascia board that closes the gap completely.
15. Shelf on Wheels Next to Refrigerator
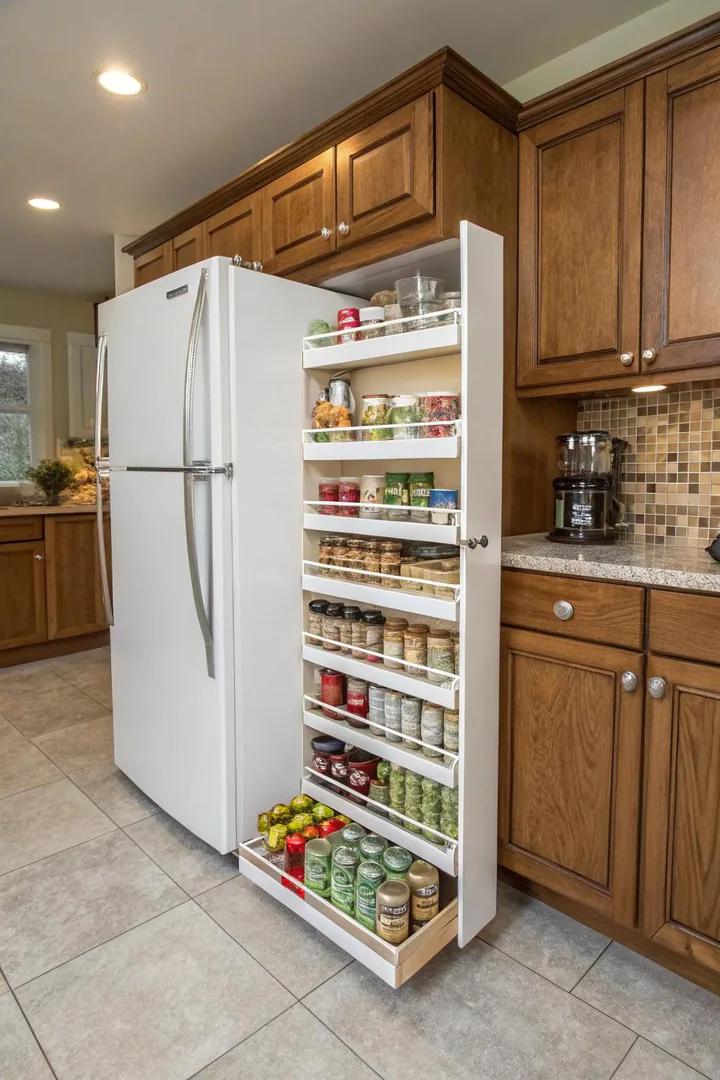
The narrow gap between the refrigerator and the wall (or the refrigerator and the adjacent cabinet) — typically three to six inches wide — is one of the most commonly wasted spaces in any kitchen. A slim roll-out shelf unit on casters fills this gap perfectly, storing canned goods, spice bottles, oils, and condiments in a vertical rack that slides out on wheels when you pull the handle and slides back flush against the refrigerator when you push it in.
Narrow roll-out shelving units are available from Amazon, Wayfair, and Target in widths from 3.5 to 8 inches, with three to five tiers and locking casters. Look for units with sturdy steel frames rather than lightweight plastic — the loaded shelf can weigh 30+ pounds when filled with cans and bottles, and a flimsy frame will wobble or tip. The Slim Rolling Pantry by Everyday Home and the Narrow Storage Cart by Simple Houseware are both steel-framed options under $40 that fit gaps as narrow as 4.5 inches.
16. Small Spice Bookcase
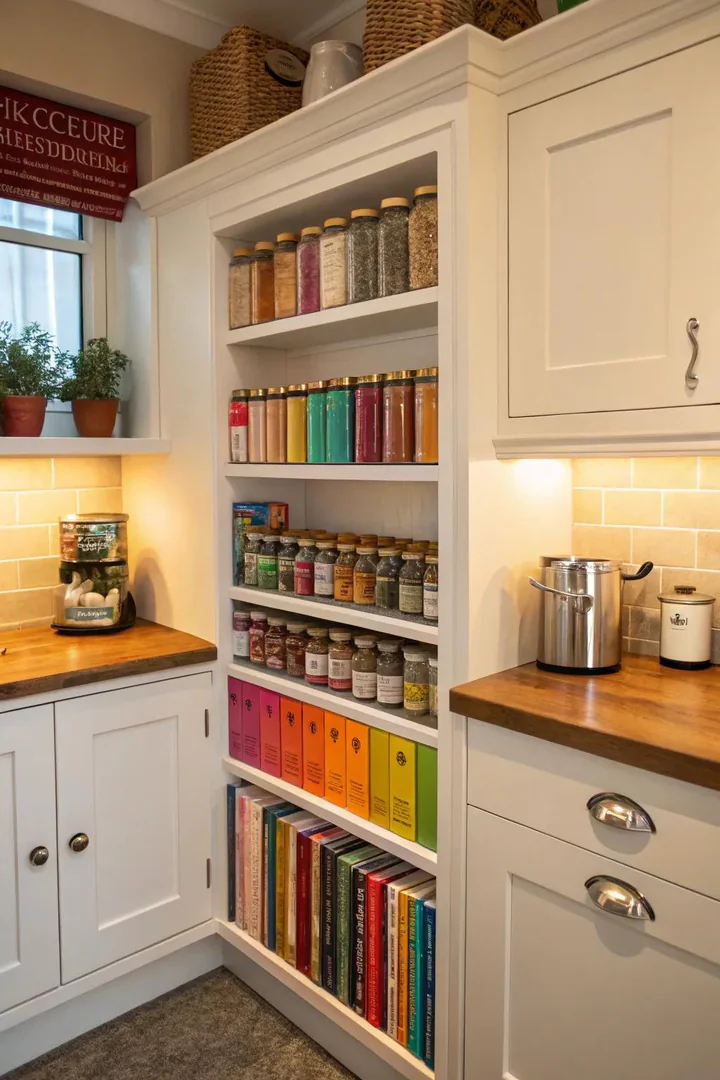
A small bookcase-style shelf unit — 12 to 18 inches wide, 24 to 36 inches tall, with narrow shelves spaced three to four inches apart — works as a dedicated spice rack when placed in a corner on the countertop or mounted on the wall at eye level. The narrow shelf depth (three to four inches) holds standard spice jars in a single row with the labels facing forward, so you can find any spice at a glance without digging through a deep cabinet or a spinning rack.
IKEA’s BEKVÄM spice rack ($5 each, wall-mounted), the AllSpice wooden spice rack, and the Kamenstein revolving spice tower are all options for different corner sizes and budgets. For a custom look, build a small bookcase from 1×4 pine or poplar boards with three to five shelves, finish it to match the kitchen’s trim, and mount it in the corner above the countertop. The dedicated spice bookcase keeps your collection organized, visible, and within arm’s reach of the stove — the three qualities that make the difference between a spice collection you actually use and one that expires forgotten in a cabinet.
17. Storage on the Windowsill
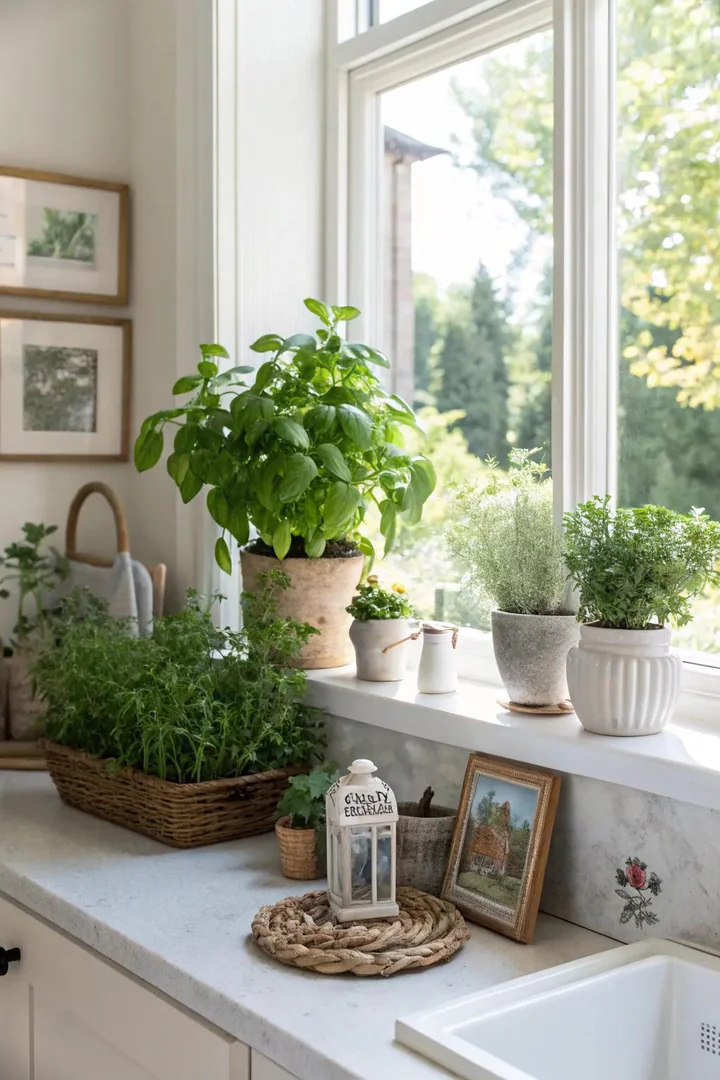
A kitchen window sill — especially one in a corner where it is too narrow for a cabinet below — is free horizontal surface that most kitchens underuse. Widen a narrow sill by attaching a shelf bracket and a piece of finished wood (a 1×6 pine or oak board, sanded and sealed with polyurethane) to create a six-inch-deep shelf that holds potted herbs, small plants, a soap dispenser, or a decorative tray for oils and seasonings.
Potted herbs on the windowsill get the natural light they need and stay within arm’s reach of the cutting board and the stove — basil, cilantro, rosemary, thyme, and chives all thrive on a sunny kitchen sill. Use matching terra-cotta or white ceramic pots (four to six inches in diameter) arranged in a row for a clean, coordinated look. If the sill gets direct afternoon sun, choose heat-tolerant herbs (rosemary, thyme, oregano) rather than delicate herbs (basil, cilantro) that wilt in strong direct light. The windowsill herb garden is one of the simplest and lowest-cost corner solutions — it costs under $30 in pots, soil, and herbs.
18. Bookcases for Breakfast Bars
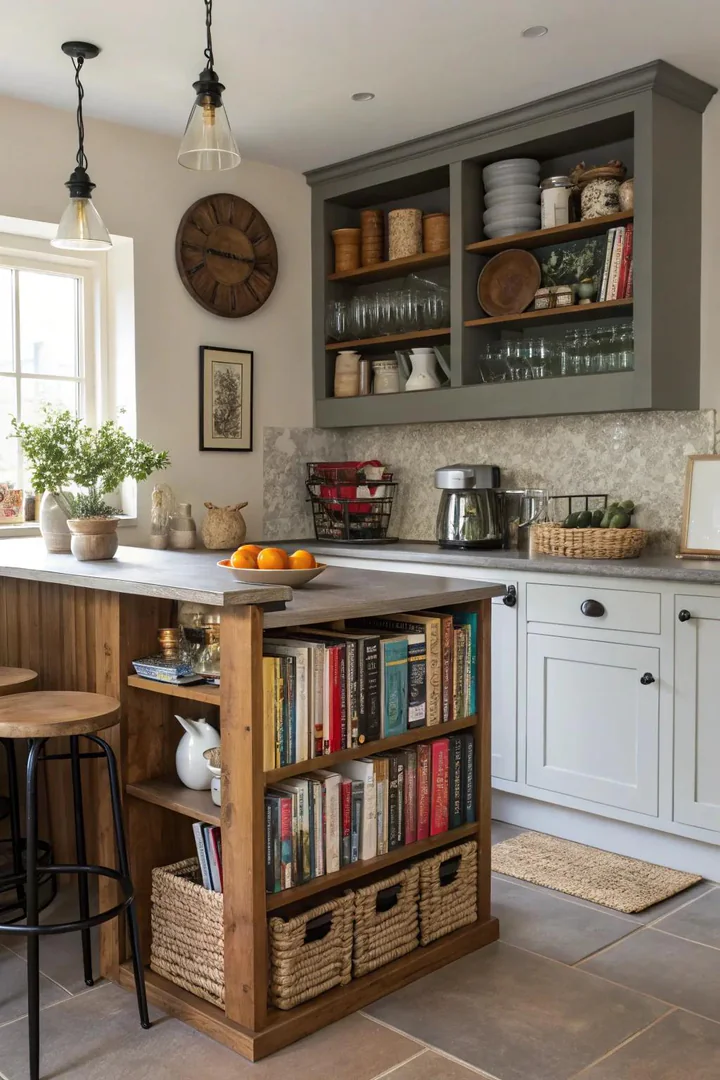
A breakfast bar built into an awkward corner — a countertop-height surface (36 inches) or bar-height surface (42 inches) extending from the corner along one wall — creates a casual eating spot that doubles as additional prep space during cooking. The underside of the breakfast bar is prime territory for open bookcase-style shelving where you can store cookbooks, small baskets, decorative objects, or everyday items like napkins and placemats.
Build the bookcase into the bar’s supporting structure: the vertical supports that hold up the bar overhang can be connected with horizontal shelves at eight- to ten-inch intervals, creating a built-in bookcase that faces the seating side of the bar. Finish the shelves to match the bar’s countertop or the kitchen’s cabinetry. For a quicker version, place a small freestanding bookcase (IKEA’s KALLAX 2×2 cube unit at $40 is an ideal size) under the bar overhang and top it with a matching countertop surface to create a combined breakfast bar and storage unit.
19. Find a New Home for Your Trash Can
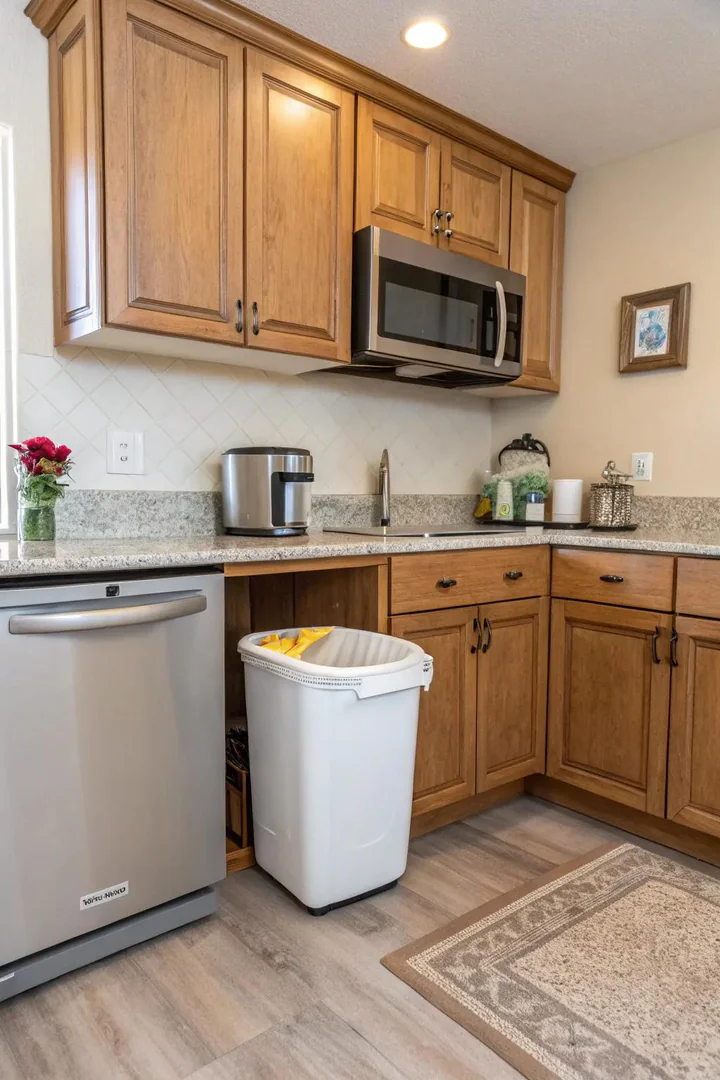
An awkward corner is the best place to hide the kitchen trash can — it is out of the main traffic path, out of direct sight lines, and close enough to the prep area for easy scraping during cooking. A pull-out trash and recycling system inside a corner base cabinet (Rev-A-Shelf’s 53WC series or simplehuman’s pull-out trash can mount) keeps the bins behind a cabinet door and pulls them forward on full-extension slides when you open the door.
If you do not have a cabinet in the corner, a freestanding trash can with a lid — simplehuman’s semi-round step can or iTouchless’s sensor-operated can — fits neatly against the wall in a corner. The semi-round profile (flat on the back, rounded on the front) is designed specifically for wall or corner placement. Choose a size that matches your household’s trash output: a 45-liter (12-gallon) can is standard for a family of four. Place the trash can near the sink and the prep area, not near the dining table — the can should be on the working side of the kitchen.
20. Set Up Convenient Access Cabinets
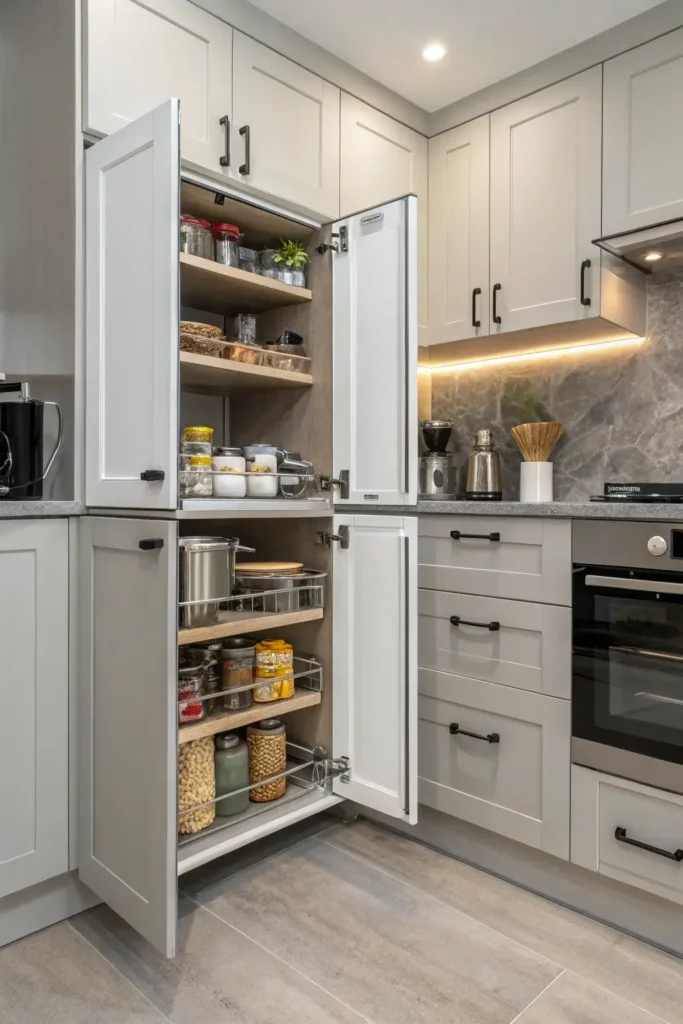
Easy-reach cabinets — base cabinets with pull-out drawers, swing-out trays, or full-extension shelves instead of fixed interior shelves — bring the contents of the cabinet to you rather than requiring you to kneel, bend, or reach into the deep interior. In a corner base cabinet, this is especially important because the back half of a standard corner cabinet is essentially inaccessible without getting on the floor and reaching with your arm fully extended.
Rev-A-Shelf, Hafele, and Knape & Vogt all produce retrofit pull-out and swing-out inserts designed specifically for corner base cabinets. The most effective options are the half-moon swing-out (two semicircular shelves that pivot out of the cabinet opening on a door-mounted hinge) and the full-extension pull-out shelf (a flat tray on drawer slides that pulls the full depth of the cabinet forward). Either option costs $100 to $350 and installs in under two hours with basic tools — a straightforward upgrade that makes a corner cabinet as accessible as a standard drawer. For more on planning your kitchen cabinet layout with corner solutions built in from the start, our guide covers blind corners, diagonal cabinets, and specialty inserts.
How to Measure and Plan for an Awkward Kitchen Corner
Taking Accurate Corner Measurements
Measure the two walls that form the corner independently — record the length of each wall from the corner to the nearest cabinet, appliance, or doorway. Then measure the depth of the corner: from the back wall to the front edge of the countertop on each side. Finally, measure the height from the floor to the underside of the upper cabinets (or to the ceiling if there are no upper cabinets in the corner). These three measurements — width of each wall run, depth, and height — determine which corner solutions will fit physically.
Assessing What You Need Most
Before choosing a corner solution, decide what the kitchen lacks most: storage, counter space, seating, or a specialized function like a desk or a display area. If the kitchen has adequate cabinet storage but limited counter space, a corner countertop extension or a small rolling island is more useful than a corner pantry. If the kitchen has plenty of countertop but not enough seating, a banquette is a better use of the corner than more shelving. Match the solution to the kitchen’s biggest gap, not to the most visually appealing option.
Checking for Plumbing and Electrical Constraints
Before committing to a corner solution, check what is behind the walls and under the floor in the corner. Plumbing supply lines and drain pipes for the sink, dishwasher, or refrigerator ice maker may run through the corner walls, limiting where you can mount shelves, cut openings, or install built-in furniture. Electrical wiring, outlets, and switches in the corner walls must be located and avoided (or relocated by a licensed electrician) before building any structure into the corner.
Corner Solution Types Comparison
| Solution | Best For | Cost Range | DIY Difficulty |
|---|---|---|---|
| Pull-out shelves | Existing blind corner cabinets | $100 – $350 | Easy |
| Corner drawers | Full access to deep corners | $500 – $1,200 | Professional only |
| Corner pantry | Maximizing food storage | $400 – $2,000 | Moderate |
| Banquette seating | Adding dining in small kitchens | $300 – $1,500 | Moderate |
| Rolling island/cart | Portable prep surface | $40 – $400 | None (freestanding) |
| Desk nook | Home office in the kitchen | $200 – $800 | Moderate |
Common Awkward Corner Mistakes to Avoid
Installing a lazy Susan when a pull-out would work better. Lazy Susans spin the contents in a circle, which means items in the back are still hard to see and small jars fall over every time the tray rotates. A pull-out shelf or a swing-out tray brings everything forward in a single motion and keeps items stable. The lazy Susan was the default corner solution for decades, but modern pull-out hardware outperforms it in accessibility and organization.
Leaving the corner empty because nothing standard fits. The fact that a standard 36-inch base cabinet does not fit the corner does not mean the corner must stay empty. Custom-width filler cabinets, narrow roll-out shelves, tray divider slots, and freestanding furniture all work in non-standard dimensions. Measure the actual space and find a solution sized to fit, rather than defaulting to a filler strip and a blank wall.
Blocking the work triangle with corner furniture. A corner banquette, a hutch, or a desk nook should not sit in the path between the sink, the stove, and the refrigerator. The work triangle must stay clear for the cook to move freely during meal preparation. Place non-cooking functions (seating, desk, display) in corners that are outside or adjacent to the work triangle, not inside it.
Ignoring the door swing radius. Cabinet doors, oven doors, and dishwasher doors in adjacent cabinets all need clearance to open fully. A corner solution that blocks an adjacent door’s swing — even partially — creates a daily frustration. Open every nearby door and drawer simultaneously during the planning phase to check for interference before building or installing anything in the corner.
Frequently Asked Questions
What is the best way to use a blind corner cabinet?
Install a swing-out pull-out shelf system (Rev-A-Shelf 5PSP series or Hafele Magic Corner) that brings the contents of the blind corner forward and out of the cabinet opening when you open the door. This hardware retrofit costs $150 to $350 and provides full access to a space that is otherwise nearly impossible to reach. For more kitchen decor ideas that solve common layout problems, our guide covers functional and aesthetic solutions for every kitchen style.
How do I make a corner cabinet more accessible?
Replace fixed shelves with full-extension pull-out shelves or drawers. Full-extension slides (from brands like Blum or King Slide) pull the shelf 100 percent of its depth out of the cabinet, exposing the full contents. Add interior LED lighting (battery-powered puck lights or hardwired strip lights) so you can see the contents clearly without a flashlight.
Can I put a dishwasher in a corner?
Yes, but the dishwasher door needs at least 24 inches of clear floor space in front of it to open fully, and the adjacent cabinet doors and drawers must not collide with the open dishwasher door. A 45-degree corner cabinet with an angled face can accept a dishwasher, but this is a custom installation that requires a cabinet maker and a plumber working together.
What is the cheapest way to fix an awkward corner?
Hanging produce baskets ($15 to $30), a narrow roll-out shelf for the fridge gap ($25 to $50), wall-mounted spice racks ($5 to $15 each), or open floating shelves ($20 to $40 per shelf) are all budget solutions under $50 that use awkward corners productively. These require no cabinet modification and install with basic hand tools in under 30 minutes each.
Should I remove the corner cabinet entirely?
Only if you plan to replace it with something more functional — a corner pantry, a banquette, a desk nook, or open shelving. Removing a corner cabinet without replacing it reduces the kitchen’s total storage, which is rarely a good trade. If the cabinet is in poor condition, replace it with a new cabinet sized to fit the actual corner dimensions rather than removing it and leaving the space empty.
How do I add lighting to a dark corner cabinet?
Battery-powered LED puck lights (GE, Brilliant Evolution, or Energizer) stick to the inside top of the cabinet and turn on with a tap or a remote control. For a permanent solution, hardwire an LED strip light (WAC Lighting or American Lighting) inside the cabinet connected to a door-activated switch that turns the light on when the cabinet opens and off when it closes. Visit The Designers Company for more kitchen storage guides and layout planning resources.
Conclusion
Every awkward kitchen corner has a solution — the question is whether that solution is a $15 hanging basket or a $1,200 set of custom corner drawers. Start by measuring the corner accurately, deciding what the kitchen needs most (storage, counter space, seating, or a specialized function), and then matching the corner’s dimensions to the option that fits both the space and the budget.
The most common mistake is doing nothing — leaving the corner empty or blocked by a filler strip because no standard cabinet fits. The 20 ideas above prove that non-standard corners are not wasted space; they are opportunities to add function, storage, and character that a standard cabinet run cannot provide. Pick one, measure twice, and reclaim the square footage your kitchen has been wasting.

