Granite Walkway Ideas: Discover 19 Elegant Paths for Your Garden
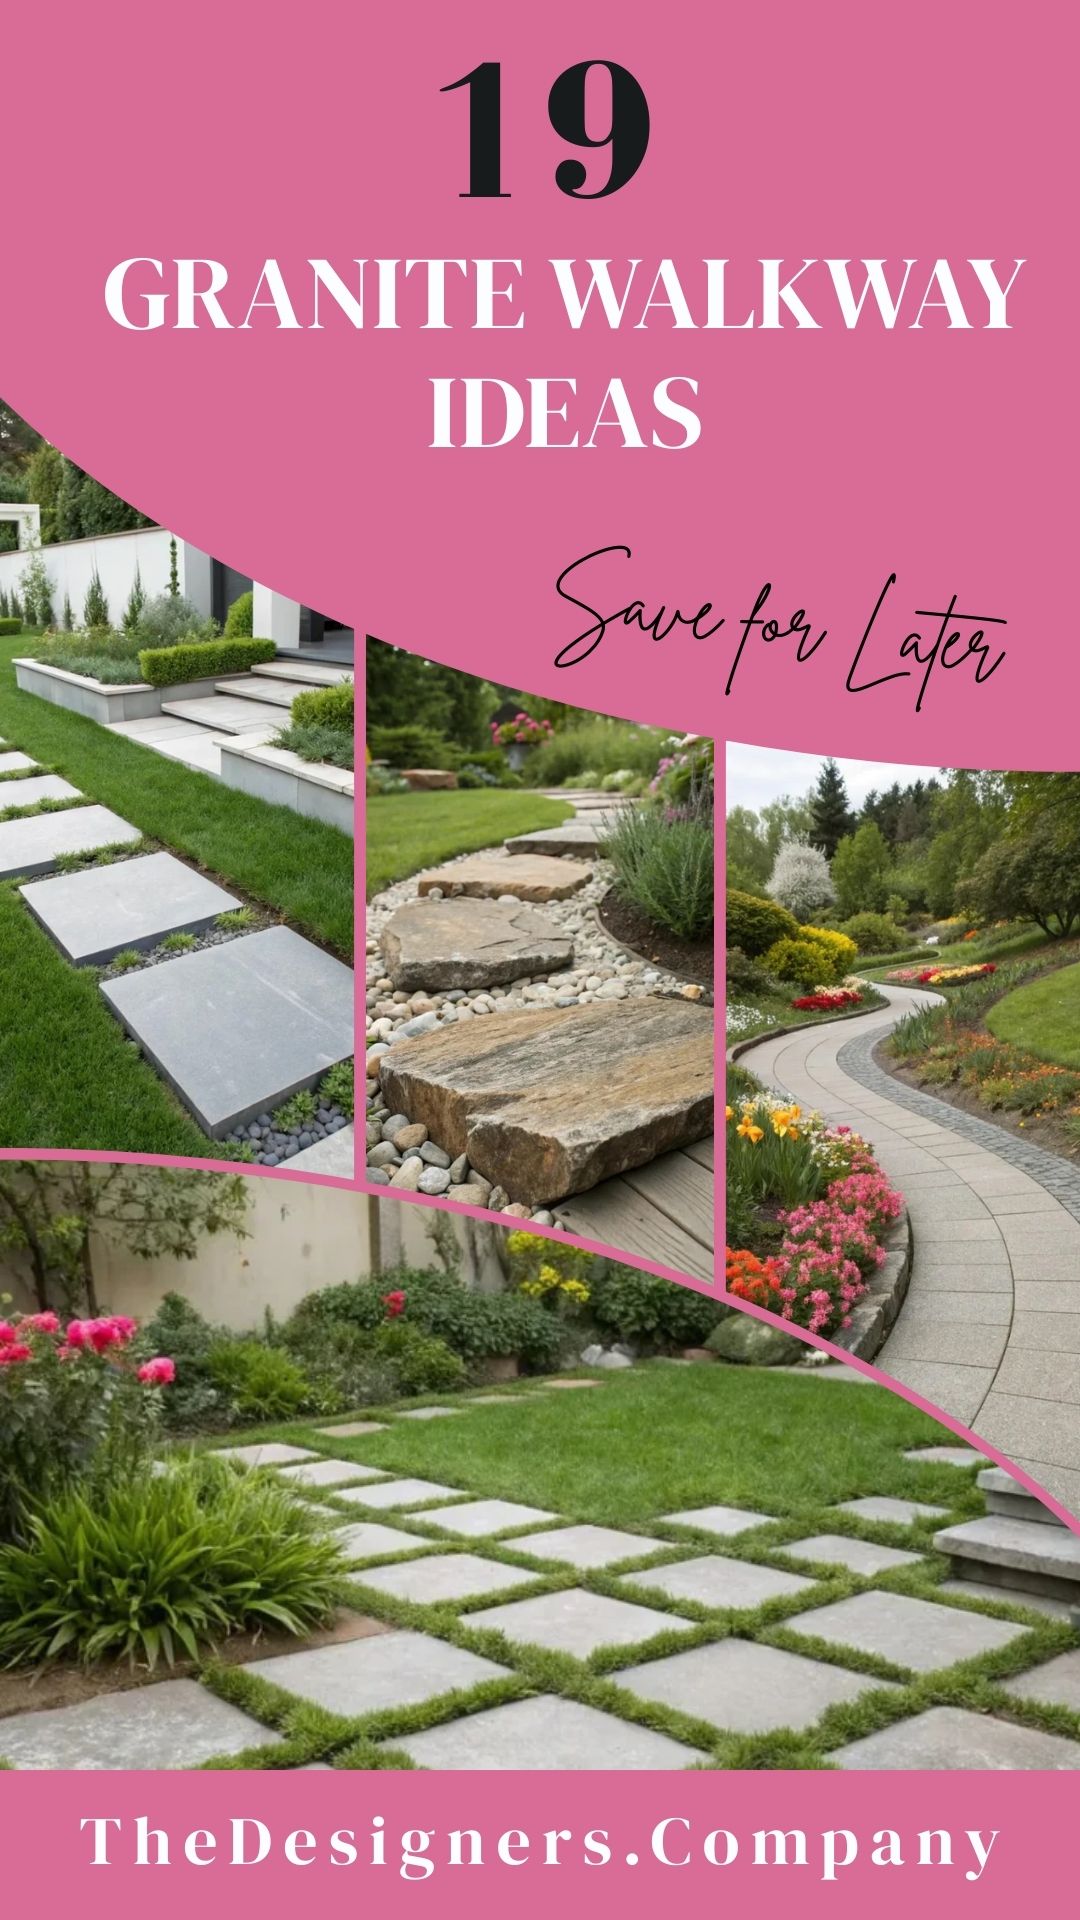
Granite walkways deliver a permanent, slip-resistant path that handles freeze-thaw cycles, heavy foot traffic, and decades of UV exposure without cracking, fading, or shifting. The stone comes in grey, black, pink, gold, and blue-grey tones, in finishes ranging from rough-split cobblestone to honed slab, so the same material can build a rustic garden path or a polished modern entry. Below are 19 granite walkway ideas with stone types, setting methods, layout patterns, and cost breakdowns for each style.
1. Rustic Granite and Pebble Combo

Irregular-cut granite flagstones (1.5 to 2 inches thick, 12 to 24 inches across) set in a bed of river pebbles create a naturalistic path that looks like it has been in place for generations. Caledonia and Giallo Fiorito granite in warm grey and gold tones pair well with tan or brown Mexican beach pebbles ($150 to $250 per ton, covering 80 to 100 square feet at 2 inches deep). Lay a weed barrier fabric under the pebble bed, set the flagstones on 1 inch of compacted stone dust, and fill the joints with pebbles flush to the flagstone surface.
Space the flagstones 2 to 3 inches apart for a natural look and keep each stone level with its neighbours by adding or removing stone dust underneath. A 30-foot-long, 3-foot-wide rustic path uses 15 to 20 flagstones ($5 to $12 per square foot) and 1 to 1.5 tons of pebbles, for a total material cost of $600 to $1,200. Edge the path with steel or aluminium garden edging ($30 to $50 per 20-foot section from EasyFlex or Dimex) to keep the pebbles from migrating into the lawn or planting beds.
2. Modern Granite Stepping Stones

Square or rectangular sawn granite pavers (18 x 18-inch or 12 x 24-inch, 2 inches thick) set at regular intervals in a mowed lawn deliver a clean, modern stepping-stone path with zero mortar and no gravel bed. Absolute Black and Jet Mist granite in flamed or thermal finish ($8 to $15 per square foot) provide grip in wet conditions while keeping the sleek, dark look. Dig each paver seat 2.5 inches deep, lay 1/2 inch of sand at the bottom, set the paver, and tamp it level so the top sits flush with the surrounding grass.
Space the pavers at a comfortable stride length (22 to 26 inches centre to centre) so walkers step naturally from stone to stone without stretching or shuffling. A 40-foot path needs 18 to 22 pavers ($150 to $350 total for the stone) and takes one person about 3 hours to install with a flat shovel, a rubber mallet, and a 4-foot level. Mow right over the flush-set pavers because the mower deck clears the surface, and the grass edges frame each stone with a green border that sharpens the modern grid look.
3. Curved Granite Path

A gently curving granite path guides the eye through the garden and makes a short walk feel longer and more interesting than a straight line between the same two points. Use irregular flagstones or fan-shaped granite setts (Belgard and Techo-Bloc sell tumbled granite fan kits for $12 to $20 per square foot) that naturally follow a curve without requiring pie-shaped cuts. Lay a garden hose on the ground to test the curve before digging, then mark the edges with spray paint and excavate 4 to 6 inches deep for a compacted gravel base plus sand setting bed.
The inside edge of each curve should be narrower than the outside edge (taper the path from 3 feet wide on the outside to 2.5 feet on the inside of each bend) so the curve reads as intentional rather than sloppy. A covered patio entry works well as the starting or ending point of a curved granite path, anchoring the walkway to the house while the curve leads out into the garden. Set the stones tight on the inside radius and slightly wider on the outside, and fill wider joints with polymeric sand ($15 to $25 per 50-pound bag from Alliance Gator) to lock the stones and prevent weed growth.
4. Granite and Grass Strips

Alternating granite plank pavers (6 x 24 inches or 8 x 36 inches, 2 inches thick) with strips of turf grass between them creates a permeable path that blends hardscape and green space. Silver Grey and Charcoal granite planks ($10 to $18 per linear foot) look sharp against Bermuda, zoysia, or Kentucky bluegrass, and the grass strips absorb stormwater that would otherwise run off a solid path. Set each granite plank on a 1-inch sand bed with 3 to 4 inches of grass between planks, and mow the grass flush with the stone surface.
Use a sod cutter ($50 to $75 per day rental) to strip the turf in the paver seats, excavate 3 inches, lay sand, set the plank, and re-sod the strips between. A 3-foot-wide path with 4-inch grass gaps needs about 60 percent stone and 40 percent turf by area, cutting the granite cost by nearly half compared to a solid-stone path. Edge the outer sides of the path with flush-set steel edging to keep the turf strips neat and prevent grass runners from creeping onto the stone surfaces.
5. Granite Path with Water Feature

Running a narrow recirculating water channel alongside a granite walkway adds sound, movement, and a cooling mist that makes the path feel like a passage through a botanical garden. Aquascape pondless waterfall kits ($400 to $1,200) recirculate water through a buried basin and a stone-lined channel, while EasyPro sells linear stream kits ($300 to $800) with pre-formed fiberglass channel sections that butt together for a straight or gently curved run.
Set the water channel 6 to 12 inches from the walkway edge on the side that gets the most foot traffic so the sound reaches walkers at close range. Line the channel with EPDM pond liner ($0.50 to $1 per square foot), stack flat granite offcuts along the channel edges to hide the liner, and run the recirculating pump on a GFCI outlet with an outdoor timer ($10 to $15) that shuts the pump off at midnight and restarts at sunrise. A 20-foot water channel uses 200 to 400 gallons of water in the buried basin and costs $5 to $10 per month in electricity to run a small 1,200 GPH submersible pump.
6. Granite Path with Natural Edging

Lining the edges of a granite walkway with natural cobblestones, fieldstone, or rough-split granite setts creates a border that looks like it grew out of the ground. Use 4 x 4-inch or 6 x 6-inch Belgian block setts ($3 to $6 each from Belgard or local stone yards) set in a mortar bed along both sides of the path, with the top of the edging stone sitting 1 inch above the walkway surface to contain sand and pebble fill within the path.
Dig a 6-inch-deep trench along each side of the walkway, pour 2 inches of concrete ($4 to $5 per 80-pound bag of Quikrete) into the trench, and press the edging stones into the wet concrete with a rubber mallet. Mortar the joints between the edging stones with Type S mortar ($5 per 80-pound bag) for a permanent bond, or leave 1/2-inch open joints planted with creeping thyme or Irish moss for a softer, cottage-garden look. Natural edging costs $3 to $8 per linear foot in materials and adds 1 to 2 hours of labour per 20-foot section.
7. Granite Path with Flower Borders

Planting a 12-to-18-inch-wide flower border on each side of a granite walkway frames the path with colour and softens the hard stone edges. Low-growing perennials (lavender, catmint, dwarf coreopsis, and creeping phlox) stay under 18 inches tall and spill slightly over the path edge without blocking the walking surface. Plant in a repeating pattern (three plants of one species, then three of another) for a rhythmic effect that guides the eye along the path.
Amend the soil along the path edge with 2 inches of compost mixed into the top 6 inches before planting, and lay 2 inches of shredded bark mulch ($3 to $5 per 2-cubic-foot bag) between the plants to retain moisture and suppress weeds. Keep the flower border 2 inches back from the granite edge so root growth does not heave the path stones, and trim any plants that flop more than 3 inches onto the walkway surface. Spring-blooming bulbs (crocus, grape hyacinth, miniature daffodils) planted under the perennials add a first wave of colour in March and April before the perennials leaf out.
8. Minimalist Granite Path

A single row of identical sawn granite slabs (24 x 24-inch or 24 x 36-inch, 2 inches thick) set in a straight line with 1/4-inch joints filled with dark polymeric sand delivers the cleanest, most restrained walkway look. Absolute Black or Steel Grey granite in a honed finish ($12 to $20 per square foot) paired with charcoal polymeric sand ($20 per 50-pound bag) makes the joints nearly invisible and creates a continuous stone plane. Saw-cut edges are mandatory for this style because irregular edges break the grid and ruin the minimalist effect.
Set the slabs on a 4-inch compacted gravel base (3/4-inch minus) topped with 1 inch of coarse sand, and level each slab with a 4-foot spirit level and a rubber mallet. A 30-foot path at 24-inch slab width costs $1,200 to $2,000 in stone alone, making this one of the pricier granite options per linear foot, but the zero-maintenance finish (no weeding, no re-sanding, no re-sealing) earns back the cost over 20 to 30 years. Run a string line between two stakes along the path centreline before setting the first slab to guarantee a dead-straight run.
9. Granite Path with Path Lighting

Low-voltage LED path lights ($3 to $15 each from Hampton Bay, Malibu, or WAC Lighting) staked every 6 to 8 feet along a granite walkway light the path at ground level for safe nighttime walking and add a warm glow that picks up the stone colour and texture after dark. A 12-light kit with a 120W low-voltage power supply and 100 feet of direct-burial cable costs $80 to $200 at Home Depot or Lowe’s and installs in 2 to 3 hours with no wiring permit required.
Stagger the lights on alternating sides of the path (left, right, left, right) rather than pairing them directly across from each other, because staggered placement illuminates both edges with fewer fixtures and avoids a runway-landing-strip look. Bury the cable 3 to 4 inches deep along the path edge and loop 6 inches of slack at each fixture connection so the lights can shift slightly during seasonal ground movement without pulling loose. Pool deck lighting uses the same low-voltage system to light the coping edge and create a matching glow around the water.
10. Granite and Wood Fusion

Alternating granite slabs with ipe, cumaru, or pressure-treated pine timber sections (4 x 4 or 6 x 6, cut to path width) creates a mixed-material walkway that pairs the permanence of stone with the warmth of wood. Set the granite slabs on a sand bed and the timber sections on compacted gravel pads, keeping both materials at the same finished height so the surface stays flat and trip-free. The colour contrast between grey granite and warm brown wood sharpens with age as the wood weathers to silver-grey and the stone stays true.
Drill two 1/2-inch holes through each timber section and drive 12-inch galvanised ground spikes ($0.50 each) through the holes into the gravel base to pin the wood in place. Space the timber sections every 3 to 4 feet (about every second or third granite slab) for a rhythmic pattern that reads as intentional. Seal the wood sections annually with TWP 1500 or Penofin Ultra Premium penetrating oil ($40 to $50 per gallon) to slow greying and prevent rot at the ground contact points. Replace individual timber sections every 8 to 12 years as they wear, while the granite slabs stay for the life of the path.
11. Granite Path with Pergola Overhead

Running a granite walkway under a pergola or arbour creates a shaded corridor that feels like a garden room. Set the pergola posts (4 x 4 or 6 x 6 cedar or pressure-treated pine) on concrete footings at the outer edges of the path, and span the path width with 2×6 or 2×8 rafters at 16-to-24-inch spacing. A 12-foot-long, 4-foot-wide pergola walkway uses 4 posts, 2 beams, and 6 to 8 rafters, costing $500 to $1,500 in lumber and hardware.
Train climbing roses, wisteria, or star jasmine up the posts and across the rafters to build a living canopy that fills in over 2 to 3 growing seasons. A pergola walkway works best as the connector between two distinct garden areas (front yard to backyard, patio to pool, driveway to front door) because the overhead structure signals a transition from one space to another. Light the pergola with a strand of Edison string lights ($20 to $40 per 48-foot strand) draped along the rafter undersides for a warm glow after dark.
12. Granite Path with Seating Nooks

Widening the granite path at one or two points along its length to create a 4 x 4-foot or 4 x 6-foot seating nook gives walkers a place to pause, sit, and take in the garden view. Set a stone bench ($150 to $500 from local stone yards or Campania International) or a pair of Adirondack chairs ($250 to $400 each from Polywood) in the widened area, and border the nook with the same granite edging used on the main path for a cohesive look.
Position the seating nook at the midpoint of a long path or at a bend where the view changes, because walkers naturally slow down at curves and are more likely to stop and sit. Pave the nook area with the same granite as the path (or a complementary tone one shade lighter or darker) so the pause spot feels like part of the walkway rather than a separate patio. Add a low planting pocket (2 x 2 feet, filled with Japanese forest grass or hosta) beside the bench to screen the seating from the main path and create a semi-private garden alcove.
13. Granite Path with Sculptures

Placing one or two sculptures along a granite walkway turns the path into a gallery stroll. A cast-stone or bronze garden sculpture ($100 to $2,000 depending on size and material from Design Toscano, Henri Studio, or local artists) positioned 2 to 3 feet off the path edge draws the eye without blocking the walking surface. Set the sculpture on a granite pedestal (a 12 x 12-inch or 16 x 16-inch sawn granite block, $30 to $80) that matches the path material and raises the piece to eye level.
A single focal-point sculpture at the end of a straight path creates a destination that pulls walkers forward, while two or three smaller pieces spaced along a curving path create a sequence of discoveries. Avoid overcrowding the path with sculptures (one piece per 20 to 30 linear feet is plenty) because too many objects compete for attention and make the garden feel like a gift shop. Anchor tall sculptures to their pedestals with construction adhesive or stainless bolts to prevent wind toppling, and position the pieces where they catch morning or late-afternoon light for the best shadow and texture effects.
14. Granite Path with Mixed Textures

Combining two or three granite finishes (flamed, bush-hammered, and honed) on the same walkway adds visual depth and tactile variety without introducing a second stone type. Flamed granite has a rough, pebbly surface that provides maximum grip in wet conditions, bush-hammered granite has a uniform pitted texture, and honed granite has a smooth matte finish. Alternate finish types in bands (3 feet of flamed, 3 feet of honed, repeat) or use the rougher finishes at slope transitions and steps where traction matters most.
Order all three finishes in the same granite colour (for example, Silver Cloud or Luna Pearl) so the texture contrast reads as a deliberate design choice rather than a material mismatch. The finish change is subtle from a distance but obvious underfoot, creating a sensory walk that people notice even if they cannot explain why the path feels interesting. Balcony floor tiles use the same mixed-texture approach at a smaller scale to add grip and visual interest in a tight space.
15. Granite Path with Seasonal Plantings

Building 12-inch-wide planting pockets into the granite walkway every 4 to 6 feet (by leaving one paver-width gap in the stone pattern and filling it with soil) creates built-in beds that change colour four times a year. Plant pansies ($2 to $4 per six-pack) in early spring, swap to marigolds or zinnias ($3 to $5 per six-pack) in late spring, switch to ornamental kale ($3 per plant) in fall, and tuck in winter-flowering heather ($5 to $8 per plant) for cold-month colour.
Line each planting pocket with weed barrier fabric on the sides (not the bottom) to keep soil from washing into the gravel base under the adjacent granite pavers. Top-dress the pockets with 1 inch of fine gravel in the same colour as the walkway joints to tie the planted sections into the stone pattern. A 30-foot granite path with 5 planting pockets adds $20 to $40 per season in plant cost and 30 minutes of swap-out labour each quarter, delivering year-round colour for less than the price of two hanging baskets.
16. Granite Path with Overhead Trellis

A series of flat-topped trellis arches (4 feet wide, 7 feet tall, spaced 4 to 6 feet apart) over a granite walkway creates a tunnel effect that fills in with climbing plants by the second growing season. Build each arch from two 4 x 4 cedar posts and a 2 x 6 crossbar, or buy pre-made metal garden arches ($40 to $150 each from Gardener’s Supply Company or Wayfair) and bolt them to concrete footings alongside the path.
Train clematis, honeysuckle, or passionflower up each post and across the crossbar with garden twine or plastic plant clips ($5 per 50-count). Three to five arches spaced evenly along a 20-to-30-foot path create a rhythm that draws the eye to the far end, while a single arch at a garden gate or property boundary marks a threshold between zones. Prune the vines each winter to keep the growth on the structure and prevent the canopy from drooping low enough to brush heads.
17. Granite Path with Water Feature Alongside

A pondless stream or bubbling boulder positioned 3 to 5 feet from the granite walkway adds constant background sound that masks traffic noise and makes the garden feel larger and more secluded. Aquascape bubbling-rock kits ($200 to $600) use a single drilled boulder sitting on a buried basin with a recirculating pump, while a full pondless stream kit ($800 to $2,000) runs 8 to 15 feet of flowing water over stacked stone into a buried reservoir.
Position the water feature on the side of the path that faces the main viewing angle (usually the side visible from the patio or house windows) so the feature reads as part of the overall garden composition rather than hidden behind the walkway. Use granite cobblestones matching the path stone to line the stream edges and tie the water feature visually into the walkway material. Run the pump cable through a buried 1/2-inch PVC conduit from the water feature to a GFCI outlet, and install an inline ball valve ($5 to $10) on the pump line to adjust the flow rate and sound volume.
18. Granite Path with Natural Stone Edging

Stacking two or three courses of rough-split granite or fieldstone (4 to 6 inches tall per course) along the path edges creates a low retaining wall that doubles as a planting bed and a casual seat. Source the stone from a local quarry ($100 to $300 per ton, covering 20 to 30 linear feet per ton at two courses high) and dry-stack without mortar for a rustic look that allows easy rearrangement. Backfill behind the stacked stone with gravel for drainage and top with 4 inches of topsoil for planting pockets between the stones.
Plant sedum, hen-and-chicks, or rock cress in the gaps between the stacked stones for living mortar that softens the wall face and attracts pollinators. The stacked edge works best on sloped properties where the path cuts through a grade change: the uphill side gets a taller stone edge (3 to 4 courses) that holds back the soil, while the downhill side needs only a single course to define the path boundary. Small porch entries with a short granite walkway from the sidewalk to the steps benefit from this stacked-edge treatment to give the approach a sense of arrival.
19. Granite Path with Art Accents

Setting a coloured glass mosaic panel, a metal sculpture, or a ceramic tile inlay flush into the granite walkway surface at one or two points creates a surprise element that breaks the stone pattern and rewards close attention. Commission a local mosaic artist ($200 to $800 for a 12 x 12-inch to 18 x 18-inch panel) or buy pre-assembled mosaic sheets ($15 to $30 per square foot from Artaic or Mosaic Tile Outlet) and set them into a framed opening in the granite path on a mortar bed.
Recess the art panel 1/4 inch below the surrounding granite surface and fill the perimeter gap with flexible polyurethane sealant ($6 per tube from Sika or Geocel) rather than rigid mortar, because the different thermal expansion rates of glass/ceramic and granite will crack a rigid joint within two freeze-thaw cycles. Position the art inlay where walkers will look down naturally: at a path intersection, a gate threshold, or the base of a set of steps. A single mosaic panel costs less than extending the granite path by one linear foot and delivers far more visual interest per dollar spent. Visit The Designers Company for more walkway and outdoor path design guides.
How to Install a Granite Walkway
1. Mark the Layout and Excavate
Lay a garden hose or spray-paint the path outline on the ground, then excavate 6 to 8 inches deep (4 inches of gravel base plus 1 inch of sand plus the paver thickness). Slope the excavation 1/4 inch per foot away from the house foundation so rainwater drains off the path surface. Remove all roots, rocks, and organic material from the subgrade and compact the soil with a hand tamper or a plate compactor ($50 to $75 per day rental).
2. Lay the Gravel Base and Sand Bed
Fill the excavation with 4 inches of 3/4-inch minus crushed gravel, compacting in 2-inch lifts with a plate compactor. Screed 1 inch of coarse concrete sand over the compacted gravel using two 1-inch conduit pipes as rails and a straight 2×4 as the screed board. The sand bed must be dead flat (check with a 4-foot level) because every dip or hump transfers directly to the finished stone surface.
3. Set the Granite and Fill Joints
Place each granite paver on the sand bed and tap it level with a rubber mallet and a 2-foot level. Leave 1/4-to-1/2-inch joints between pavers, then sweep polymeric sand ($15 to $25 per 50-pound bag) into all joints, mist with water per the manufacturer’s directions, and let the sand cure for 24 hours before walking on the path. Polymeric sand hardens into a firm, weed-resistant joint that flexes with seasonal ground movement.
4. Install Edging and Final Grading
Stake steel or aluminium garden edging along both sides of the path to lock the outer pavers in place and prevent lateral creep. Backfill outside the edging with topsoil or mulch to the level of the path surface, and grade the surrounding soil so water flows away from the walkway. Inspect the path annually for any settled or heaved pavers, lift and re-level them by adding or removing sand underneath, and re-apply polymeric sand to any joints that have washed out.
Granite Types Comparison
| Granite Type | Colour | Cost per Sq Ft | Best Finish | Best Use |
|---|---|---|---|---|
| Absolute Black | Pure black | $12 – $20 | Flamed, honed | Modern stepping stones, minimalist paths |
| Silver Cloud | Light grey with white veining | $8 – $14 | Bush-hammered, flamed | Mixed-texture paths, formal entries |
| Caledonia | Warm grey-brown | $6 – $12 | Natural split, tumbled | Rustic flagstone, pebble combos |
| Giallo Fiorito | Gold-tan with brown flecks | $7 – $13 | Flamed, natural split | Cottage paths, flower-bordered walks |
| Jet Mist | Blue-grey swirl | $10 – $16 | Honed, polished | Contemporary paths, water features |
Frequently Asked Questions
Is granite slippery when wet?
Flamed and bush-hammered granite finishes are slip-resistant even in heavy rain because the rough surface texture provides traction. Polished (mirror-finish) granite is slippery when wet and should only be used indoors or in covered areas. For outdoor walkways, always specify a flamed, thermal, or bush-hammered finish, which meets ADA slip-resistance standards (coefficient of friction 0.60 or higher) in wet conditions.
How thick should granite walkway pavers be?
Pedestrian-only walkways need 1.5-to-2-inch-thick pavers set on a sand bed. Driveways and paths that may carry vehicle weight (lawn tractors, golf carts) need 2.5-to-3-inch-thick pavers or a reinforced concrete slab underneath. Stepping stones set in grass can be as thin as 1.5 inches because the surrounding turf provides lateral support.
Does granite stain?
Granite is highly stain-resistant compared to sandstone, bluestone, or concrete, but it can absorb oil, wine, and organic stains if left untreated. Apply a penetrating granite sealer ($15 to $30 per quart from StoneTech BulletProof or Miracle Sealants 511) once every 3 to 5 years to repel stains without changing the stone colour or surface feel. Clean spills promptly with water and a pH-neutral stone cleaner ($10 per quart) to prevent absorption.
How long does a granite walkway last?
Granite pavers last 50 to 100-plus years in residential use. The stone itself does not degrade from UV, moisture, or freeze-thaw cycles. The base and joints are the maintenance items: re-sand the polymeric joints every 3 to 5 years, re-level any shifted pavers as needed, and keep the drainage grading away from the path to prevent base erosion.
Can I install a granite walkway myself?
A straight granite path with sawn pavers on a sand bed is a manageable DIY project for anyone comfortable with digging, raking, and levelling. Budget 2 to 3 full days for a 30-foot path including excavation, base prep, paver setting, and jointing. Curved paths, mortared joints, and step transitions add complexity that may warrant hiring a mason ($50 to $100 per hour) for the skilled portions while you handle the excavation and base work.