
Small Kitchen Bar Ideas: 16 Clever Designs That Maximize Every Inch
Small kitchen bar ideas turn unused counter space, a blank wall, a windowsill, or a narrow gap between the kitchen and living room into a functional eating and drinking spot that eliminates the need for a separate dining table. In kitchens under 120 square feet, a dedicated dining table consumes floor area that the kitchen cannot afford to lose — a bar built into the existing counter, mounted to a wall, or tucked into a corner provides seating without stealing square footage from the cooking zone.
The 16 small kitchen bar ideas below cover every configuration — from peninsula breakfast bars and floating wall-mount shelves to hidden fold-out bars and windowsill perches — and each one names specific dimensions, materials, and product sources so you can build the exact bar that fits your kitchen’s footprint and style.
1. Integrate Statement Fixtures
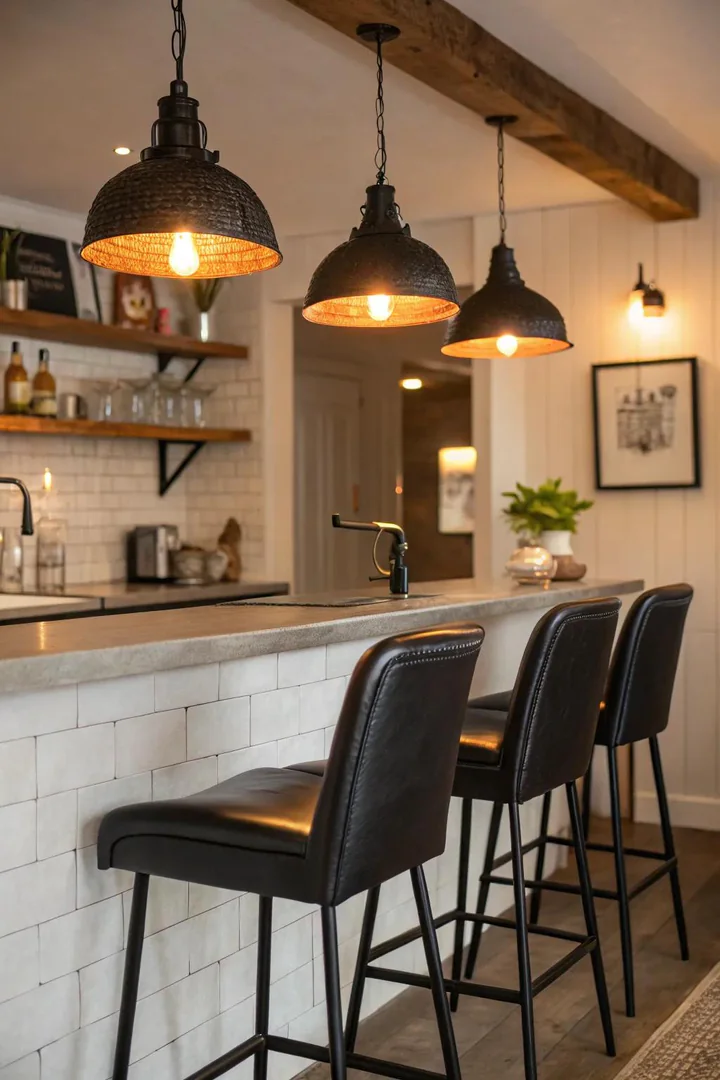
A statement fixture — a sculptural pendant light, an oversized woven shade, or a pair of bold bar stools — gives a small kitchen bar a sense of occasion and design intention that prevents it from looking like an afterthought. In a small kitchen where the bar area is compact, one strong visual element anchors the space and signals that this is a designed feature, not leftover counter space with a couple of stools.
Choose one statement element — either the lighting or the seating, not both — and keep everything else simple. A pair of oversized woven rattan pendants (Serena & Lily’s Flynn or IKEA’s SINNERLIG) over a plain butcher block bar makes the bar the kitchen’s focal point. Alternatively, two sculptural metal stools (CB2’s Vapor or Article’s Esse) at a simple white-quartz bar create drama through seating rather than lighting. Scale the fixture proportionally: a pendant light over a small bar should be 10 to 14 inches in diameter — anything larger overwhelms the compact surface.
2. Select Compact Seating Solutions
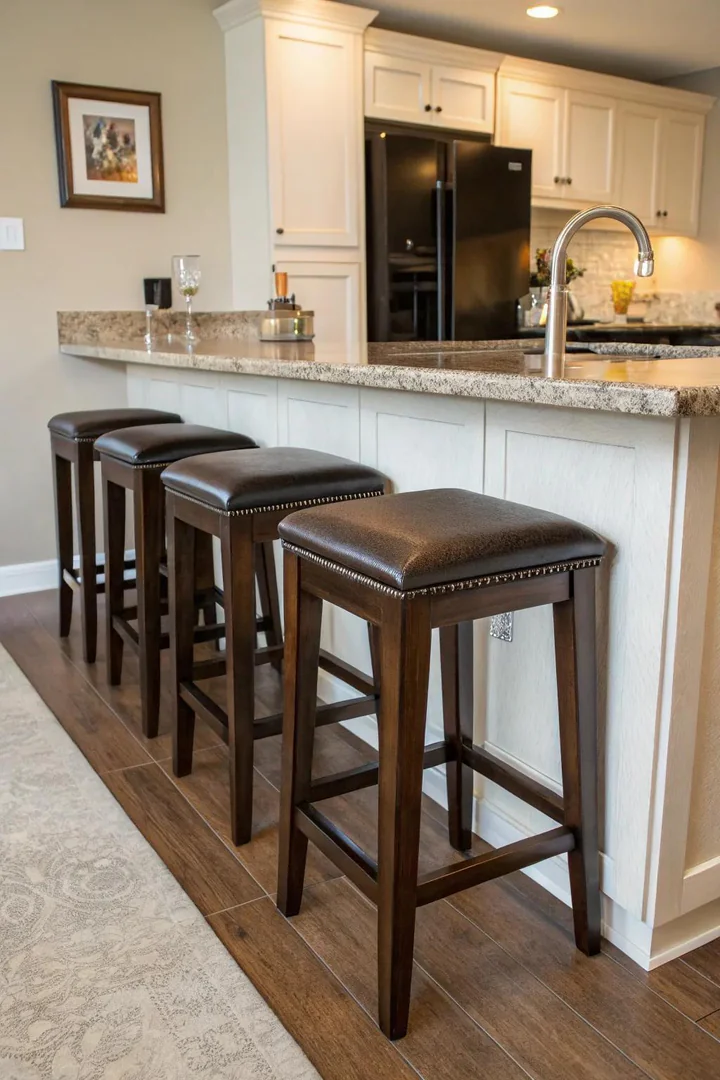
Space-saving stools — backless, stackable, foldable, or narrow-profile stools that tuck completely under the bar overhang when not in use — are essential in a small kitchen where protruding seating blocks walkways and cooking traffic. The difference between a small kitchen that works and one that feels cramped often comes down to whether the stools disappear under the bar or stick out into the room.
Backless counter stools (24-inch height) or bar stools (30-inch height) that are 14 to 16 inches wide tuck fully under a standard 12-to-15-inch countertop overhang. IKEA’s DALFRED (adjustable height, folds partially), Article’s Esse (backless, slim silhouette), and Target’s Threshold metal stools (stackable) all work in tight spaces. Avoid stools with arms, wide backs, or splayed legs — each one adds 4 to 8 inches to the stool’s footprint and prevents it from tucking under the bar.
3. Adopt a Space-Saving Design
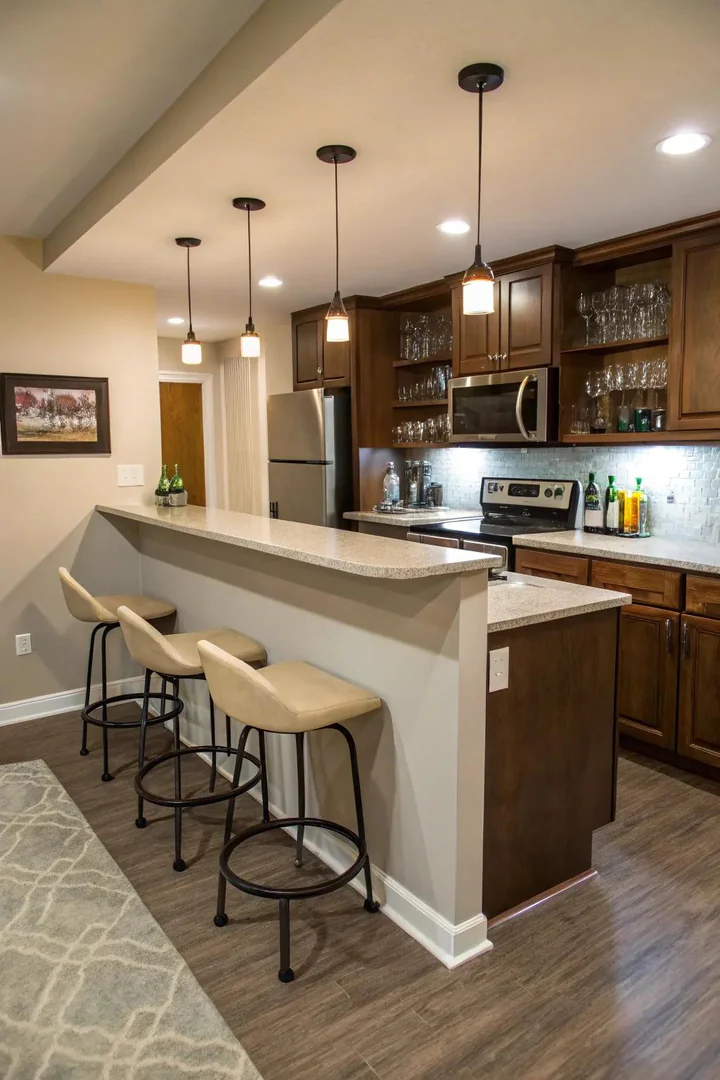
A compact bar integrates directly into the existing counter layout — an extended countertop overhang at the end of a cabinet run, a raised section of the existing counter, or a short peninsula that projects only 2 to 3 feet from the wall — rather than adding a separate structure that consumes additional floor space. The compact approach works because it uses space that the kitchen already occupies rather than claiming new territory.
The simplest compact bar is a 12-to-15-inch countertop extension beyond the last base cabinet, supported by a hidden steel bracket or a single leg. This extension seats two people and adds zero floor footprint beyond the existing cabinet depth. Use the same countertop material as the rest of the kitchen for a seamless, built-in look. For a more defined bar, raise the extension 6 inches above the standard 36-inch counter height to create a visual separation between the prep zone and the eating zone — the raised section hides cooking mess from the dining side.
4. Utilize Bright Color Palettes
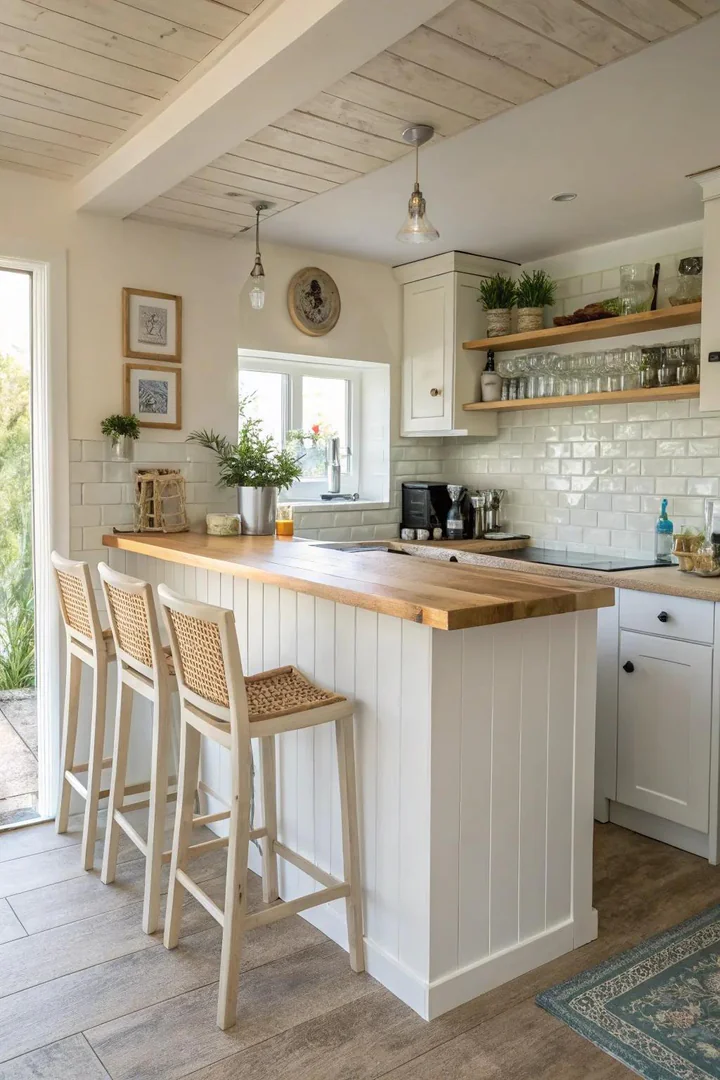
Light colors — white, cream, pale grey, light wood — make a small kitchen bar area feel larger and brighter by reflecting more light and creating less visual weight than dark colors. A white-painted bar base with a white quartz or light marble top blends into a white kitchen so smoothly that the bar does not register as an additional mass in the room. Dark bar elements (dark wood, black metal, charcoal countertops) can make a small kitchen feel more enclosed by adding visual weight at eye level.
If the kitchen has white cabinets, match the bar base and countertop to the existing white for maximum spatial illusion. If the kitchen uses light wood (white oak, birch, maple), extend the same wood to the bar surface for visual continuity. Add color through accessories — colored stools, a patterned runner beneath the stools, or a single colorful pendant light — rather than through the bar structure itself. For more on choosing colors that open up a small space, see our kitchen color ideas guide.
5. Add Open Shelving
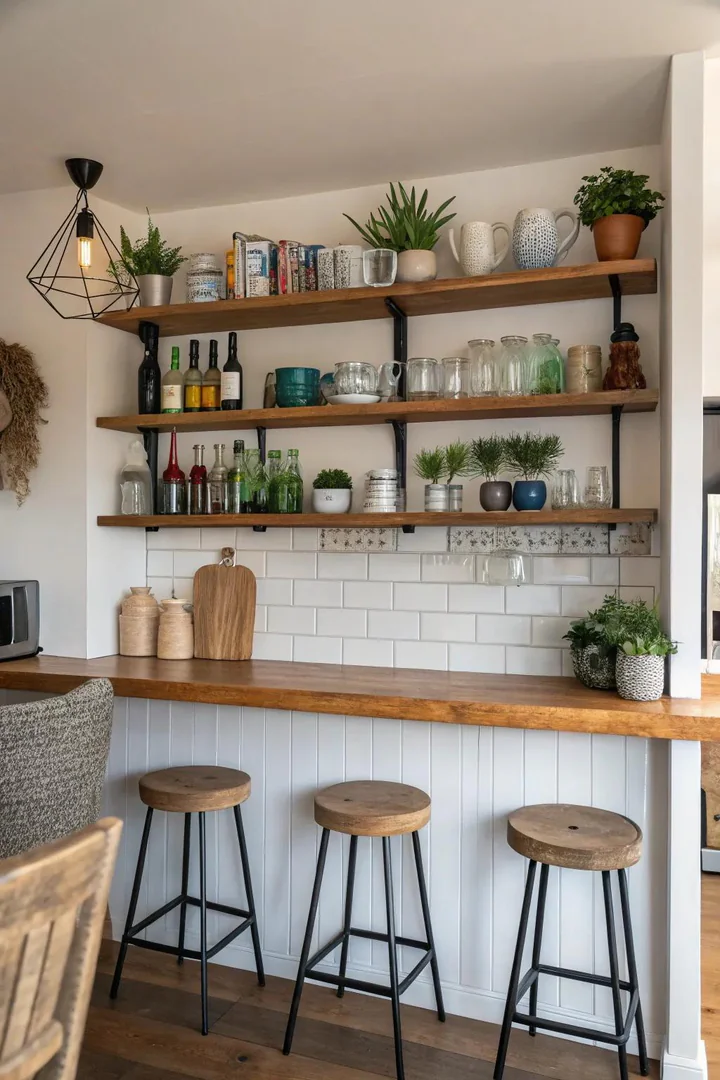
Open shelving above or behind a small kitchen bar stores glasses, bottles, barware, and decorative objects in a visible, accessible display that makes the bar area feel like a dedicated station rather than a counter with stools. The shelving also defines the bar zone architecturally — the vertical arrangement of shelves above the horizontal bar surface creates a framed, intentional area within the kitchen.
Install two or three floating shelves (white oak, walnut, or painted MDF from Shelfology or a local millwork shop) on the wall directly above the bar area, spaced 12 to 14 inches apart. Display a curated selection of bar essentials: four to six matching glasses, a cocktail shaker, two or three bottles of spirits, and one or two decorative objects (a small plant, a framed print, a ceramic vase). Keep the arrangement edited — three items per shelf creates a gallery look; ten items per shelf creates clutter.
6. Implement Lighting Solutions
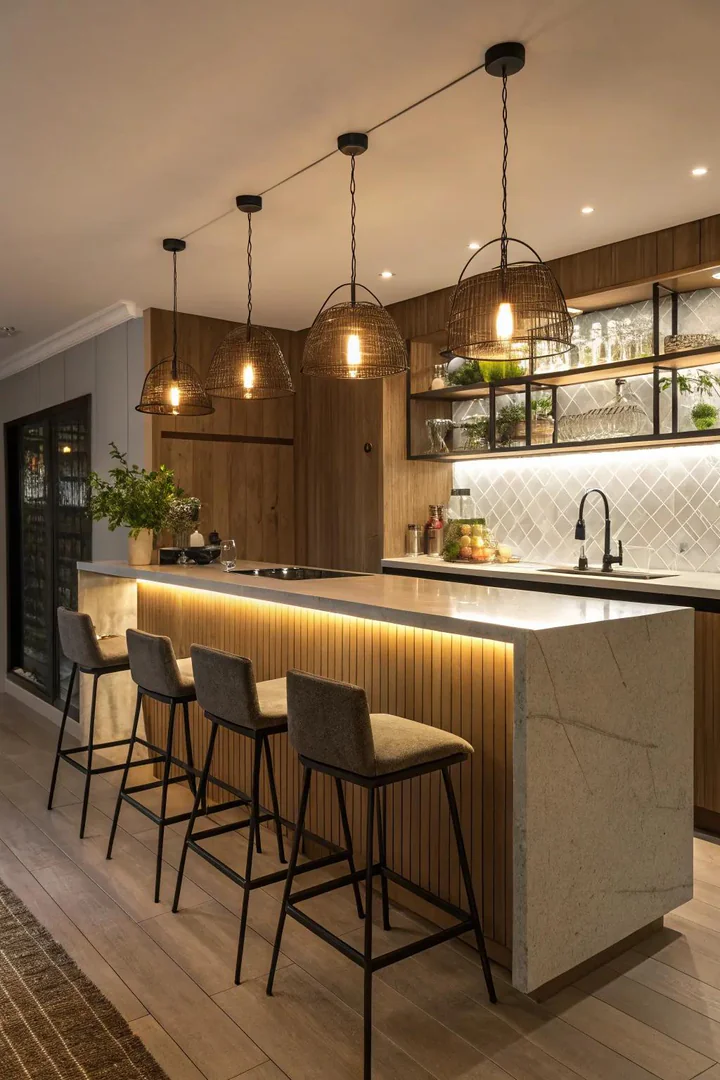
Dedicated bar lighting — pendant lights hung directly above the bar surface — defines the bar as its own zone within the kitchen and creates intimate, focused illumination that makes the bar area feel warm and inviting in the evening. Without dedicated lighting, the bar shares the kitchen’s overhead recessed lights, which are positioned for general task illumination and cast flat, even light that lacks the focused warmth of a pendant.
Hang one or two small pendants (8 to 12 inches in diameter) 30 to 36 inches above the bar surface. Use warm-white bulbs (2700K) on a dimmer for the most inviting bar atmosphere — warm light at low levels creates the comfortable, conversational ambiance that bars and restaurants use to make guests linger. Cedar & Moss, Schoolhouse Electric, and West Elm all produce small-scale pendants sized appropriately for a compact kitchen bar. For a full guide on kitchen lighting options, see our dedicated article.
7. Impress with a Secret Bar
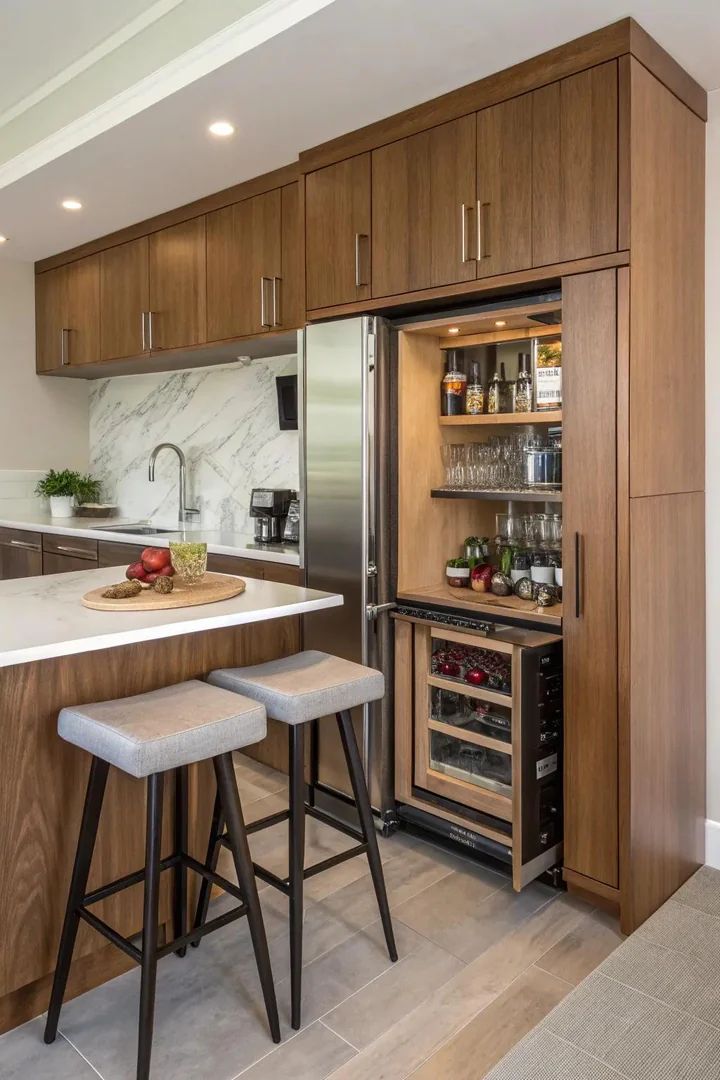
A hidden bar — a fold-down shelf that mounts flat against the wall when not in use, a pull-out counter concealed inside a cabinet, or a drop-leaf surface that unfolds from the end of a countertop — provides a bar surface when you want it and disappears completely when you do not. This is the ultimate space-saving solution for kitchens that cannot permanently dedicate any surface area to a bar.
A wall-mounted fold-down table (Norbo or NORBERG from IKEA, or a custom-built version using heavy-duty fold-down shelf brackets from Hafele or Sugatsune) provides a 20-to-30-inch-deep bar surface that folds flat against the wall, protruding only 2 inches when stored. Mount it at 42-inch bar height on a blank wall section and pair with two foldable stools that store in a closet or hang on the wall. A pull-out cutting board or extending countertop section (built into a base cabinet using heavy-duty full-extension drawer slides from Blum or Accuride) provides a hidden prep-and-eat surface that slides back into the cabinet when not in use.
8. Incorporate Versatile Surfaces
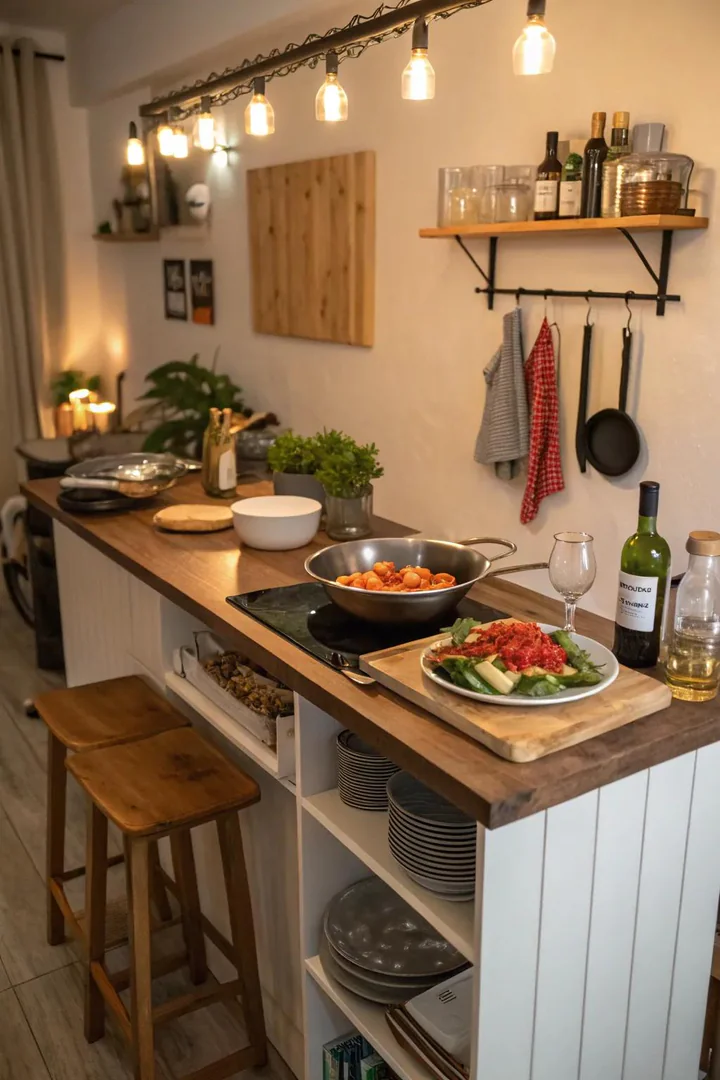
A multipurpose bar surface does double or triple duty — serving as a food prep area, an eating bar, a homework station, and a laptop workspace depending on the time of day. In a small kitchen, no surface can afford to serve only one function, so the bar countertop must be durable enough for food prep (cutting, kneading, setting down hot pots) and presentable enough for dining and working.
Engineered quartz (Caesarstone, Cambria, or Silestone) is the best multipurpose bar surface because it is non-porous (resists stains from wine, coffee, and food), scratch-resistant (handles cutting boards and laptop edges), heat-resistant (tolerates warm pots, though trivets are recommended), and available in colors and patterns that look good as both a work surface and a dining surface. Butcher block is a warm alternative that handles food prep beautifully but requires periodic oiling and is susceptible to water stains and knife marks.
9. Employ Effective Arrangements
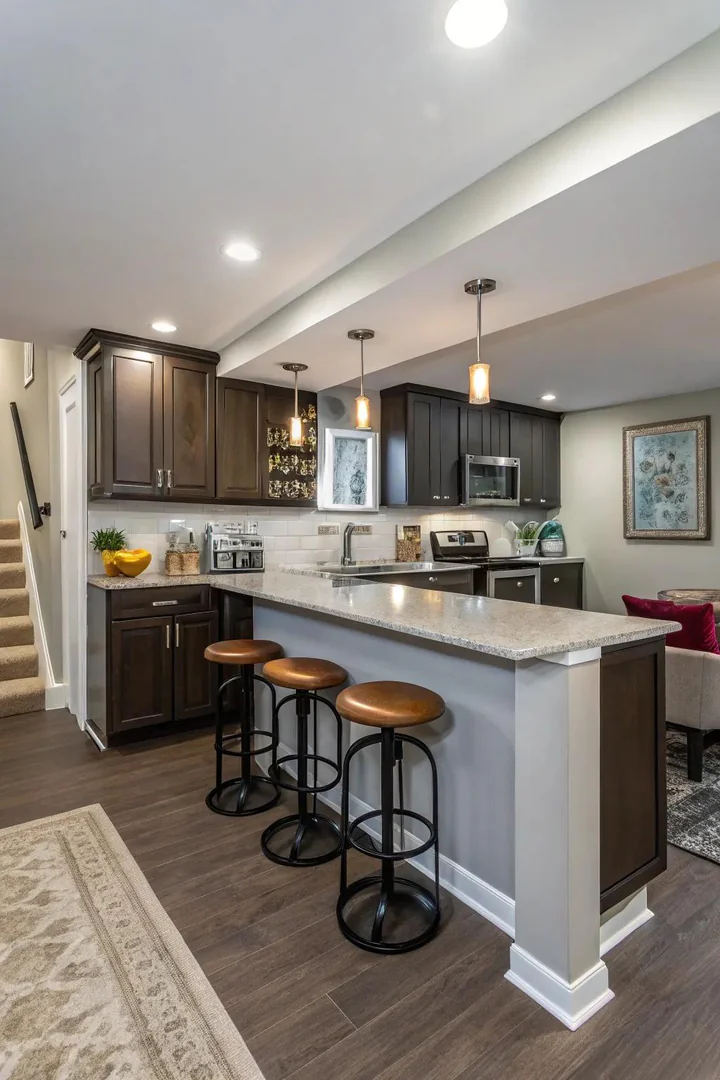
An efficient bar layout positions the bar surface where it serves the cooking workflow rather than interrupting it. In an L-shaped kitchen, the bar extends from the short leg of the L, turning the corner into a peninsula that adds seating without blocking the main cooking path. In a galley kitchen, the bar occupies the end wall, turning a dead-end into a destination. In a U-shaped kitchen, the bar replaces one section of upper cabinets with a raised counter and stools.
The most efficient bar placement follows a simple rule: put the bar at the transition point between the kitchen and the adjacent room (living room, dining room, or hallway). This position turns the bar into a pass-through — the cook can set plates and drinks on the bar for people on the other side, and the bar stools face the living area rather than a kitchen wall. Allow 24 inches of width per stool and 36 inches of walkway clearance on the kitchen side of the bar. For more layout strategies, see our small kitchen storage guide.
10. Add a Floating Bar
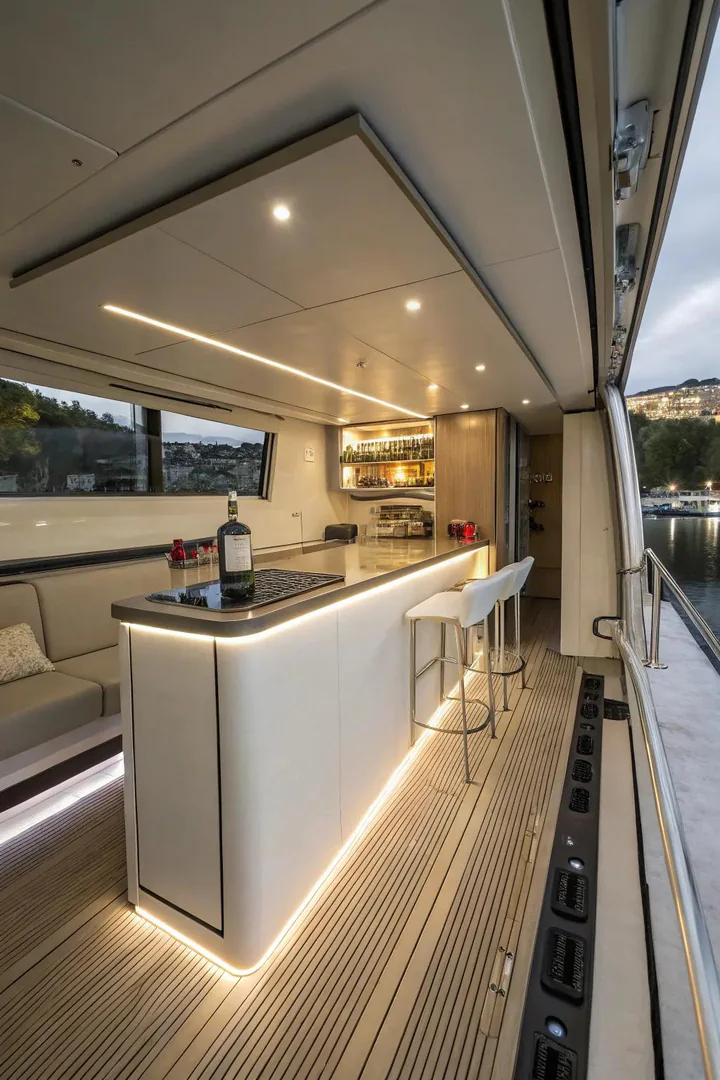
A floating bar — a wall-mounted shelf or countertop with no visible legs or base cabinets — takes up zero floor space and reads as a slim, architectural element rather than a piece of furniture. The floating bar is the best option for very narrow kitchens (under 8 feet wide) and galley kitchens where any floor-level structure would block the walkway.
Mount a 12-to-18-inch-deep floating shelf at bar height (42 inches) on the wall opposite the cabinets or on an end wall. Use concealed heavy-duty floating shelf brackets (rated for 200+ pounds from Federal Brace or Granite Brackets) that are hidden inside the shelf for a clean, minimalist appearance. A solid walnut, white oak, or butcher block shelf (1.5 to 2 inches thick) provides enough depth for a plate, a glass, and an elbow — all you need for a casual eating perch. The wall-mounted floating bar works in pairs — two people sitting side by side at a 4-foot-long shelf — and the open floor beneath makes the kitchen feel more spacious than a cabinet-based bar would.
11. Combine Materials for Added Interest
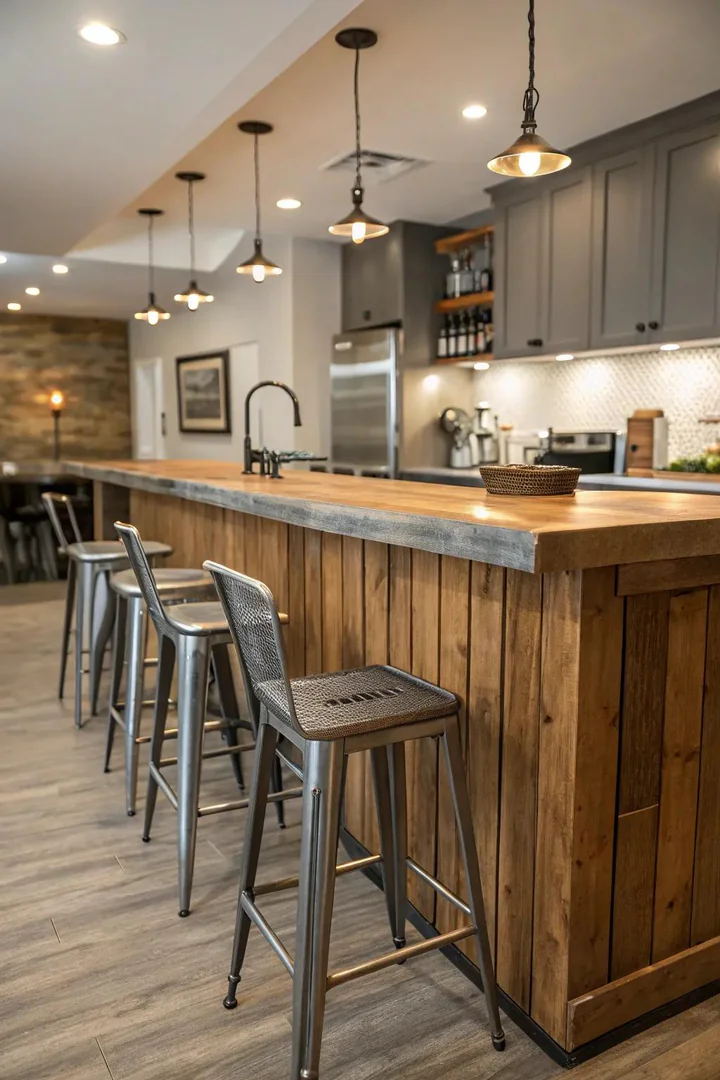
Mixing materials on a small kitchen bar — a wood top on a metal base, a marble surface on a wood-panel base, or a concrete countertop on an open-shelf steel frame — creates visual interest and prevents the bar from blending into the surrounding kitchen cabinetry. Material contrast makes the bar read as a separate, designed element rather than an extension of the counter.
The most effective material combinations pair one warm material with one cool material: a live-edge walnut bar top on black steel hairpin legs creates a warm-cool, organic-industrial contrast. A white marble slab on a reclaimed wood base creates a refined-rustic contrast. A butcher block surface on pipe-bracket supports creates a workshop-meets-kitchen contrast. Choose materials that complement but do not match the existing kitchen — if the kitchen has white quartz counters, a walnut bar provides differentiation; if the kitchen has butcher block, a marble or quartz bar provides contrast.
12. Create a Comfortable Corner Bar
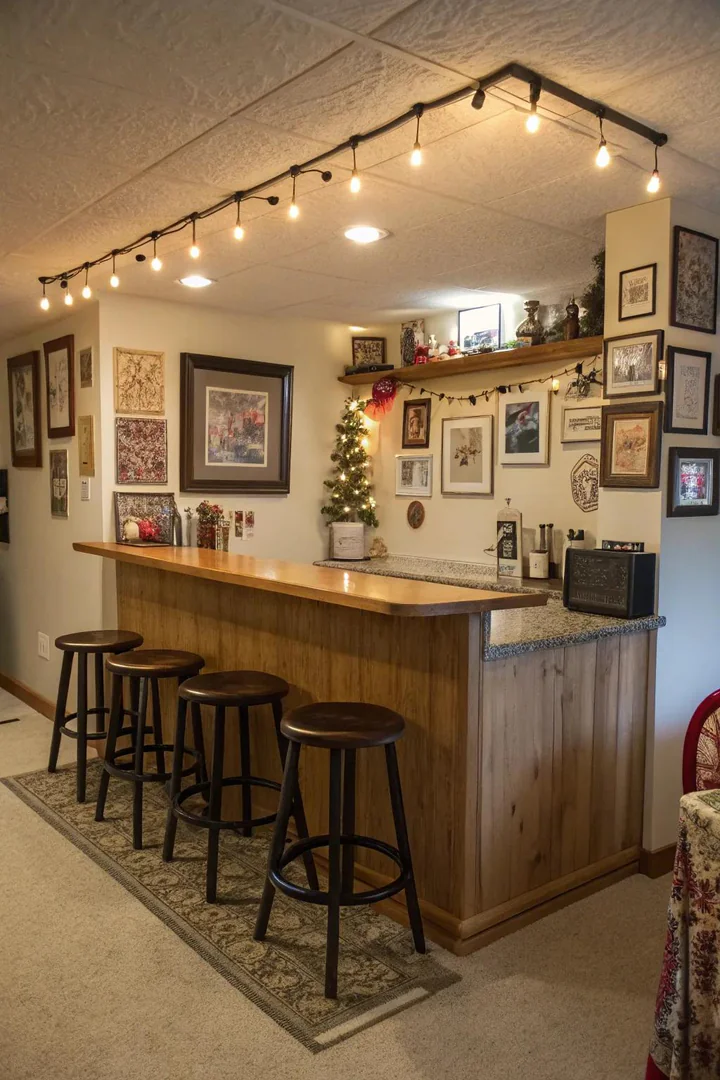
A corner bar fits into an unused kitchen corner — the dead zone where two walls meet — and turns wasted space into a compact, intimate drinking and eating spot. The corner provides two walls for mounting shelves, hanging art, and installing lighting, creating a three-sided enclosure that feels like a dedicated nook rather than an exposed counter in the middle of the kitchen.
Build the corner bar with an L-shaped or triangular floating shelf mounted into both walls at bar height, with one or two stools facing the corner. Mount shelving above for glasses and bottles, hang a small pendant light from the ceiling above the bar, and add a piece of art or a mirror on one of the two walls to prevent the corner from feeling closed-in. The corner bar seats one to two people comfortably and uses approximately 6 to 9 square feet of floor space — area that was previously dead storage or empty floor.
13. Add Decorative Features
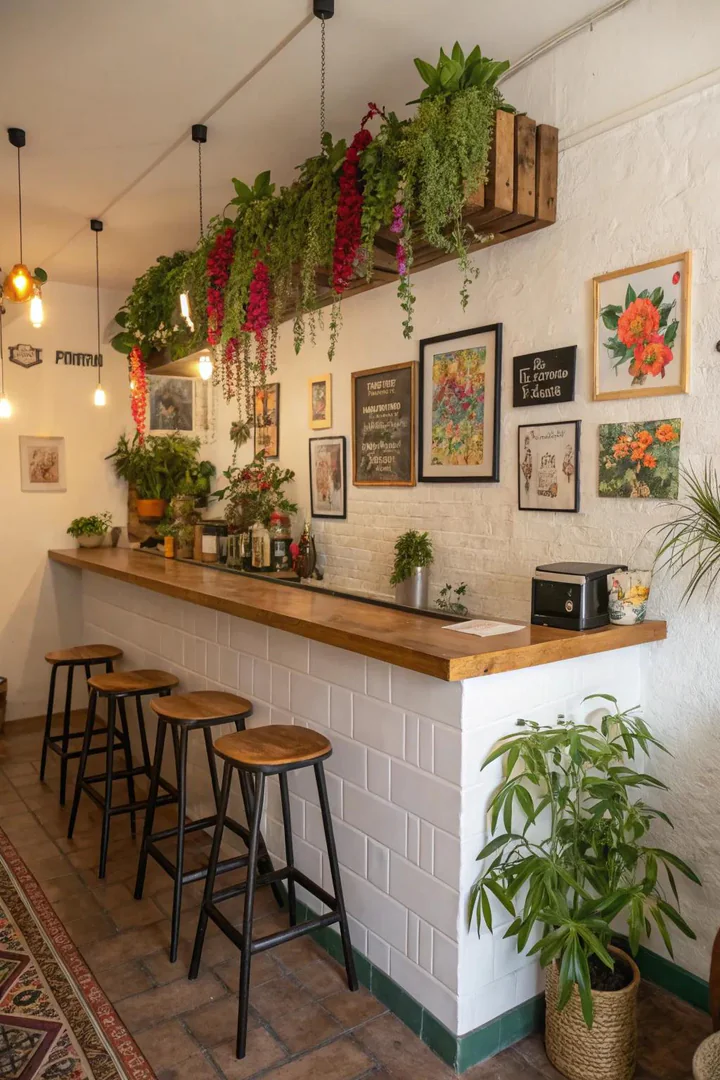
Decorative elements — a small potted plant, a framed print, a ceramic vase, a stylish napkin holder, or a cocktail recipe card in a frame — make a small kitchen bar feel like a designed feature rather than a utilitarian counter extension. Decoration signals intention: it says “this is a bar” rather than “this is the end of the counter where we sometimes eat.”
Keep bar decorations small and functional — the limited surface area cannot accommodate purely decorative objects that take up eating and drinking space. A small pothos in a ceramic pot (East Fork, Heath, or a local potter), a vintage cocktail print in a 5×7 frame, or a set of attractive coasters (leather, marble, or ceramic) serve both decorative and functional purposes. Place decorative items against the wall or in the corner of the bar to keep the eating surface clear. One or two decorative objects is enough — more than three on a small bar creates clutter.
14. Establish a Visual Barrier
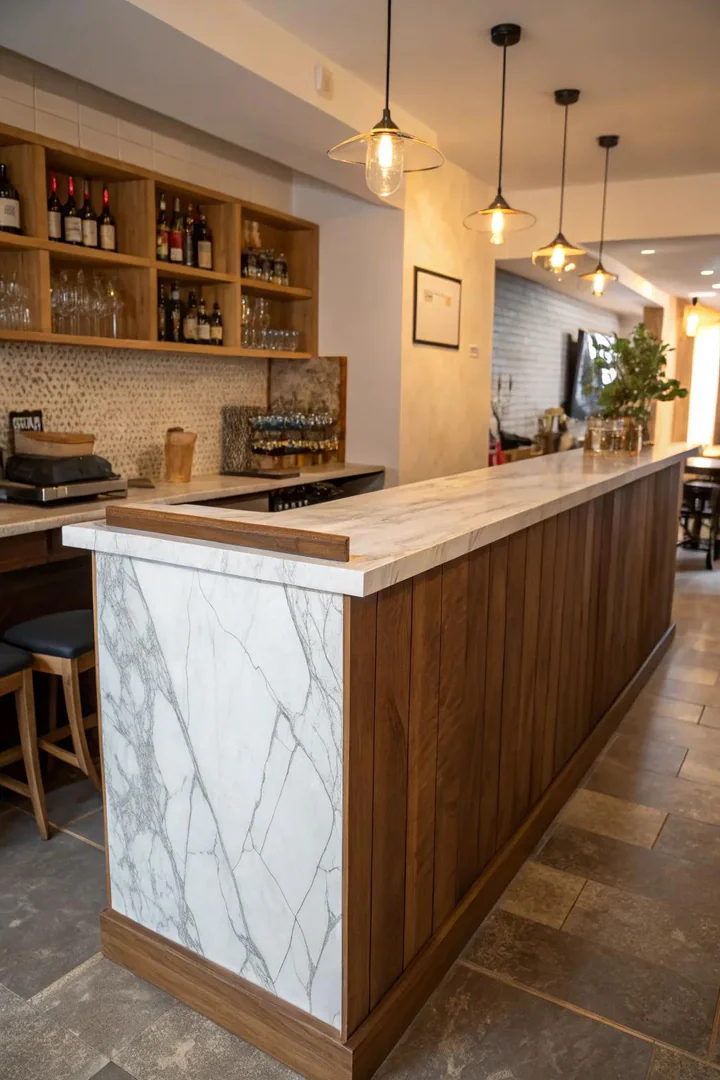
A bar placed at the boundary between the kitchen and the living or dining area creates a visual divider that separates the two rooms without a wall. The bar serves the same spatial function as a half-wall or a room divider — it defines the kitchen zone while maintaining the open sight lines that make a small home feel larger. The seated guests face the living area while the cook works on the kitchen side.
Build the bar at a raised height (42 inches) so the bar top sits above the standard counter height (36 inches), creating a visual screen that hides kitchen mess (dirty dishes, cooking clutter, prep ingredients) from the living-room view. The 6-inch height difference between the counter and the bar top is enough to block the sight line to the counter surface without blocking the conversation between cook and guests. Clad the living-room side of the bar base in a different material (shiplap, tile, wood paneling) to reinforce the visual separation between kitchen and living room.
15. Combine Appliances
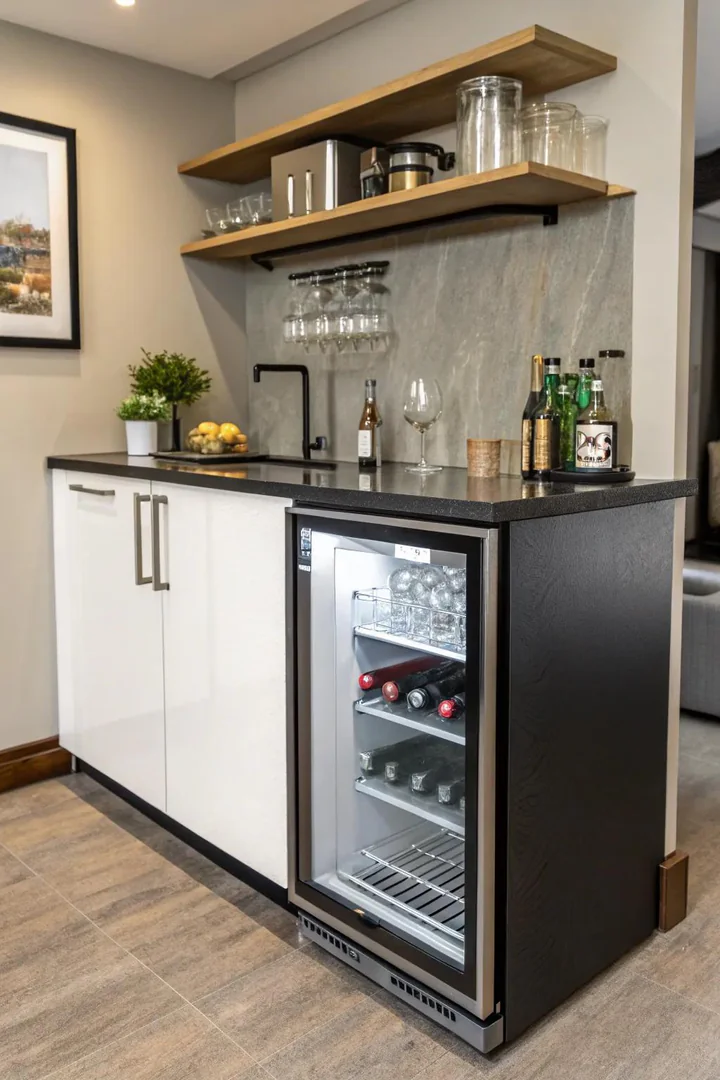
Integrating small appliances into the bar structure — an undercounter beverage refrigerator, a built-in wine cooler, a drawer microwave, or a built-in ice maker — turns the kitchen bar into a self-contained beverage station where everything needed for drinks is within arm’s reach of the seated guest. The bar becomes functional rather than merely decorative.
An undercounter beverage refrigerator (15-inch or 24-inch width from brands like Zephyr, U-Line, or Summit) stores wine, beer, sparkling water, and soft drinks at the bar rather than requiring trips to the main refrigerator. A built-in ice maker (Scotsman, GE, or U-Line nugget-ice models) provides bar-quality ice without ice trays. Mount a pop-up power outlet (Lew Electric or Hubbell) in the bar top for a blender, cocktail shaker with USB-powered lights, or a phone charger. These integrated appliances add $500-2,000 each but turn a simple eating bar into a real home bar.
16. Utilize a Windowsill Bar
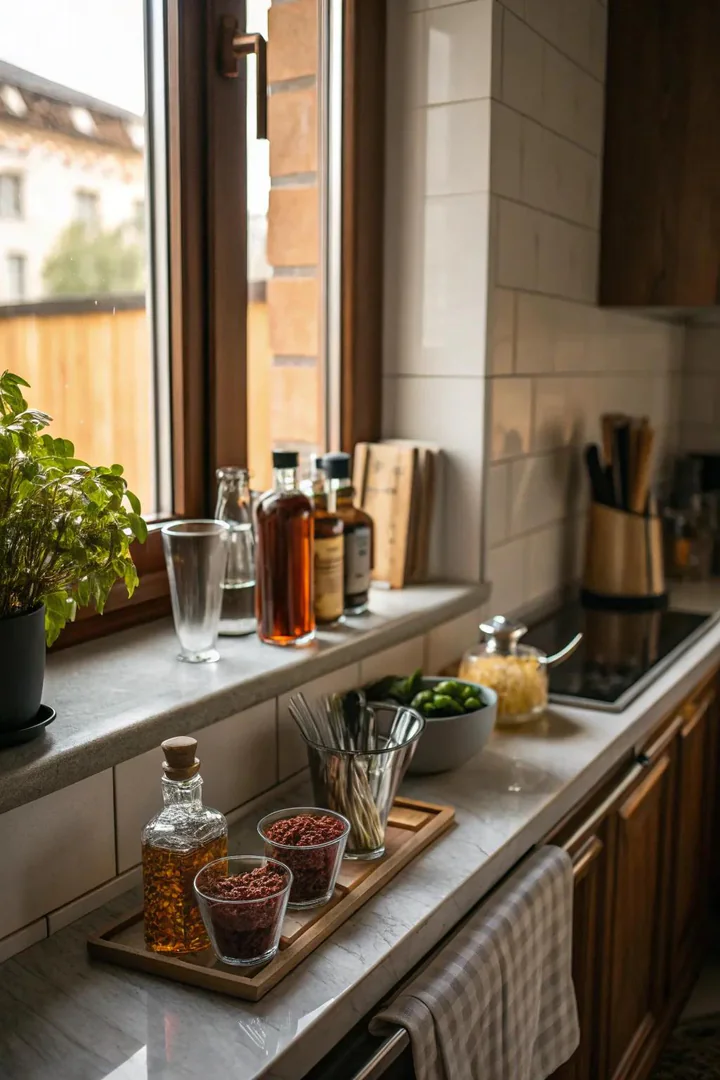
A windowsill bar extends or replaces the existing windowsill with a wider shelf (12 to 18 inches deep) at eating height, creating a bar surface that faces the window and floods the dining spot with natural light. The windowsill bar is the most space-efficient bar option because it uses vertical wall space that is otherwise occupied by a narrow, non-functional windowsill.
Replace the standard 4-to-6-inch windowsill with a 12-to-18-inch-deep butcher block, quartz, or solid wood shelf that extends from the wall on concealed heavy-duty brackets. Position the bar surface at 36-inch counter height (if the window is at counter height) or 42-inch bar height (if the window is higher). Add two to three stools that face the window — morning coffee with a view and evening drinks at sunset become daily rituals rather than occasional luxuries. The windowsill bar works in any kitchen with a window that faces an attractive view or receives good natural light.
How to Build a Small Kitchen Bar
Choosing the Right Bar Style
Match the bar style to your kitchen’s biggest limitation. If floor space is the constraint, choose a floating bar or fold-down bar that occupies zero floor area. If the kitchen lacks a natural transition point to another room, build a peninsula bar that creates a boundary. If the kitchen has an unused corner, build a corner bar. If the kitchen already has counter space but no seating, extend the existing counter with a 12-to-15-inch overhang and add stools.
Selecting the Right Bar Height
Standard counter height (36 inches) works for eat-in bars that double as prep surfaces — it is the same height as the kitchen counters, so it integrates visually and functionally. Bar height (42 inches) works for dedicated drinking and socializing bars — the extra height creates a visual separation from the counter and makes standing conversations comfortable. Choose counter height if the bar will be used primarily for meals; choose bar height if it will be used primarily for drinks and socializing.
Budgeting Your Bar Project
A small kitchen bar costs $200-500 for a DIY wall-mounted floating shelf with brackets and stools, $500-2,000 for a built-in counter extension with professional installation, and $2,000-5,000 for a custom peninsula bar with plumbing, electrical, and integrated appliances. The countertop material is the biggest variable: a 4-foot butcher block shelf costs $60-120; the same length in quartz costs $200-400; in marble, $400-800. Stools add $50-300 per stool depending on quality and brand.
Small Kitchen Bar Configurations Comparison
| Bar Type | Floor Space Required | Seats | Cost Range |
|---|---|---|---|
| Counter overhang | None (uses existing counter) | 2-3 | $200-600 |
| Floating wall shelf | None (wall-mounted) | 2 | $150-400 |
| Fold-down shelf | None when stored | 1-2 | $100-300 |
| Windowsill bar | None (window area) | 2-3 | $200-500 |
| Corner bar | 6-9 sq ft | 1-2 | $300-800 |
| Peninsula bar | 12-20 sq ft | 2-4 | $1,000-5,000 |
Common Small Kitchen Bar Mistakes to Avoid
Making the bar too narrow. A bar surface narrower than 12 inches does not fit a dinner plate and a glass side by side — the minimum functional depth for an eating bar is 12 inches, and 15 to 18 inches is comfortable. A 10-inch-deep shelf works as a coffee perch but not as a real eating surface.
Blocking the cooking walkway. A bar that narrows the walkway below 30 inches makes cooking stressful because you cannot move between the stove, sink, and refrigerator without bumping into bar stools or squeezing past seated guests. Measure the walkway with stools in place (pulled out as if someone is sitting) and ensure at least 36 inches of clearance on the working side.
Choosing oversized stools. Bar stools with wide backs, arms, or splayed legs add 6 to 10 inches to the stool footprint and prevent the stool from tucking under the bar. In a small kitchen, every protruding inch matters. Choose backless, narrow-profile stools that disappear under the overhang when not in use.
Skipping dedicated lighting. A bar area lit only by the kitchen’s general ceiling lights looks flat and uninviting. Hang one or two small pendants directly above the bar surface on a dimmer switch to create a warm, focused atmosphere that makes the bar feel special. Visit The Designers Company for more kitchen design guides, bar inspiration, and small-space solutions.
Frequently Asked Questions
What is the minimum space needed for a kitchen bar?
A functional kitchen bar needs a minimum surface depth of 12 inches, a minimum length of 24 inches (for one stool), and 36 inches of walkway clearance on the kitchen side. A wall-mounted floating bar or fold-down shelf can be installed in virtually any kitchen because it uses vertical wall space rather than floor space. A peninsula bar needs 12 to 20 square feet of floor space.
Can I add a bar to a rental kitchen?
Yes — use non-permanent options that do not require drilling into walls or modifying cabinetry. A freestanding bar cart placed at the end of a counter, a clamp-on shelf that attaches to the existing counter edge, or a tension-mounted shelf between two walls provides a bar surface without any permanent modifications. Foldable stools store in a closet when not in use.
What height should kitchen bar stools be?
Counter-height stools (24 inches from floor to seat) pair with 36-inch-high bar surfaces. Bar-height stools (30 inches from floor to seat) pair with 42-inch-high bar surfaces. The seat height should be 10 to 12 inches below the bar surface for comfortable seating. Measure the bar height first, then buy stools 10 to 12 inches shorter.
How do I make a small kitchen bar look bigger?
Use light colors (white, cream, light wood) on the bar surface and base to reflect light. Mount a mirror on the wall behind the bar to double the perceived depth. Use transparent or slim-profile stools (acrylic ghost stools, wire-frame stools) that take up visual space but allow sight lines through them. Add under-bar LED lighting that illuminates the floor beneath a floating bar, creating a sense of weightlessness.
What is the best countertop material for a small bar?
Engineered quartz is the best all-around choice because it is durable, stain-resistant, available in any color, and does not require sealing. Butcher block is the warmest and most affordable option but requires periodic oiling and is susceptible to water damage. Marble is the most visually striking but the most maintenance-intensive (requires sealing, etches from acidic drinks like lemon juice and wine). For a bar that will see heavy drink use, choose quartz or stainless steel.
How many stools fit at a small kitchen bar?
Allow 24 inches of bar length per stool for comfortable spacing. A 4-foot bar seats two stools, a 6-foot bar seats three, and an 8-foot bar seats four. In tight spaces, reduce spacing to 20 inches per stool for slim backless stools, but anything tighter feels cramped. One or two stools is the sweet spot for most small kitchen bars.
Conclusion
A small kitchen bar does not require a large kitchen — it requires clever use of the space you already have. A countertop extension, a floating wall shelf, a fold-down table, a windowsill perch, or a corner nook provides enough surface for two people to eat, drink, and socialize without a dedicated dining table consuming precious floor area.
Start with your kitchen’s unused space: the end of a counter run, a blank wall, a wide windowsill, or a dead corner. Build the bar into that space using a durable, good-looking surface material, add one or two compact stools, and hang a small pendant light overhead to make the spot feel intentional. The result is a kitchen that works harder, seats more people, and feels more social — all within the same footprint.

