Backyard Pavilion Ideas That’ll Inspire Your 16 Dream Projects

A backyard pavilion gives you a permanent, roofed outdoor room that stays usable through rain, full sun, and light snow while adding $5,000-$30,000 in property value depending on size and materials. Free-standing pavilion kits from Yardistry, Backyard Discovery, and Sojag start at $2,000-$5,000 for a 10×12-foot structure, while custom-built timber frame or vinyl pavilions run $8,000-$25,000+ for a 12×16 to 16×20-foot footprint with electrical, ceiling fans, and built-in seating.
The 16 pavilion designs below cover wood, vinyl, timber frame, poolside, garden, solar-powered, entertainment-ready, and multi-season builds with specific product names, material costs, and construction details. Visit The Designers Company for hundreds of additional outdoor living and deck project guides.
1. Rustic Wooden Pavilion
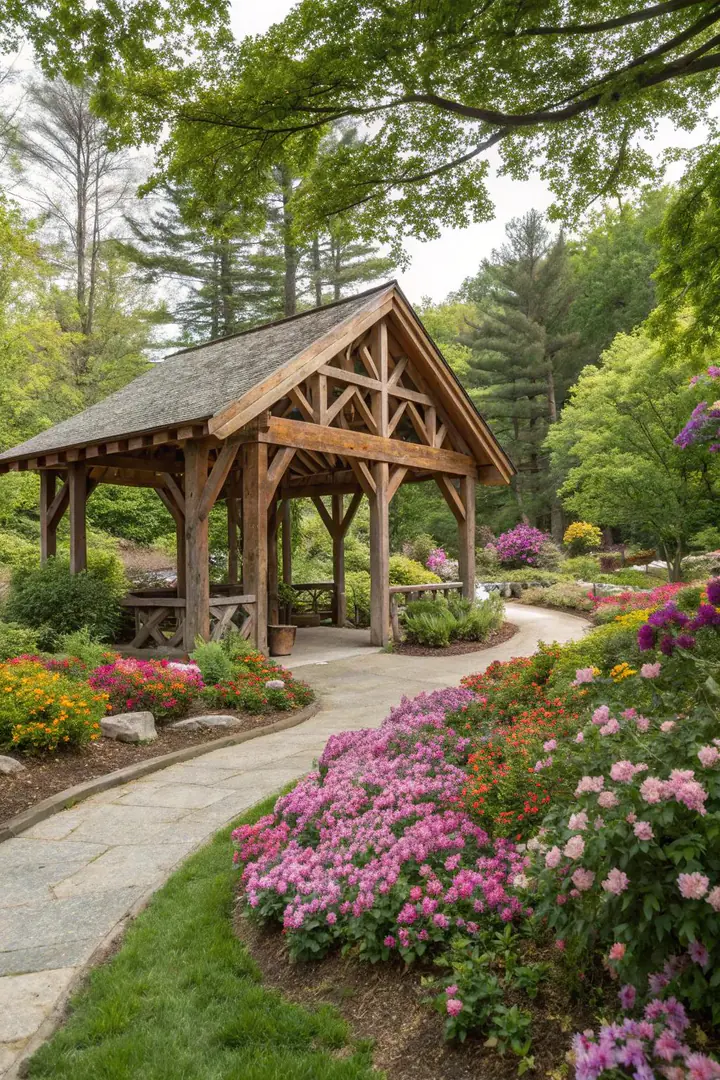
A rustic wood pavilion built from rough-sawn cedar or pine posts (6×6-inch, $15-$30 each for 10-foot lengths) with a cedar shake or metal roof creates a lodge-style shelter that weathers naturally over 15-20 years without paint. Leave the wood unfinished for a silver-gray patina, or apply a single coat of penetrating oil stain (Cabot Australian Timber Oil, $35-$45 per gallon) to hold the warm brown tone for 2-3 years between reapplications.
Use notched post-and-beam joinery rather than metal brackets at visible connections for a hand-built appearance. Rough-sawn lumber costs 20-30% less than surfaced (S4S) lumber from the same species, and the mill marks and saw tooth texture add to the rustic character. A 12×14-foot rustic pavilion using rough-sawn Douglas fir posts, 2×6 rafters, and corrugated metal roofing costs $2,500-$5,000 in materials for a DIY build.
2. Modern Vinyl Pavilion
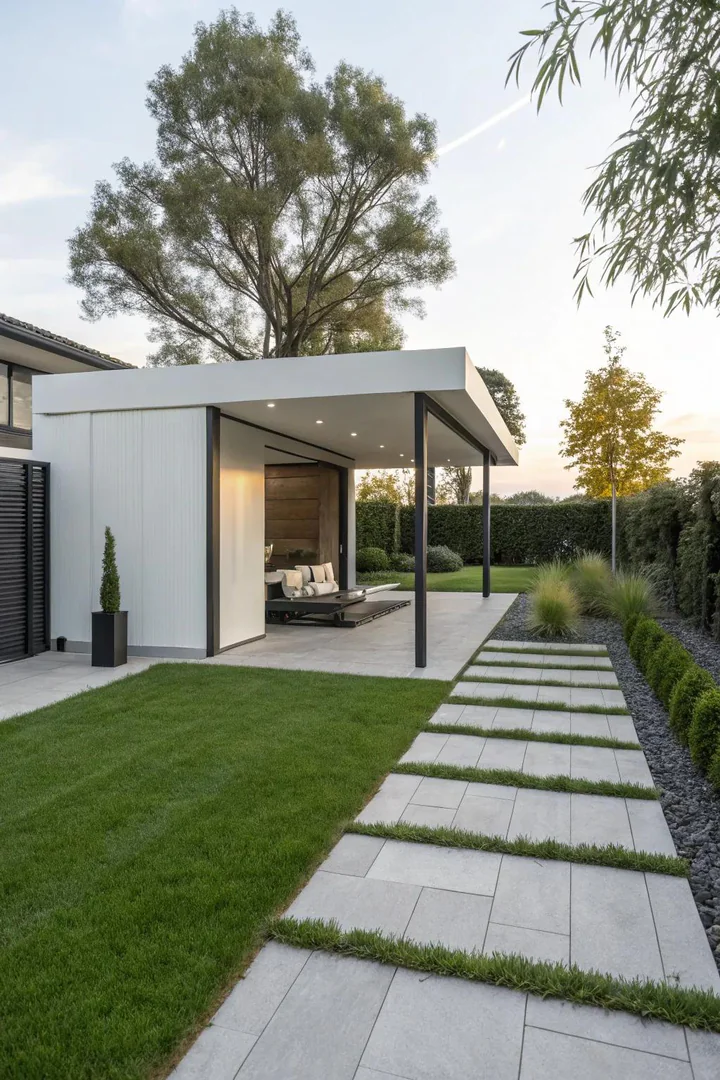
Vinyl pavilion kits from Crestline, New England Arbors, and Amish-built manufacturers ($3,000-$8,000 for a 10×12 to 12×16-foot unit) arrive with pre-cut posts, beams, and roof panels that snap and bolt together in 6-12 hours. White, tan, and gray vinyl never needs painting, won’t rot or attract termites, and cleans with a garden hose and household soap. Vinyl posts are steel-reinforced internally for structural strength while maintaining a lightweight feel during assembly.
Modern vinyl pavilions feature flat or low-slope roof profiles with aluminum-filled roof panels rather than traditional gable peaks. The clean, straight lines pair well with contemporary house styles and minimalist yard designs. Vinyl pavilions carry 20-year to lifetime warranties against cracking, peeling, and yellowing from UV exposure, making them the lowest-maintenance permanent pavilion option available.
3. Timber Frame Pavilion
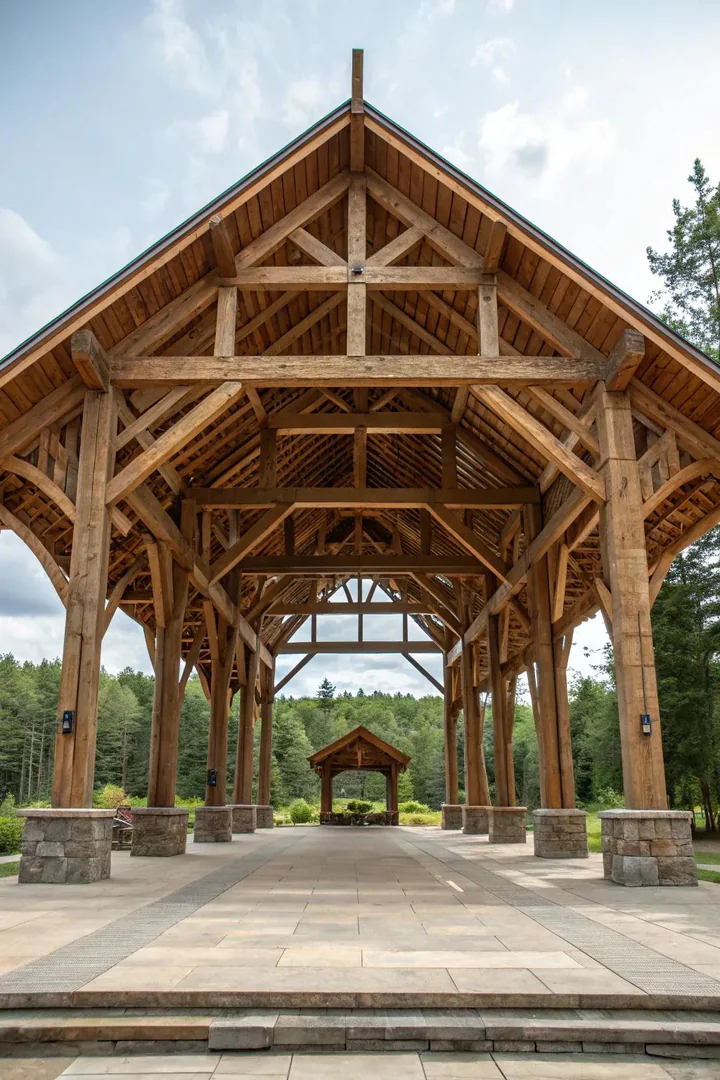
A timber frame pavilion uses 8×8 or larger posts and beams connected with mortise-and-tenon joints and wooden pegs for a structure that looks like it belongs in a national park lodge. Pre-cut timber frame kits from Vermont Timber Works, Mid-Atlantic Timberframes, and Woodhouse ($10,000-$25,000 for a 14×16 to 16×20-foot pavilion) ship with every joint pre-cut and numbered so assembly requires no specialty joinery tools on site.
Douglas fir and eastern white pine are the most common timber frame species, with Douglas fir offering higher strength-to-weight ratio and white pine providing a lighter color and softer grain. Add king-post or queen-post trusses to the gable ends for both structural reinforcement and visual drama. A timber frame pavilion is the most expensive per-square-foot pavilion type but also the longest-lasting, with a structural lifespan exceeding 100 years when properly maintained.
4. Poolside Pavilion
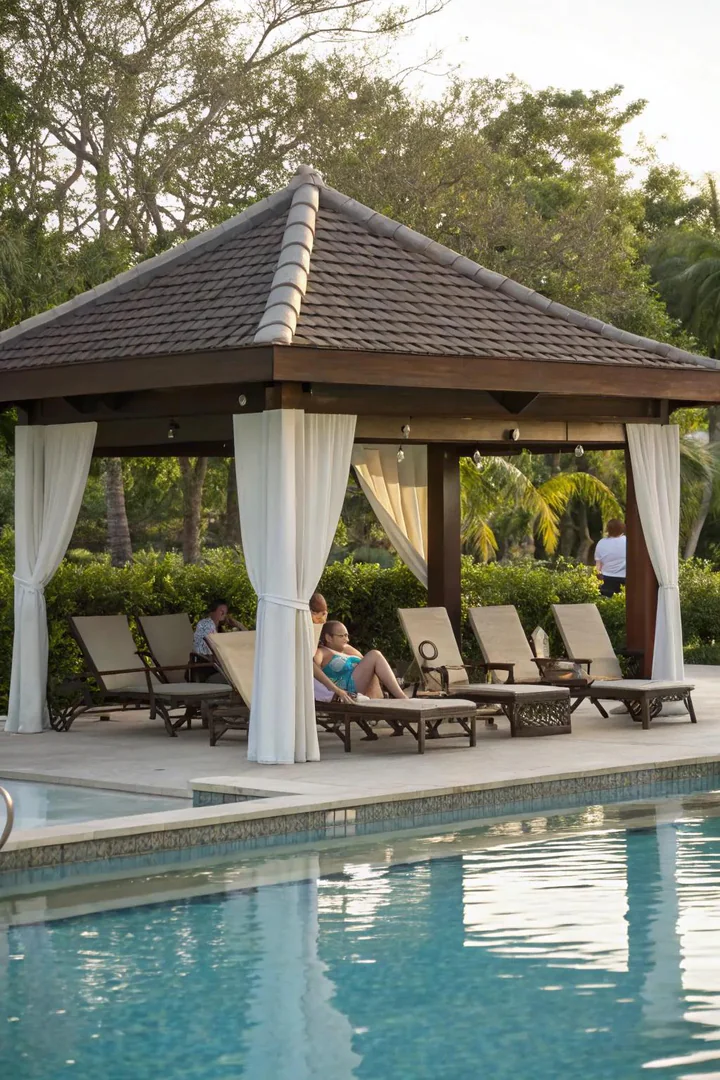
A poolside pavilion provides shade for swimmers, a dry area for towels and electronics, and a sheltered spot for poolside dining. Position the pavilion 8-12 feet from the pool edge on the side that faces the afternoon sun so the shadow falls across the pool deck rather than the water. Use moisture-resistant materials (cedar, composite, aluminum, or PVC) for all structural members within the splash zone, since chlorinated pool water accelerates corrosion and wood decay.
Hang outdoor curtain panels ($15-$30 per panel from Nicetown or DWCN) from a ceiling-mounted curtain rod on 2-3 sides of the pavilion for privacy screening and wind protection. Add a ceiling fan ($100-$250 from Hunter or Minka-Aire, rated for damp/wet locations) to keep air moving through the covered space during humid pool days. A poolside pavilion pairs with the sun shelter and shade concepts found in hot tub surroundings where covered structures protect both bathers and nearby furniture from weather exposure.
5. Privacy Pavilion
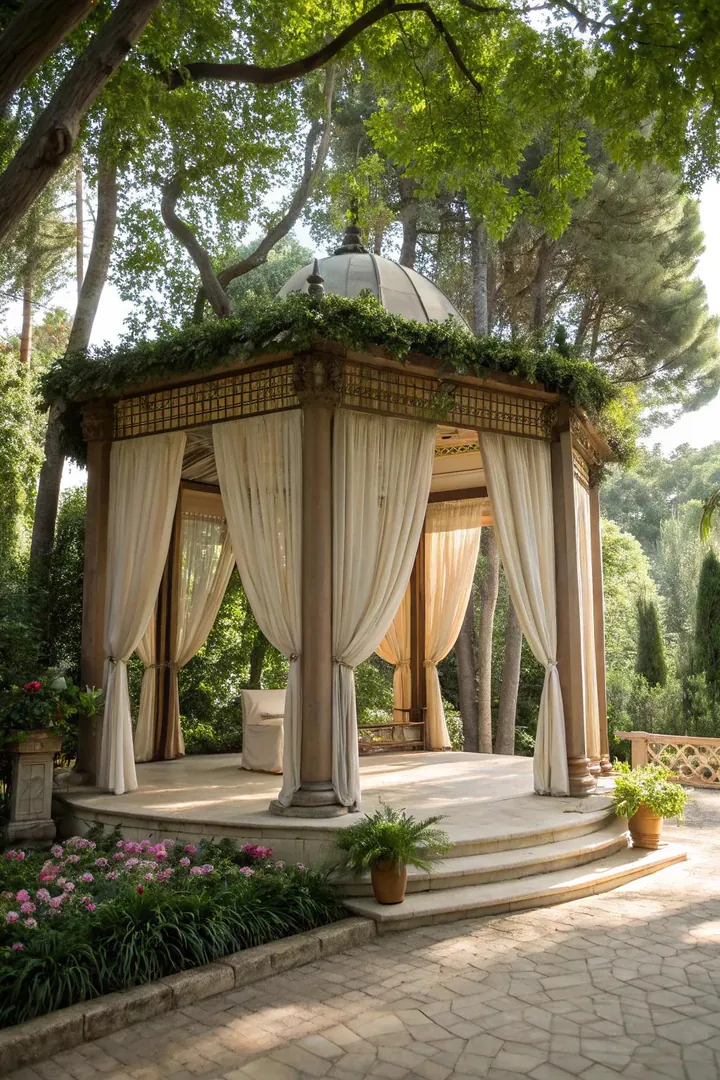
Adding lattice panels, privacy screens, or partial walls to 2-3 sides of a pavilion creates a screened outdoor room that blocks sightlines from neighboring yards. Vinyl lattice panels ($20-$40 per 4×8-foot sheet from Veranda or Barrette) install between posts with channel molding and require zero maintenance. Wood lattice ($15-$25 per sheet) takes stain and paint for a custom color match to the pavilion frame.
Train climbing plants (star jasmine, Confederate jasmine, or climbing hydrangea, $10-$25 per plant) up the lattice for a living privacy wall that thickens each growing season. Leave the side facing the house or the best backyard view completely open so the pavilion feels connected to the yard rather than boxed in. A privacy pavilion works especially well on lots with close neighbors or properties that back up to commercial buildings or parking areas.
6. Garden Pavilion
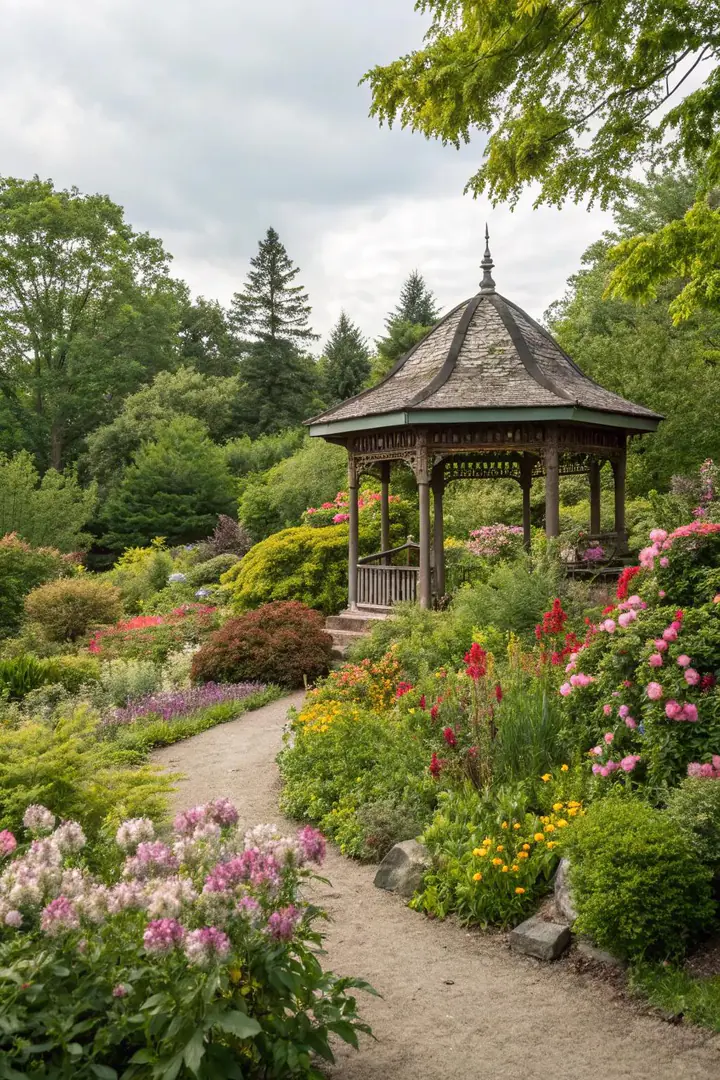
A garden pavilion sits at the center or far end of a planted garden setting, serving as the destination point that draws visitors through the garden. Surround the pavilion base with 3-4 foot wide planting beds filled with perennials (lavender, coneflower, black-eyed Susan, $5-$12 per gallon pot) that bloom at staggered intervals from spring through fall. A gravel or stepping stone path leading from the house to the pavilion creates a sense of approach and arrival.
Keep the pavilion structure itself simple (4-post open design with a gable or hip roof) so the surrounding garden remains the visual focus. Hang 2-3 hanging baskets ($10-$20 each with trailing petunias, fuchsia, or bacopa) from the roof beams for overhead color. A garden pavilion surrounded by dense plantings also attracts pollinators, songbirds, and butterflies, adding movement and sound to the sheltered seating area throughout the growing season.
7. Pavilion with Cupola
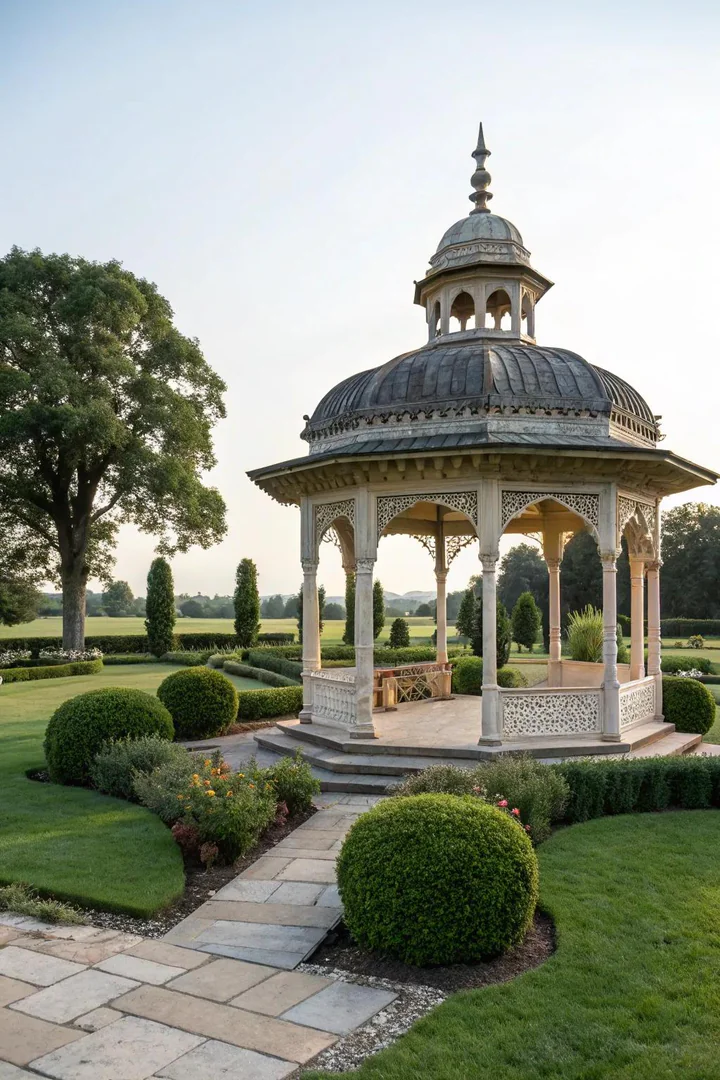
A cupola ($200-$800 from Good Directions, Whitehall Products, or Lazy Hill Farm) mounted at the roof ridge adds a traditional architectural accent and allows hot air to vent out the top of the pavilion through louvered openings. Standard cupola sizes for backyard pavilions run 18-30 inches square at the base, sized proportionally to the roof span (roughly 1 inch of cupola base width per foot of roof ridge length).
Add a copper or aluminum weather vane ($50-$200) to the cupola top for a functional decorative finial. Cupolas come in vinyl, copper-clad, and painted wood options that match the pavilion material and color. The ventilation benefit is real: a louvered cupola on a 12×16-foot pavilion reduces under-roof temperature by 10-15 degrees on still summer days by creating a convection chimney that draws cool air in through the open sides and exhausts warm air through the top.
8. String Light Pavilion
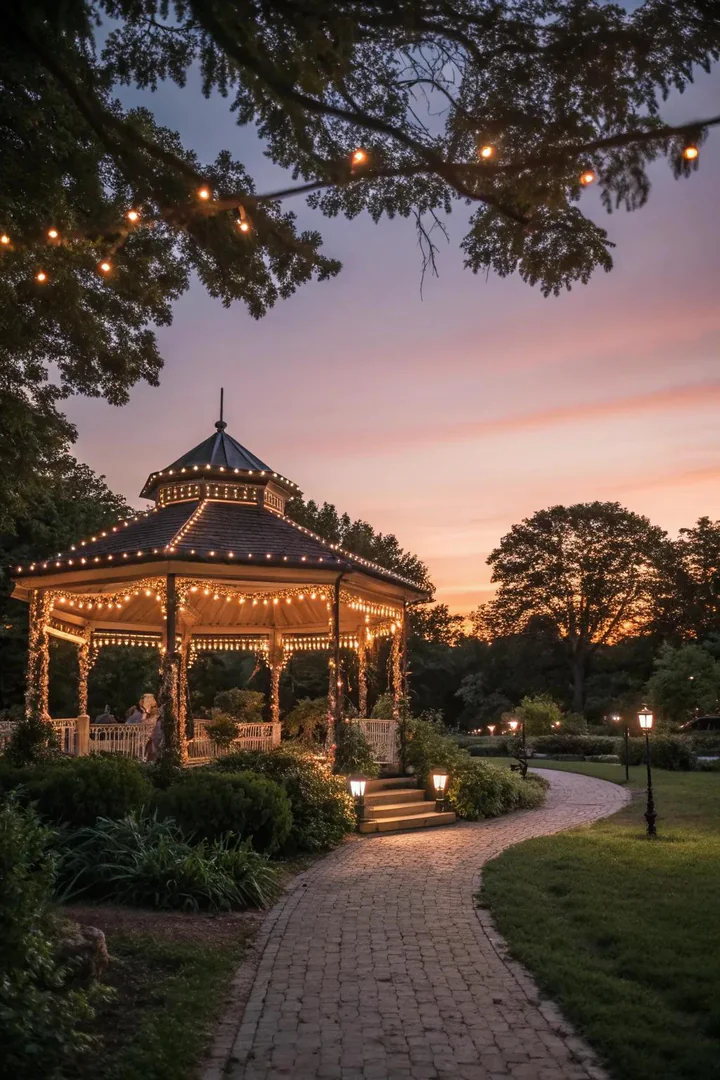
String lights criss-crossed under the pavilion roof beams create a warm canopy of light that makes the structure the centerpiece of evening outdoor gatherings. Commercial-grade string lights from Brightech, Newhouse, or Feit Electric ($25-$50 for a 48-foot strand, $15-$30 for Edison-style LED bulbs) withstand rain, wind, and temperature swings that burn out cheaper residential strands within one season.
Run 4-6 parallel strands from one side of the pavilion to the other, spaced 18-24 inches apart, using screw-in cup hooks ($3-$5 for a pack of 20) mounted to the underside of each rafter. Connect all strands to a single outdoor-rated timer or smart plug ($10-$20 from Kasa or Wyze) so the lights turn on automatically at sunset. Warm white bulbs (2700K) produce the most inviting glow, while daylight-white bulbs (5000K+) wash out skin tones and create a commercial feel.
9. Solar-Powered Pavilion
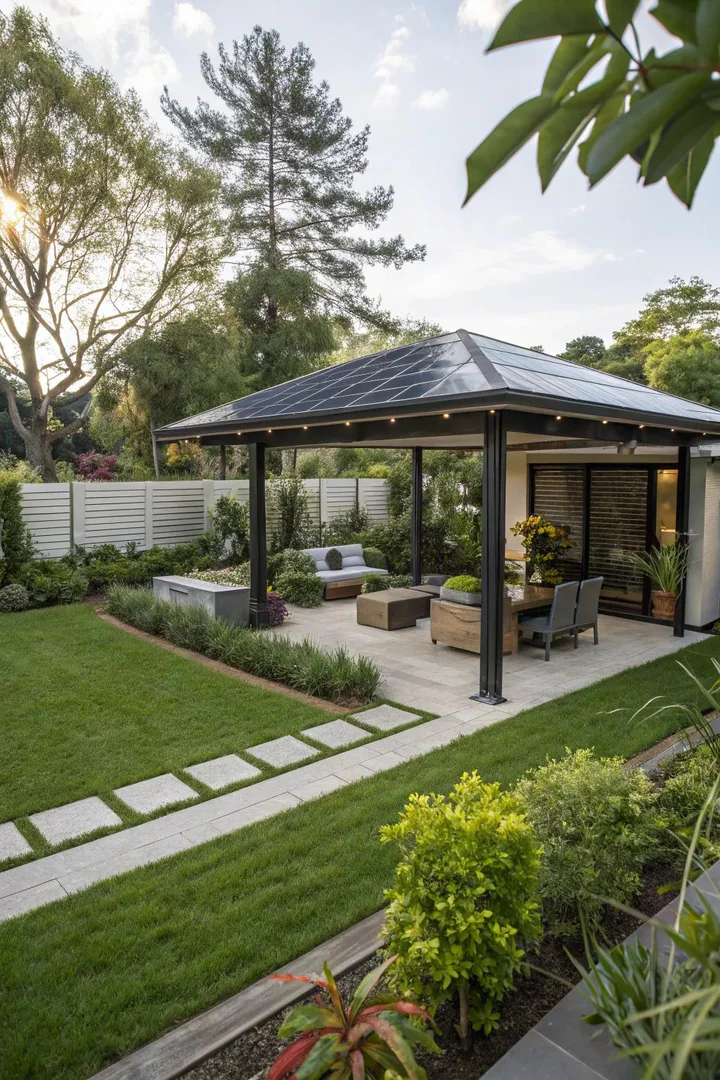
Mounting 2-4 small solar panels ($100-$200 each for 100-watt panels from Renogy or HQST) on the pavilion roof generates enough power to run LED lights, a ceiling fan, a phone charging station, and a Bluetooth speaker without running electrical wire from the house. A 200-400 watt solar array paired with a 12V lithium battery ($100-$200 from Ampere Time or LiTime) stores enough energy for 6-8 hours of evening use per full day of sun.
Mount panels on the south-facing roof slope at a 20-30 degree angle using adjustable tilt brackets ($20-$40 per pair). Run 12V DC wiring through the roof beams to LED strip lights ($15-$25 for a 16-foot waterproof strip), a 12V DC ceiling fan ($40-$80 from Vent-A-Matic), and USB charging outlets ($5-$10 each). A solar-powered pavilion avoids the $500-$2,000 cost of running buried electrical conduit from the house panel and eliminates monthly energy costs for outdoor lighting.
10. Entertainment Pavilion
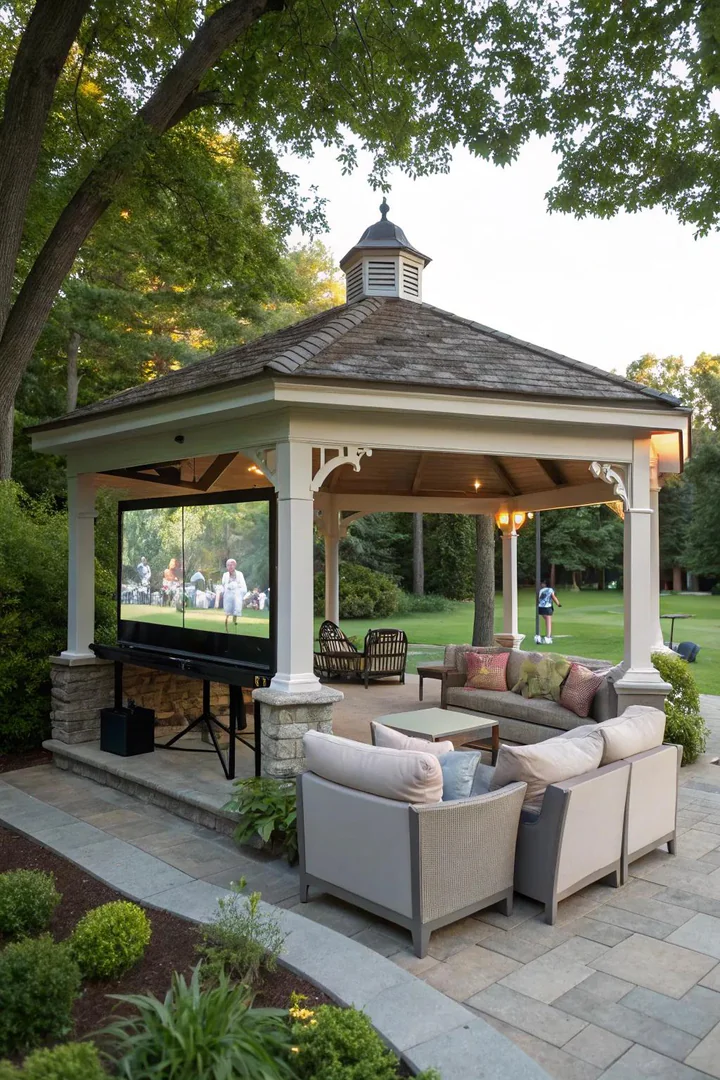
An entertainment pavilion combines a weatherproof TV, sound system, bar area, and comfortable seating under a single roof for a backyard living room that hosts game days, movie nights, and parties. An outdoor-rated TV from SunBrite or Furrion ($1,500-$4,000 for a 55-65 inch model) handles rain, humidity, and temperatures from -20 to 120 degrees. Mount the TV to a post or on a ceiling-drop bracket ($30-$60) facing away from direct afternoon sun to reduce glare.
Wire the pavilion with at least two 20-amp electrical circuits: one dedicated to the TV and audio equipment, and one for outlets, fans, and lighting. Run speaker wire to 4 all-weather speakers ($100-$300 per pair from Polk Audio Atrium or Yamaha NS-AW) mounted in the corners for surround sound. Add a wet bar station (sink, mini fridge, countertop) along one side of the pavilion using the same bar-building techniques covered in outdoor plant stand ideas that repurpose found materials into functional outdoor furniture.
11. Tropical Pavilion
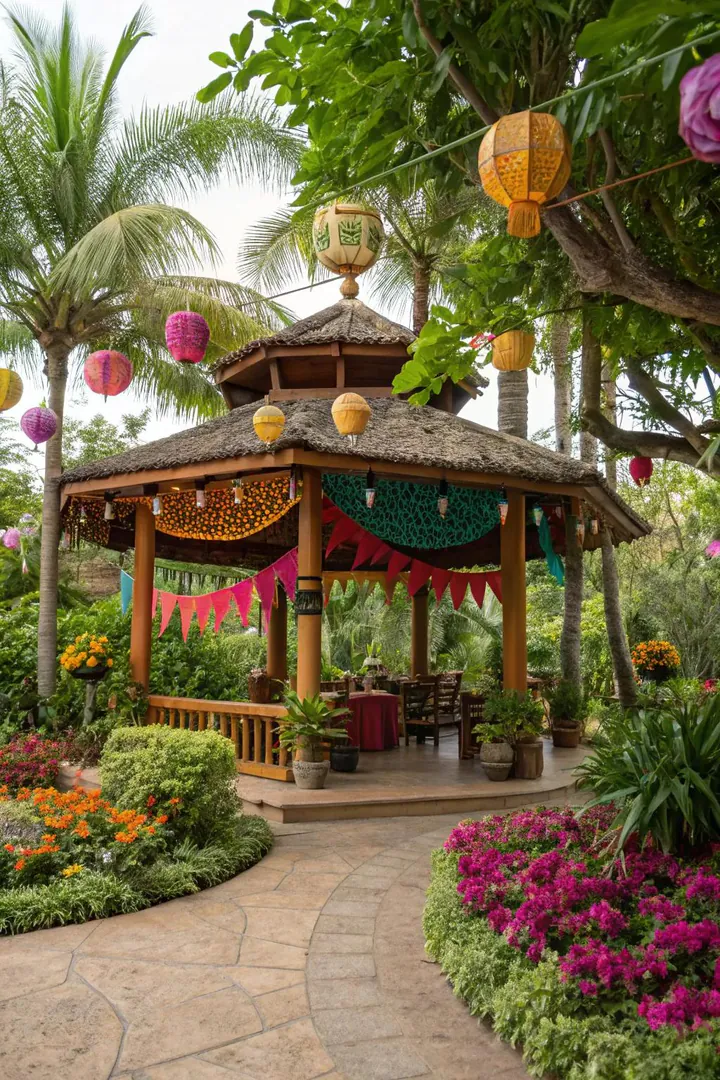
A tropical pavilion uses a thatched roof, bamboo accents, and broad-leaf plants to create a resort-style shelter in zones 9-11 (or a warm-season focal point in cooler zones). Mexican palm thatch panels ($25-$50 per 4×8-foot section from Forever Bamboo) stapled over a plywood or metal roof deck create an authentic thatched look that lasts 3-5 years before replacement. Synthetic thatch ($40-$80 per panel from Endureed) looks nearly identical and lasts 15-20 years.
Wrap cedar or pressure-treated posts with bamboo pole covers ($5-$15 per 8-foot bamboo pole, split lengthwise and zip-tied around the post) for a tropical column effect at a fraction of the cost of solid bamboo structural posts. Plant large-leaf tropicals (banana, elephant ear, bird of paradise, $15-$40 per plant) around the pavilion base, and hang a hammock ($30-$60 from Vivere or Lazy Daze) between two posts for poolside relaxation.
12. Gothic-Style Pavilion
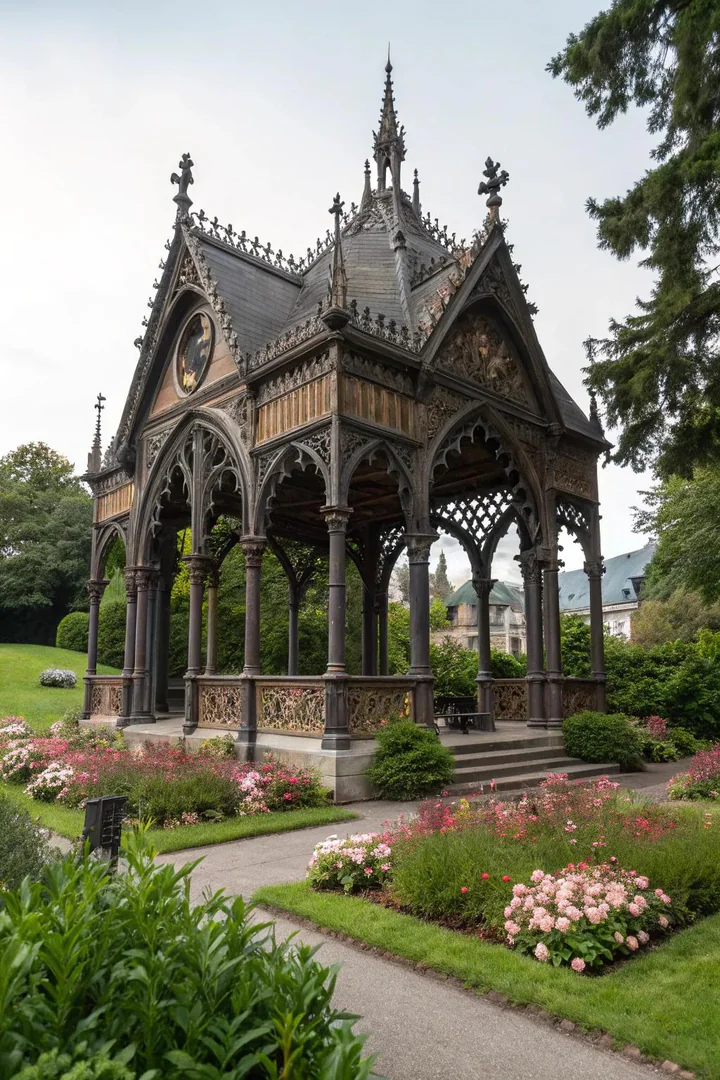
A Gothic pavilion uses pointed arches, steep roof pitches (12:12 or steeper), and dark-stained wood for a dramatic structure that stands out in formal gardens and estate-style yards. Cut pointed arch profiles from 2×10 or 2×12 lumber ($10-$20 per board) using a jigsaw, or order pre-cut arch brackets from Architectural Depot ($50-$200 per pair). Apply a dark walnut or ebony exterior stain (Varathane or Cabot, $8-$15 per quart) for the Gothic color palette.
Add iron-look hardware (black strap hinges, decorative bolts, and ring pulls, $5-$15 each from Signature Hardware or House of Antique Hardware) to beam connections and gate posts for period-correct detailing. A Gothic pavilion pairs well with wrought iron furniture ($100-$400 per piece), pillar candles in iron candelabras ($20-$50 each), and dark-flowering plants (black hollyhock, chocolate cosmos, dark-leaved heuchera) in the surrounding beds.
13. Eco-Friendly Materials Pavilion
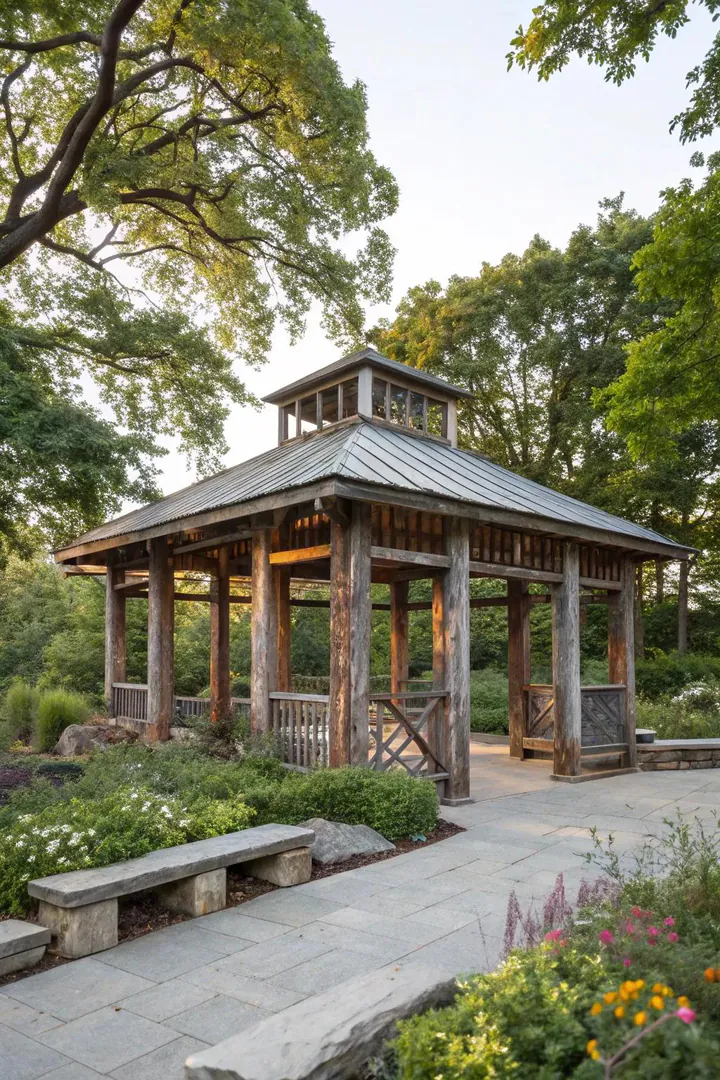
An eco-friendly pavilion uses reclaimed lumber, recycled metal roofing, and sustainably harvested wood to reduce the carbon footprint of new construction. Reclaimed barn beams ($5-$15 per board foot from salvage dealers like Elmwood Reclaimed or local architectural salvage shops) provide structural timbers with 100+ years of natural aging and character that new wood can’t match. Recycled corrugated metal roofing ($2-$5 per square foot) comes from deconstructed agricultural buildings and warehouses.
FSC-certified lumber (Forest Stewardship Council, available at Home Depot and specialty yards) verifies that the wood was harvested from responsibly managed forests. Use non-toxic wood treatments (Tall Earth or Eco Wood Treatment, $25-$40 per gallon) instead of pressure-treated lumber for posts that contact the ground. An eco-built pavilion costs roughly the same as a conventional build when sourcing reclaimed materials locally, since salvage lumber prices offset the premium for green certifications.
14. Victorian-Inspired Pavilion
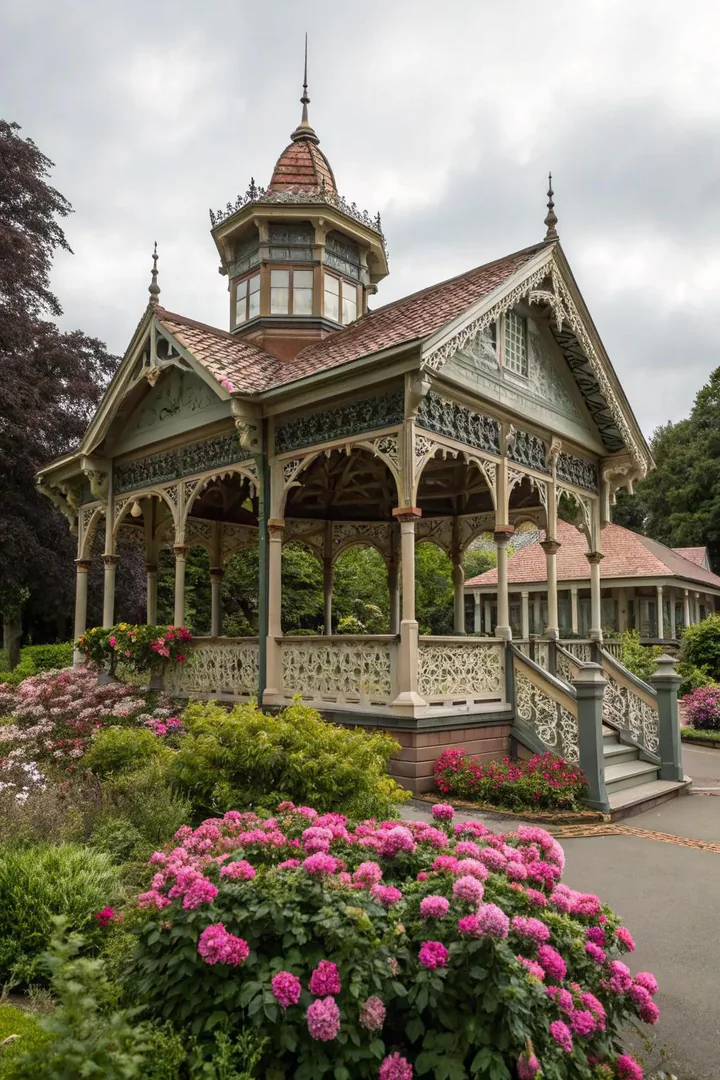
A Victorian pavilion features turned posts, decorative gingerbread trim, scalloped fascia boards, and a multi-hipped or bell-curve roof profile. Turned wood posts ($30-$80 each from Porch Store or BuyRailings) and running trim (spandrel brackets, $15-$40 per pair from Vintage Woodworks) bolt to a standard post-and-beam frame to add period detail without custom carpentry. Paint the pavilion in a two or three-color scheme (body, trim, and accent) following historic Victorian color palettes from Sherwin-Williams or Benjamin Moore.
Add a ceiling-mounted porch swing ($150-$300 from Porchgate Amish or Hinkle Chair Company) and wicker furniture ($100-$400 per piece from Lloyd Flanders or Jeco) for seating that matches the Victorian period. A pavilion with cool decking boards underfoot, like those shown in cool decking ideas, keeps the floor comfortable barefoot during summer months even under the warmest roof styles.
15. Multi-Season Pavilion
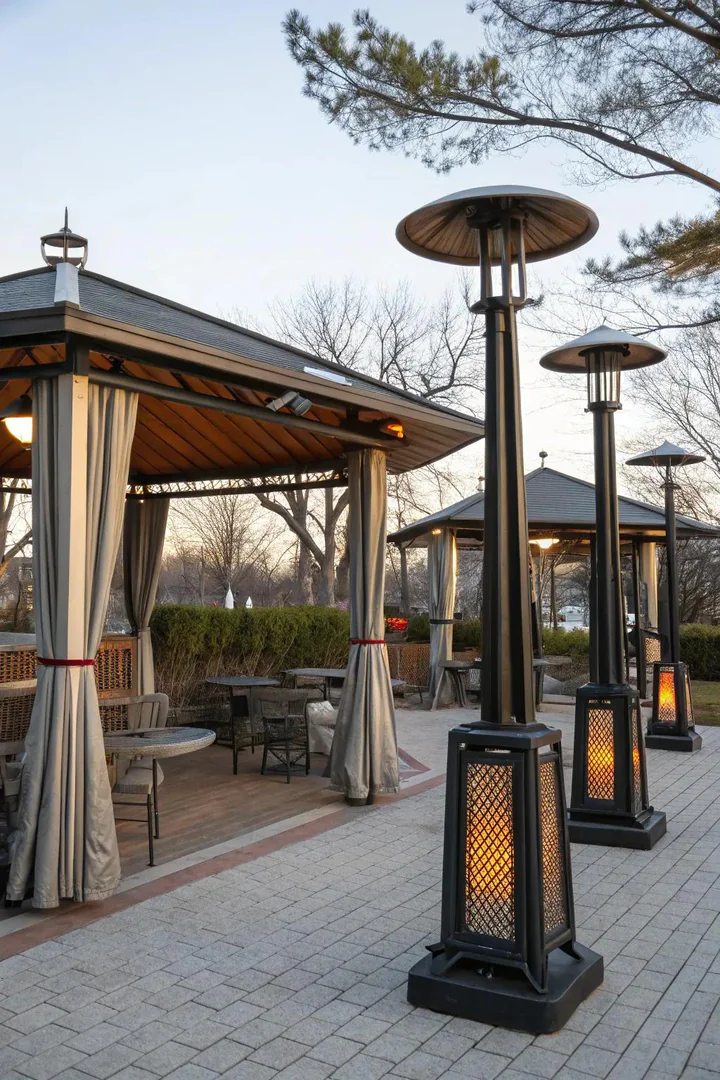
A multi-season pavilion adds retractable screen walls, a heating source, and weatherproof curtains to extend outdoor use from early spring through late fall (or year-round in mild climates). Retractable screen panels from Phantom Screens or Screenmobile ($500-$2,000 per opening) roll into a housing at the roofline and deploy with a pull handle or motorized remote. Mosquito net curtains ($15-$30 per panel) provide a budget alternative that ties back when not needed.
Add a ceiling-mounted electric patio heater ($150-$400 from Infratech or Dr. Infrared) that provides 1,500-5,000 watts of radiant heat directly to the seating area below. A gas fire table ($200-$600 from Outland Living or Endless Summer) placed at the center of the pavilion produces 40,000-60,000 BTU of warmth and serves as a visual focal point. A multi-season pavilion with screens, heat, and weatherproof curtains functions as a three-season room without the $20,000-$50,000 cost of a permanent addition to the house.
16. Artistic Statement Pavilion

An artistic pavilion breaks from standard rectangular post-and-beam construction with curved glulam beams, asymmetric roof lines, canted posts, or sculptural metalwork. Glulam (glued laminated timber) beams can be factory-curved to custom radii ($15-$40 per linear foot from Pacific Woodtech or Boise Glulam) for arching roof profiles that straight lumber can’t achieve. Steel fabricators ($50-$150 per linear foot for custom structural steel) build one-of-a-kind frames from tube, channel, or I-beam profiles.
Commission a local welder or metal artist ($500-$5,000 depending on complexity) to create decorative rafter tails, post brackets, or hanging elements that double as functional structure and outdoor art. Pair an artistic pavilion with a stained concrete or stamped concrete floor ($8-$15 per square foot) that carries the custom design down to the ground level. An artistic pavilion costs 50-200% more than a standard build of the same size but creates a one-of-a-kind outdoor room that no kit or catalog can replicate.
Pavilion Material Comparison
| Material | Cost Range (12×14 ft) | Lifespan | Maintenance | Best For |
|---|---|---|---|---|
| Pressure-Treated Pine | $2,000-$4,000 | 15-20 years | Stain/seal every 1-2 yrs | Budget builds |
| Cedar | $3,500-$7,000 | 20-30 years | Seal every 2-3 yrs | Natural wood look |
| Vinyl | $3,000-$8,000 | 25-50 years | Wash annually | Zero maintenance |
| Timber Frame (Douglas Fir) | $10,000-$25,000 | 50-100+ years | Inspect/oil every 3-5 yrs | Heirloom quality |
| Aluminum | $4,000-$12,000 | 30-50 years | Wash annually | Modern/coastal |
| Steel | $5,000-$15,000 | 40-60 years | Paint every 5-7 yrs | Custom/artistic |
How to Build a Backyard Pavilion
1. Check Permits and Set the Footprint
Contact your local building department to determine permit requirements for a permanent roofed structure. Most jurisdictions require a permit for any structure over 120-200 square feet or any structure with electrical wiring. Mark the pavilion footprint on the ground using string lines and stakes, verifying square by measuring diagonals (equal diagonal measurements confirm a true rectangle). Check setback requirements from property lines, septic systems, and the house before committing to a location.
2. Pour Footings and Set Posts
Dig post holes 42-48 inches deep (below your local frost line) and 12-16 inches in diameter for each post location. Pour 6 inches of gravel in the bottom for drainage, set a post anchor bracket ($5-$10 each from Simpson Strong-Tie) in wet concrete ($5-$8 per 80-pound bag of Quikrete, 2-3 bags per hole), and let cure for 48 hours. Mount posts to the anchors so the wood sits 1-2 inches above the concrete, preventing ground moisture from wicking into the post end grain.
3. Install Beams, Rafters, and Roof
Bolt double 2×10 or 2×12 beams to the post tops using 1/2-inch carriage bolts ($1-$2 each) with washers and nuts. Set rafters on 16-24 inch centers across the beams, secured with hurricane ties ($0.50-$1 each from Simpson). Sheath the rafters with 1/2-inch plywood ($25-$35 per 4×8-foot sheet), apply roofing felt or synthetic underlayment ($30-$50 per roll), and install shingles ($30-$50 per bundle covering 33 square feet), metal panels ($3-$6 per square foot), or polycarbonate sheets ($15-$25 per 8-foot panel).
4. Add Electrical, Finishes, and Furnishings
Run underground electrical conduit (UF-rated cable in PVC conduit, $1-$3 per linear foot) from the house electrical panel to the pavilion for lights, outlets, and fans. Hire a licensed electrician ($50-$100 per hour) if you are not comfortable with electrical work, since outdoor wiring requires GFCI protection and weatherproof boxes. Stain or paint all wood surfaces, mount the ceiling fan, hang lights, and arrange furniture. Add a pergola blind system to one or more open sides for adjustable shade and wind protection throughout the day.
Frequently Asked Questions
Do you need a permit to build a backyard pavilion?
Most cities and counties require a building permit for any permanent roofed structure exceeding 120-200 square feet (the threshold varies by jurisdiction). Permit fees run $50-$500 depending on your area. Submitting a plan drawing showing the pavilion dimensions, footing depths, and roof construction triggers a review and 1-2 inspections (foundation and final). Building without a permit can result in fines, mandatory removal, and complications when selling the home.
How much does it cost to build a backyard pavilion?
A DIY pavilion using a pre-cut kit costs $2,000-$8,000 in materials for a 10×12 to 12×16-foot structure. A contractor-built custom pavilion runs $8,000-$25,000+ for the same size range, with timber frame and steel-frame builds at the high end. Electrical wiring adds $500-$2,000, a concrete slab foundation adds $1,500-$4,000, and finishing details (ceiling fan, lights, furniture) add $500-$2,000 on top of the structure cost.
What is the best roof material for a backyard pavilion?
Architectural asphalt shingles ($30-$50 per bundle, 25-30 year lifespan) offer the best balance of cost, appearance, and durability for most residential pavilions. Standing seam metal roofing ($5-$12 per square foot, 40-60 year lifespan) costs more upfront but lasts twice as long and requires zero maintenance. Polycarbonate panels ($15-$25 per sheet) let filtered light through the roof but trap heat underneath, making them better suited for cooler climates or pavilions with good cross-ventilation.
How big should a backyard pavilion be?
A 10×10-foot pavilion seats 4-6 people for dining. A 12×14-foot pavilion (168 square feet) comfortably holds a 6-person dining table or a 3-piece seating group with room to walk around. A 14×18 or 16×20-foot pavilion (250-320 square feet) accommodates separate dining and lounge zones, a bar area, or a built-in grill station. Size the pavilion 20-30% larger than the floor space you think you need, since roofed outdoor spaces feel smaller than open-air areas of the same dimensions.
Can a pavilion be built on a deck instead of the ground?
A pavilion can be built on an existing deck if the deck framing can support the added weight of the posts, beams, and roof (typically 1,500-4,000 pounds depending on size and materials). Bolt pavilion posts to the deck frame using post base brackets ($10-$20 each from Simpson) lag-bolted through the deck boards and into the joists or beams below. Consult a structural engineer ($300-$800 for an assessment) if the deck is more than 4 feet above grade or if the pavilion exceeds 150 square feet, since the additional roof load and wind uplift forces need proper engineering.