
Kitchen Ideas Without an Island: 23 Smart Layouts That Work
Kitchen ideas without an island focus on layouts, furniture, and storage solutions that provide the prep space, seating, and organizational capacity of an island using alternatives that often work better in narrow, small, galley, L-shaped, and open-plan kitchens where a fixed island would block traffic flow, crowd the work triangle, or simply not fit. Not every kitchen needs an island — and many kitchens work better without one.
The 23 kitchen ideas without an island below include galley layouts, freestanding tables, breakfast nooks, wall-mounted shelving, peninsulas, rolling carts, dining tables, extended countertops, floating counters, console tables, open shelving, multifunctional spaces, bar carts, farm tables, window seats, drop-leaf tables, butcher blocks, continuous flow designs, built-in storage benches, sliding shelves, collapsible tables, light color strategies, and overhead pot racks. Each idea provides specific product recommendations, dimensions, and installation tips for maximizing your kitchen’s function and style without a permanent island.
1. Adopt the Galley Design
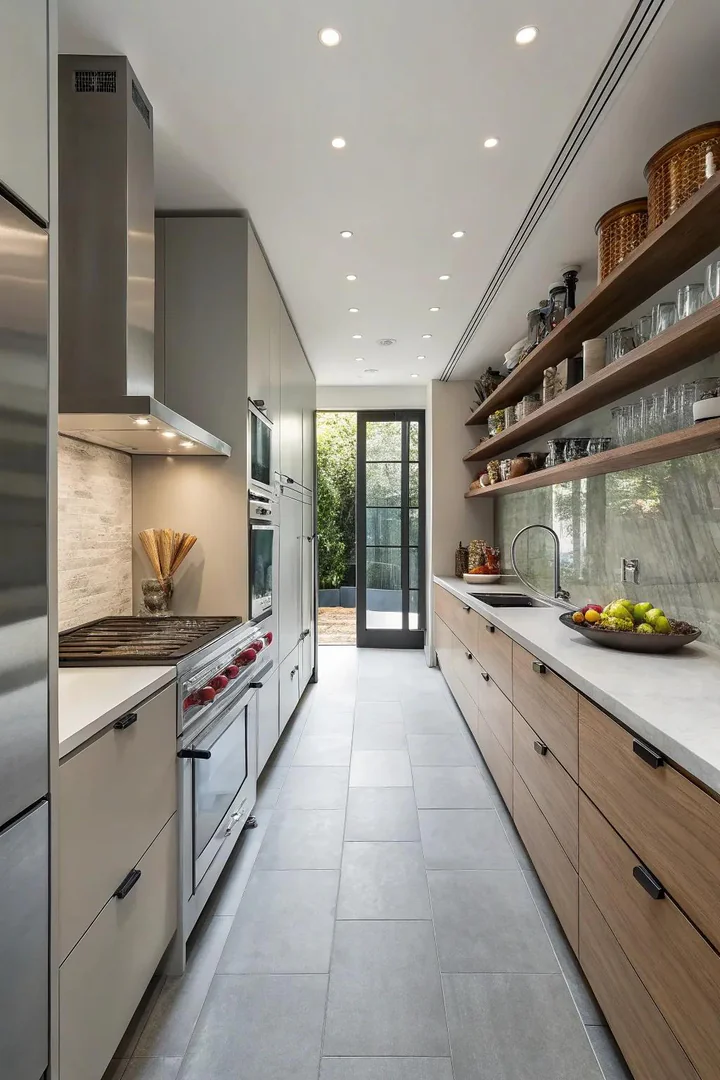
A galley layout — two parallel runs of countertop, cabinets, and appliances facing each other across a central aisle — is the most space-efficient kitchen configuration and the layout preferred by professional chefs because it minimizes the distance between the sink, stove, and refrigerator. Galley kitchens provide maximum counter and cabinet length per square foot of floor space, with everything within one or two steps of the cook’s working position.
The ideal galley aisle width is 42 to 48 inches (36 inches minimum in tight spaces, 60 inches if two cooks work simultaneously). Place the sink and cooktop on one wall and the refrigerator on the opposite wall to create a triangular work flow across the aisle. Use full-height upper cabinets (42 inches tall rather than the standard 30 or 36 inches) to maximize vertical storage and eliminate the dust-collecting gap above the cabinets. For a broader look at efficient kitchen configurations, see our kitchen layout ideas guide.
2. Choose a Standalone Table
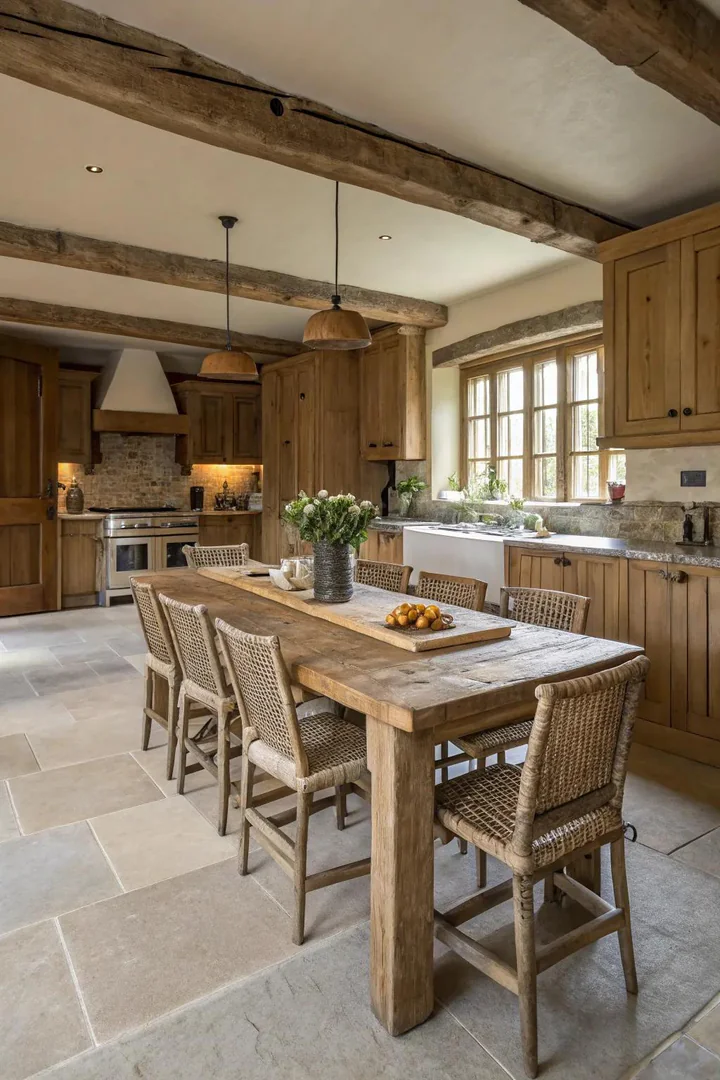
A freestanding table — not built in, not attached to a wall, not fixed to the floor — serves as a movable island alternative that can be repositioned for cooking, pulled to the center of the room for large meals, pushed against a wall when floor space is needed, or removed entirely for parties or renovations. Unlike a permanent island, a freestanding table gives you the flexibility to change your kitchen’s layout any time your needs change.
Choose a table with a durable, food-safe surface: solid butcher block (from John Boos or Michigan Maple Block), stainless steel (from Gridmann or TRINITY), or a solid wood farmhouse table with a polyurethane or wax finish. A 36-inch-tall table (counter height) works as a standing prep station, while a 30-inch-tall table (standard dining height) doubles as a dining surface. Add a lower shelf or an undershelf for extra storage — many kitchen work tables (from Ikea Stenstorp, Pottery Barn, or Williams Sonoma) include a slatted or solid lower shelf for bowls, cookbooks, or small appliances.
3. Design a Comfortable Breakfast Corner
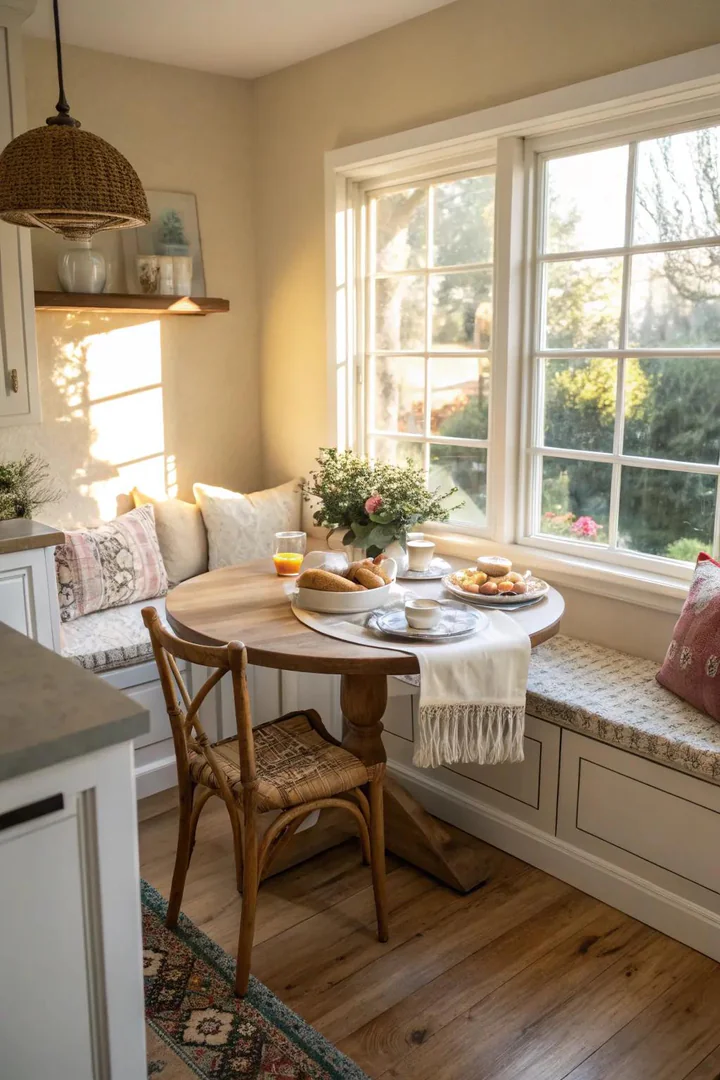
A breakfast nook — a small built-in or semi-built-in seating area with an L-shaped or U-shaped banquette bench, a compact table, and typically positioned in a corner, a window bay, or an alcove — provides the social seating and dining function of an island’s counter stools without consuming the center of the kitchen. Breakfast nooks seat more people per square foot than island stools because banquette seating is continuous (no gaps between chairs) and the corner configuration uses space that would otherwise be dead zone.
Build the banquette from a plywood box frame (18 inches high, 18 to 20 inches deep for the seat) with a hinged top that opens for storage underneath — blankets, table linens, or rarely used appliances. Add a 2- to 3-inch-thick upholstered cushion in a durable fabric (Sunbrella, Crypton, or performance velvet from Kravet or Perennials) that can withstand spills and daily use. Pair with a pedestal table (round or oval, 36 to 42 inches diameter) rather than a four-leg table — pedestal bases make it easier to slide in and out of banquette seating.
4. Make Use of Shelves Mounted on Walls
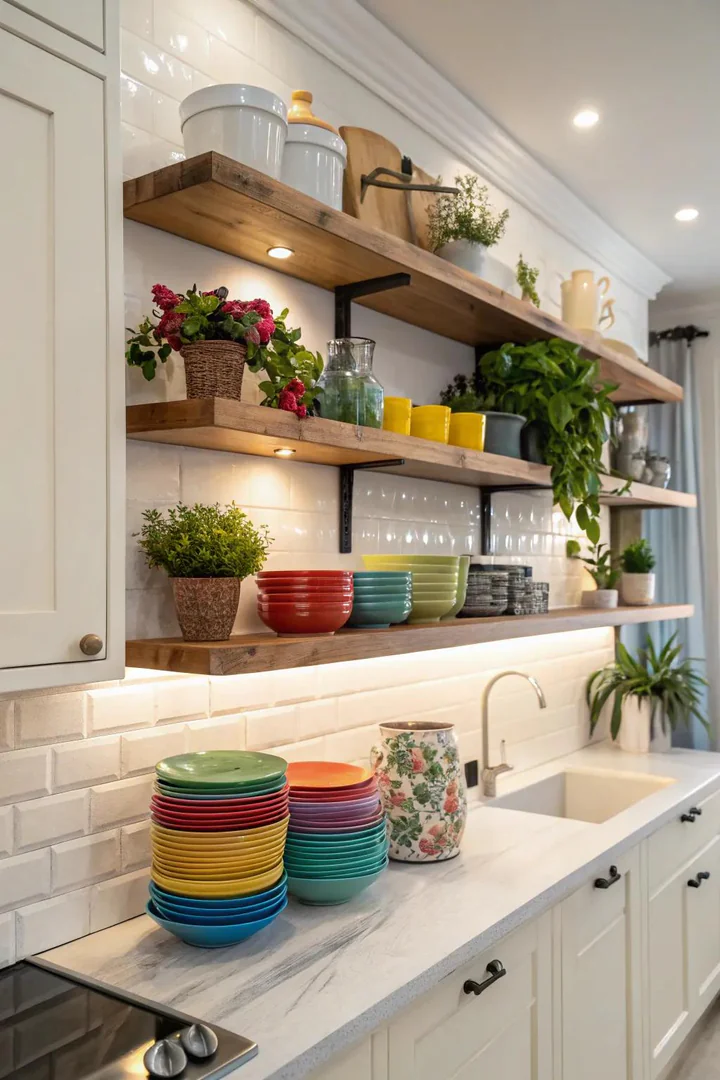
Wall-mounted shelves — floating shelves, bracketed shelves, rail-and-hook systems, or pegboard panels mounted on kitchen walls — move storage off the countertop and floor and onto the walls, freeing up the horizontal surfaces that an island would otherwise provide. In a kitchen without an island, every inch of counter space is working space, so wall-mounted storage keeps counters clear for active food preparation.
Install floating shelves (solid walnut, white oak, or pine, 10 to 12 inches deep, on concealed heavy-duty brackets from Shelfology or Federal Brace) between the upper cabinets and the countertop for spice jars, oils, and frequently used ingredients. Mount a stainless steel rail system (IKEA Kungsfors, Hahn Metro, or Enclume) on the backsplash wall for hanging utensils, small pots, and towels. For maximum wall storage density, install a pegboard panel (painted MDF pegboard from a hardware store, or a custom birch plywood pegboard from Kreisdesign) that holds hooks, shelves, and containers in a customizable grid.
5. Experience a Peninsula Design
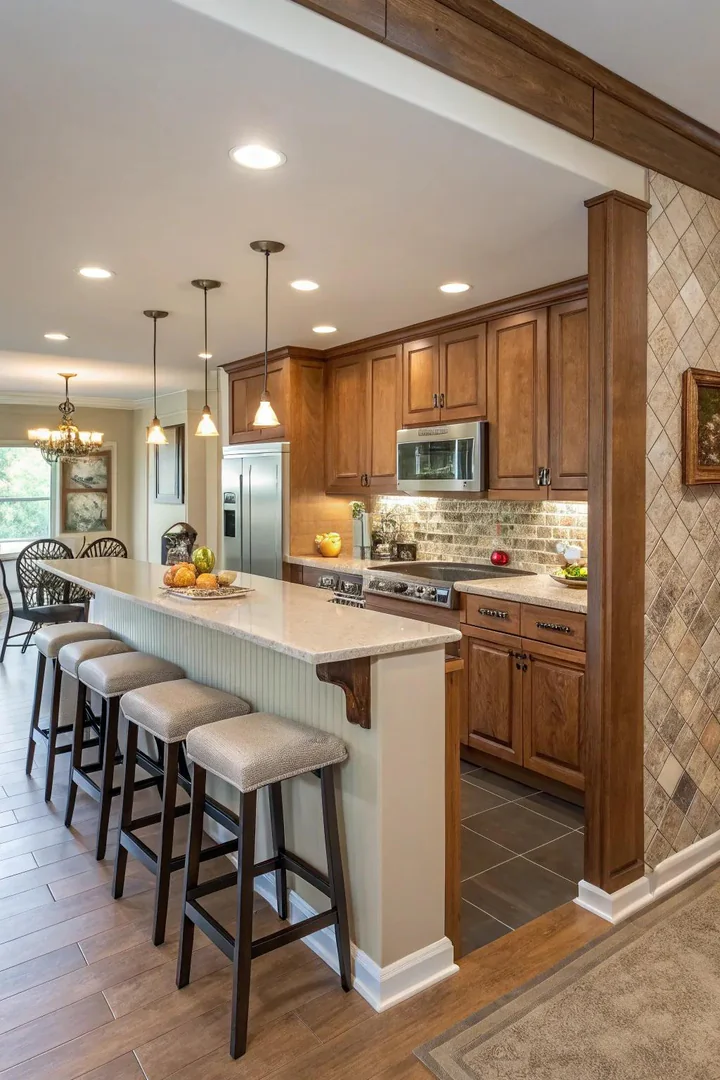
A peninsula — a countertop extension that projects from a wall or a run of cabinets into the kitchen, connected at one end rather than freestanding — provides the extra counter space, cabinet storage, and bar-style seating of an island while requiring less floor space because it is anchored to the existing cabinetry. Peninsulas work particularly well in U-shaped and L-shaped kitchens where the peninsula forms the third or fourth leg of the cabinet run.
Design the peninsula at counter height (36 inches) for a continuous work surface with base cabinets underneath, or at bar height (42 inches) on the seating side with a raised countertop overhang (10 to 12 inches deep) for bar stools. A 24- to 36-inch-wide peninsula provides meaningful prep space and can seat 2 to 3 people on the overhang side. Include electrical outlets on the peninsula’s end cap for small appliances (toaster, blender, stand mixer) that would otherwise crowd the main countertops.
6. Add Mobile Carts
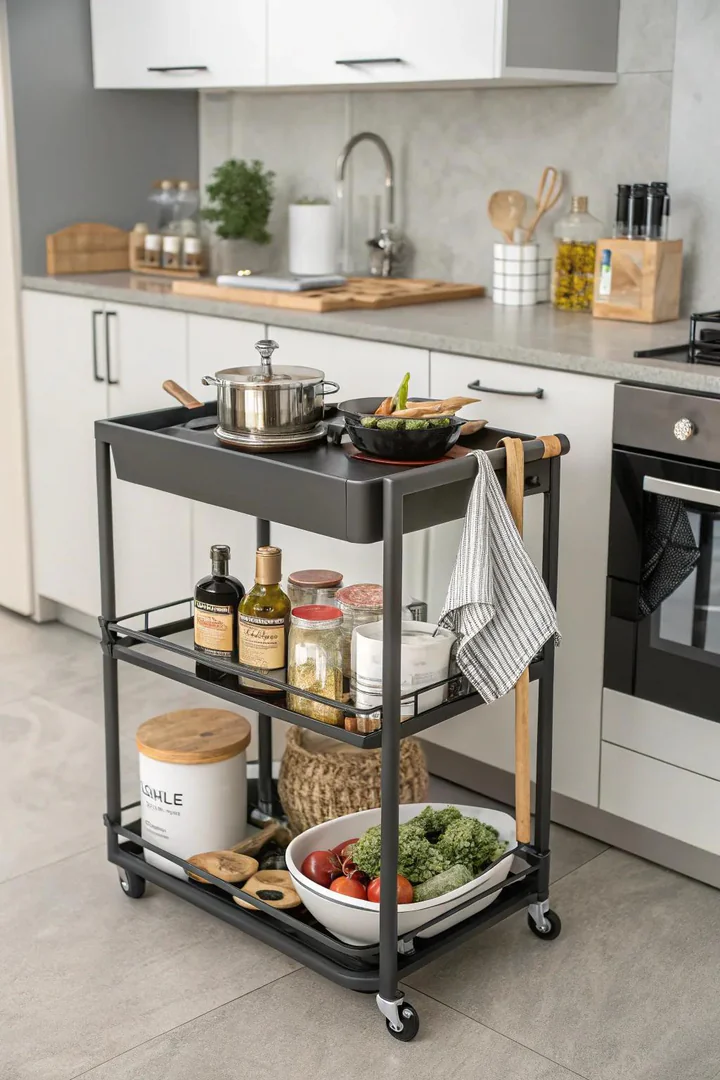
A rolling kitchen cart — a wheeled, movable work surface with one or two shelves, a drawer or towel bar, and locking casters — functions as a portable island that can be positioned beside the stove during cooking, rolled to the dining area for serving, parked against a wall when not in use, or wheeled out of the kitchen entirely for outdoor entertaining. Rolling carts are the most flexible island alternative because their position is never permanent.
Choose a cart with a butcher block top (from John Boos, Chris & Chris, or IKEA Bekvam) for a food-safe cutting and prep surface, or a stainless steel top (from Seville Classics or TRINITY) for a heat-resistant, easy-clean surface. The standard kitchen cart is 24 to 30 inches wide and 18 to 24 inches deep — compact enough to fit in the aisle of a galley kitchen. Look for carts with locking casters (two locking wheels minimum) so the cart stays stationary during chopping and prep. For more small-space storage strategies, explore our small kitchen storage ideas guide.
7. Add a Dining Table
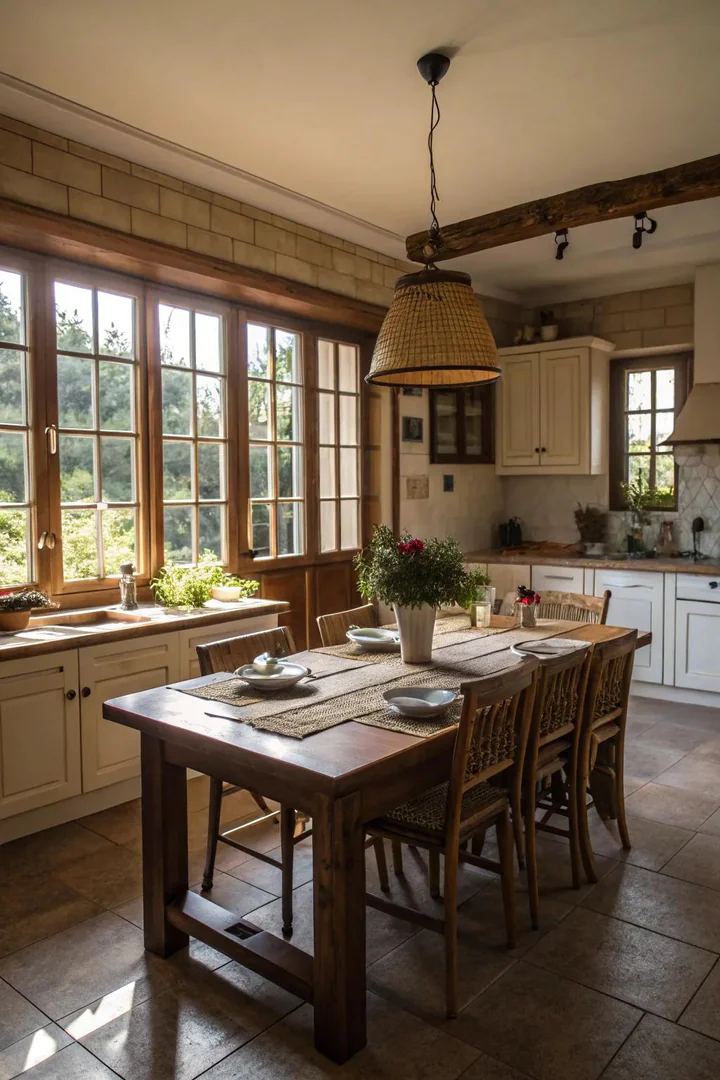
Placing a full-size dining table in or adjacent to the kitchen — rather than reserving it for a separate dining room — creates a large, flat surface that doubles as both a dining area and an oversized prep station during cooking. A kitchen dining table provides more usable surface area than most islands (a 72 x 36-inch table offers 18 square feet of surface, compared to 12 square feet on a typical 48 x 36-inch island) and seats more people comfortably.
Choose a table with a hard, durable surface that can withstand kitchen use: solid hardwood (oak, maple, walnut) with a polyurethane or conversion varnish finish, a marble or granite top on a wood or metal base, or a commercial-grade laminate top. Round tables (42 to 48 inches in diameter) work well in square kitchens and seat 4 to 6. Rectangular tables (60 to 72 inches long, 30 to 36 inches wide) work in long or open-plan kitchens. Place the table parallel to the main counter run so the cook can step from the stove to the table in 2 to 3 steps.
8. Optimize Countertop Area
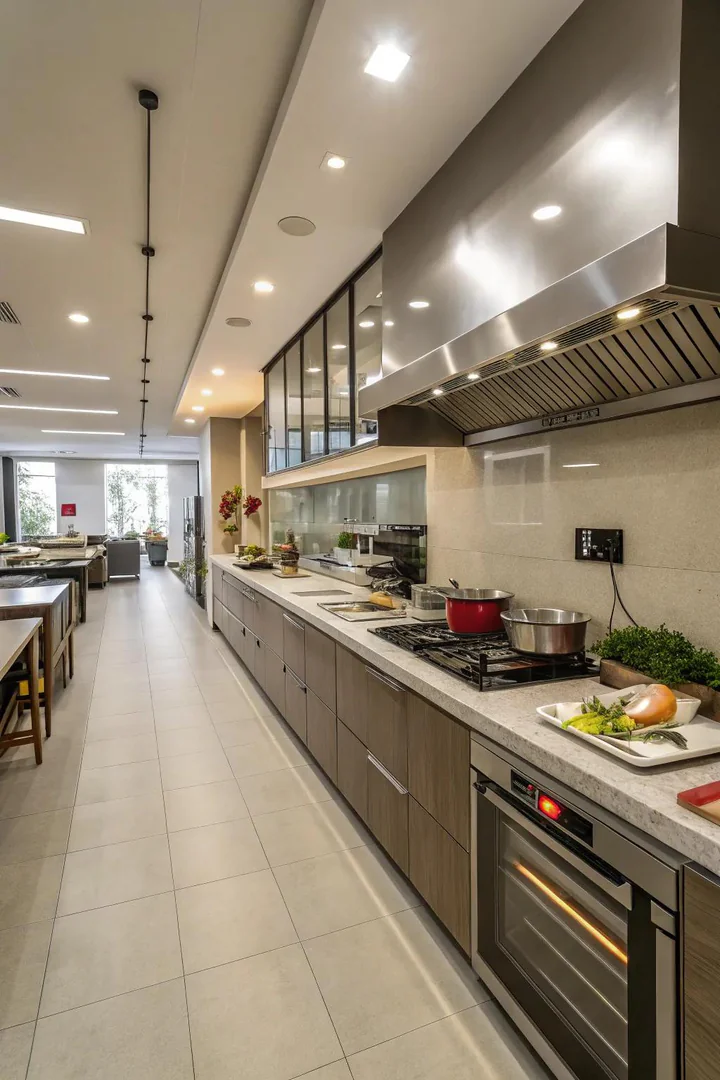
Maximizing the existing countertop area — extending counter runs to fill unused wall space, deepening counters from the standard 25 inches to 28 or 30 inches where plumbing allows, and keeping counters clear of appliances and clutter — compensates for the absent island’s prep surface by making every inch of perimeter counter available for active cooking. In a kitchen without an island, the perimeter countertops are your only horizontal work surface, so their total length and usable depth directly affect how comfortably you can cook.
Extend countertops into corners with a lazy Susan corner cabinet or a blind corner pull-out (from Rev-A-Shelf or Hafele) that makes the corner countertop above it usable rather than dead space. Add a countertop extension at the end of a cabinet run — a 12- to 18-inch cantilevered countertop overhang supported by a steel bracket or corbel creates a small prep area or coffee station without a full cabinet underneath. Use an over-the-sink cutting board (from John Boos or Epicurean) to temporarily extend the countertop across the sink during heavy prep.
9. Set Up a Floating Counter
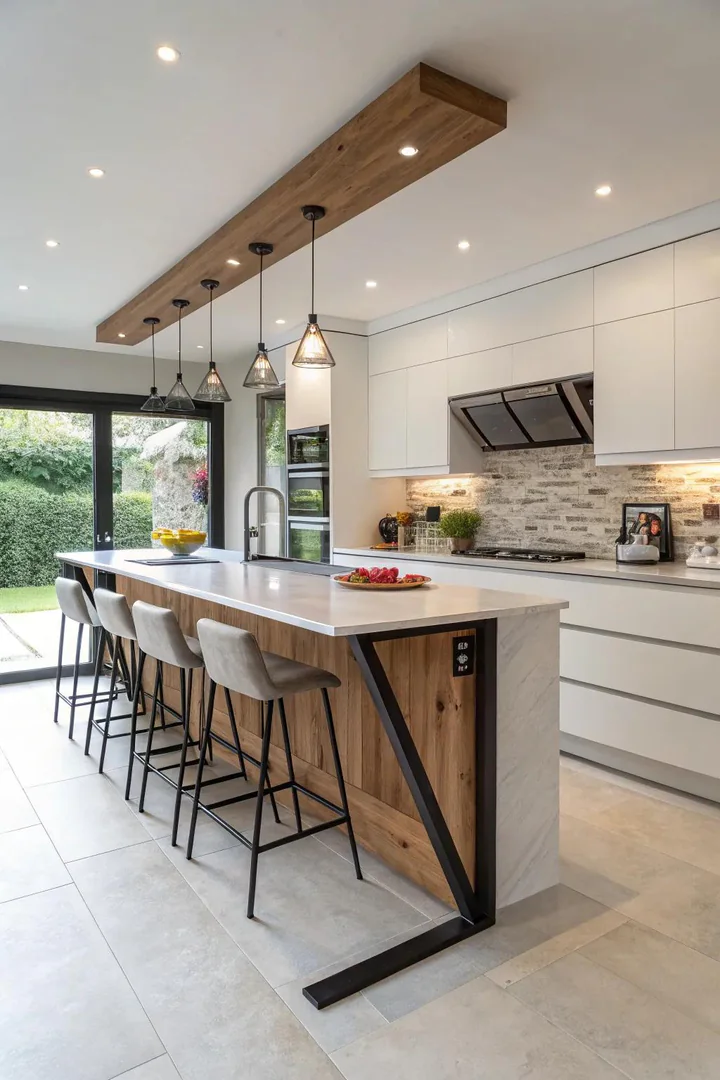
A floating counter — a wall-mounted countertop with no base cabinets underneath, supported by concealed brackets, a steel frame, or a cantilevered structure attached to wall studs — adds prep surface or casual dining space without consuming any floor area. Floating counters maintain clear sightlines and open floor space below, making small kitchens feel larger while providing the functional surface of a narrow island or breakfast bar.
Mount a floating counter on a wall adjacent to the main kitchen using heavy-duty concealed brackets (rated for 200+ pounds, from Federal Brace, Shelfology, or Cain Custom Fabrication) anchored into wall studs. Use a solid wood (butcher block, walnut, or white oak), quartz, or compact laminate (Fenix or Richlite) countertop material, 12 to 18 inches deep and 36 to 60 inches long. Set the height at 36 inches (counter height) for prep use or 42 inches (bar height) for casual dining with stools. A floating counter along a half-wall between the kitchen and living room creates a natural pass-through and serving bar.
10. Use a Console Table
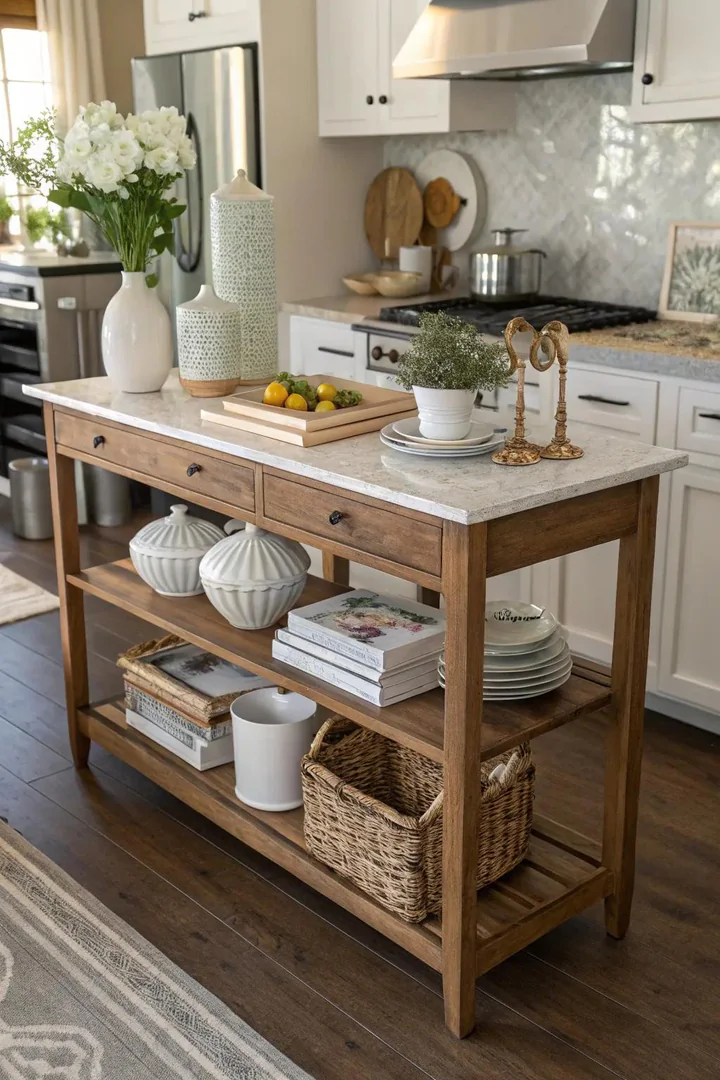
A console table — a narrow, typically 10- to 16-inch-deep table designed to stand against a wall — adds a slender extra surface for staging dishes, holding appliances, or displaying cookbooks without taking up the 24 to 36 inches of floor depth that a standard island or table requires. Console tables fit against walls, behind sofas at the kitchen-living room boundary, or along the back of a peninsula where a full-depth table would block the walkway.
Choose a console table with a lower shelf or drawer for additional storage: the IKEA Liatorp, Pottery Barn’s Benchwright, or West Elm’s Industrial Storage Console all provide both a top surface and a lower shelf. In the kitchen, a console table works well as a dedicated coffee and tea station (espresso machine on top, mugs and supplies on the shelf below), a buffet-style serving surface for dinner parties, or a landing zone for groceries, mail, and keys near the kitchen entry. A console table at the boundary between the kitchen and dining area serves as a natural room divider and a serving pass-through.
11. Incorporate Open Shelving
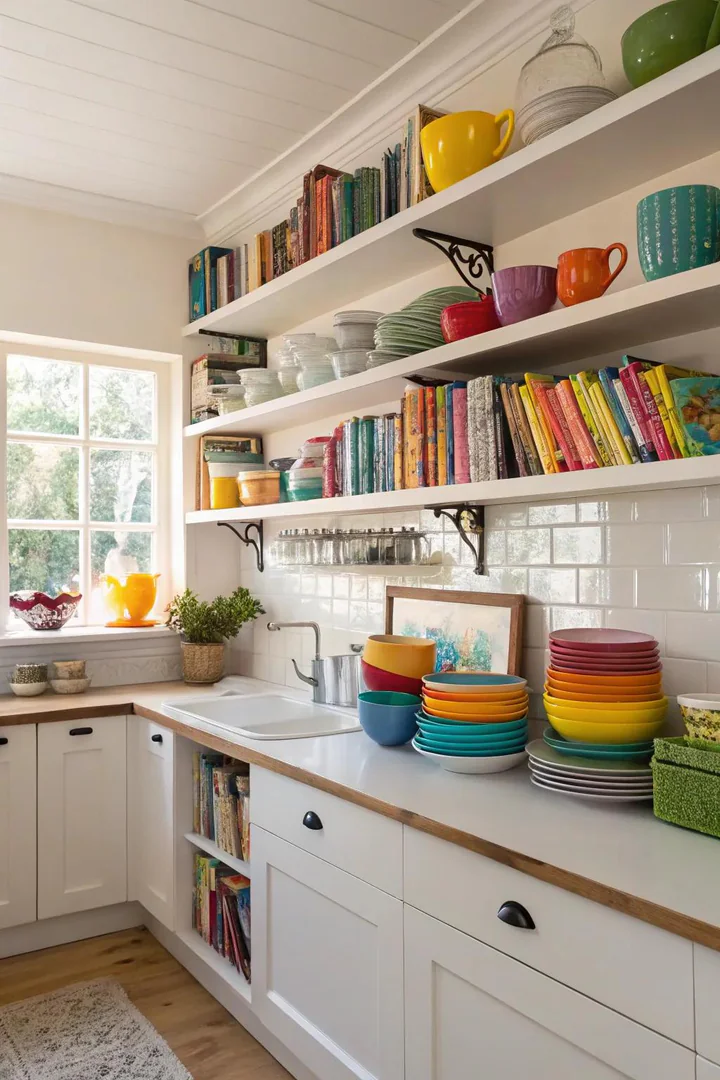
Replacing upper cabinets with open shelving on one or more walls gives a kitchen without an island a visual openness that compensates for the missing island’s social, display-oriented function. Open shelves turn the upper portion of the kitchen walls into a curated display of pottery, glassware, cookbooks, and decorative objects — the same personal, inviting quality that island countertops provide when styled with a fruit bowl, a cookbook stand, or a vase of flowers.
Use floating shelves in a wood species and finish that matches or complements the kitchen cabinets (walnut shelves with white cabinets, natural oak shelves with sage green cabinets, or painted shelves matching the cabinet color). Space shelves 10 to 14 inches apart vertically for plates and bowls, 12 to 16 inches apart for taller items and cookbooks. Keep the styling edited: 3 to 5 items per shelf section, with a mix of functional pieces (stacked plates, a ceramic pitcher) and one decorative item (a plant, a small framed print) per grouping.
12. Create a Versatile Space
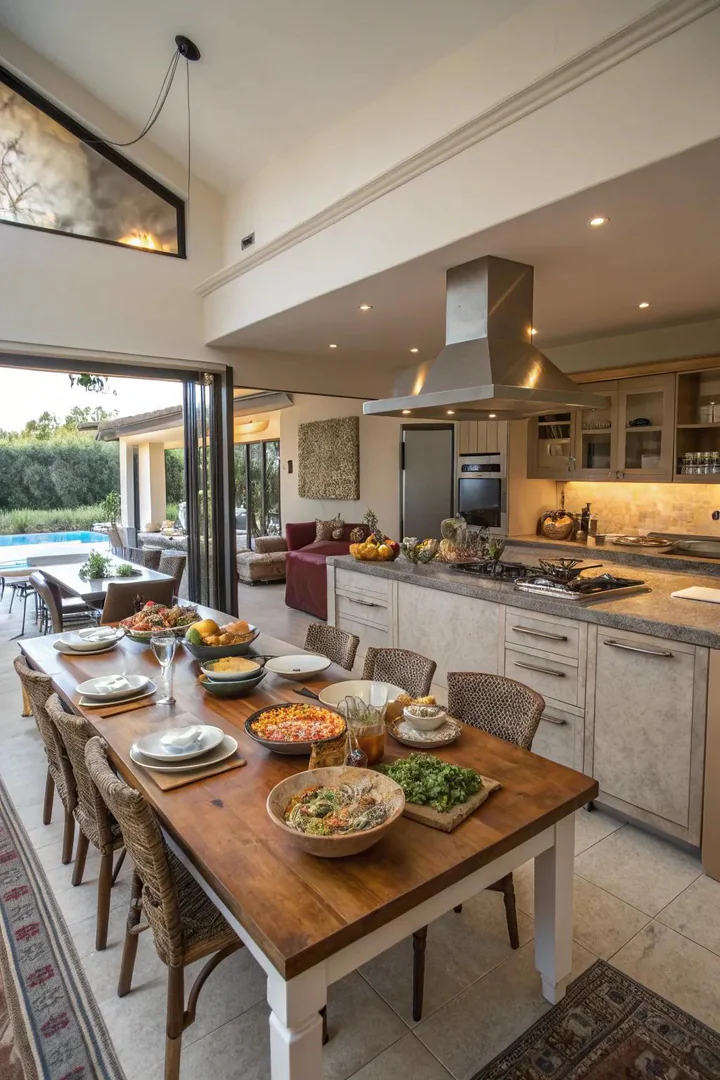
Designing the kitchen as a multifunctional space — where cooking, dining, homework, remote work, socializing, and entertaining all happen in the same open floor plan — replaces the island’s role as the kitchen’s social center with the entire room itself. Instead of one fixed island where everyone gathers, a multifunctional kitchen distributes the gathering points across a dining table, a window bench, a bar cart, a reading nook, or a desk area built into the cabinetry.
Define zones within the open space using furniture placement, area rugs, pendant lighting, and ceiling height changes (if the architecture allows). Place the dining table where it receives natural light from a window. Position a small desk or laptop station at the end of a countertop run (with an outlet and a pull-out keyboard tray from Rev-A-Shelf). Add a comfortable chair or bench where someone can sit and talk to the cook without standing in the work triangle. Each zone should be clearly defined but visually connected to the others, creating a room where multiple activities happen simultaneously.
13. Incorporate a Chic Bar Cart
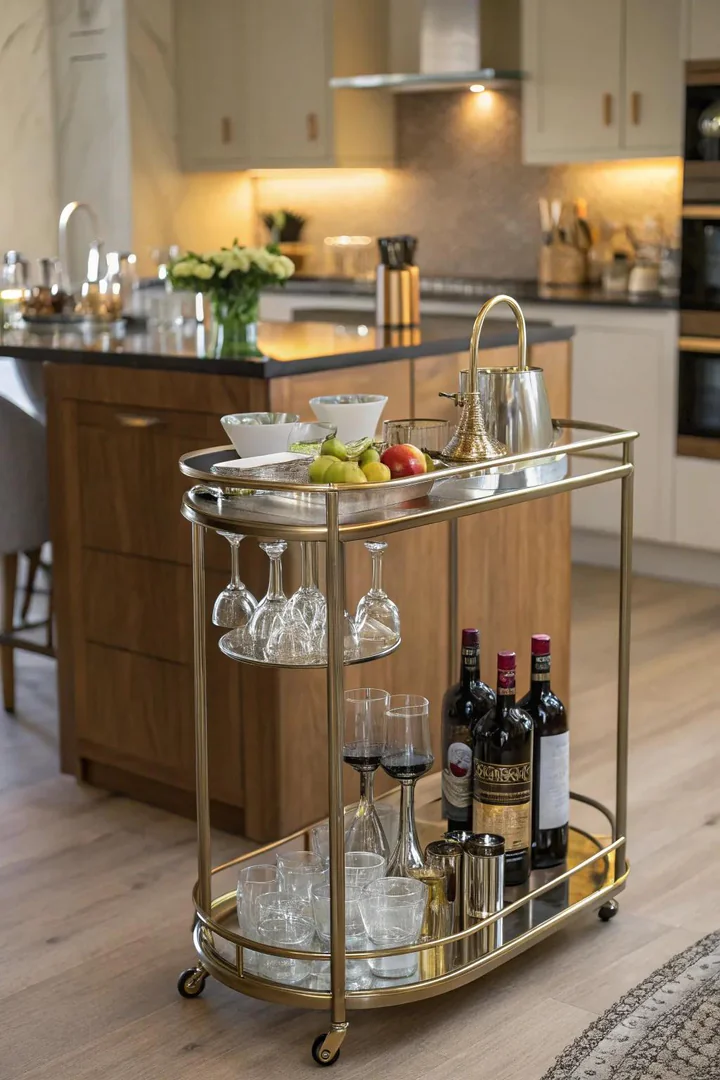
A bar cart — a two- or three-tier rolling cart in brass, black steel, wood, or rattan with glass, marble, or wood shelves — adds a portable surface for beverages, cocktail supplies, or a coffee station that can be wheeled between the kitchen and the living or dining room. Bar carts are smaller and more decorative than utility kitchen carts, making them a stylish accent piece that doubles as functional surface area in a kitchen without an island.
Use the bar cart as a permanent coffee station (espresso machine or pour-over setup on top, mugs and supplies on the lower shelf), a wine and cocktail station (bottles, glasses, a shaker, and garnish tools), or a dessert display for dinner parties. Source bar carts from West Elm, CB2, Target (Threshold line), World Market, or vintage furniture dealers. A brass and glass bar cart (from CB2’s Benson or West Elm’s Terrace) adds a mid-century modern accent; a black steel and wood cart (from Target’s Threshold line) suits industrial or Scandinavian kitchens.
14. Add a Rustic Farm Table
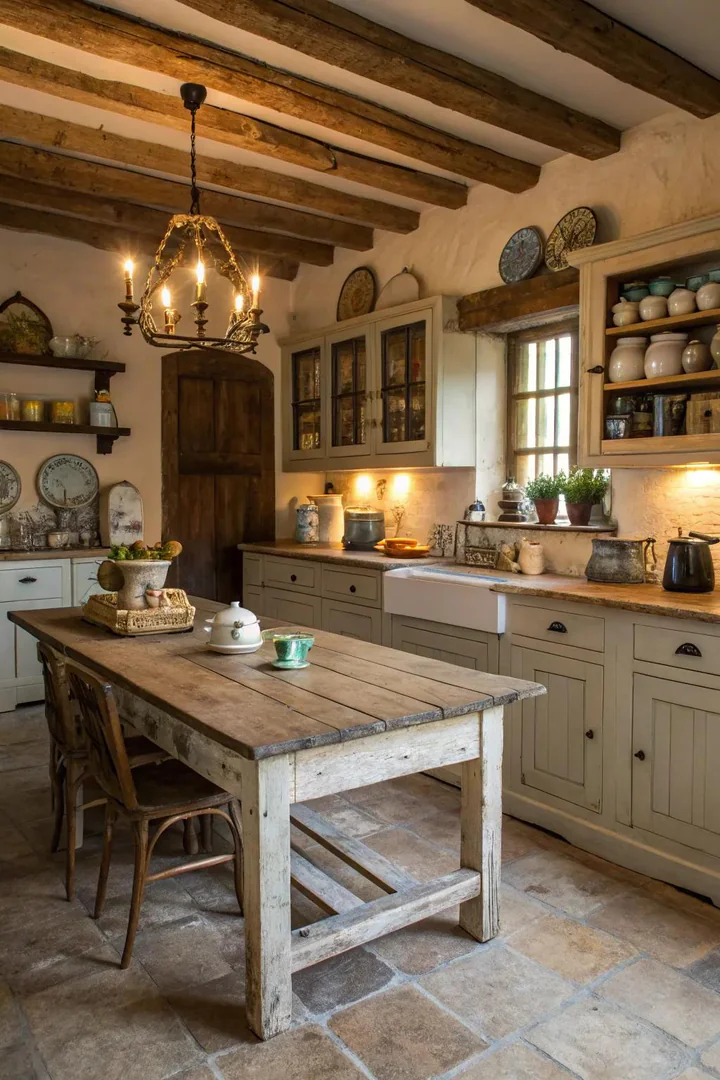
A rustic farm table — a large, solid-wood table with turned legs, a thick plank top, visible grain, and a worn or natural finish — serves as the social and functional heart of a kitchen without an island, providing a generous surface for meal prep, family meals, homework, and gathering. Farm tables were the original kitchen work surface before the modern island existed, and they bring the warmth, history, and communal character of a traditional farmhouse kitchen into any layout.
Source genuine antique farm tables from antique dealers, estate sales, and architectural salvage dealers, or purchase new reproduction farm tables from Pottery Barn (Benchwright), Restoration Hardware (Salvaged Wood collection), Etsy makers, or local woodworkers. A farm table 72 to 84 inches long and 36 to 40 inches wide provides enough surface for 6 to 8 diners and ample prep space during cooking. Pair with a mix of seating — two chairs on one side, a bench on the other — for a casual, collected-over-time aesthetic.
15. Set Up a Window Seat
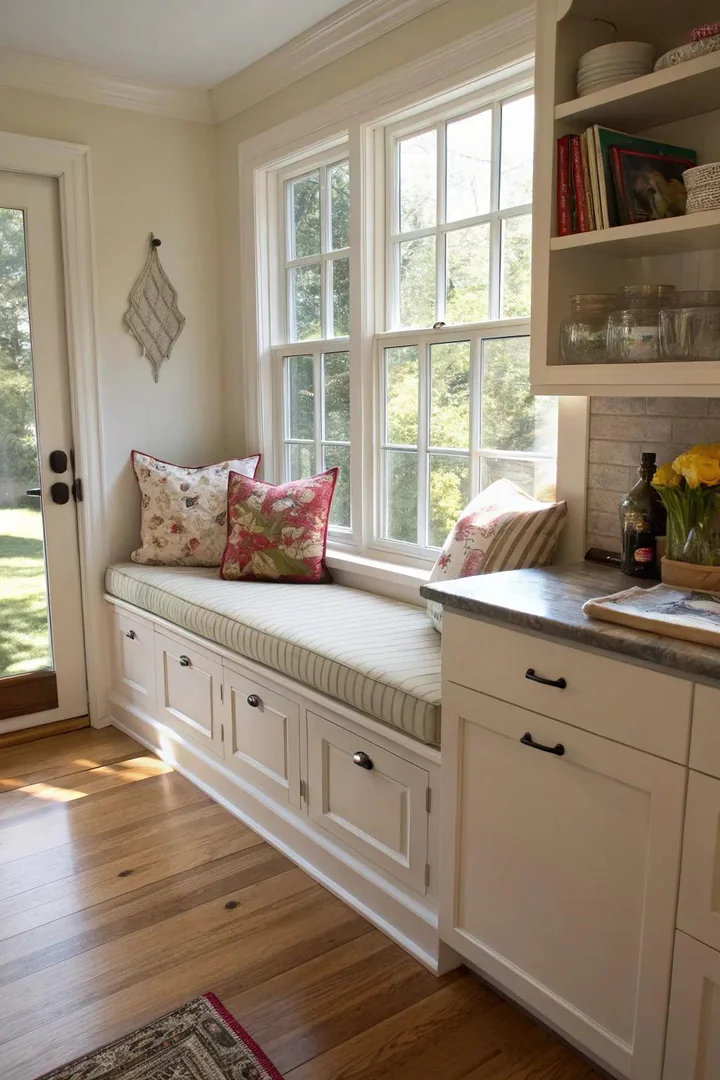
A window seat — a built-in bench positioned beneath a kitchen window, with a cushioned top for sitting, hinged or drawer storage below, and natural light streaming in from above — provides seating, storage, and a cozy perch for morning coffee or reading that takes advantage of wall space an island cannot reach. Window seats use the space directly beneath windows that is typically wasted (too low for a counter, too narrow for cabinets) and convert it into a functional, comfortable seating area.
Build the window seat as a plywood box (18 inches high, 18 to 24 inches deep, the full width of the window opening plus 6 to 12 inches on each side) with either a hinged top (for blanket and linen storage) or front-facing drawers (for easier access without removing the cushion). Top with a 3-inch-thick foam cushion in a durable, washable fabric (Sunbrella canvas or indoor-outdoor upholstery from Kravet). Add 2 to 3 throw pillows for back support when sitting. Position a small table or wall-mounted fold-down shelf beside the window seat for a mug and a book.
16. Choose a Drop-Leaf Table
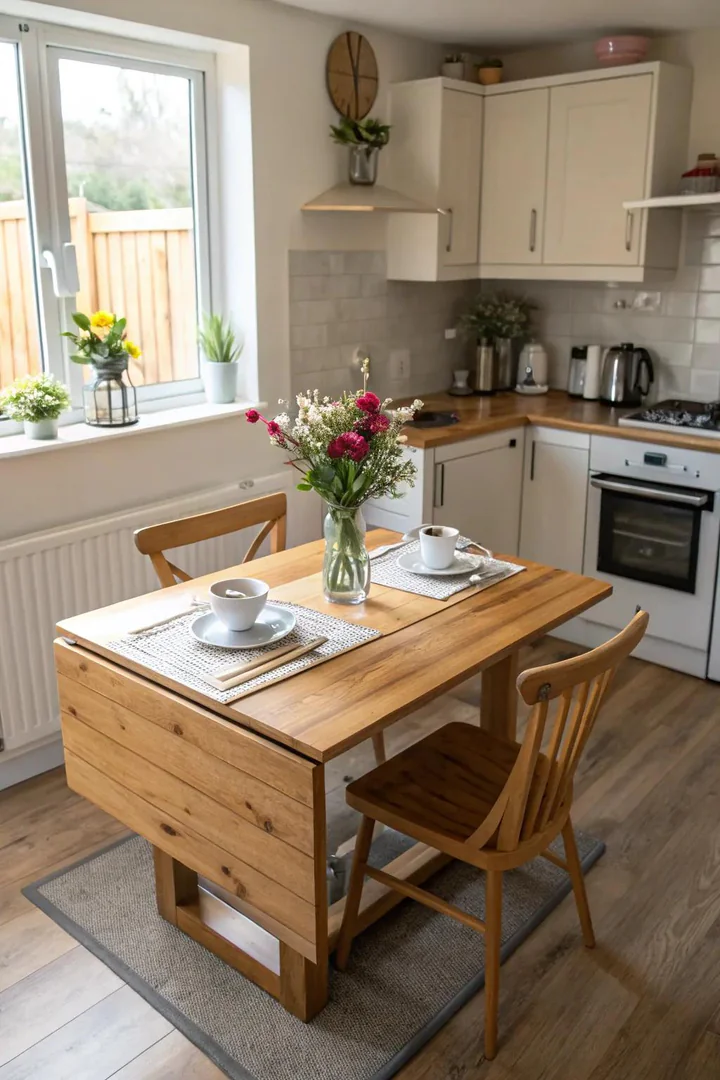
A drop-leaf table — a table with one or two hinged sections that fold down to reduce the table’s width when not in use and fold up to expand the surface when needed — provides adjustable surface area that can switch between a compact, wall-hugging profile (as narrow as 10 to 12 inches when both leaves are down) and a full-size dining or prep table (36 to 48 inches when both leaves are up). Drop-leaf tables are the classic space-saving solution for kitchens that need a table they can make appear and disappear based on the activity.
The IKEA Norden (gateleg variant, expands from 10 inches to 59 inches), the IKEA Ingatorp (round drop-leaf, expands from 25 to 48 inches), and the Crate & Barrel Origami (rectangular, folds flat) are widely available drop-leaf options. For a wall-mounted version, a fold-down wall table (hinged to the wall, folds flat against the wall when not in use) takes up zero floor space in the folded position — source from IKEA (Norberg or Bjursta), Wayfair, or a local carpenter. Place the drop-leaf table against the wall between meals and unfold it into the room for dining or prep.
17. Make Use of a Butcher Block
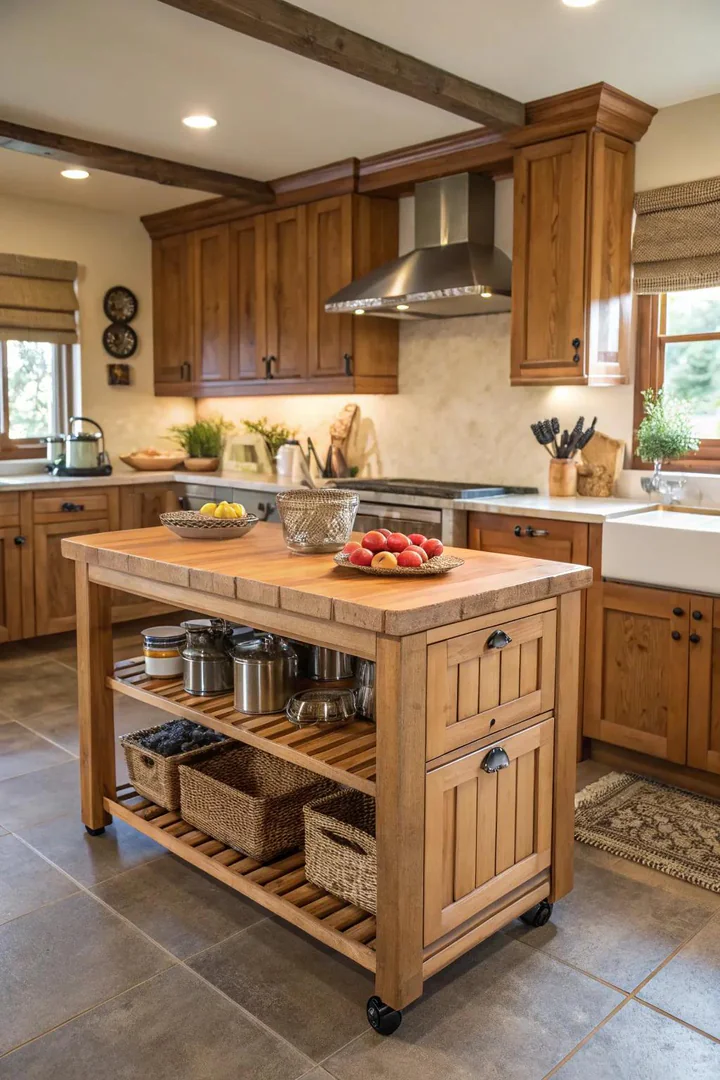
A freestanding butcher block — a thick, end-grain or edge-grain hardwood cutting and prep surface on a standalone base with legs, wheels, or a cabinet frame underneath — provides a dedicated, food-safe cutting and prep station that functions as a small island substitute without the permanence, plumbing, or construction cost of a built-in island. Butcher blocks are designed for direct food contact, heavy chopping, and years of daily use.
End-grain butcher blocks (where the wood grain points upward, showing the circular growth rings) are the most durable and knife-friendly — the end grain absorbs blade impacts rather than being scored by them, so the surface self-heals and the block lasts decades. John Boos (the industry standard, made in Effingham, Illinois since 1887), Michigan Maple Block, and Catskill Craftsmen are the leading butcher block manufacturers. A 24 x 36-inch butcher block on a wheeled base provides meaningful prep space and can be parked against a wall or rolled beside the stove during cooking. Oil the surface monthly with food-grade mineral oil (from John Boos or Howard Products) to maintain the wood and prevent drying.
18. Establish a Smooth Transition
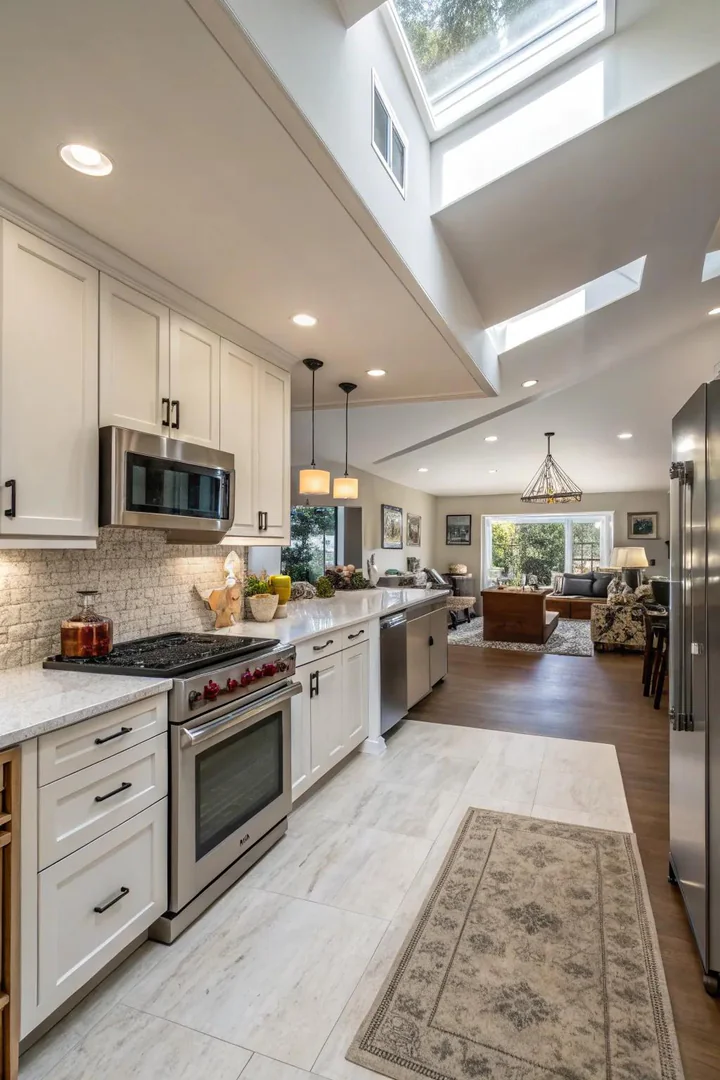
Creating a smooth, uninterrupted flow between the kitchen and adjacent living or dining areas — using continuous flooring, matched wall colors, coordinated lighting, and furniture that bridges the boundary — makes the kitchen feel larger by visually borrowing space from the rooms it opens into. Without an island anchoring the center of the kitchen, the floor plan is naturally open and unobstructed, which is an advantage for creating continuous flow between zones.
Run the same flooring material (hardwood, tile, or luxury vinyl plank) continuously from the kitchen through the dining and living areas without a transition strip at the doorway. Use the same wall color or complementary tones across all connected rooms. Align the kitchen counter height with any adjacent half-walls or pass-throughs at the same 36-inch level for a continuous horizontal line. Place furniture (a sofa back, a console table, or a low bookshelf) rather than walls between the kitchen and living areas to define the boundary without blocking sightlines or airflow.
19. Incorporate Storage Benches with Built-in Features
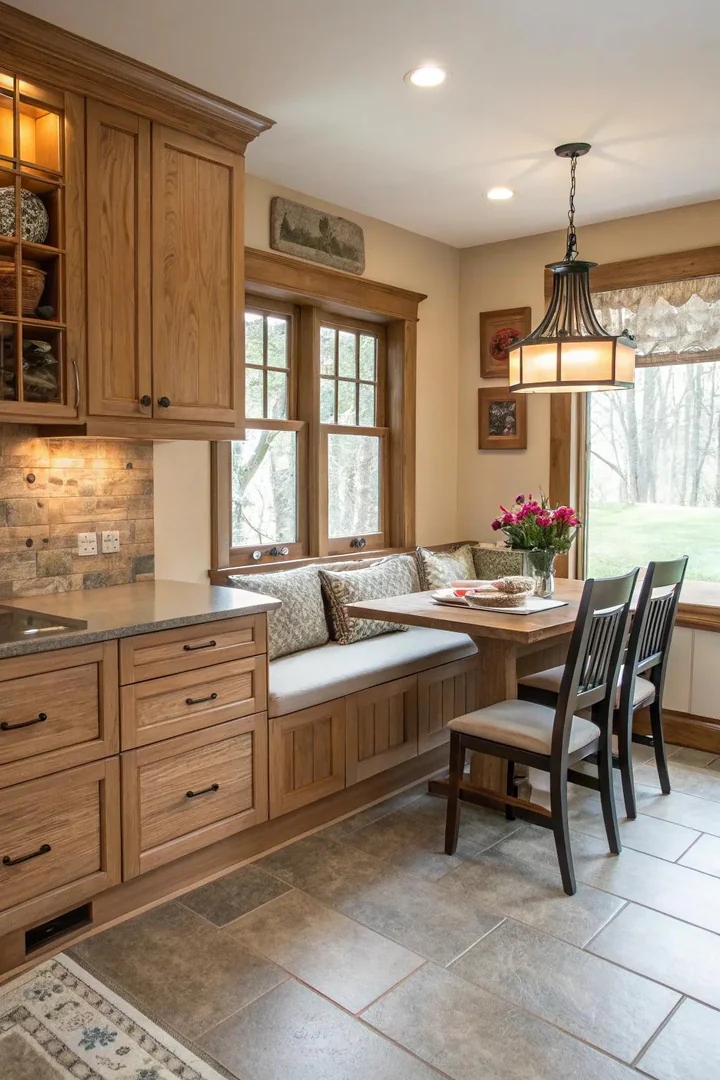
Built-in storage benches — bench seating with lift-top compartments, front-facing drawers, or pull-out bins underneath the seat — combine seating and storage in a single piece of furniture that takes up no more floor space than a chair but provides significant hidden storage volume for table linens, seasonal items, children’s supplies, pet gear, or rarely used kitchen equipment.
Build a storage bench along a kitchen wall, under a window, or as part of a breakfast nook banquette using 3/4-inch plywood, piano hinges (for lift-top access), and soft-close drawer slides (for front-facing drawers). A bench 48 to 72 inches long, 18 inches deep, and 18 inches high provides 8 to 16 cubic feet of hidden storage — equivalent to 2 to 4 kitchen base cabinet interiors. Add a 2- to 3-inch foam cushion with a washable, zippered cover (Comfort Works or a local upholsterer) for comfortable daily seating. For kitchens with children, a storage bench near the table stores art supplies, homework materials, and snack containers at kid-accessible height.
20. Set Up Sliding Shelves
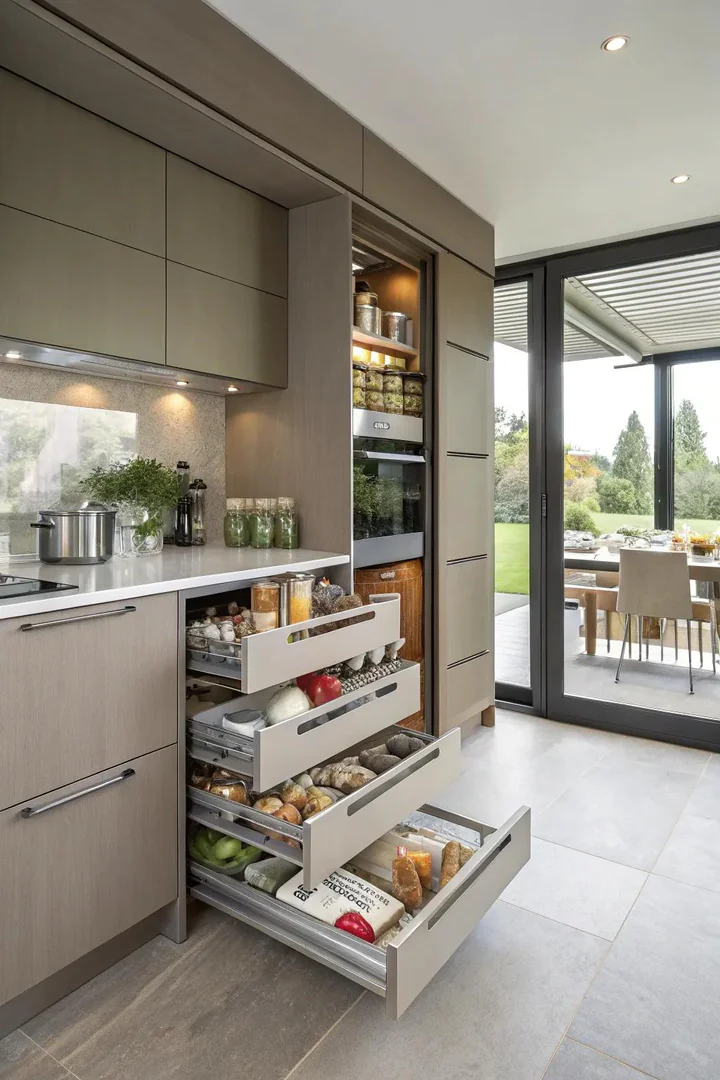
Sliding pull-out shelves — flat trays or wire baskets mounted on full-extension drawer slides inside existing base cabinets — convert deep, hard-to-reach cabinet interiors into fully accessible, slide-out storage where every item is visible and within arm’s reach. Pull-out shelves are especially important in island-free kitchens because every base cabinet needs to work at maximum storage efficiency to compensate for the storage an island’s cabinets would have provided.
Retrofit existing base cabinets with pull-out shelf kits from Rev-A-Shelf (the 5WB series, made-to-fit wood and wire shelves), Slide-A-Shelf (custom-width pull-outs), or Lynk Professional (chrome wire pull-outs). Each pull-out shelf should be mounted on 100-pound-rated, full-extension, soft-close slides (Rev-A-Shelf or Blum Tandem) so the shelf extends completely out of the cabinet and closes silently. Add pull-outs to every lower cabinet: standard flat shelves for pots, pans, and baking sheets; tiered shelves for spices and small jars; and deep drawer-style pull-outs for heavy items like stand mixers and slow cookers.
21. Add a Collapsible Table
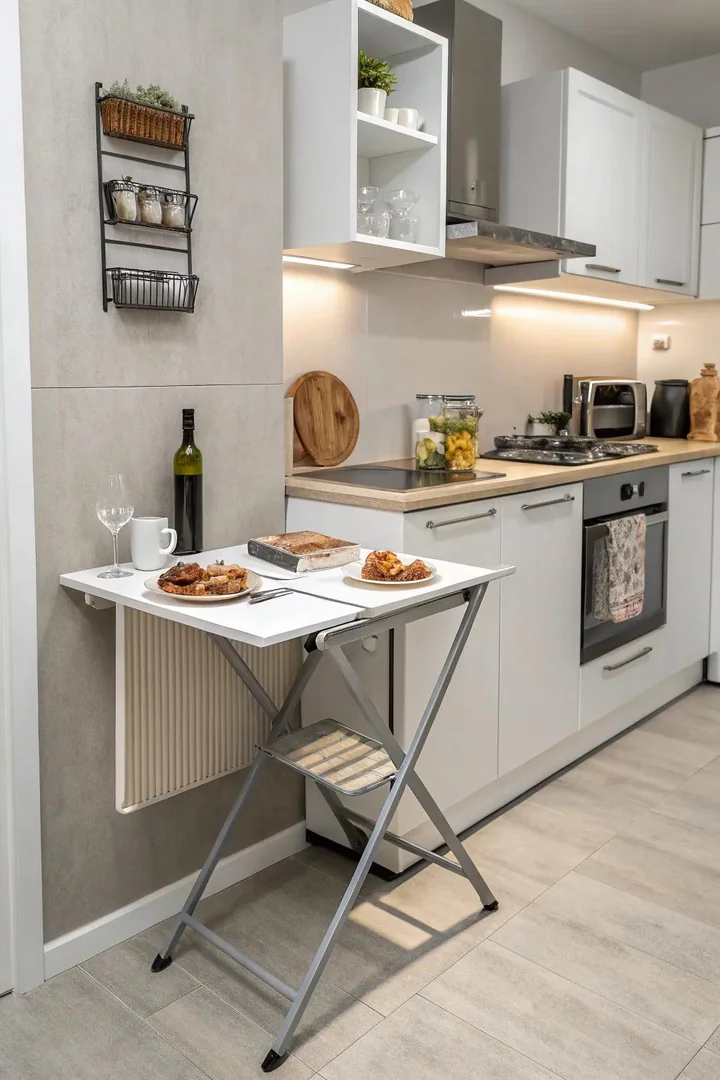
A foldable table — a table with folding legs, a collapsing frame, or a wall-mounted fold-down mechanism that allows it to be stored flat against a wall, in a closet, or behind a door when not in use — provides temporary surface area on demand without permanently occupying kitchen floor space. Foldable tables are the most extreme space-saving solution for kitchens that genuinely cannot afford any permanent furniture in the center of the room.
Wall-mounted fold-down tables (from IKEA Norberg, Prepac, or a custom carpenter) fold flat against the wall in a 2- to 3-inch profile when not in use and fold out to 24 to 36 inches deep when needed. Freestanding folding tables (from Lifetime, Cosco, or Meco) fold completely flat for storage in a closet or pantry and set up in seconds. For a higher-end option, a Murphy-style fold-down table built into a cabinet surround (with shelving visible when the table is stowed) combines wall storage and a fold-out prep surface in a single built-in unit. Use foldable tables for temporary prep during holiday cooking, extra dining seating during dinner parties, or a homework station for children that folds away after use.
22. Create with Bright Hues
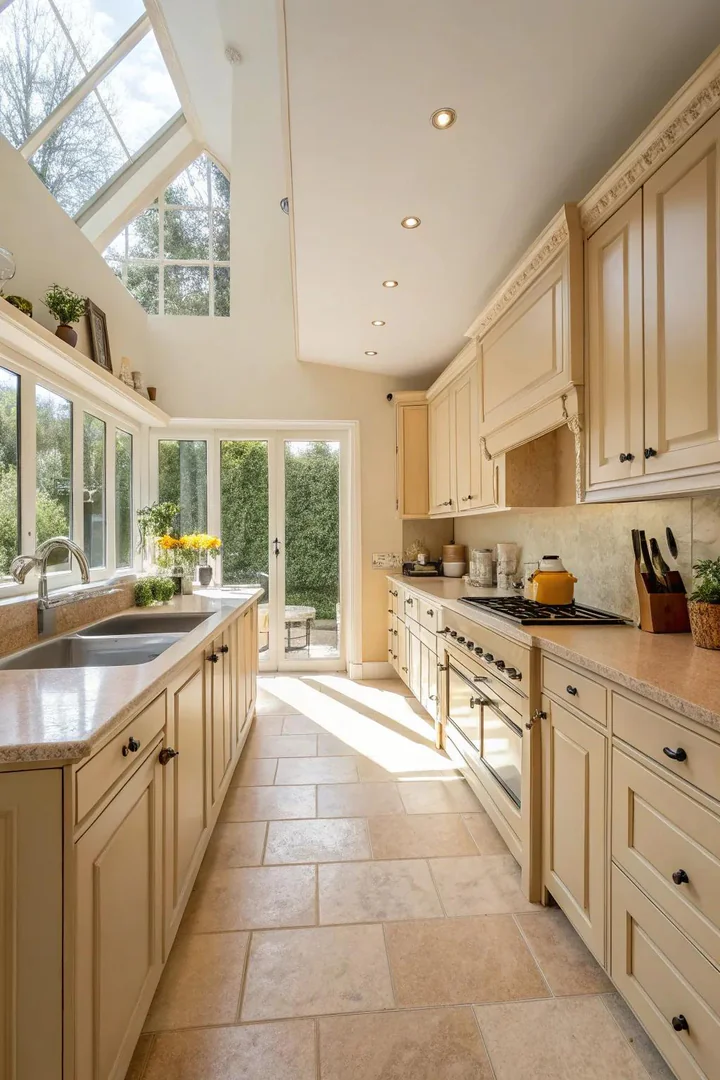
Using light colors — white, off-white, cream, pale gray, soft blue, or light sage — on cabinets, walls, countertops, and backsplash makes a kitchen without an island feel more spacious, brighter, and more open by reflecting natural and artificial light across all surfaces. Light colors visually push the walls outward and the ceiling upward, creating the perception of a larger room — an especially useful effect in small and medium kitchens where the absence of an island already provides welcome open floor space.
Paint the walls and cabinets in the same or closely related light tones (Benjamin Moore White Dove OC-17 walls with Chantilly Lace OC-65 cabinets, or Sherwin-Williams Alabaster SW 7008 on both) to blur the boundary between surfaces and make the room feel continuous. Choose a light-colored countertop (white or gray-veined quartz from Caesarstone, Silestone, or Cambria; light marble like Carrara or Calacatta; or light butcher block in maple or birch) to extend the light palette across the horizontal surfaces. For more ideas on using color to open up a kitchen, browse our kitchen color ideas guide.
23. Add a Pot Rack
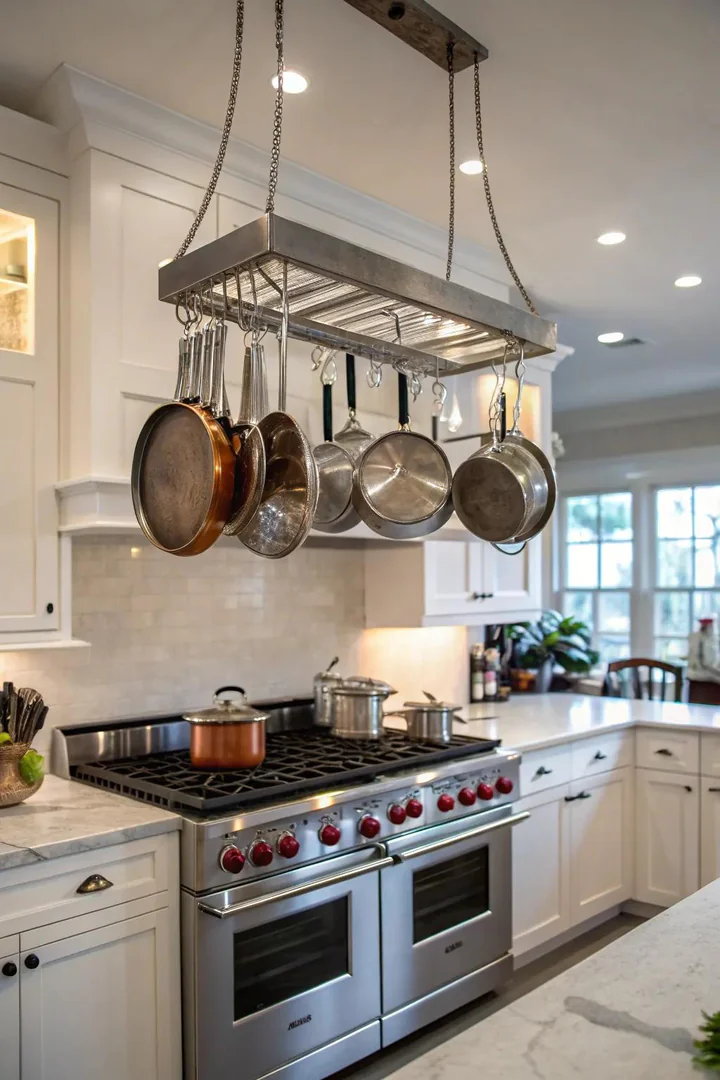
A ceiling-mounted or wall-mounted pot rack — an iron, steel, or wood frame fitted with S-hooks for hanging pots, pans, lids, and large utensils — moves heavy cookware out of the base cabinets and onto the ceiling or upper wall, freeing up the cabinet space that an island’s built-in storage would have provided. Pot racks convert empty overhead space into functional storage and put the most-used cookware within arm’s reach of the stove.
Ceiling-mounted rectangular pot racks (from Enclume, Old Dutch, or Cuisinart) work best above the stove or above the primary prep area, suspended from ceiling joists by chains or solid rods. Wall-mounted pot racks with a built-in shelf (from Enclume or Rogar) provide both hanging storage and a narrow shelf for spice jars, cookbooks, or small items. Hang pots and pans on the rack in order of frequency — daily-use skillets and saucepans closest to the center, occasional-use stockpots and specialty pans at the ends. Visit The Designers Company for more kitchen design inspiration and space-saving solutions.
How to Design a Kitchen Without an Island
Assessing Your Kitchen’s Shape and Size
Measure the kitchen floor area (length x width) and identify the layout type: galley (two parallel walls), L-shaped (two perpendicular walls), U-shaped (three walls), or single-wall (one wall). Kitchens under 100 square feet or narrower than 8 feet wall-to-wall typically cannot accommodate an island with adequate aisle clearance (36 inches minimum, 42 to 48 inches recommended). In these kitchens, island alternatives — peninsulas, rolling carts, freestanding tables, and wall-mounted counters — provide extra surface area without blocking the critical circulation path between the work zones.
Prioritizing the Work Triangle
The work triangle (the path between the sink, stove, and refrigerator) should be short, clear, and unobstructed. In a kitchen without an island, the work triangle typically has shorter legs (fewer steps between the three points) because there is no island forcing a detour. Keep each leg of the triangle between 4 and 9 feet long, and keep the total perimeter of the triangle between 13 and 26 feet. Place any freestanding furniture (tables, carts, butcher blocks) outside the triangle so the cook can move freely between the sink, stove, and fridge without stepping around obstacles.
Compensating for Lost Storage and Seating
A standard 48 x 36-inch kitchen island provides roughly 6 linear feet of base cabinet storage and 2 to 3 bar stool seats. To replace this in an island-free kitchen, add pull-out shelves to existing base cabinets (increasing usable storage by 30 to 50 percent per cabinet), install tall pantry cabinets (84 inches tall, 18 to 24 inches wide, providing 20+ cubic feet of storage), mount a wall-mounted pot rack (freeing 2 to 3 base cabinets of cookware), and add a breakfast nook or peninsula for seating. These distributed solutions often provide more total storage and more comfortable seating than a single island.
Island-Free Kitchen Alternatives Comparison
| Alternative | Prep Space | Seating | Storage | Mobility |
|---|---|---|---|---|
| Peninsula | High | 2-3 stools | Full base cabinets | Fixed |
| Rolling cart | Medium | None | 1-2 shelves | Fully mobile |
| Farm table | High | 4-8 chairs | None (unless drawers) | Movable |
| Drop-leaf table | Medium (when open) | 2-4 chairs | None | Foldable |
| Butcher block | High | None | Lower shelf | Movable/wheeled |
| Floating counter | Medium | 2 stools | None | Fixed (wall-mounted) |
| Breakfast nook | None | 4-6 (banquette) | Under-seat bins | Fixed (built-in) |
| Bar cart | Low | None | 2-3 shelves | Fully mobile |
Common Mistakes in Island-Free Kitchen Design
Leaving the center of the kitchen empty. Removing the island should not mean leaving a bare, unused floor area in the center of the room. Fill the space with a purposeful alternative — a freestanding table, a rolling cart, a rug that defines the dining zone, or a clear, wide-open circulation path that the cook uses intentionally. An empty center without a plan looks like something is missing rather than something was chosen.
Crowding the work triangle with furniture. Placing a table, cart, or bench directly in the path between the sink, stove, and refrigerator defeats the purpose of an island-free layout. Position all freestanding furniture outside the work triangle so the cook can move between the three primary stations without stepping around, reaching over, or pushing past any obstacle.
Neglecting vertical storage. Without island cabinets, the kitchen has fewer base cabinet runs for storage. Compensate by building upward: install full-height (84- or 96-inch) pantry cabinets, mount wall shelves and pot racks above the countertop zone, and add hooks, rails, and magnetic strips to the backsplash for utensils, knives, and spice jars. Vertical storage recovers the cubic footage that the missing island cabinets would have provided.
Assuming every kitchen needs an island. Many kitchens — especially galley layouts, small L-shaped kitchens, narrow apartments, and open-plan spaces where the kitchen adjoins the living room — work better without an island. The open floor area, shorter work triangle, better traffic flow, and visual spaciousness of an island-free kitchen are genuine design advantages, not compromises to be apologized for.
Frequently Asked Questions
How small is too small for a kitchen island?
A kitchen needs at least 10 x 10 feet (100 square feet) of floor area and a minimum of 42 inches of clear aisle space on all sides of the island to accommodate even the smallest island (36 x 24 inches). If the kitchen is narrower than 10 feet or the aisle clearance would drop below 36 inches with an island in place, skip the island and choose a peninsula, a rolling cart, or a wall-mounted counter instead. Cramming an island into an undersized kitchen creates a kitchen that is harder to use, not easier.
Can a peninsula replace an island?
Yes. A peninsula provides the same three functions as an island — extra counter space, base cabinet storage, and bar-stool seating — while requiring less floor space because one end is attached to the wall or to existing cabinetry. Peninsulas work especially well in L-shaped kitchens (where the peninsula forms the third wall, creating a U-shape) and in open-plan kitchens (where the peninsula serves as a partial divider between the kitchen and living areas).
What is the best rolling cart for a small kitchen?
The IKEA Bekvam kitchen cart (solid birch, butcher block top, 22 x 23 inches, 2 shelves and a towel rail, under $70) is the most popular small kitchen cart and fits in nearly any kitchen. For a slightly larger option, the IKEA Forhoja (birch with drawers, 39 x 17 inches) provides more surface area and drawer storage. For a sturdier, restaurant-grade option, the John Boos Cucina Technica (stainless steel and maple, 30 x 24 inches) or the TRINITY stainless steel prep table (24 x 49 inches) offers a professional-quality work surface on wheels.
How do I add seating to a kitchen without an island?
Four primary options: (1) a breakfast nook with banquette seating and a small table, (2) a peninsula with a raised countertop overhang and bar stools, (3) a freestanding dining table with chairs in or adjacent to the kitchen, or (4) a wall-mounted counter or floating bar at bar height (42 inches) with 2 to 3 stools. Banquette nooks seat the most people per square foot because the continuous bench eliminates the wasted space between individual chairs.
Does removing the island reduce kitchen resale value?
Not necessarily. Kitchen islands add resale value primarily when the kitchen is large enough for the island to improve the layout. In kitchens under 120 square feet, an island that crowds the walkways and shrinks the usable counter space can actually reduce the kitchen’s appeal to buyers. A well-designed island-free kitchen with a peninsula, good storage solutions, and an open floor plan often appraises and sells comparably to a kitchen with a small or poorly placed island.
What is the best layout for a kitchen without an island?
The galley layout is the most space-efficient for kitchens without an island — it provides the most counter and cabinet length per square foot and the shortest work triangle. The L-shape with a peninsula is the best option for open-plan kitchens because the peninsula provides seating and a visual boundary between the kitchen and living areas. The U-shape provides the most total storage and counter space but requires a wider room (at least 10 feet between opposing cabinet runs). The single-wall layout works in very small spaces but has the least counter and storage capacity.
Conclusion
Kitchen ideas without an island prove that a fixed island is not a requirement for a functional, beautiful, and well-organized kitchen. The 23 alternatives above — from galley layouts and peninsulas to rolling carts, drop-leaf tables, butcher blocks, and built-in breakfast nooks — provide the prep space, storage, and seating functions of an island using solutions that often work better in small, narrow, galley, and open-plan kitchens.
Start by identifying what you need most from your kitchen’s center zone: prep surface, seating, storage, or a combination. Then choose the alternative that matches your kitchen’s size, shape, and the way you actually cook and eat. A rolling cart or butcher block adds instant, movable prep space. A peninsula or breakfast nook adds permanent seating and storage. A drop-leaf or foldable table adds temporary surface that disappears when you need the floor space back. The best kitchen layout is the one that fits your room and your routine — island or not.

