Outdoor BBQ Shelter Ideas: 14 Smart Builds for All-Season Cookouts
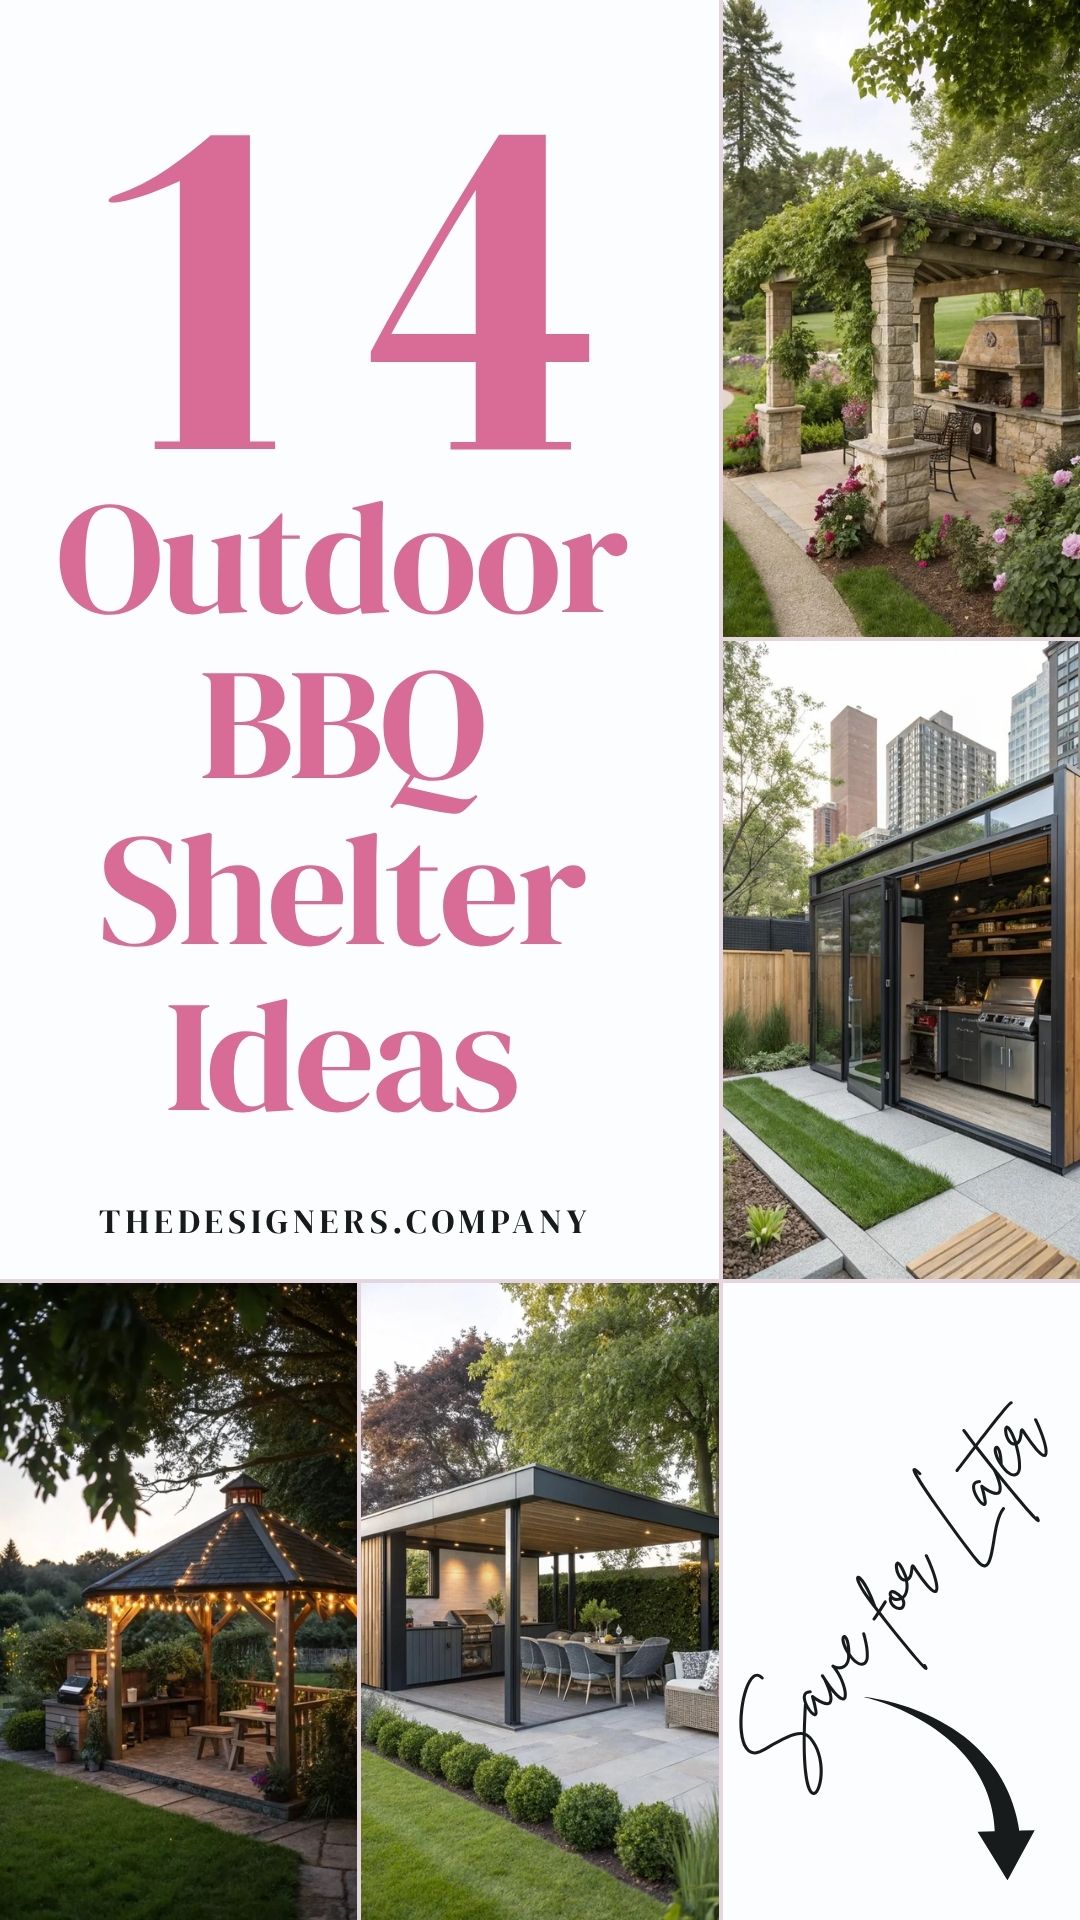
Outdoor BBQ shelter ideas protect your grill, smoker, and prep surfaces from rain, wind, and direct sun so you can cook year-round without wheeling equipment in and out of the garage every session. Below are 14 BBQ shelter builds with specific framing dimensions, roofing materials, ventilation requirements, and cost ranges for structures sized to fit standard 36 to 60-inch grills and kamado cookers.
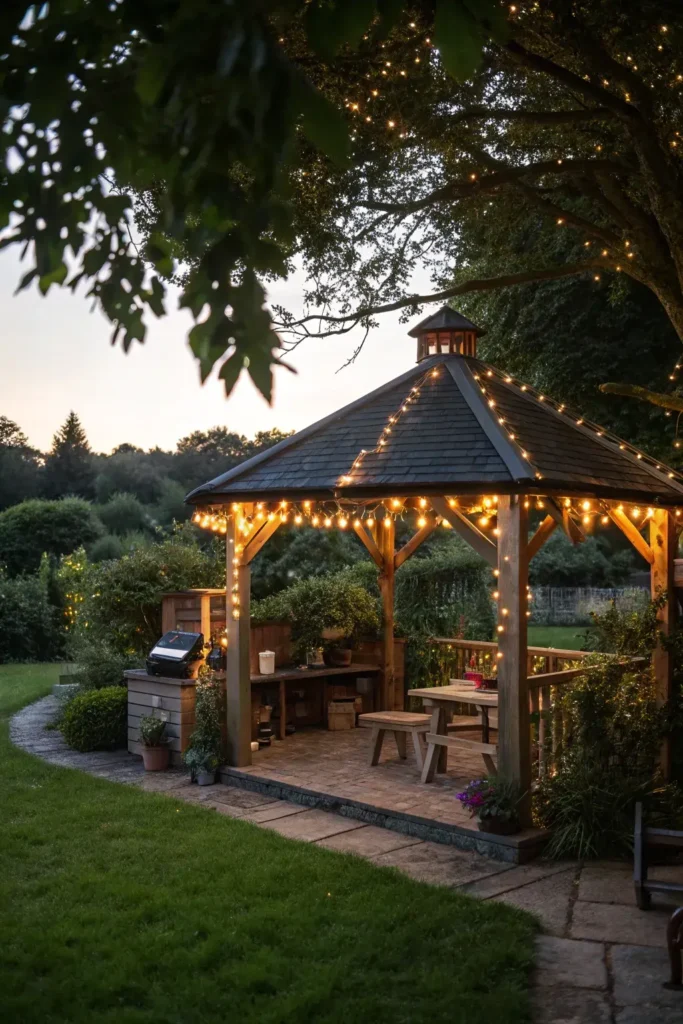
1. Timber Frame Gazebo BBQ Station
A 10 x 12-foot timber frame gazebo built from 6 x 6 Douglas fir or cedar posts and 4 x 8 beams gives a BBQ station a permanent, furniture-grade shelter with open sides for airflow and smoke ventilation. Frame the roof with 2 x 6 rafters on 24-inch centers in a hip or gable configuration (4/12 to 6/12 pitch) and cover with cedar shingles, asphalt dimensional shingles, or standing seam metal panels.
Total lumber cost for a 10 x 12 timber gazebo runs $1,500 to $3,000 depending on wood species and roof covering. Set the 6 x 6 posts on concrete pier footings (12-inch Sonotube forms, $8 each, filled with Quikrete 5000 at $7 per 80-pound bag) dug 42 inches deep for frost-zone stability. Add a 24 x 36-inch stainless steel prep counter ($200 to $400 from BBQGuys or Amazon) mounted between two posts for a permanent food prep surface next to the grill.
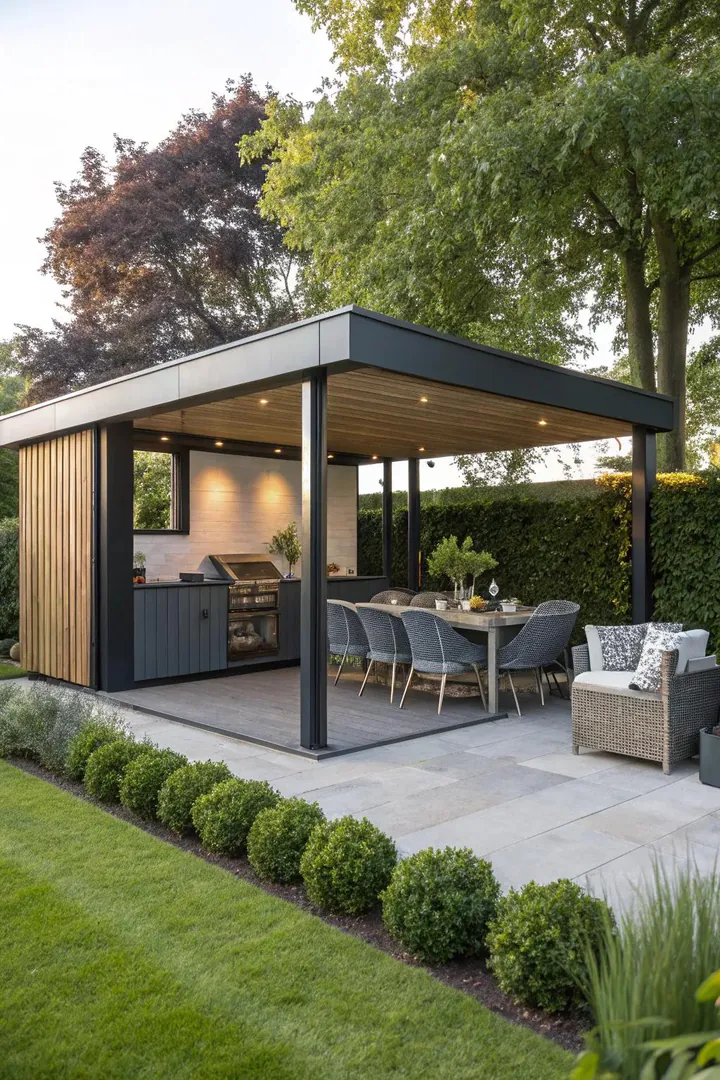
2. Open-Front Garden Building
A 6 x 8-foot garden building (shed-style structure with three enclosed walls and one fully open front) provides weather protection on three sides while keeping the cooking area ventilated and accessible. Build the three walls from 2 x 4 framing sheathed with T1-11 plywood siding ($30 per 4 x 8 sheet) or horizontal cedar lap boards ($3 per linear foot), and top with a single-slope (shed) metal or shingle roof.
The enclosed walls protect the grill from crosswinds and blowing rain while the open front allows smoke to exit freely. Mount a pegboard or slat-wall panel ($20 to $40 per 4 x 4-foot sheet) on the back wall for hanging grilling tools, tongs, spatulas, and thermometers. A 6 x 8-foot open-front cook shed costs $600 to $1,200 in materials for a DIY build and fits two standard cart-style grills side by side.
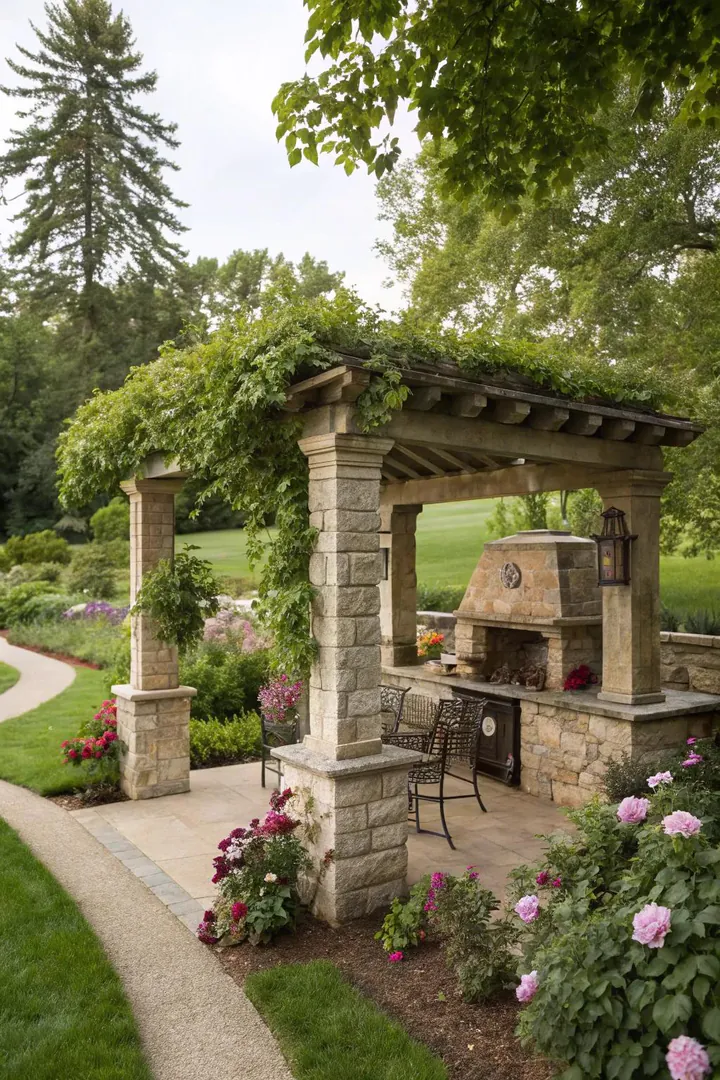
3. Stone Pillar BBQ Shelter
Building the shelter posts from stacked natural stone or manufactured stone veneer ($8 to $15 per square foot for cultured stone panels from Eldorado, Coronado, or GenStone) wrapped around 6 x 6 pressure-treated cores gives the structure a masonry look without the cost or weight of solid stone columns. Each pillar uses 20 to 30 square feet of veneer at $160 to $450 per column, with four columns supporting the roof.
Connect the stone pillars with a flat or arched metal roof (R-panel or corrugated steel, $2 to $4 per square foot) and add a matching stone-veneer counter base topped with a 2-inch-thick flagstone or granite slab ($15 to $30 per square foot, cut to size at a stone yard). A four-pillar stone BBQ shelter with a 10 x 14-foot roof costs $2,500 to $5,000 in materials. The stone veneer also acts as a heat shield, protecting the wooden core posts from radiant grill heat.
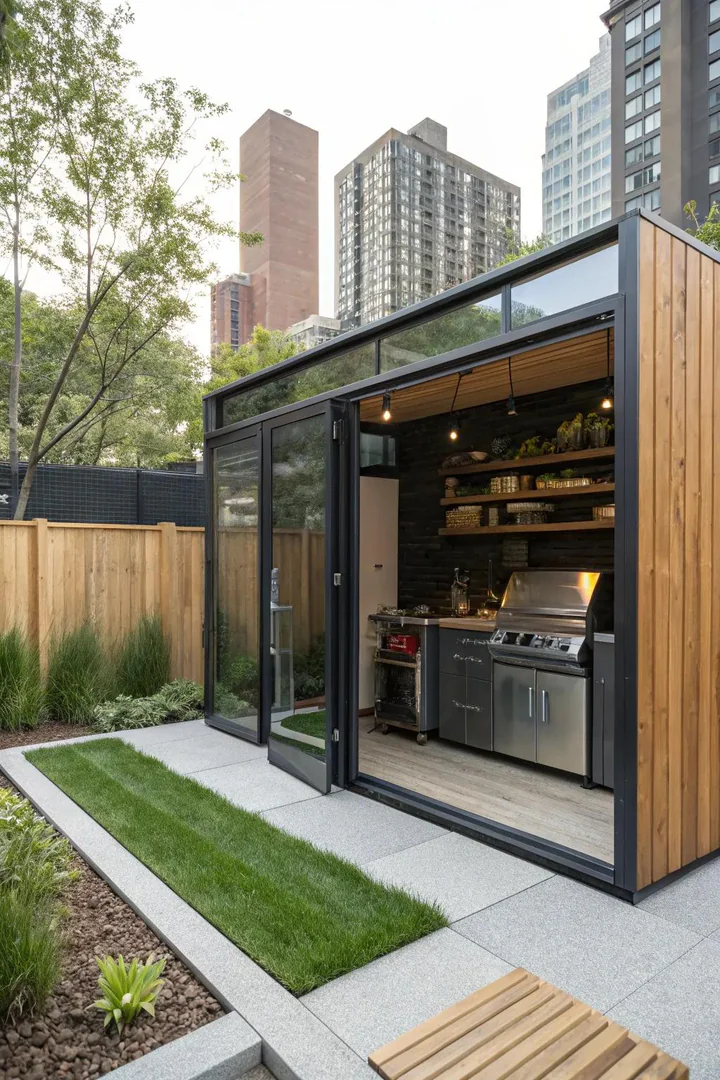
4. Modern Flat-Roof BBQ Shed
A flat-roof BBQ shed (8 x 10 feet) with dark metal siding (charcoal or matte black corrugated panels), a 1/4:12 pitch membrane roof, and built-in stainless steel cabinets creates a sleek, contemporary outdoor kitchen shelter. Frame the walls with 2 x 4 studs on 16-inch centers, sheath with 1/2-inch OSB, and apply corrugated metal panels as exterior cladding ($1.50 to $3 per square foot).
Route a dedicated 20-amp GFCI electrical circuit to the shed for powering a pellet grill, refrigerator, or rotisserie motor. Add an exhaust fan (Broan 8-inch inline duct fan, $80 to $120) in the back wall near the ceiling to pull smoke out of the enclosed space. A modern BBQ shed costs $1,200 to $2,500 in materials and provides a fully enclosed cooking station that keeps rain, wind, and insects away from the food prep area.
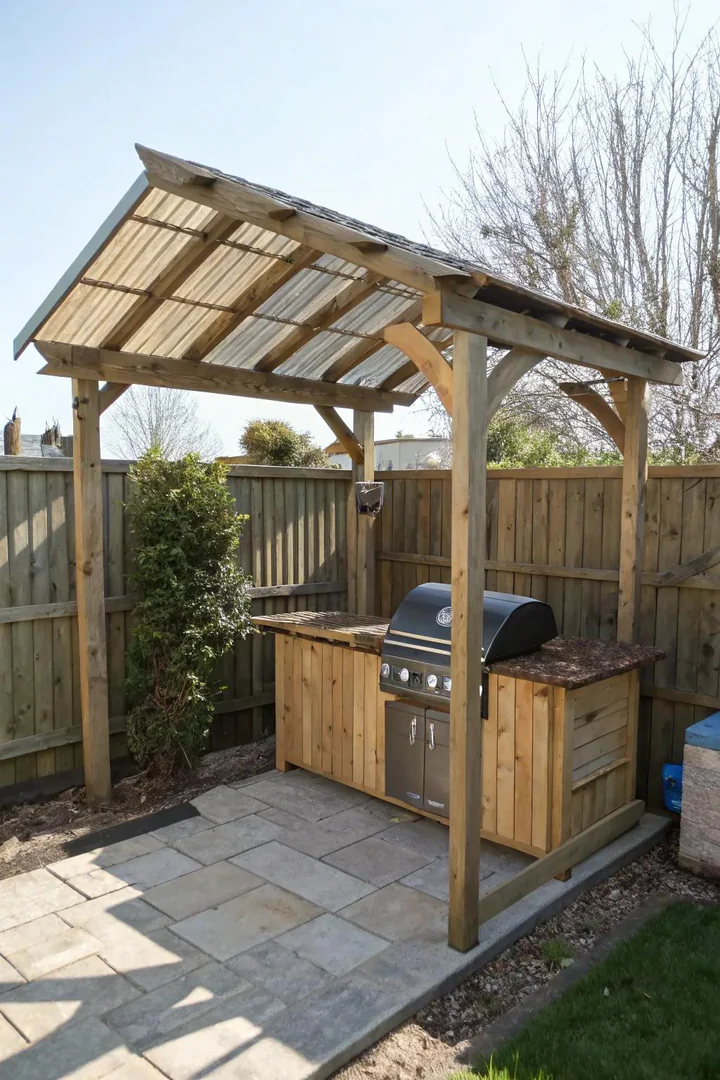
5. Half-Covered Pergola
A pergola with metal roof panels covering only the grill-side half and open lattice rafters on the dining-side half gives the cook weather protection while the dining guests sit in filtered sunlight. Build the pergola frame from 6 x 6 posts and 2 x 8 beams (12 x 16-foot footprint), cover one 8-foot-wide section with R-panel metal roofing, and leave the other 8-foot section with open 2 x 6 rafters on 16-inch centers.
The open-rafter section can support shade cloth ($0.50 to $1 per square foot), retractable canvas panels, or climbing vines (wisteria, grape, trumpet vine) for adjustable shade. A half-covered 12 x 16 pergola costs $1,000 to $2,000 in lumber and roofing materials. Position the covered half on the side where prevailing winds push rain, and the open half on the leeward side for the most practical weather protection.
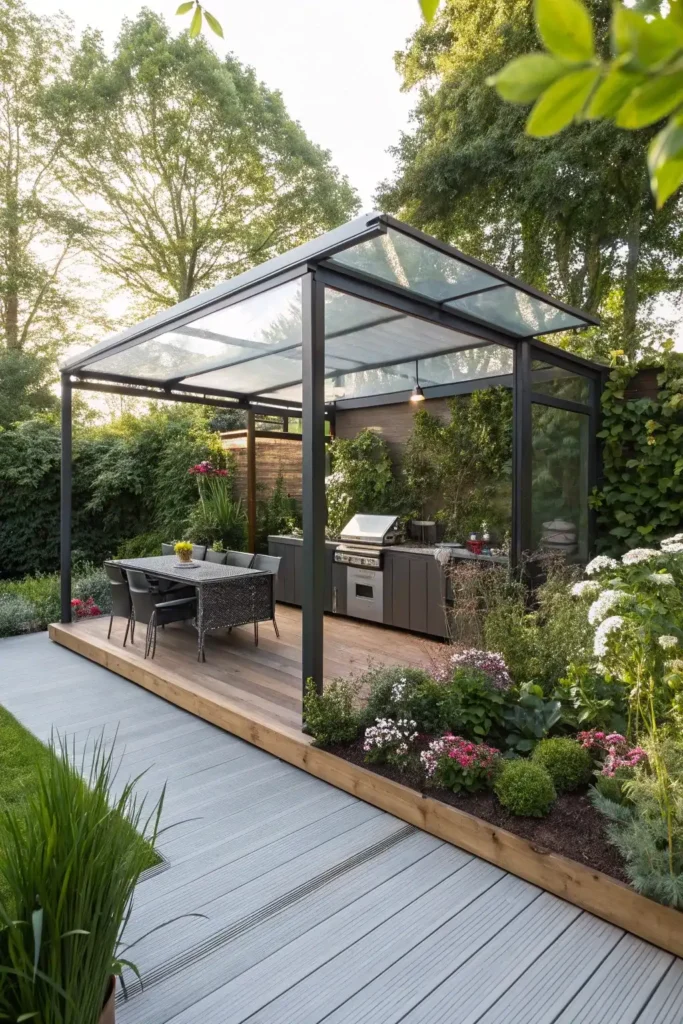
6. Clear Polycarbonate Canopy
A clear or tinted polycarbonate panel roof (Suntuf, Palram SunSky, or Tuftex PolyCarb, $2 to $4 per square foot) lets full daylight reach the cooking area while blocking 100 percent of rain and roughly 90 percent of harmful UV rays. Mount the panels on a simple aluminum or wood frame with matching polycarbonate closure strips and self-drilling screws with UV-rated neoprene washers.
Choose clear panels for maximum light in shaded yards, opal (white translucent) for glare reduction on south-facing patios, or bronze-tinted for a warmer light tone. A 10 x 12-foot polycarbonate canopy costs $240 to $480 in panels plus $300 to $600 for the support frame. The lightweight panels (under 1 pound per square foot) put less structural load on the posts than metal or shingle roofing, allowing the use of smaller 4 x 4 posts instead of 6 x 6 columns. Browse more metal roof cover designs for heavier-duty overhead structures.
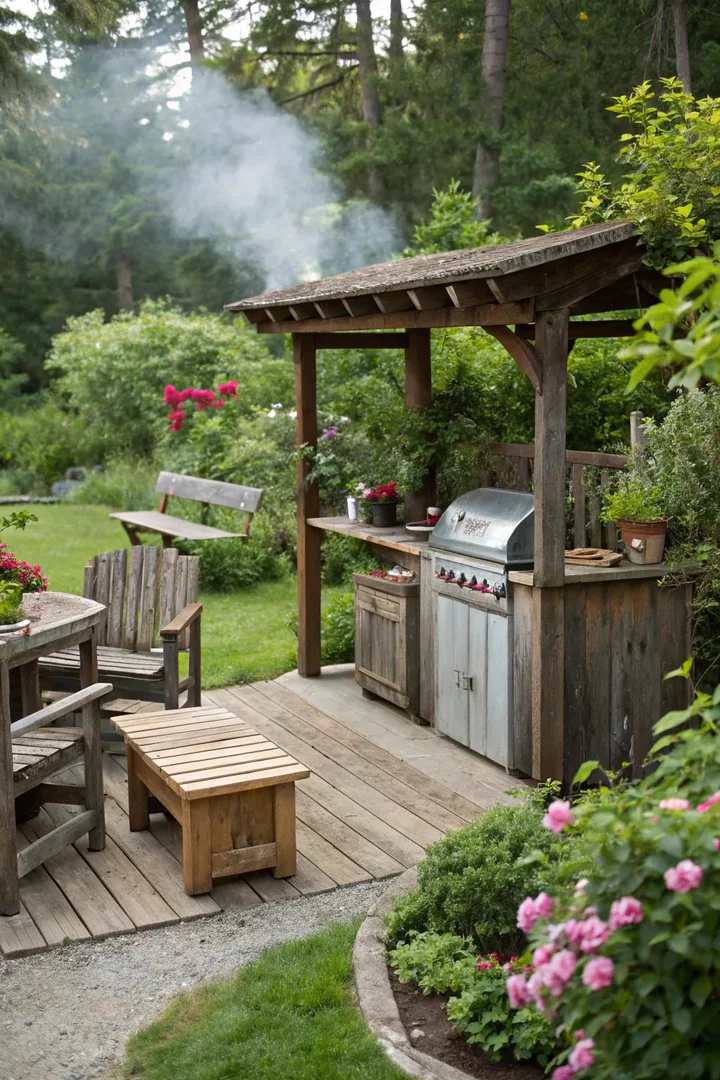
7. Rustic Cedar Corner Shelter
Building an L-shaped BBQ shelter into a patio corner uses two existing fence lines or walls as the back and side, reducing the framing needed to just two posts, a beam, and a roof. Construct the two open sides from 6 x 6 Western red cedar posts ($25 to $45 per 8-foot post) and cap with a shed-style cedar shake or metal roof that pitches away from the corner.
Cedar weathers to a silver-gray tone over 2 to 3 years without stain or sealant, producing a natural, aged look that blends with rustic and farmhouse-style backyards. Mount a cedar plank shelf ($15 to $25 in 2 x 10 cedar) along the back wall at counter height (36 inches) for resting plates, seasonings, and drinks while cooking. A corner shelter costs $400 to $800 in cedar lumber and roofing materials because it needs only two posts instead of four.
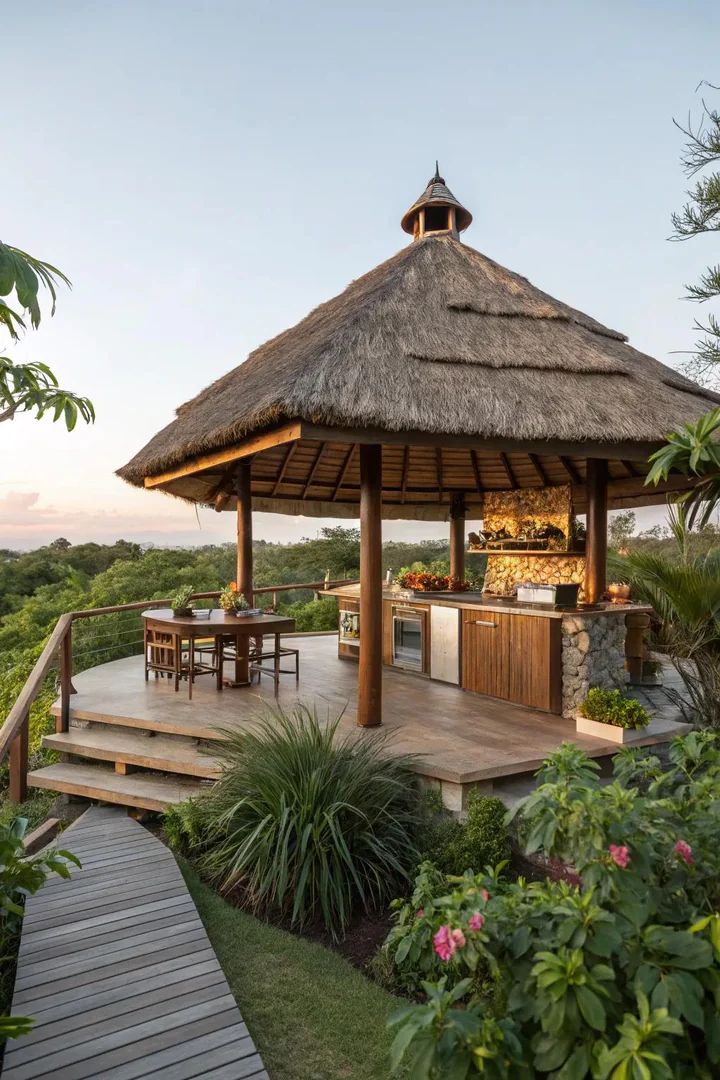
8. Raised Deck BBQ Platform
Building the BBQ shelter on a raised 8 x 10-foot deck platform (24 to 36 inches above ground) separates the cooking zone from the lawn, provides a level surface for the grill and prep table, and keeps the cook dry during rain by combining the deck with an overhead roof structure. Frame the deck on 4 x 4 posts with 2 x 8 joists on 16-inch centers, and extend the posts upward to support a shed-style roof 7 to 8 feet above the deck surface.
The raised platform also improves air circulation under the grill, which helps charcoal and kamado cookers maintain consistent temperatures. Add a 36-inch railing on the open sides for safety (required by code on decks 30 inches or more above grade) and mount the railing top cap at bar height (42 inches) to double as a standing counter for guests. A raised deck BBQ platform with roof costs $1,500 to $3,000 in pressure-treated lumber and roofing panels.
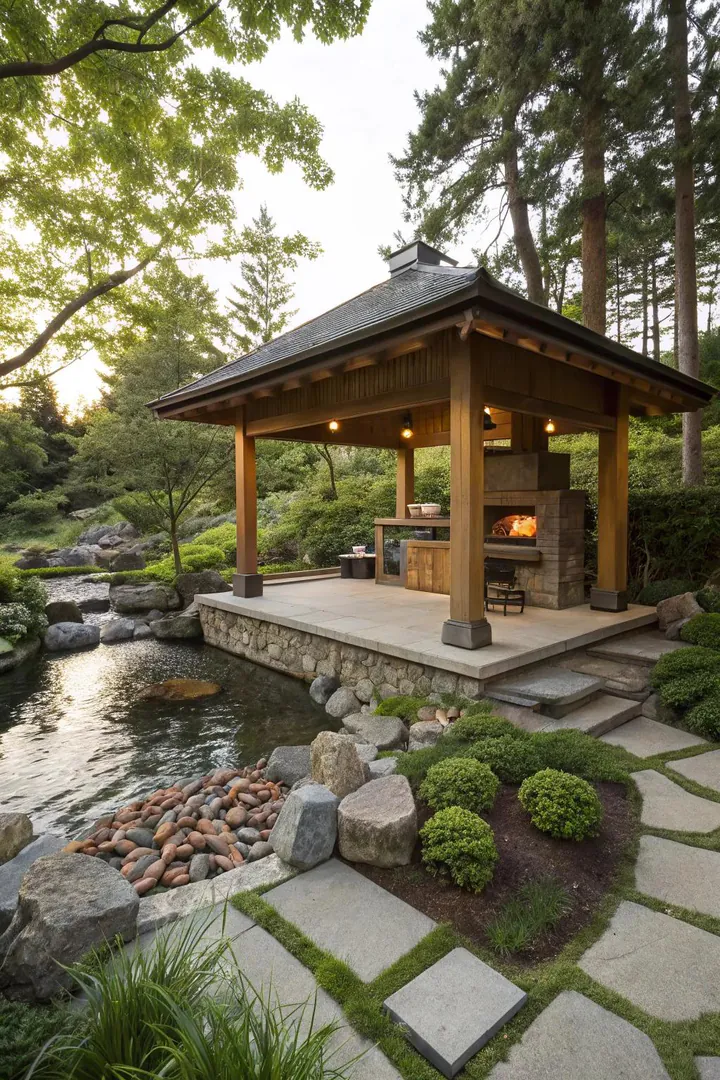
9. Japanese-Style Grill Pavilion
A small 8 x 8-foot pavilion with upturned eaves (modeled after a Japanese azumaya garden shelter) creates a calm, focused cooking space for tabletop hibachi, yakitori, and konro grills. Build the frame from 4 x 4 cedar or cypress posts with 2 x 6 rafters cut to a gentle upward curve at the eave ends (template the curve from a 1/4-inch plywood jig and cut with a jigsaw).
Top the curved rafters with 1 x 4 tongue-and-groove cedar ceiling boards for a finished underside, then cover with copper-tone or dark bronze standing seam metal panels. A Japanese-style pavilion costs $1,200 to $2,500 in materials. The compact 8 x 8 footprint fits in small backyards and side yards where larger structures would overwhelm the space. Add a low wooden bench or floor cushions inside for traditional floor-level dining around the grill.
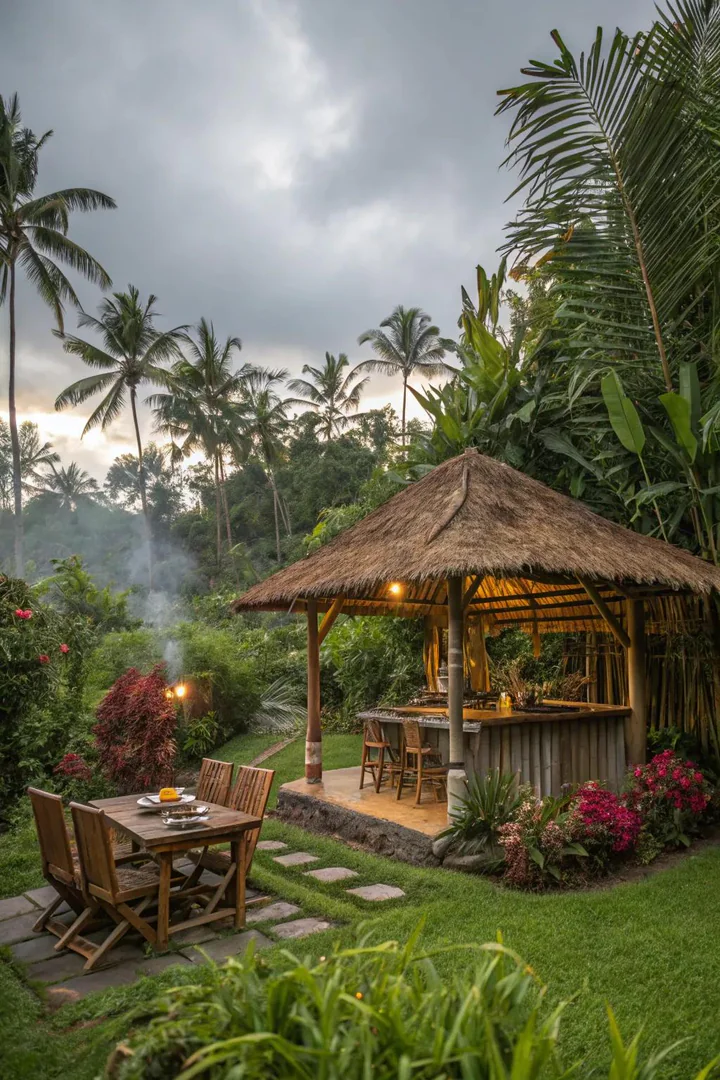
10. Bamboo Tiki BBQ Hut
A bamboo-frame BBQ hut with a synthetic thatch roof (Viro, Endureed, or Forever Bamboo synthetic thatch panels at $8 to $15 per square foot) creates a tropical resort atmosphere for grilling and entertaining. Build the frame from 3 to 4-inch diameter bamboo poles ($5 to $12 per 8-foot pole from a bamboo supplier or garden center) lashed together with galvanized wire or stainless steel bolts.
Synthetic thatch lasts 10 to 20 years without the fire risk, insect damage, or seasonal replacement that natural palm thatch requires. Add a bamboo bar counter ($200 to $500 for a pre-built 6-foot bamboo bar top from Backyard X-Scapes or Bamboo Creasian) across the front of the hut for serving food and drinks directly from the grill area. A 10 x 10-foot bamboo tiki BBQ hut costs $800 to $1,800 in bamboo poles, synthetic thatch, and bar components. Explore additional front yard and porch projects for more outdoor structure ideas.
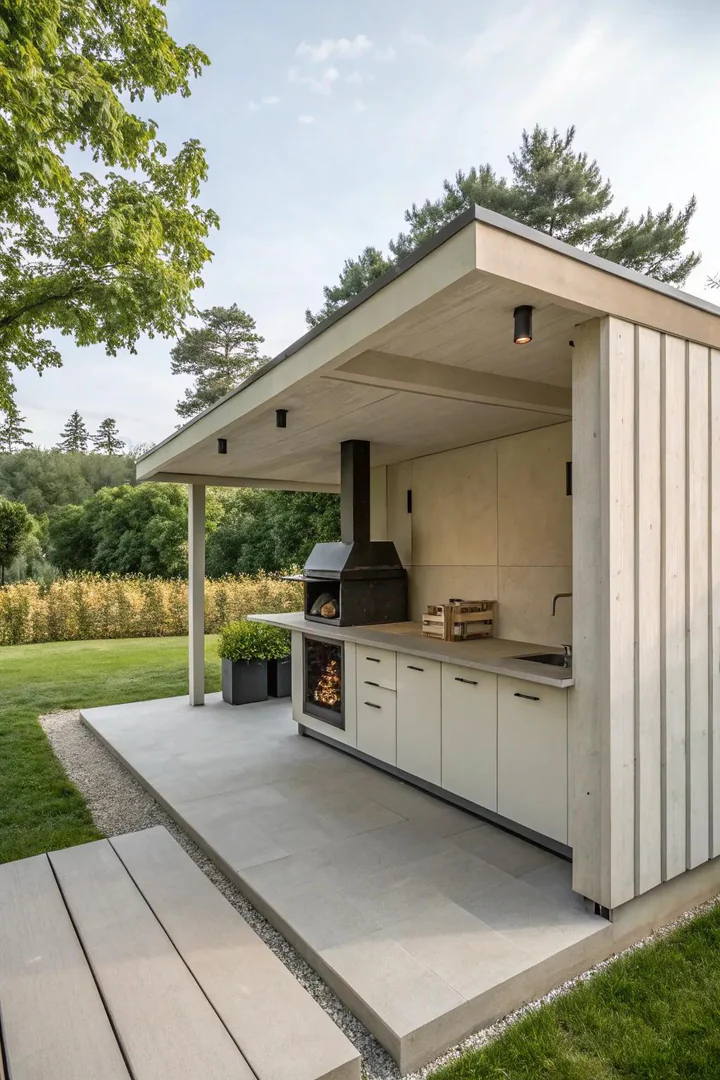
11. Scandinavian Minimalist BBQ Shelter
A white-painted or light-stained wood shelter with clean geometric lines, a flat roof, and no decorative trim produces a Scandinavian-modern cooking station that pairs with contemporary homes. Build the frame from 4 x 4 pine posts and 2 x 6 beams, paint with two coats of exterior semi-gloss (Benjamin Moore Decorator’s White or Sherwin-Williams Extra White), and top with a white membrane or white-painted metal flat roof.
Keep the design stripped to its essentials: four posts, one roof plane, and a single-shelf counter. No lattice, no brackets, no trim. The restraint is what creates the look. A 6 x 8-foot minimalist shelter costs $400 to $800 in lumber, paint, and roofing. Mount two or three IKEA SKADIS pegboard panels ($15 each) on the back wall for tool organization that matches the clean visual language.
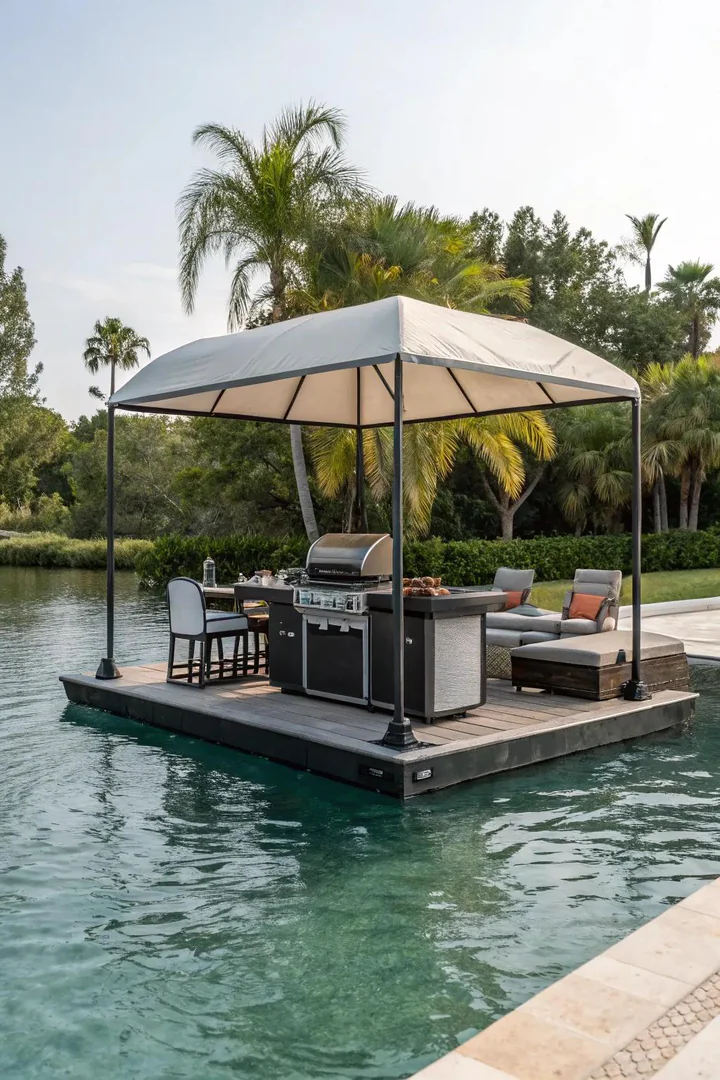
12. Cantilevered Floating Roof Shelter
A cantilevered BBQ roof extends from a house wall or fence without front support posts, creating an unobstructed cooking zone beneath. Bolt 2 x 10 or LVL (laminated veneer lumber) joists through the house wall into the interior floor framing or install a steel tube frame welded to a base plate and bolted to a concrete patio pad with 1/2-inch wedge anchors.
Maximum cantilever distance for a residential BBQ shelter is 4 to 6 feet using 2 x 10 joists on 16-inch centers, or up to 8 feet with a steel frame (2-inch square tube, 11-gauge wall thickness). Cover the cantilevered frame with lightweight corrugated polycarbonate or 26-gauge metal panels to keep dead load under 2 pounds per square foot. A cantilevered BBQ roof costs $500 to $1,500 in materials depending on span distance and frame type.
13. Glass-Panel BBQ Pavilion
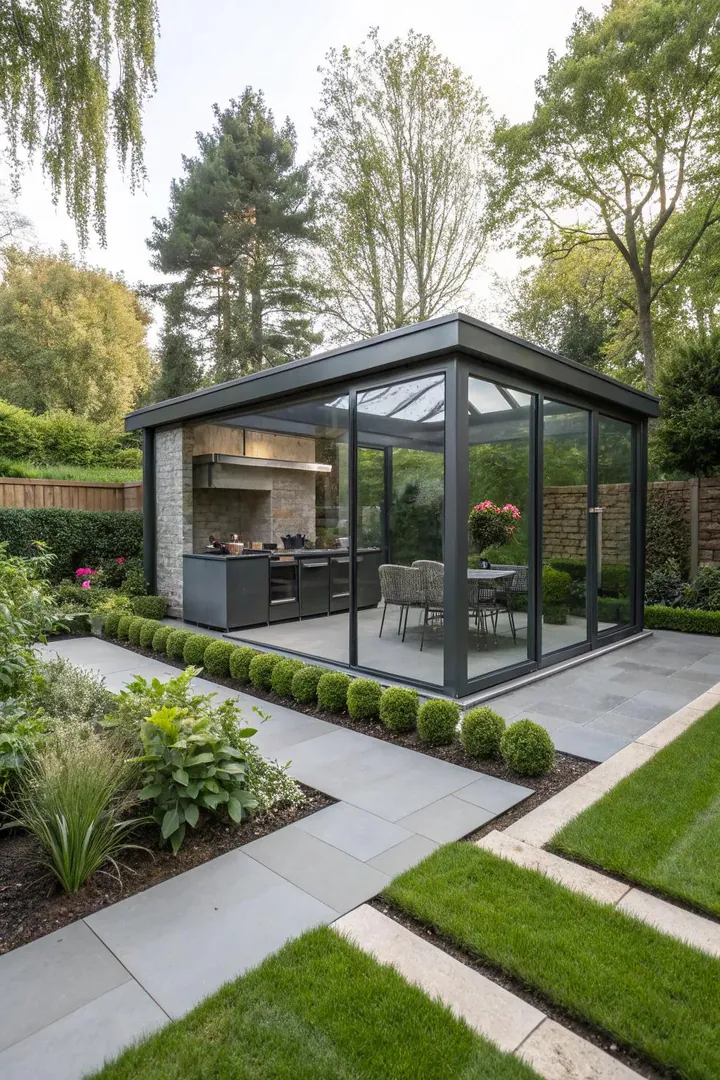
A steel-frame pavilion with tempered glass side panels (1/4-inch clear tempered glass, $6 to $12 per square foot from a local glass shop) blocks wind and rain on three sides while maintaining full visibility of the surrounding yard. Build the frame from 2-inch square steel tube (11-gauge, $3 to $5 per linear foot from a metal supplier) welded into a rectangular box structure and painted with rust-preventive primer and topcoat.
Set the glass panels in U-channel aluminum frames ($2 per linear foot) siliconed to the steel structure. Leave the front fully open or install a single sliding glass panel on a top-hung barn-door track for a closable cooking enclosure. A 10 x 10-foot glass-panel BBQ pavilion costs $2,000 to $4,000 in steel, glass, and hardware. The glass walls keep cold wind off the cook during fall and winter grilling sessions without blocking natural light or sightlines to the yard.
14. Shipping Container BBQ Shelter
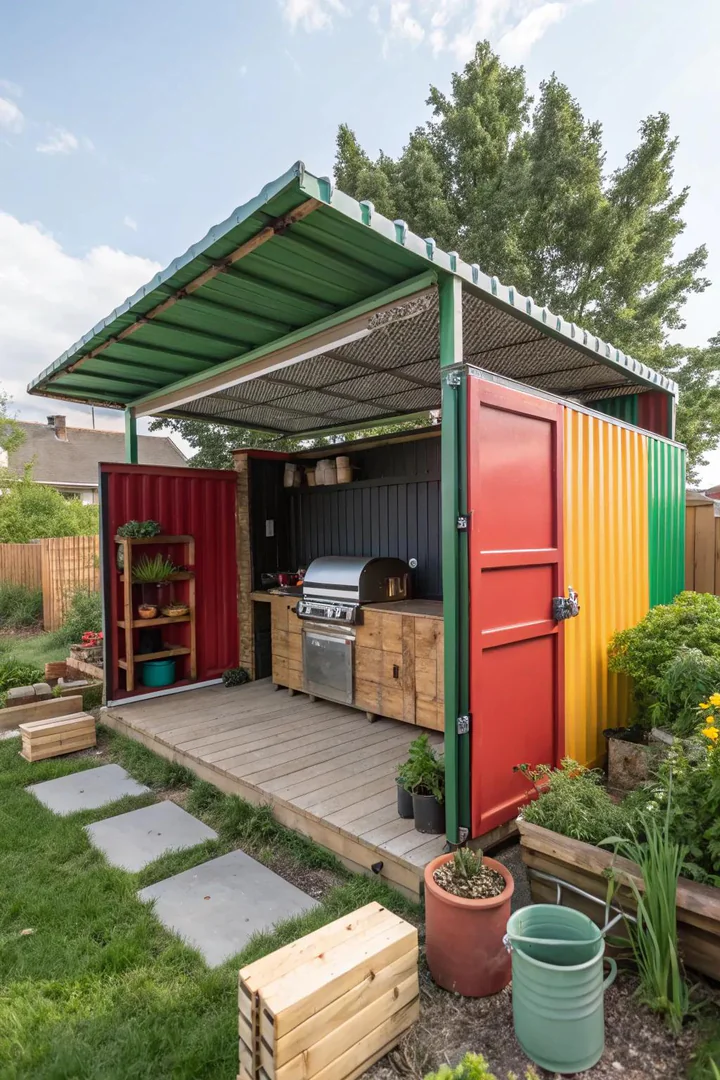
A 20-foot shipping container ($1,500 to $3,000 for a used container in good condition from a local container depot) cut open on one long side with a plasma cutter or angle grinder becomes a weatherproof BBQ shelter with built-in steel walls, a watertight roof, and a concrete floor. Reinforce the cut opening with a welded steel header beam (4-inch C-channel or 3 x 3 square tube) to prevent the container from losing structural rigidity.
Mount the grill, smoker, and prep counter inside the container against the back wall, and add a fold-down bar counter along the cut-open side for serving. Paint the exterior with Rust-Oleum Protective Enamel in any color ($12 per quart) and the interior with heat-resistant stove paint (Stove Bright, $15 per can) in matte black for a clean, industrial cooking space. A fully outfitted container BBQ shelter costs $2,000 to $5,000 including the container, cutting, welding, paint, and counter surfaces. Browse all outdoor projects at The Designers Company or check out outdoor TV setup ideas for entertainment features next to your grill, or see detached patio designs for standalone outdoor living spaces.
How to Build an Outdoor BBQ Shelter
1. Choose a Location and Check Clearances
Position the BBQ shelter at least 10 feet from the house, garage, or any combustible structure per NFPA (National Fire Protection Association) guidelines for outdoor cooking appliances. Verify local zoning setback requirements (typically 5 to 10 feet from property lines for accessory structures) and pull a building permit if the shelter exceeds 120 to 200 square feet (the threshold varies by municipality). Place the shelter on a level concrete slab, paver patio, or compacted gravel pad rated for the grill’s weight (most cart grills weigh 100 to 300 pounds).
2. Set Footings and Posts
Dig post holes 36 to 42 inches deep at each corner of the shelter footprint. Set 4 x 4 or 6 x 6 posts in concrete footings (Quikrete 5000, two to three 80-pound bags per hole) and level plumb in both directions. Allow 24 to 48 hours of concrete cure time before loading. For a shed-style shelter attached to the house, install a pressure-treated ledger board on the house wall with 1/2-inch lag screws every 16 inches and flashing above the ledger to prevent water intrusion.
3. Frame the Roof and Add Ventilation
Cut 2 x 6 or 2 x 8 rafters to the roof pitch (2/12 minimum for water runoff), notch bird’s-mouth bearing cuts, and attach to the beam and ledger with hurricane ties. Run 2 x 4 purlins across the rafters on 24-inch centers and install the roofing material (metal panels, polycarbonate, shingles, or thatch). Leave a 6 to 12-inch gap between the top of the back wall and the roof line for smoke ventilation, or install a ridge vent or gable-end exhaust fan to pull smoke out of enclosed shelters.
4. Add Counters, Storage, and Utilities
Build a prep counter from pressure-treated 2 x 4 framing topped with a granite remnant slab ($10 to $20 per square foot from a local stone fabricator’s scrap pile), butcher block, or stainless steel sheet. Add under-counter storage with weather-resistant outdoor kitchen cabinet boxes (NewAge Products, $200 to $500 per base unit) or build simple open shelves from 2 x 10 cedar boards. Run a dedicated GFCI electrical outlet (20 amp, at least 6 feet from any gas connection per NEC code) for powering pellet grills, electric smokers, or blenders.
5. Finish and Fireproof
Install a stainless steel or cement board heat shield ($20 to $40 for a 24 x 36-inch panel) on the wall directly behind the grill to protect wood framing from radiant heat. Apply two coats of exterior stain or paint to all exposed wood surfaces. Mount a fire extinguisher (5-pound ABC dry chemical, $25 to $40 from Home Depot or Amazon) within arm’s reach of the cooking station. Test the grill under the shelter at full heat for 30 minutes before the first cook to verify that smoke vents properly and no hot spots develop on the roof or walls.
BBQ Shelter Material Comparison
| Shelter Type | Footprint | Material Cost | Build Time (DIY) | Best For |
|---|---|---|---|---|
| Open-Front Shed | 6 x 8 ft | $600 to $1,200 | 2 to 3 days | Wind and rain protection |
| Half-Covered Pergola | 12 x 16 ft | $1,000 to $2,000 | 3 to 4 days | Combined grill and dining |
| Timber Gazebo | 10 x 12 ft | $1,500 to $3,000 | 4 to 6 days | Year-round outdoor kitchen |
| Stone Pillar Shelter | 10 x 14 ft | $2,500 to $5,000 | 5 to 7 days | Permanent, high-end finish |
| Polycarbonate Canopy | 10 x 12 ft | $540 to $1,080 | 1 to 2 days | Rain cover with full light |
| Shipping Container | 8 x 20 ft | $2,000 to $5,000 | 3 to 5 days | Industrial, all-weather |
Frequently Asked Questions
How far should a BBQ shelter be from the house?
NFPA and most local fire codes recommend a minimum 10-foot clearance between any open-flame cooking appliance and a combustible structure (wood-frame house, garage, fence, or deck railing). Gas grills produce less radiant heat than charcoal or wood-burning smokers, but the 10-foot rule applies to all fuel types. Check your local building code and HOA rules for specific setback requirements because some jurisdictions require 15 to 25 feet for permanent outdoor kitchen structures.
Do you need a permit for a BBQ shelter?
Most municipalities require a building permit for any roofed structure over 120 to 200 square feet (the threshold varies by jurisdiction). Attached structures (shelters bolted to the house) almost always need a permit regardless of size because they modify the house structure. Freestanding shelters under the permit threshold may still need zoning approval if they sit within required setback distances from property lines. Permit fees range from $75 to $400 depending on the project size and your local building department.
What is the best roof material for a BBQ shelter?
Corrugated or R-panel metal roofing ($1.50 to $3.50 per square foot) is the best all-around choice because metal resists fire from stray sparks, sheds rain instantly, lasts 30 to 50 years, and installs quickly with self-drilling screws. Polycarbonate panels ($2 to $4 per square foot) are the best option when you want rain protection with full daylight. Avoid wood shingles or any combustible roofing material directly above a charcoal or wood-fired grill because airborne embers can ignite dry cedar or pine shakes.
How do you ventilate an enclosed BBQ shelter?
Leave a minimum 6 to 12-inch gap between the top of the back wall and the roof plane so smoke rises and exits through the opening naturally. For fully enclosed shelters, install a gable-end exhaust fan (Broan or Air King, 8 to 10-inch inline duct fan, $80 to $150) wired to a switch near the grill. Position the exhaust opening on the leeward side (away from prevailing wind direction) so wind creates a natural suction that pulls smoke out of the shelter rather than pushing it back inside.
Can you put a gas grill under a covered structure?
Natural gas and propane grills operate safely under a covered structure if the roof is at least 7 to 8 feet above the grill surface (grate level, not lid-closed height), combustible materials like wood framing are at least 36 inches away from the grill on all sides, and the structure has adequate cross-ventilation on at least two sides. Never operate a gas grill in a fully enclosed space without mechanical ventilation because propane and natural gas can accumulate to explosive concentrations in sealed rooms. Keep the propane tank outside the shelter footprint and run the hose through an open side.