
Polymer Clay Kitchen Wall Art Ideas: 14 Creative Designs to Make
Polymer clay kitchen wall art ideas bring handcrafted, three-dimensional decoration into the kitchen using an oven-baked modeling clay that costs $2 to $4 per 2-ounce block, bakes at 275 degrees Fahrenheit in a standard home oven, and hardens into a durable, lightweight, paintable material. Polymer clay (sold as Sculpey III, Fimo Soft, Cernit, and Premo Sculpey at craft stores and Amazon) can be shaped into flat wall tiles, framed relief panels, sculptural food replicas, botanical wall hangings, and custom name plaques that personalize the kitchen in a way that mass-produced wall art cannot. Below are 14 polymer clay wall art projects with specific clay brands, tools, techniques, and display methods, followed by a how-to beginner guide, a comparison table, and FAQs on baking, sealing, and hanging.
1. Abstract Textured Wall Tiles
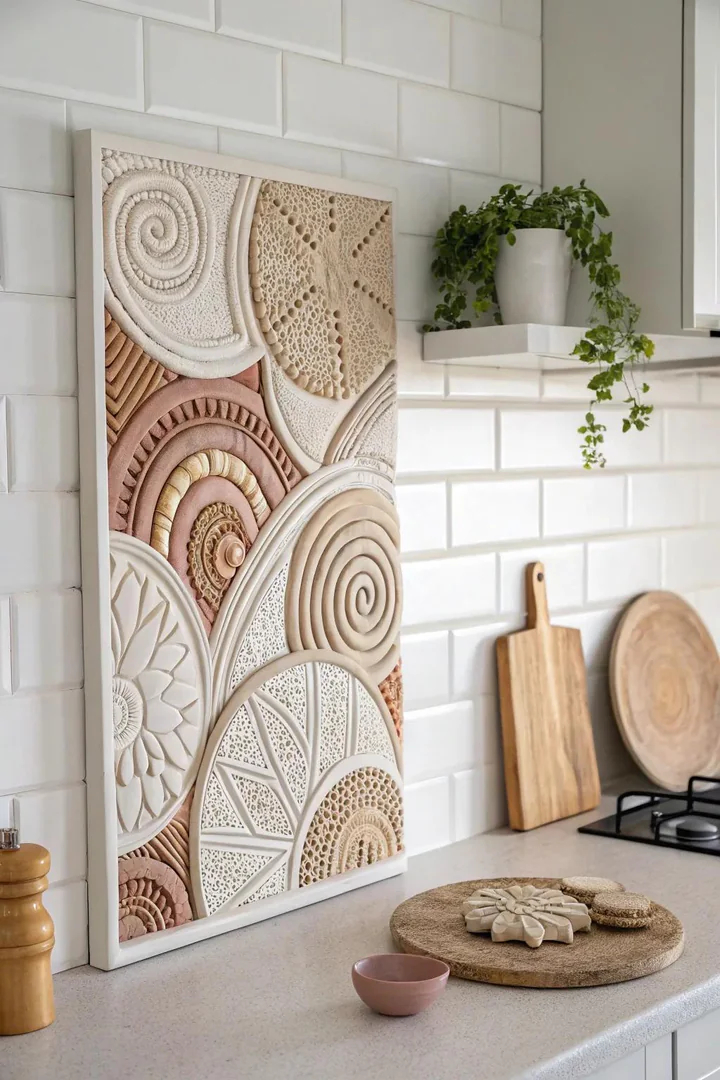
Rolling Premo Sculpey ($3 to $5 per 2-ounce block in white, ecru, or beige) into 1/4-inch-thick slabs and pressing texture tools (lace fabric, burlap, leaf skeletons, rubber texture mats from Lisa Pavelka Texture Stamps, $8 to $12 per sheet) into the surface creates abstract textured wall tiles that read as handcrafted ceramic art. Cut the textured slab into 4-by-4-inch or 6-by-6-inch squares with a craft knife, bake at 275 degrees Fahrenheit for 30 minutes per 1/4-inch thickness, and mount on the kitchen wall in a grid of 4 to 9 tiles.
A 3-by-3 grid of 4-inch textured tiles covers a 12-by-12-inch wall section and creates a focal point above a coffee station, beside a window, or on the backsplash wall between the countertop and upper cabinets. Finish the baked tiles with Sculpey Glaze ($6 per 1-ounce bottle, satin or gloss) or leave them matte for a raw, organic aesthetic. Mount the tiles on the wall with 3M Command Picture Hanging Strips ($5 for a 4-pack) for a damage-free, rental-safe installation that removes cleanly.
2. Miniature 3D Terrain Dioramas
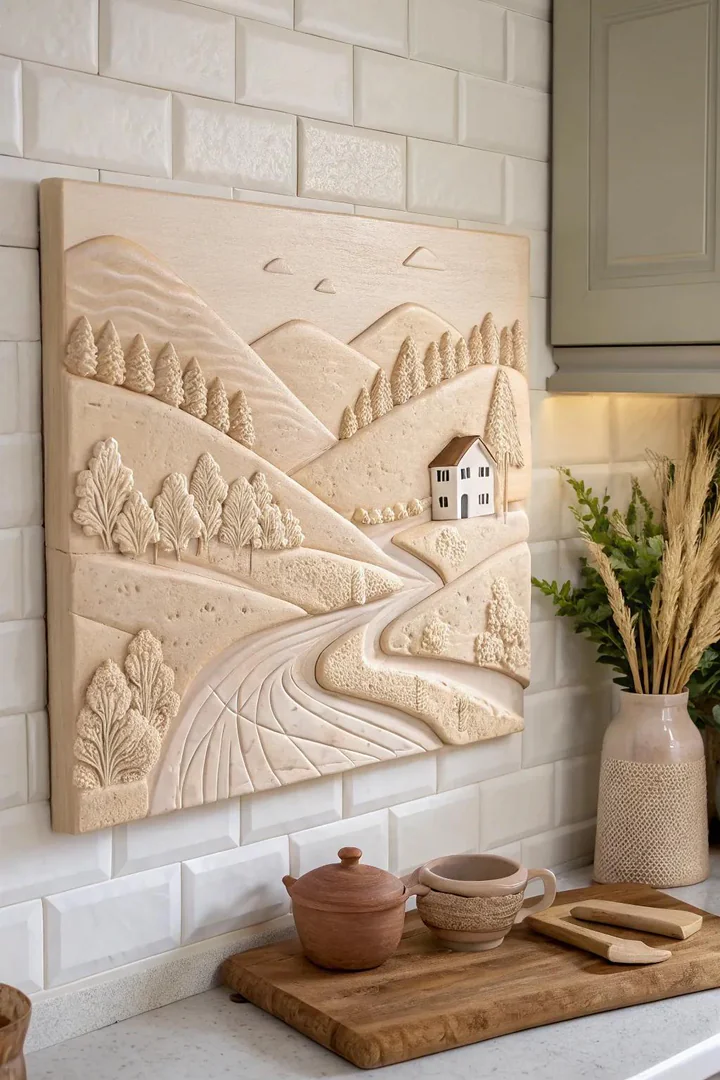
Building a miniature terrain diorama (rolling hills, tiny cottages, trees, gardens, a winding road) in polymer clay on a flat backing board (a 5-by-7-inch or 8-by-10-inch wooden panel, $3 to $5 from a craft store) creates a three-dimensional diorama that hangs on the kitchen wall like a framed painting but with sculptural depth. Use Fimo Soft in greens, browns, blues, and white ($2 per 2-ounce block) to build terrain layers directly on the wooden panel.
Apply the clay to the panel in thin layers (1/8 inch thick for background hills, 1/4 inch thick for foreground details) and bake the entire panel at 265 degrees Fahrenheit for 45 minutes. A miniature terrain diorama kitchen art piece brings an outdoor scene into a windowless kitchen or a kitchen where the window faces a brick wall or parking lot, providing a visual “escape” that the real view cannot offer. Add tiny details (a red mailbox, a white picket fence, a golden wheat field) with acrylic paint ($1 per tube from Apple Barrel at Walmart) after baking and cooling.
3. Whimsical Animal Wall Hangings
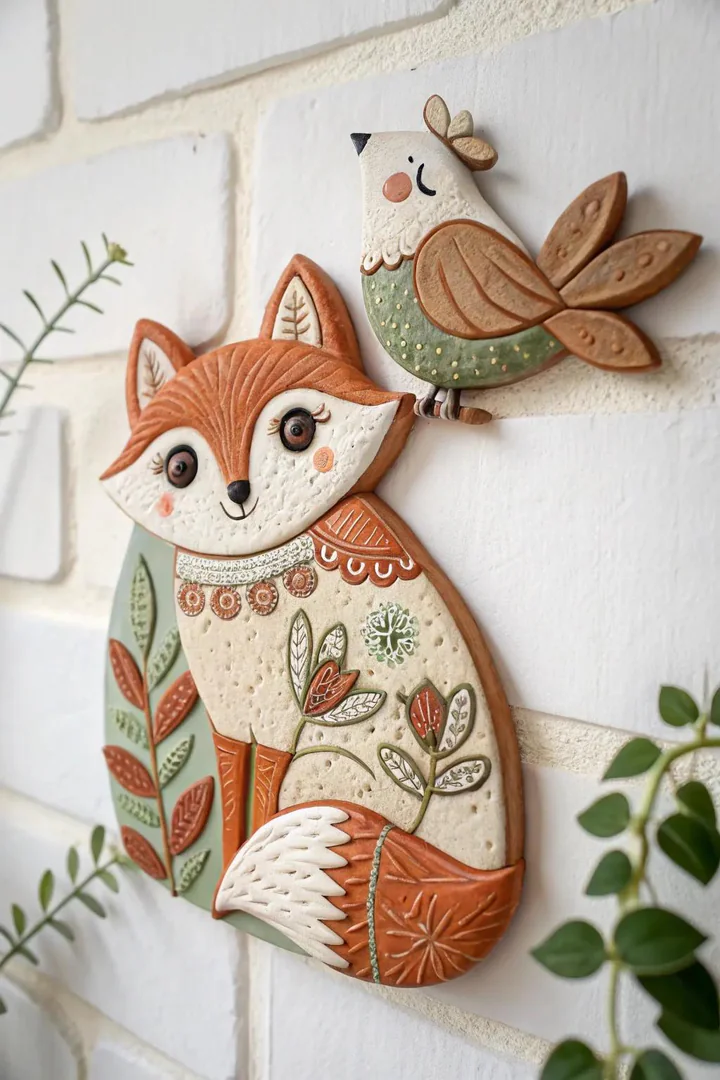
Sculpting whimsical kitchen animals (a fat rooster, a contented cow, a curious cat, a plump chicken, a sleeping dog, a perched owl) from Sculpey III ($2 per 2-ounce block in assorted colors) and mounting them on individual wooden plaques ($2 each for 4-by-6-inch birch rounds from a craft store) creates a farmhouse-style gallery wall that adds personality and humor to the kitchen. Each animal sculpture takes 30 to 60 minutes to shape, bakes in 20 to 30 minutes, and mounts on the plaque with E6000 craft adhesive ($5 per 2-ounce tube).
Arrange 3 to 5 animal plaques in a vertical column beside the pantry door, in a horizontal row above the window, or in an asymmetric cluster on a blank wall. A matching set (all farm animals, all woodland creatures, or all kitchen-themed animals like a pig, cow, and chicken) tells a cohesive story. Hand-paint details (eyes, spots, feathers, whiskers) with a fine-tip acrylic paint pen ($3 from Posca) after baking for precise, permanent lines that do not smudge. Browse more wall art display strategies at painted kitchen cabinet ideas for coordinating art with cabinet colors.
4. Colorful Floral Wall Panels
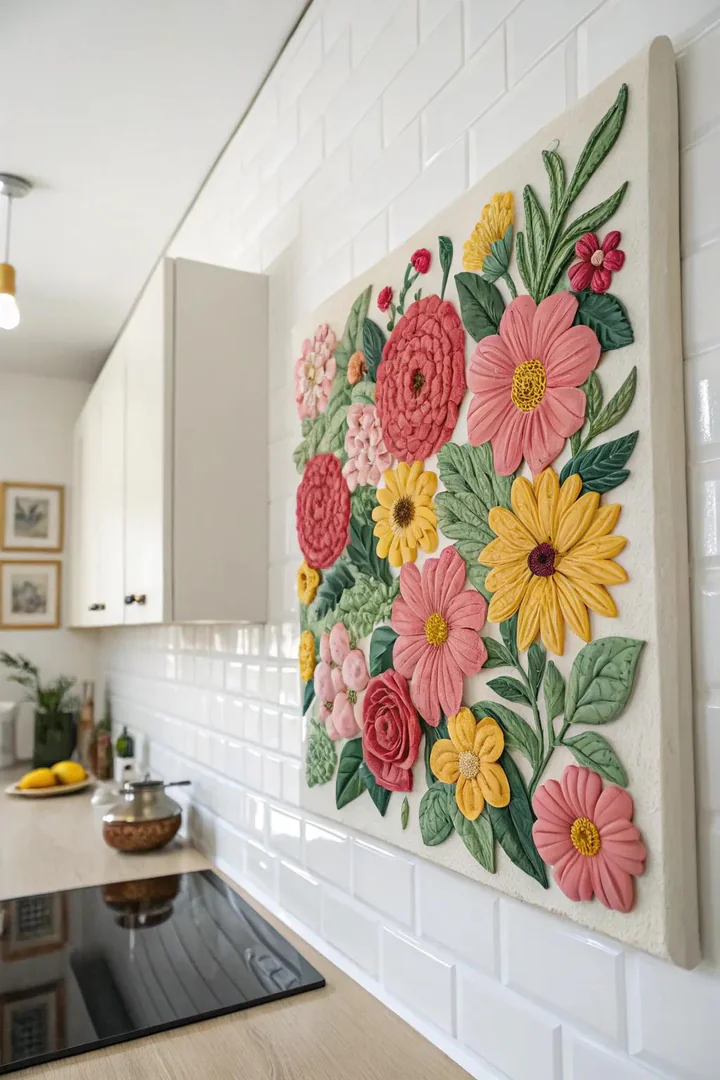
Building three-dimensional flowers (roses, sunflowers, daisies, peonies, lavender sprigs, succulents) from polymer clay and arranging them on a flat panel or inside a shadow-box frame creates a permanent floral display that never wilts, never needs water, and brings garden color into the kitchen year-round. Roll petal shapes from Cernit Number One ($3 per 2-ounce block in red, pink, yellow, white, and purple), layer them around a central bud, and curl the edges for a natural, lifelike petal shape.
A 5-by-7-inch shadow-box frame ($8 to $15 from Michael’s or IKEA RIBBA) filled with 5 to 8 polymer clay flowers in coordinated colors (all pastels, all warm tones, or all white-and-green) creates a spring-inspired wall piece. Attach the baked flowers to the frame backing with E6000 adhesive. A larger 11-by-14-inch frame ($15 to $25) holds a full floral arrangement (12 to 20 flowers plus greenery leaves) that reads as a custom art installation rather than a craft project.
5. Storybook Kitchen Scenes
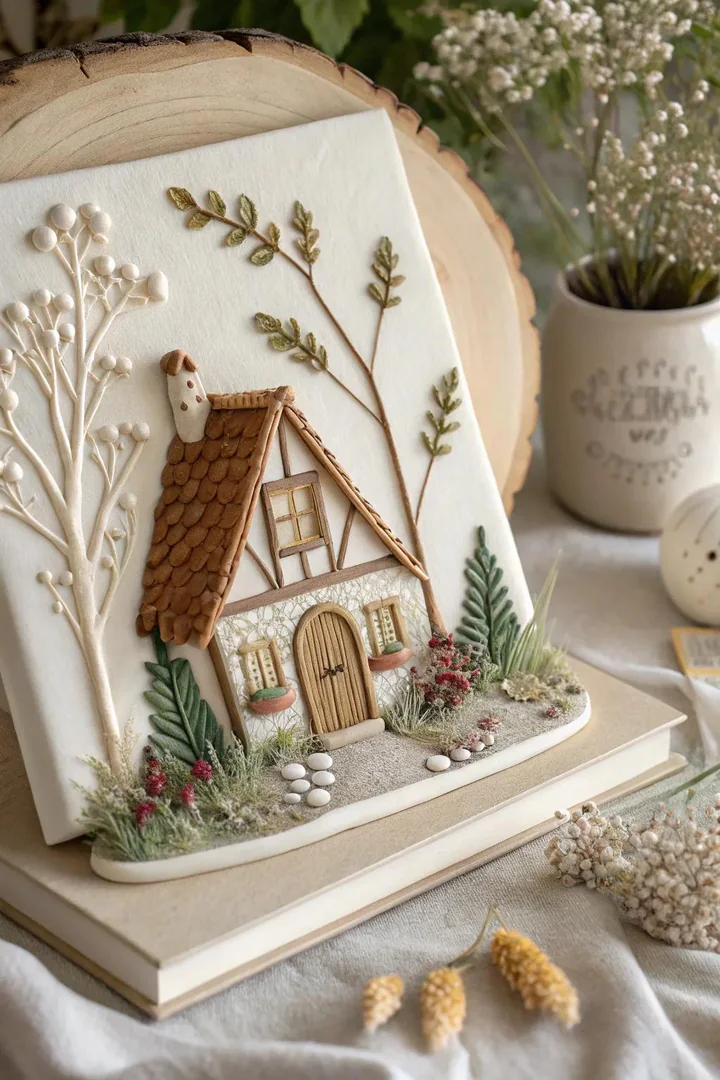
Creating a storybook scene (a bakery storefront, a grandmother’s kitchen, a garden tea party, a Tuscan vineyard, a Paris cafe) in polymer clay on a wooden panel combines illustration, sculpture, and narrative into a single art piece that becomes a conversation starter on the kitchen wall. Build the scene in layers: flat background (sky, walls, floor) pressed onto the panel, then mid-ground details (furniture, windows, shelves) in medium relief, then foreground elements (characters, food, flowers) in full 3D projection.
A storybook scene takes 3 to 5 hours to build, bakes for 45 to 60 minutes at 275 degrees Fahrenheit, and measures 8 by 10 inches or 11 by 14 inches on a wooden panel. Use Premo Sculpey for the structural elements (Premo is stronger after baking than Sculpey III and resists breakage during handling and hanging) and Sculpey III for surface details (Sculpey III blends colors more easily for subtle shading). Frame the finished scene in a deep shadow-box frame to protect the 3D elements from dust and accidental contact.
6. Tactile Mixed-Media Wall Panels
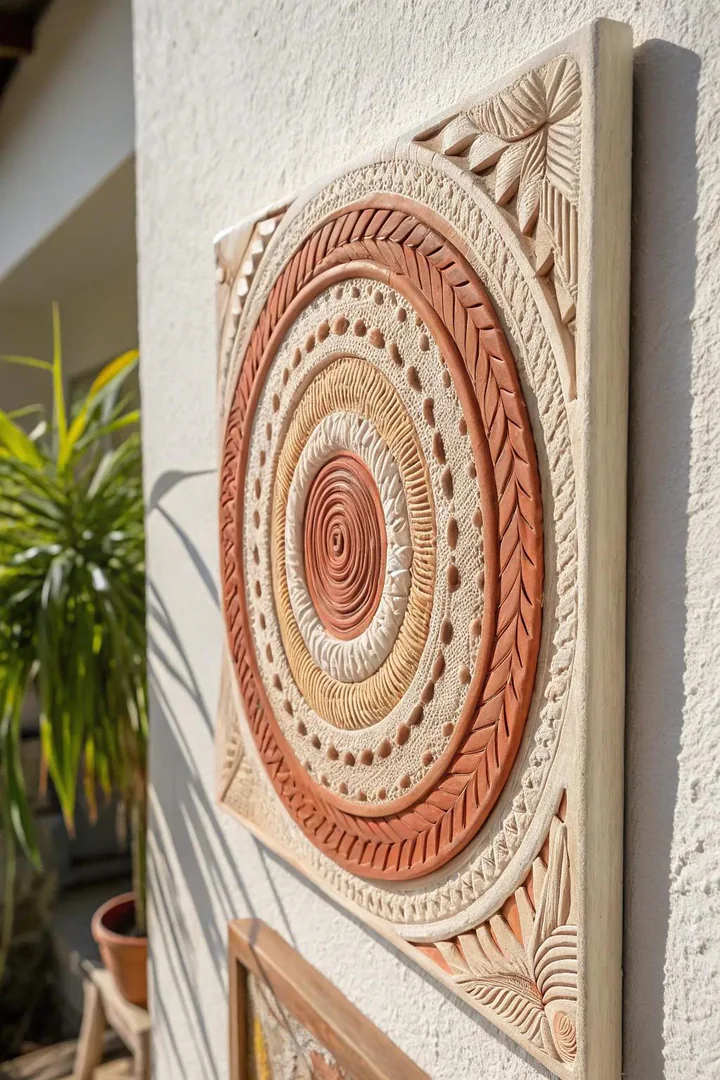
Combining polymer clay with other materials (wire, fabric, dried flowers, beads, metal leaf, sand, coffee beans) on a single panel creates mixed-media wall art with varied textures that invite touching. Press dried lavender sprigs, whole peppercorns, or dried star anise into the clay surface before baking to embed real kitchen spices and botanicals into the art. The embedded items bake safely at 275 degrees Fahrenheit and bond permanently with the clay during curing.
A mixed-media panel on a 9-by-12-inch canvas board ($3 from a craft store) might combine a polymer clay border (textured with a rolling pin and lace), a center panel of embedded coffee beans forming a mosaic pattern, and wire-wrapped dried herb bundles mounted at the top. Seal the entire panel with Mod Podge Matte ($8 per 16-ounce bottle) to protect the mixed materials from kitchen moisture and grease. Mount the panel on the wall between the coffee station and the spice cabinet where the kitchen-ingredient theme connects visually to the surrounding functional zone.
7. Kitchen-Themed Decorative Tiles
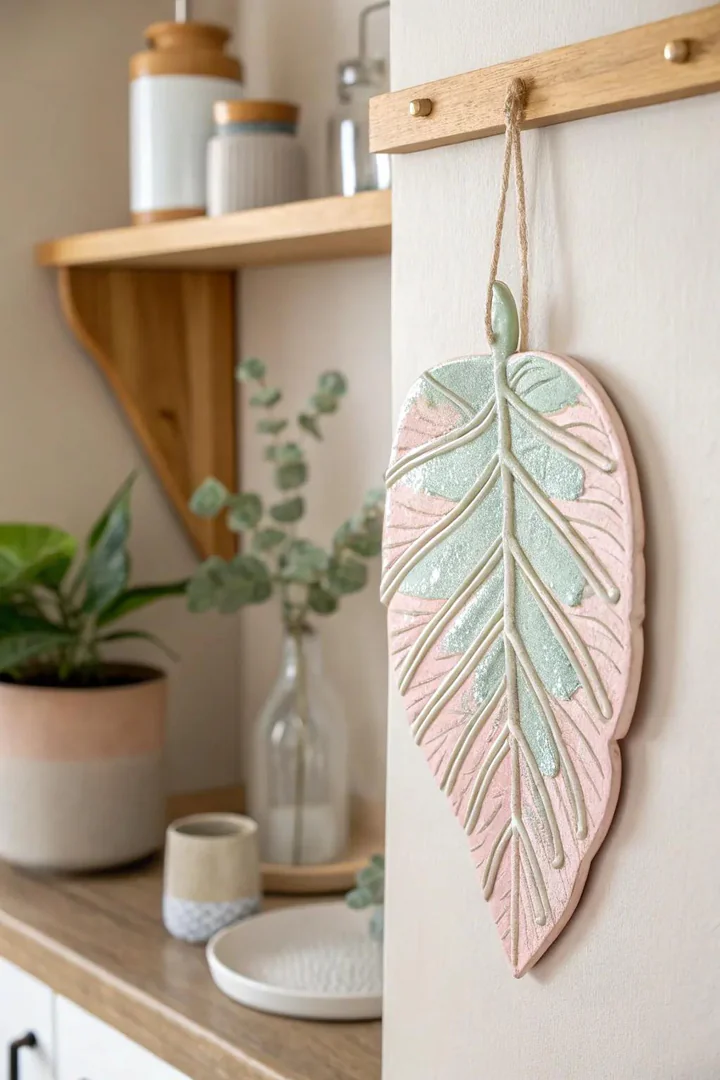
Sculpting kitchen-themed bas-relief tiles (a rolling pin, a whisk, a cupcake, a coffee cup, a wine bottle, a chef’s hat, a cutting board with vegetables) from polymer clay and arranging them in a row or grid on the wall creates a themed gallery that celebrates cooking as art. Roll a flat 4-by-4-inch tile from white or cream clay, then sculpt the kitchen item in low relief (1/8 to 1/4 inch raised above the tile surface) directly on the tile face.
Bake each tile on a flat ceramic baking tile ($5 from a pottery supply store) to prevent warping. Paint the relief design with acrylic paint (a single contrasting color like navy, terracotta, or forest green against the white clay base creates a Wedgwood-style cameo effect). A row of 5 to 7 kitchen-themed tiles mounted on a reclaimed wood plank ($5 to $10 for a 36-inch barn board from a salvage yard) creates a rustic-modern wall display. Space the tiles 1 to 2 inches apart on the plank and secure with E6000 adhesive.
8. Seasonal Theme Displays
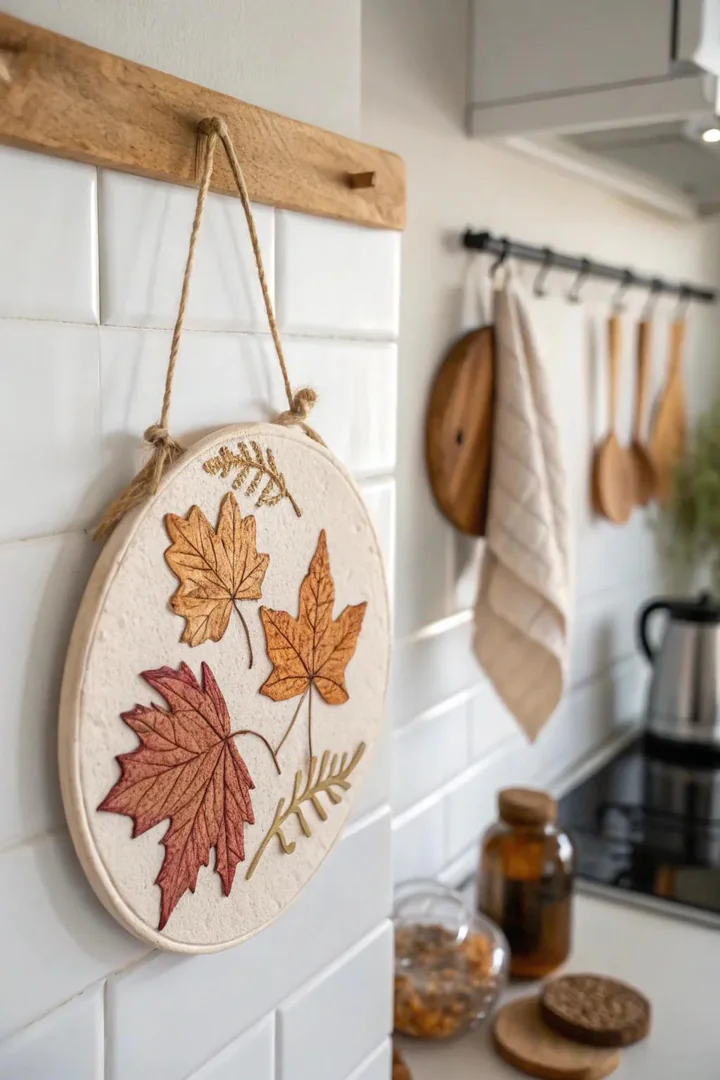
Creating 4 seasonal wall art sets (spring flowers and birds, summer fruits and suns, autumn leaves and pumpkins, winter snowflakes and evergreens) and rotating them on the kitchen wall every 3 months keeps the kitchen decor fresh and aligned with the season. Each seasonal set consists of 3 to 5 small sculptures (2 to 3 inches each) mounted on a shared wooden display rail ($10 for a 24-inch picture ledge from IKEA MOSSLANDA).
Store the off-season sets in a labeled box (wrapped in tissue paper to prevent dust and surface contact). A full 4-season collection requires 12 to 20 small sculptures total, representing a 6-to-10-hour crafting project spread across several weekends. Use Fimo Effect ($3 per block, available in metallic, glitter, and translucent finishes) for seasonal sparkle: metallic gold for autumn leaves, glitter white for winter snowflakes, translucent yellow for spring flower petals, and metallic copper for summer sun rays. Seasonal rotation pairs well with a full kitchen refresh; see ideas for remodeling a small kitchen for compact spaces where seasonal art swaps make the biggest visual difference.
9. Culinary Quote Plaques
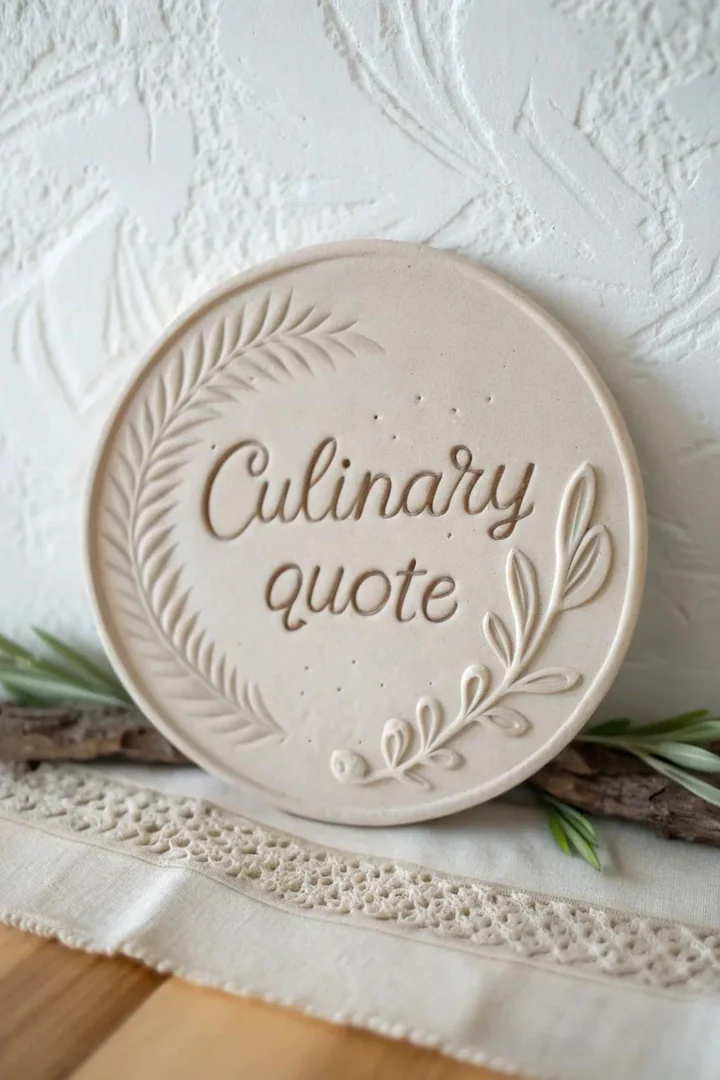
Pressing letter stamps (Sculpey Alphabet Stamp Set, $10 for a 36-piece set) or metal letter stamps ($15 for a 27-piece set from Amazon) into a flat polymer clay slab imprints a favorite kitchen quote, recipe, or family motto into a permanent wall plaque. Popular kitchen quotes: “Eat well, live simply, laugh often,” “Seasoned with love,” “Gather here,” “The kitchen is the heart of the home.” A 4-by-8-inch plaque holds a single-line quote; a 6-by-10-inch plaque holds a 2-to-3-line quote.
Roll the clay slab to 1/4-inch thickness, stamp the letters firmly and evenly (practice on a scrap piece first), cut the slab to the desired shape (rectangle, oval, or organic free-form), and bake at 275 degrees Fahrenheit for 30 minutes. Rub acrylic paint into the stamped letter impressions with a fingertip, then wipe the flat surface clean with a damp cloth so paint remains only in the recessed letters, creating a contrasting, readable inscription. Drill a small hole (1/8-inch drill bit) at the top of the baked plaque for a hanging cord or ribbon.
10. Color Palette Exploration Tiles
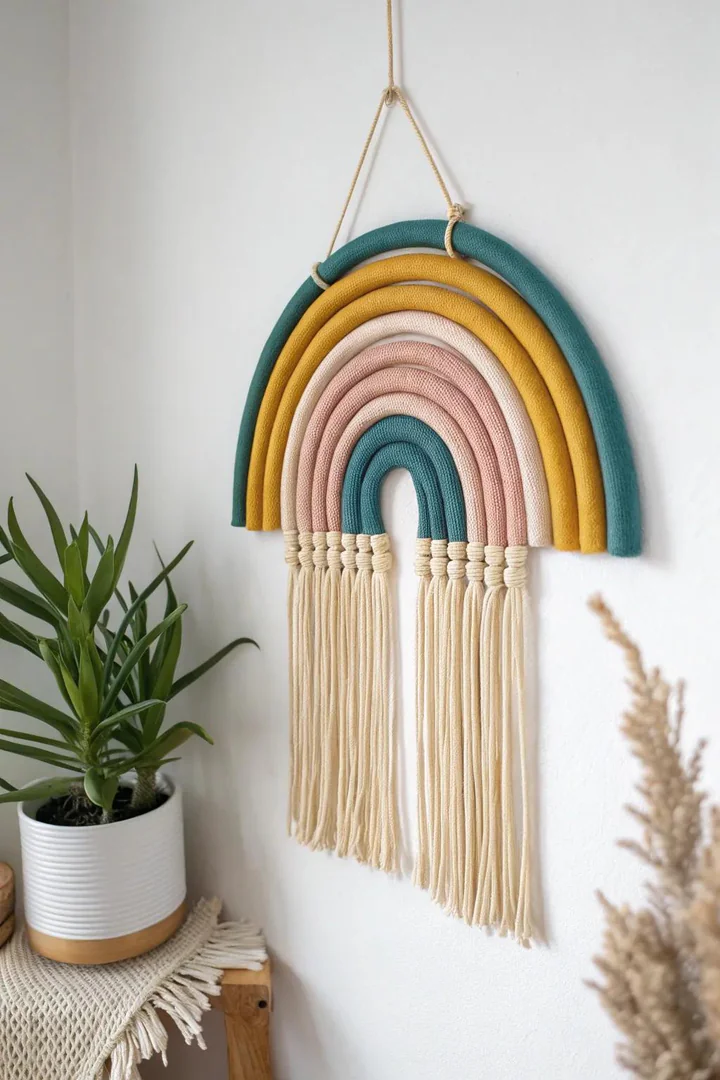
Mixing custom clay colors by blending 2 to 3 base colors (knead a pinch of blue into white for sky blue, mix equal parts red and white for coral, blend yellow and a touch of green for chartreuse) and pressing the blended colors into a grid of 1-by-1-inch mini tiles creates a decorative color palette display that doubles as a design reference for the kitchen’s accent colors. A 4-by-6 grid of 24 color tiles mounted on a 6-by-8-inch frame creates a paint-chip-inspired wall art piece.
Match the clay color palette to the kitchen’s existing color scheme: blues and whites for a coastal kitchen, sage greens and creams for a farmhouse kitchen, terracotta and gold for a Mediterranean kitchen. The color palette display reinforces the kitchen’s design story and reads as an intentional, curated art installation. Use Premo Sculpey Accents ($4 per block, available in granite, opal, and peacock pearl effects) for tiles with built-in shimmer and depth that flat colors cannot achieve.
11. Nature-Inspired Botanical Reliefs
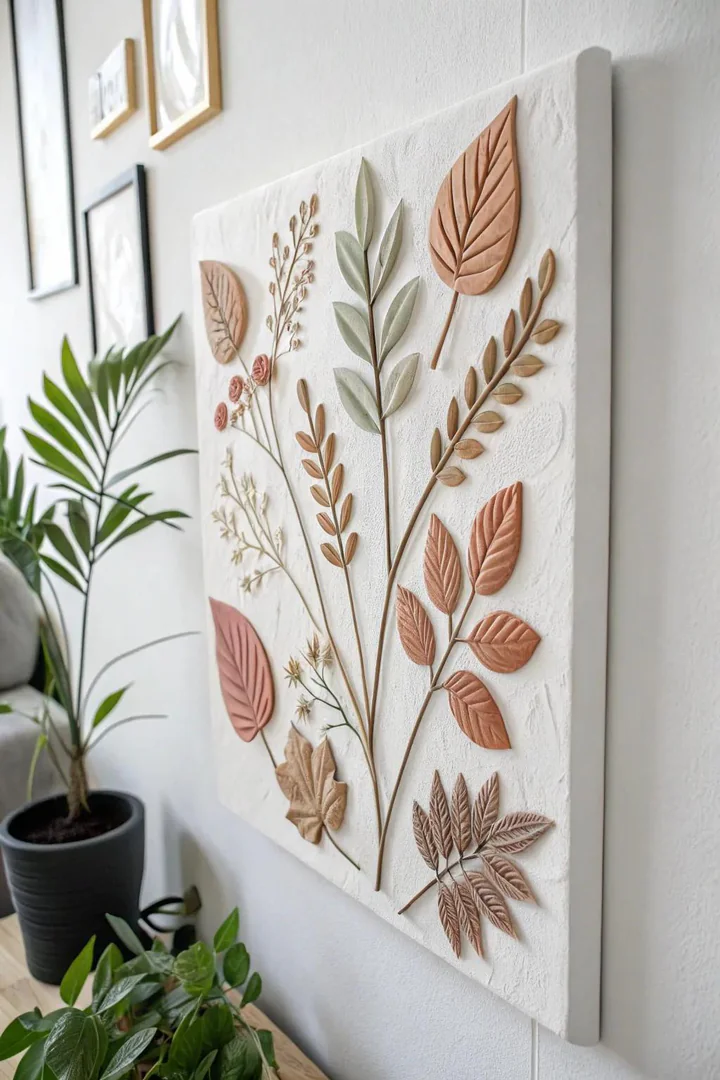
Pressing real leaves, ferns, and flower petals into a flat polymer clay slab creates a botanical impression (a fossil-like imprint) that captures the veining, texture, and shape of the plant in permanent clay form. Collect large leaves (monstera, fern fronds, maple, oak, ginkgo), press them firmly into a 1/4-inch-thick clay slab, peel away the leaf, and bake the imprinted slab. The result is a clay tile with the exact vein pattern and edge silhouette of the original leaf preserved in the surface.
A set of 3 to 5 leaf-impression tiles (each 5 by 7 inches, each featuring a different leaf species) mounted in a vertical column creates a botanical specimen display reminiscent of a natural-history museum collection. Finish the tiles with a single wash of diluted acrylic paint (thin green or brown paint with water to a watercolor consistency, brush across the surface, and wipe the high points clean so color pools in the vein impressions) for a vintage botanical-illustration look. Explore more wall decoration approaches at sunflower kitchen cabinets for floral-themed kitchen design.
12. Handmade Textured Tile Backsplash Accent
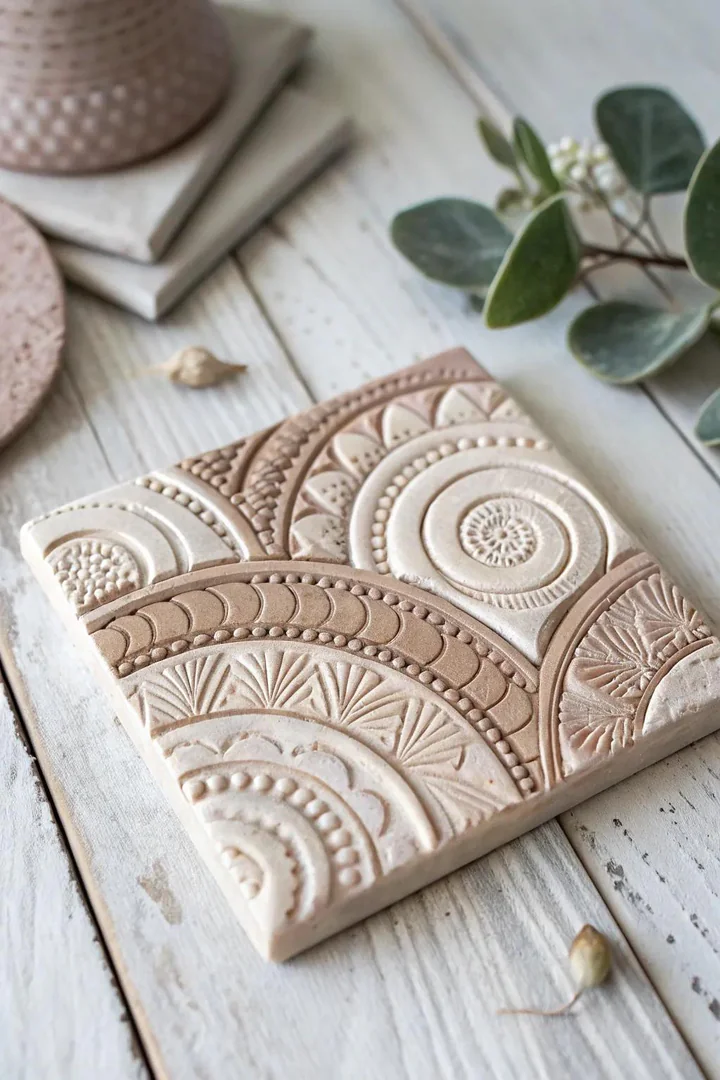
Creating a 3-to-5-tile accent strip of handmade polymer clay tiles and mounting them on the backsplash wall (between the countertop and upper cabinets, in a row behind the stove or sink) adds a handcrafted, artisan touch to an otherwise plain tile or painted backsplash. Each handmade tile (3 by 3 inches or 4 by 4 inches) features a unique texture: stamped geometric patterns, carved lines, pressed fabric weave, or sculpted low-relief motifs.
Mount the baked tiles on the wall with Loctite Power Grab adhesive ($5 per tube) or 3M VHB double-sided tape ($8 per roll) for a removable, rental-safe installation. A 5-tile accent strip (20 inches wide) positioned at the center of the backsplash creates a decorative band that breaks up a large expanse of plain tile or paint. Seal each tile with 2 coats of polyurethane spray ($8 per can from Minwax or Varathane, satin finish) to protect the clay surface from kitchen moisture, grease, and cleaning chemicals.
13. Personalized Family Name Plaques
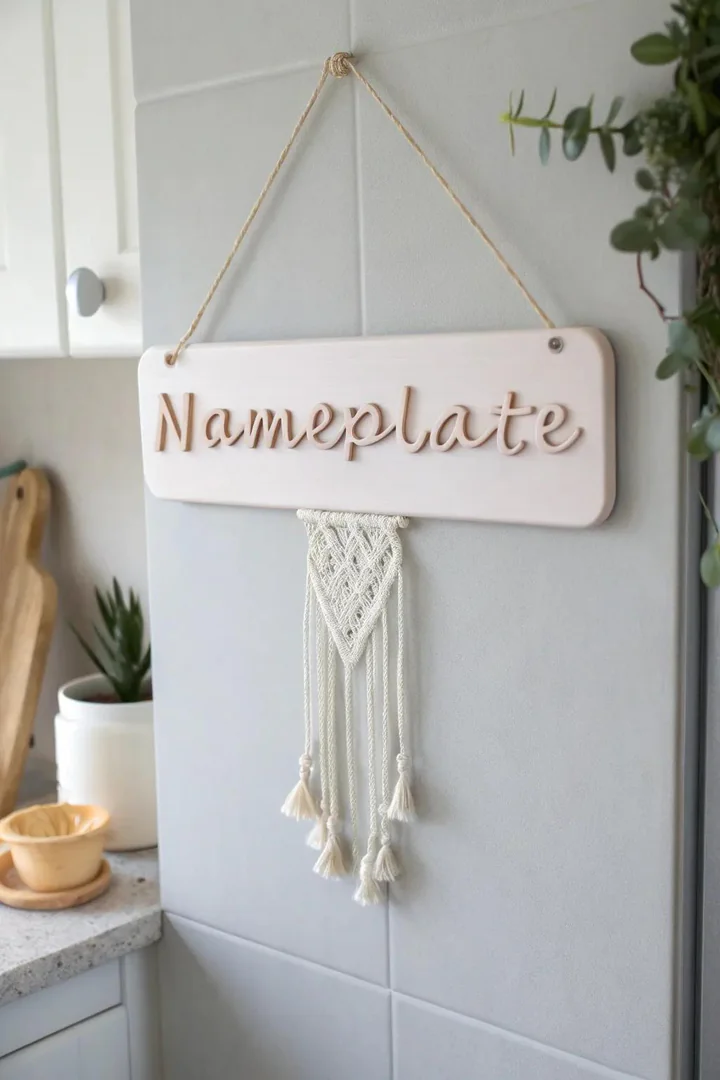
Sculpting a family name plaque (“The Johnsons’ Kitchen,” “Welcome to Grandma’s Kitchen,” or simply the family surname in decorative script) from polymer clay creates a personalized wall sign that no store-bought sign can replicate. Roll a clay slab to 1/4-inch thickness, cut to an oval, rectangle, or scroll shape (8 to 12 inches wide), and form the family name from thin clay ropes (1/8-inch-diameter coils shaped into cursive or block letters) pressed onto the slab surface.
Add decorative borders (tiny clay flowers, leaves, hearts, stars, or a braided rope edge) around the name for a polished, finished look. Bake the plaque on a flat ceramic tile at 275 degrees Fahrenheit for 40 to 50 minutes (longer baking time for thicker pieces ensures full curing through the center). Paint the raised lettering with metallic acrylic paint (Martha Stewart Metallic Gold, $3 per 2-ounce bottle) for a gold-leaf effect against a matte white or cream clay base. Attach a sawtooth picture hanger ($3 for a 20-pack) to the back with E6000 adhesive for wall mounting.
14. Faux Marble Decorative Frames
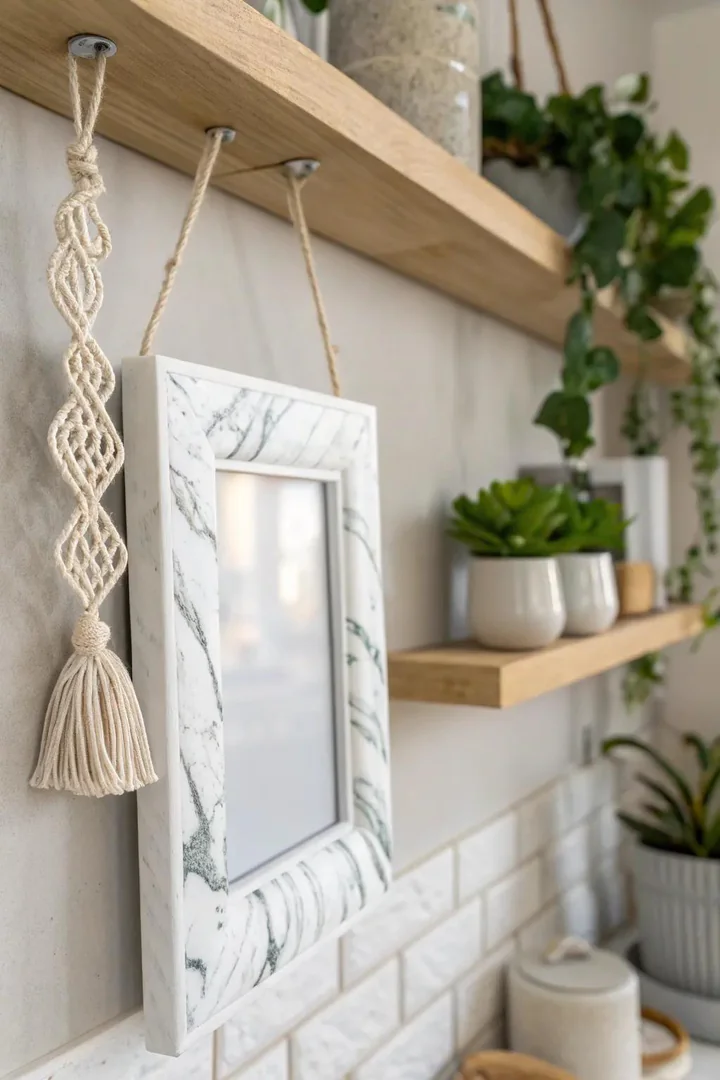
Creating a faux marble frame from polymer clay uses the classic marbling technique: twist together ropes of white, gray, and black clay (3 parts white, 1 part gray, 1/4 part black), fold the twisted ropes in half, twist again, fold again, and repeat 3 to 5 times until the clay displays thin, irregular veins of gray and black against a white base (matching the look of Carrara or Calacatta marble). Roll the marbled clay to 1/4-inch thickness and cut into 1-to-2-inch-wide strips that form a rectangular frame (outer dimension 8 by 10 inches or 11 by 14 inches).
Bake the frame pieces flat, then assemble them around a printed recipe card, a vintage kitchen illustration, or a family photo with E6000 adhesive on a backing board. A faux marble frame reads as a luxury design accent (marble frames retail for $30 to $80) but costs $5 to $10 in polymer clay and takes 1 to 2 hours to make. The marbling technique produces a unique pattern every time (no two frames are identical), giving each piece the one-of-a-kind character of handmade art. Visit simple outdoor kitchen ideas for more DIY projects, or browse the full library at The Designers Company.
How to Make Polymer Clay Kitchen Wall Art
1. Gather Materials and Condition the Clay
Purchase 4 to 6 blocks of polymer clay ($2 to $5 each) in the desired colors, a clay roller or pasta machine ($20 for a dedicated clay pasta machine from Amazon), clay cutting tools ($5 for a basic set), and a baking surface (a ceramic tile or a parchment-lined baking sheet). Condition the clay by kneading each block for 2 to 3 minutes until the clay is soft, pliable, and free of cracks. Unconditioned clay cracks during baking because air pockets trapped in the stiff clay expand in the oven.
2. Shape, Texture, and Assemble the Design
Roll the conditioned clay to 1/4-inch thickness on a clean, smooth surface (glass, tile, or a silicone mat). Cut to the desired shape, apply textures with stamps, tools, or found objects, and add sculptural details (flowers, letters, relief elements) by pressing additional clay pieces onto the base slab. Work on the baking surface (ceramic tile or parchment) so the finished piece does not need to be moved and risk distortion before baking.
3. Bake, Cool, and Finish
Bake the piece in a preheated oven at the temperature specified on the clay package (typically 275 degrees Fahrenheit for Sculpey and 265 degrees Fahrenheit for Fimo) for 15 minutes per 1/4 inch of thickness. Allow the piece to cool completely in the oven (turn off the oven and leave the door cracked) to prevent thermal shock cracking. After cooling, sand any rough edges with 400-grit sandpaper, apply acrylic paint details if desired, and seal with Sculpey Glaze or polyurethane spray for moisture protection.
4. Mount on the Kitchen Wall
Attach a sawtooth hanger to the back of thick, rigid pieces with E6000 adhesive. Use 3M Command Strips for lightweight, flat tiles (under 1 pound). Frame three-dimensional pieces in a shadow-box frame to protect the sculpture from kitchen grease and dust. Position polymer clay wall art away from the stove and oven (heat above 300 degrees Fahrenheit can soften cured polymer clay) and away from direct, prolonged sunlight (UV can fade some clay colors over several years).
Polymer Clay Brand Comparison
| Brand | Cost/Block | Bake Temp | Strength | Best For |
|---|---|---|---|---|
| Sculpey III | $2 | 275°F | Moderate (brittle thin) | Beginners, flat tiles |
| Premo Sculpey | $3–$5 | 275°F | High (flexible after baking) | Jewelry, structural pieces |
| Fimo Soft | $2–$3 | 265°F | High | Detail work, millefiori |
| Cernit Number One | $3 | 265°F | Very high (porcelain-like) | Realistic sculpting |
| Fimo Effect | $3 | 265°F | High | Metallic, glitter, translucent |
| Kato Polyclay | $4–$6 | 300°F | Very high | Advanced sculptors, caning |
Frequently Asked Questions
Is polymer clay food safe for kitchen art?
Cured (baked) polymer clay is certified non-toxic by the Art & Creative Materials Institute (ACMI) and safe to display in kitchens. Polymer clay should not come into direct contact with food or food-preparation surfaces because the clay is not FDA-approved for food contact. Wall art, framed pieces, and decorative tiles hung on the wall are fully safe for kitchen display. Seal finished pieces with a food-safe polyurethane or Sculpey Glaze to prevent dust and grease absorption.
How do you hang polymer clay art on the wall?
Lightweight flat pieces (under 8 ounces) mount with 3M Command Picture Hanging Strips ($5 for a 4-pack, holds up to 4 pounds per pair, removes cleanly from painted walls). Heavier pieces (8 ounces to 2 pounds) mount with a sawtooth picture hanger glued to the back with E6000 adhesive. Three-dimensional sculptural pieces display best in a shadow-box frame ($8 to $25 from Michael’s or IKEA) that protects the raised elements from kitchen grease and accidental contact.
Can polymer clay withstand kitchen heat and humidity?
Cured polymer clay withstands temperatures up to 300 degrees Fahrenheit and normal household humidity (30% to 60%) without softening, warping, or degrading. Avoid hanging polymer clay art directly above the stove or range where temperatures can exceed 300 degrees Fahrenheit during cooking. Kitchen steam (from boiling water, dishwashers, or sinks) does not affect sealed polymer clay; unsealed clay may absorb surface moisture over time, which a coat of polyurethane spray prevents.
What tools do beginners need for polymer clay wall art?
A starter kit costs $30 to $50: a clay roller or dedicated pasta machine ($20), a craft knife ($3), a set of ball-end sculpting tools ($5), a texture stamp sheet ($8 to $12), and 4 to 6 blocks of polymer clay ($8 to $20 depending on brand). A ceramic tile ($3) serves as both a work surface and a baking surface. A silicone baking mat ($8) prevents the clay from sticking to the work surface during rolling. No kiln, no pottery wheel, and no special equipment beyond a standard home oven.
How long does polymer clay wall art last?
Properly baked and sealed polymer clay lasts indefinitely. Museums and art galleries display polymer clay sculptures from the 1970s and 1980s that show no degradation after 40+ years. Kitchen wall art sealed with polyurethane or Sculpey Glaze resists moisture, grease, and cleaning products. The primary aging factor is UV exposure: direct sunlight can fade some clay pigments (especially reds and pinks) over 5 to 10 years. Hanging polymer clay art on a wall that does not receive direct afternoon sunlight preserves the original colors for decades.

