
Simple Outdoor Kitchen Ideas: 23 Easy Designs to Build This Year
Simple outdoor kitchen ideas turn a patio, deck, or backyard into a functional cooking and dining zone without the $15,000 to $50,000 price tag of a full-custom outdoor kitchen with built-in cabinetry, masonry countertops, and permanent plumbing. A simple outdoor kitchen can be assembled for $500 to $5,000 using modular components, portable grills, rolling carts, and basic countertop surfaces that require no permits, no concrete work, and no contractor. Below are 23 outdoor kitchen setups with specific products, dimensions, material costs, and installation methods, followed by a how-to planning guide, a comparison table, and FAQs on weatherproofing, permits, and budget breakdowns.
1. Compact Corner Grill Station

A corner grill station tucks into an L-shaped patio corner using two short countertop runs (each 4 to 6 feet long) that meet at a 90-degree angle, creating a prep surface on one leg and a grill bay on the other. A Weber Spirit II E-310 three-burner gas grill ($450 to $550, 30 inches wide) sits on one arm of the L while a butcher-block prep cart ($100 to $200 from IKEA VADHOLMA or Wayfair) occupies the other arm.
A corner layout maximizes a small patio (8 by 10 feet or larger) because the cook stands at the inside corner with grill and prep surface within arm’s reach on both sides, reducing walking and turning. Mount a stainless-steel wall shelf ($30 to $50 from IKEA KUNGSFORS) on the house wall above the prep cart for spices, sauces, and utensils. A corner station costs $550 to $800 in grill, cart, and shelf and sets up in under an hour with zero permanent installation.
2. Freestanding Island with Grill
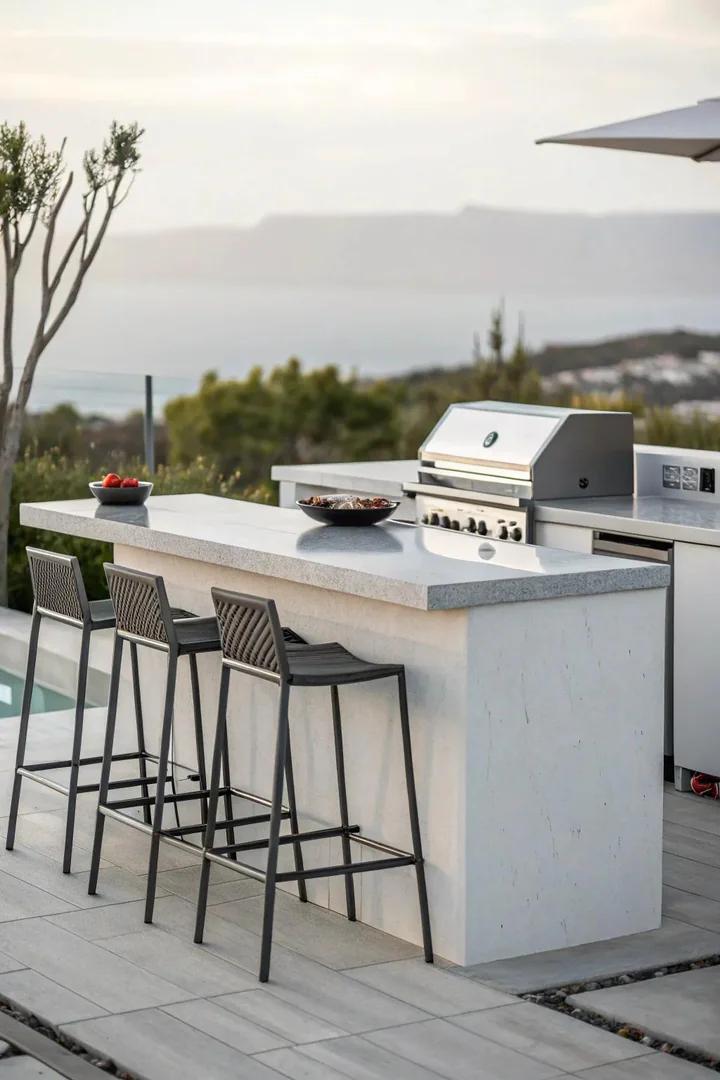
A prefabricated outdoor kitchen island from Bull Outdoor Products Angus Island ($2,500 to $3,500) or KitchenAid 9-Burner Island Grill ($3,000 to $4,500) arrives as a single assembled unit with a built-in gas grill, stainless-steel countertop, storage cabinet, and sometimes a built-in side burner or refrigerator compartment. A prefab island drops onto a level patio surface (concrete, pavers, or compacted gravel) with no masonry, no framing, and no permanent installation.
A DIY island alternative: build a frame from pressure-treated 2×4 lumber ($3 to $5 per 8-foot stud) and cement board sheathing ($12 per 3-by-5-foot sheet from Home Depot), finish the exterior with stacked stone veneer ($8 to $15 per square foot) or stucco ($5 to $10 per square foot), and top with a granite or concrete countertop ($30 to $80 per square foot). A 6-foot DIY island with a drop-in grill costs $800 to $2,000 in materials and takes a weekend to build.
3. Modular Cart System
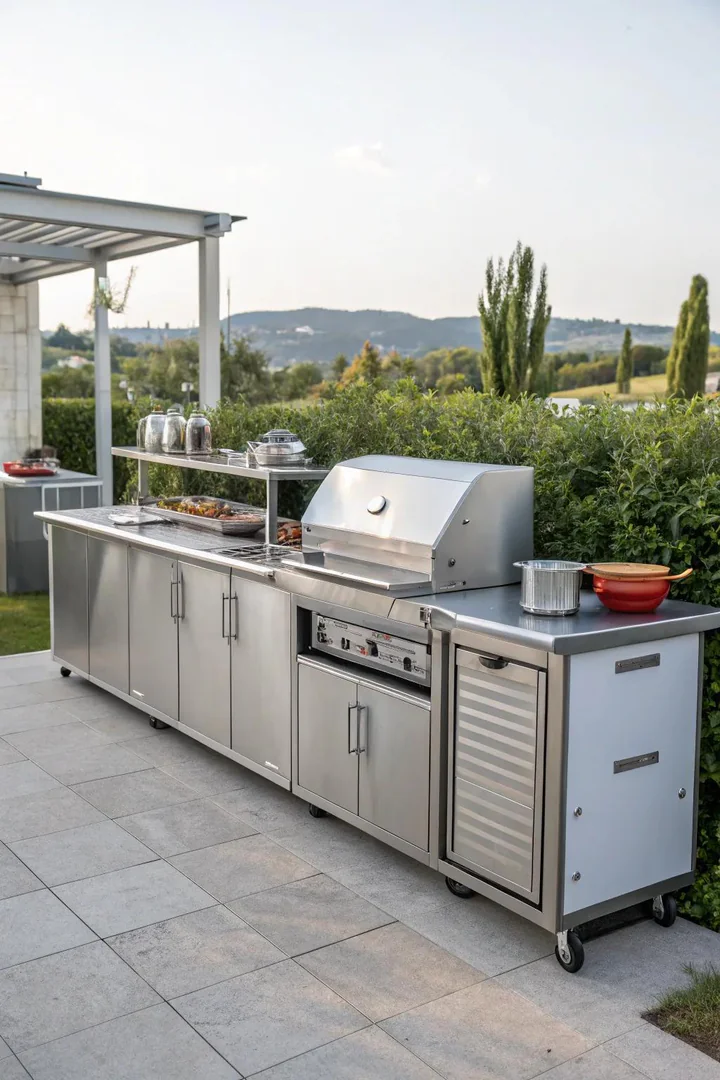
A modular outdoor kitchen system from Char-Broil Modular Outdoor Kitchen ($200 to $600 per module) or Nexgrill Revelry Modular System ($300 to $800 per module) lets the homeowner assemble a custom kitchen from individual components (grill module, prep station module, storage cabinet module, bar/serving module) that bolt together in any configuration. Each module rolls on casters and locks in place, so the entire kitchen can be rearranged, expanded, or stored in a garage during winter.
Start with two modules (grill + prep station, $400 to $1,200) and add modules over time as the budget allows. A full 4-module system (grill, prep, storage, bar) creates an 8-to-12-foot outdoor kitchen for $800 to $2,400. Modular systems suit renters and homeowners who move frequently because the entire kitchen disassembles and transports without leaving any permanent modifications to the property.
4. Pergola-Covered Cooking Area
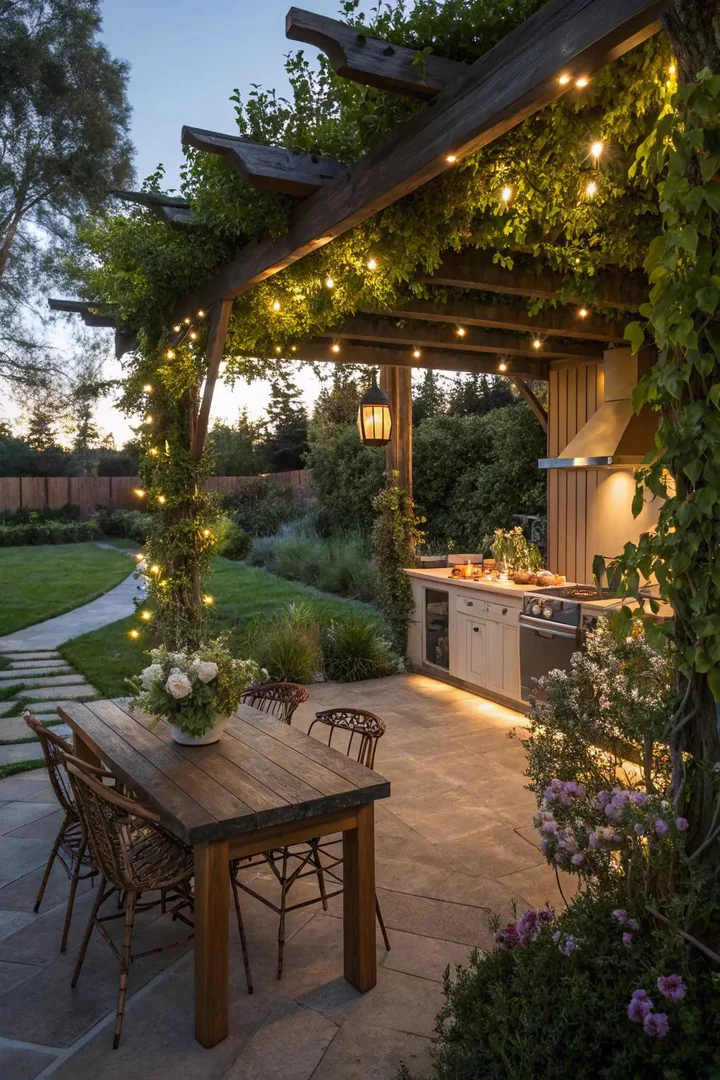
Building a freestanding pergola ($500 to $2,000 for a 10-by-12-foot cedar or pressure-treated pine kit from Home Depot or Wayfair) over the grill and prep zone creates a defined outdoor room with overhead shade, string-light mounting points, and a visual frame that separates the cooking area from the rest of the yard. A retractable canopy shade ($100 to $200 for a Coolaroo Shade Sail or a slide-wire canopy panel) attaches to the pergola rafters and provides rain and UV protection during cooking.
A pergola-covered kitchen keeps direct sun off the cook during summer grilling sessions (reducing surface temperatures by 15 to 25 degrees Fahrenheit under the shade) and shelters countertop prep areas from light rain. Mount outdoor LED string lights ($15 to $30 for a 48-foot strand from Brightech or Amazon) along the pergola rafters for evening ambiance. A pergola also defines the kitchen’s footprint, making the space feel intentional and designed rather than a random grill parked on an open patio. Pair the shaded cooking zone with countertop ideas from white kitchen countertop ideas that translate well to outdoor surfaces.
5. Rustic Pallet-Wood Kitchen
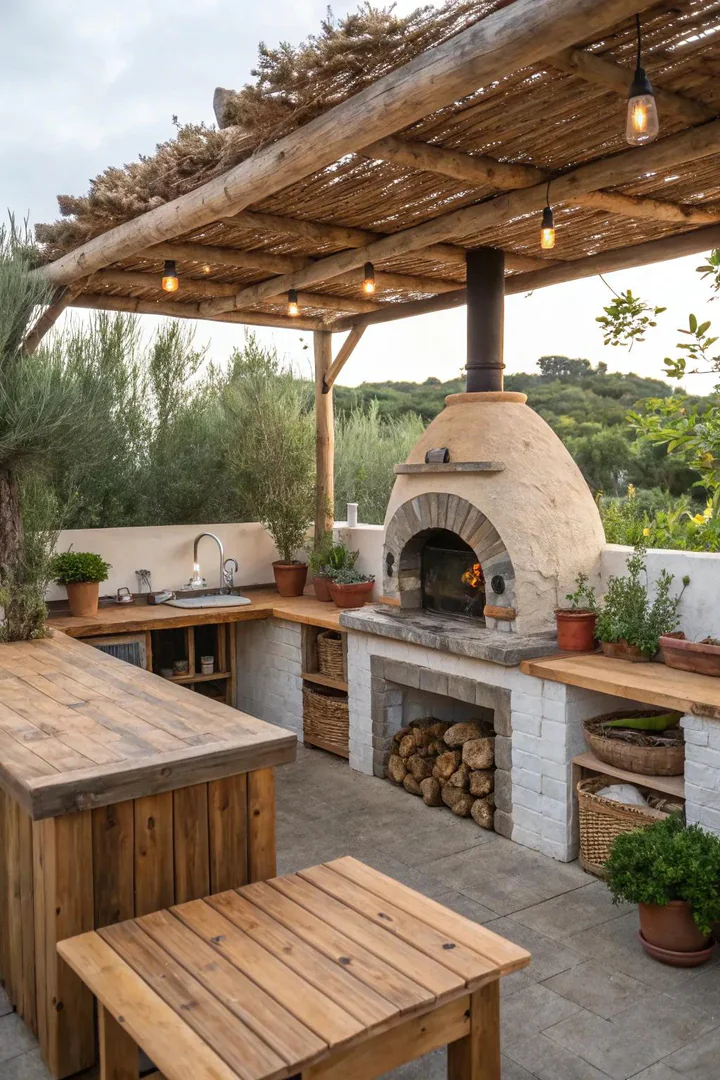
Building an outdoor kitchen base from reclaimed pallet wood (free from warehouses, factories, and shipping yards, or $5 to $10 per pallet from Craigslist) creates a rustic, farmhouse-style cooking station for under $200 in materials. Disassemble 4 to 6 pallets, sand the boards with 80-grit sandpaper, treat with Thompson’s WaterSeal ($20 per gallon) for weather protection, and assemble into a bar-height (42-inch) counter with an open base for storage bins and propane tank access.
Top the pallet-wood base with a concrete paver countertop (24-by-24-inch concrete pavers, $3 to $8 each from Home Depot, laid side by side) or a butcher-block slab ($50 to $100 for a 4-foot-long piece from IKEA or a lumber yard) sealed with exterior-grade polyurethane ($15 per quart). Pallet wood weathers to a silver-gray patina within 6 to 12 months, which suits the rustic aesthetic but requires annual re-sealing to prevent rot. A pallet-wood kitchen pairs with a freestanding charcoal grill (Weber Original Kettle, $120 to $170) for a fully rustic outdoor cooking setup.
6. Portable Propane Grill Cart
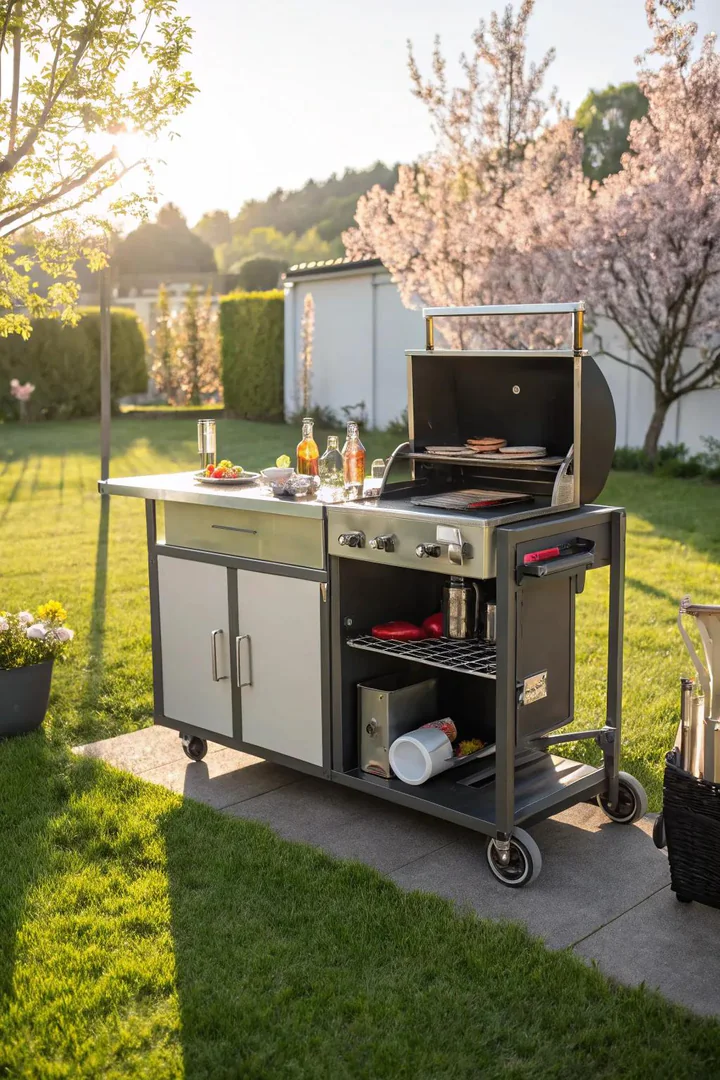
A portable gas grill on a rolling cart from Weber Q2200 ($270 to $320, 21 inches wide, 12,000 BTU) with the Weber Q Portable Cart ($80 to $100) creates a mobile outdoor kitchen that rolls from the garage to the patio, from the patio to the poolside, or from the house to a campsite. The Q2200 runs on a standard 20-pound propane tank, grills for 4 to 6 people, and folds down for transport in a car trunk.
A portable grill cart suits apartments with shared patios, condos with balconies (check HOA rules for propane restrictions on upper floors), and homeowners who prefer not to leave a permanent grill outdoors. A Blackstone 22-inch tabletop griddle ($150 to $200) on a Blackstone griddle stand ($60) provides a flat-top cooking surface for breakfast pancakes, smash burgers, stir-fry, and fajitas. A portable grill + griddle combo ($300 to $500 total) delivers two cooking methods in a roll-away, store-away package.
7. Balcony Urban Kitchen
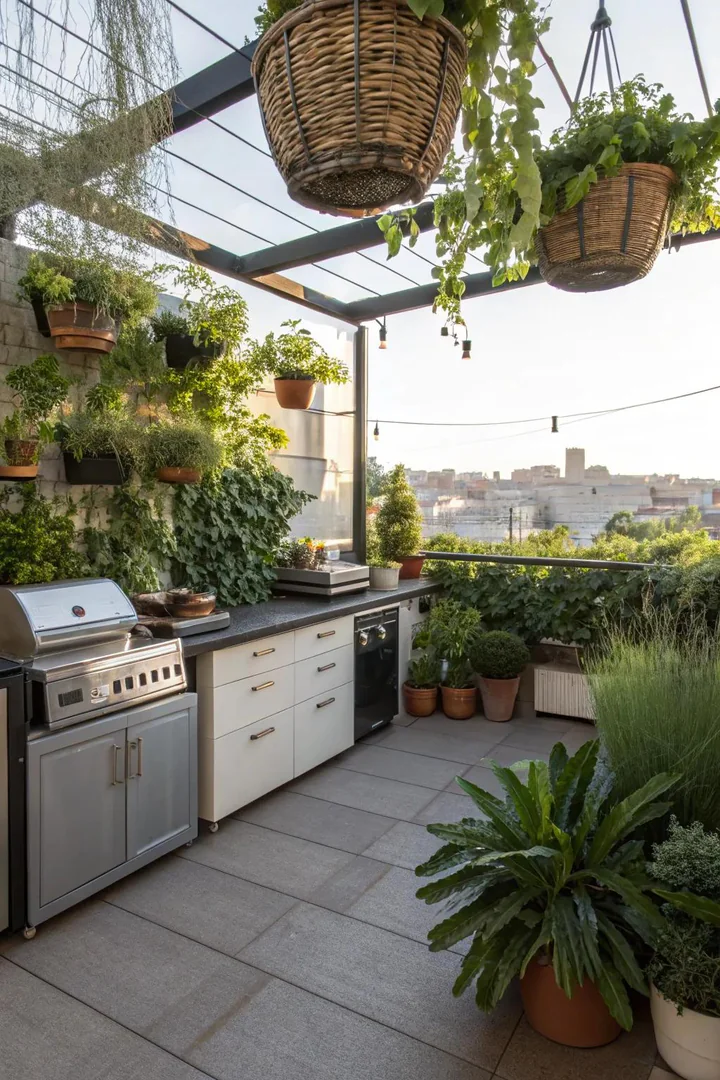
A balcony outdoor kitchen for apartment and condo dwellers fits within a 4-by-8-foot balcony using a compact electric grill (Weber Pulse 2000, $400 to $500, runs on a standard 120V outlet, no propane needed), a folding prep table ($30 to $50 from Cosco or Amazon), and a vertical herb garden ($20 to $40 for a stackable planter from Amazon). Electric grills are permitted on most apartment balconies where propane and charcoal grills are banned by fire code.
Mount a foldable wall shelf ($20 to $30 from IKEA NORBERG or Amazon) on the balcony wall for a fold-down prep surface that stores flat when not in use. A bar-height folding table ($40 to $60, 24 by 24 inches) serves as both a prep station during cooking and a dining table for two during the meal. An urban balcony kitchen costs $500 to $700 in grill, table, shelf, and herbs, and leaves zero permanent modifications to the building.
8. Herb Garden Integration
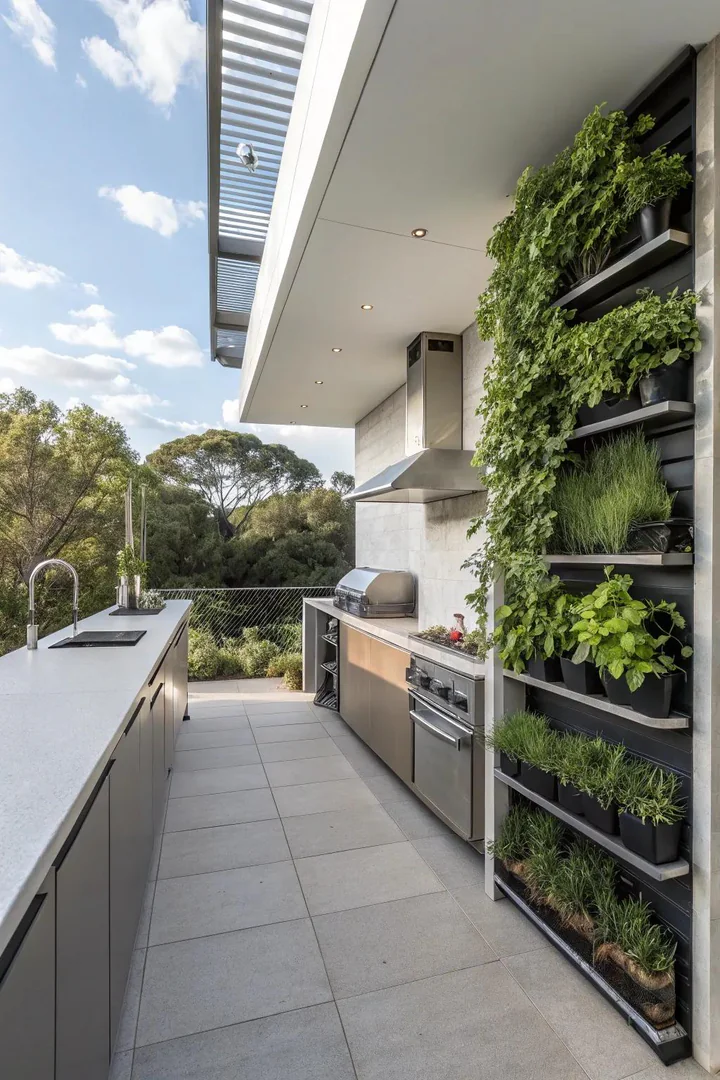
Building a raised herb planter ($50 to $100 for a cedar raised bed from Greenes Fence, 2 by 4 feet, 10.5 inches tall) directly beside the outdoor prep counter puts fresh basil, rosemary, thyme, oregano, cilantro, mint, and parsley within arm’s reach during cooking. A tiered vertical herb planter ($30 to $60 from Mr. Stacky or Amazon) stacks 4 to 5 planting levels vertically, growing 20+ herb plants in a 2-square-foot footprint.
Position the herb garden between the grill and the prep counter where the cook can pluck a sprig of rosemary or a handful of basil without walking to a separate garden area. A self-watering planter box ($25 to $40 from Lechuza or Bloem) with a built-in water reservoir reduces watering frequency to once every 3 to 5 days in summer. Herb gardens near the grill benefit from the radiant warmth of the grill and the reflected heat from the patio surface, extending the growing season by 2 to 4 weeks in spring and fall.
9. Outdoor Fireplace with Side Counter
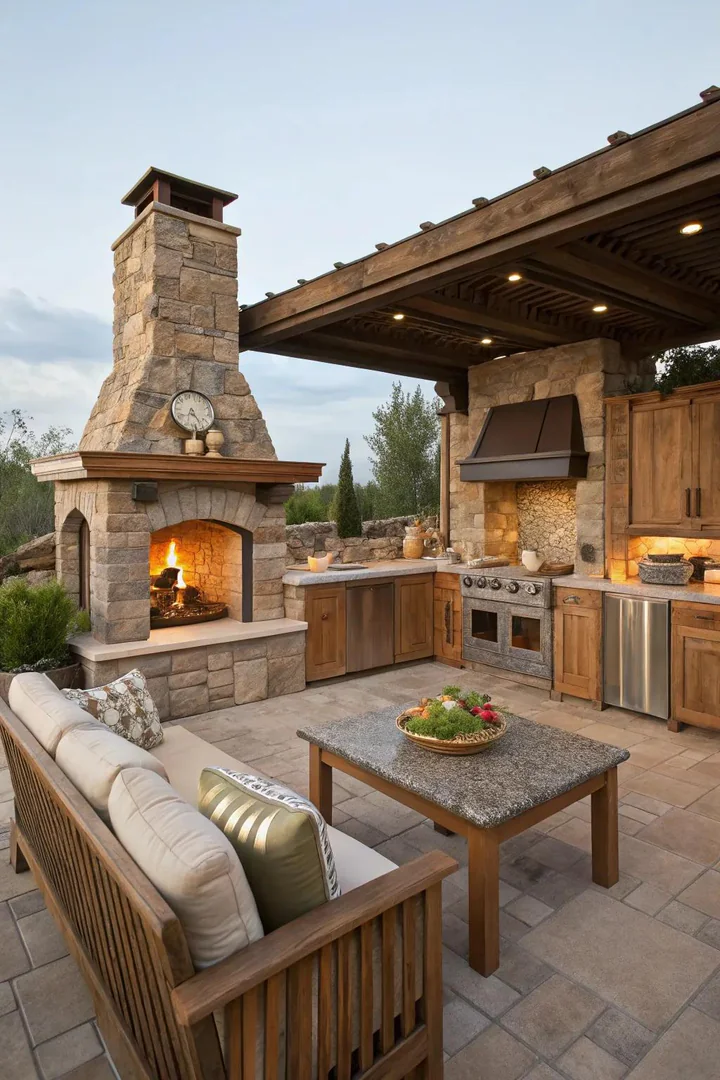
An outdoor fireplace with a built-in cooking grate and flanking side counters creates a campfire-style cooking station that doubles as a patio fireplace for evening warmth and ambiance. A Sunjoy Avondale Outdoor Fireplace ($800 to $1,200, steel and faux-stone construction) or a DIY concrete-block fireplace ($200 to $500 in concrete blocks, fire brick, and mortar) provides a wood-burning fire pit with a chimney that directs smoke upward rather than into the cook’s face.
Flanking the fireplace with two short countertops (each 3 to 4 feet long, built from stacked concrete blocks topped with a concrete paver or granite remnant) creates a prep surface and a serving surface on either side of the fire. Cook directly on the fire using a cast-iron grate ($30 to $50 from Lodge) or a rotisserie attachment ($50 to $80) mounted across the fireplace opening. A fireplace kitchen suits homeowners who prefer wood-fire cooking flavors (smoky, charred, flame-licked) over gas-grill cooking.
10. Stacked Stone Grill Surround
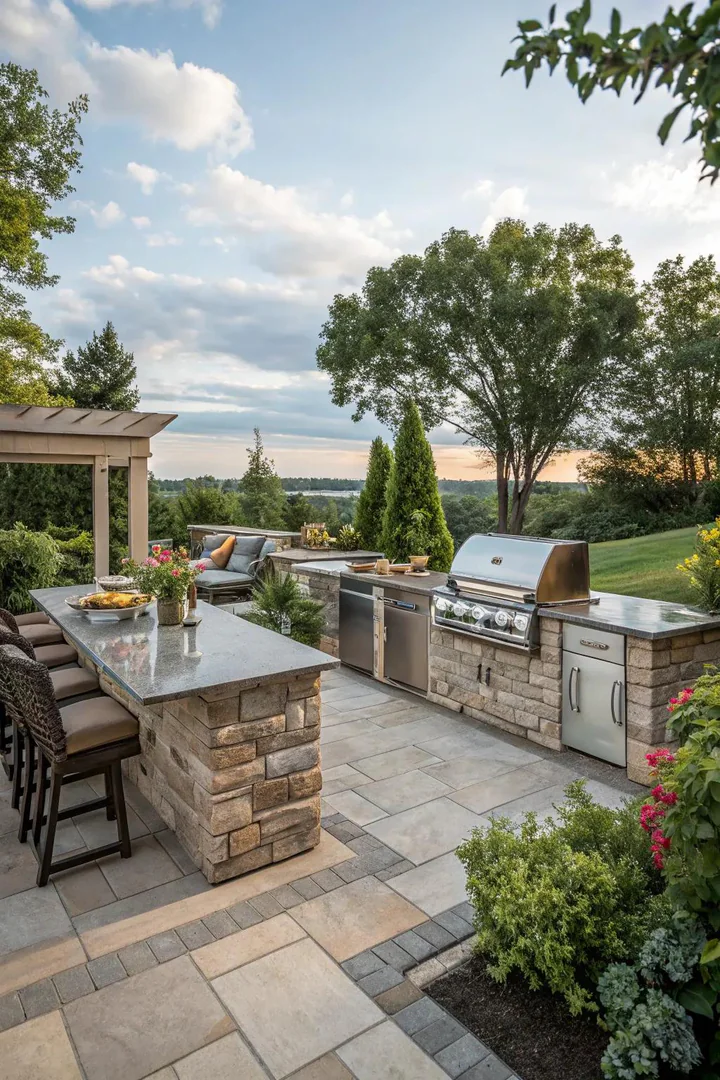
Building a stacked stone surround around a drop-in grill creates a permanent, masonry-look outdoor kitchen at a fraction of the cost of full stone construction. Frame the grill surround from concrete blocks ($2 to $3 each, standard 8-by-8-by-16-inch CMU from Home Depot), then veneer the exterior with manufactured stone veneer ($8 to $15 per square foot from Eldorado Stone, GenStone, or AirStone). A 6-foot-wide grill surround with a 24-inch countertop overhang on each side costs $400 to $1,000 in materials.
Top the block surround with a granite remnant countertop ($20 to $40 per square foot for remnant slabs from a local stone yard) or poured concrete ($5 to $15 per square foot DIY using Quikrete Countertop Mix). GenStone stacked stone panels ($30 to $50 per 12-square-foot panel) are a lightweight, screw-on alternative to traditional mortar-set stone veneer that installs in half the time. A stacked stone surround reads as a $5,000+ custom grill island but costs $400 to $1,000 and takes a weekend to build.
11. Built-In Bench Seating
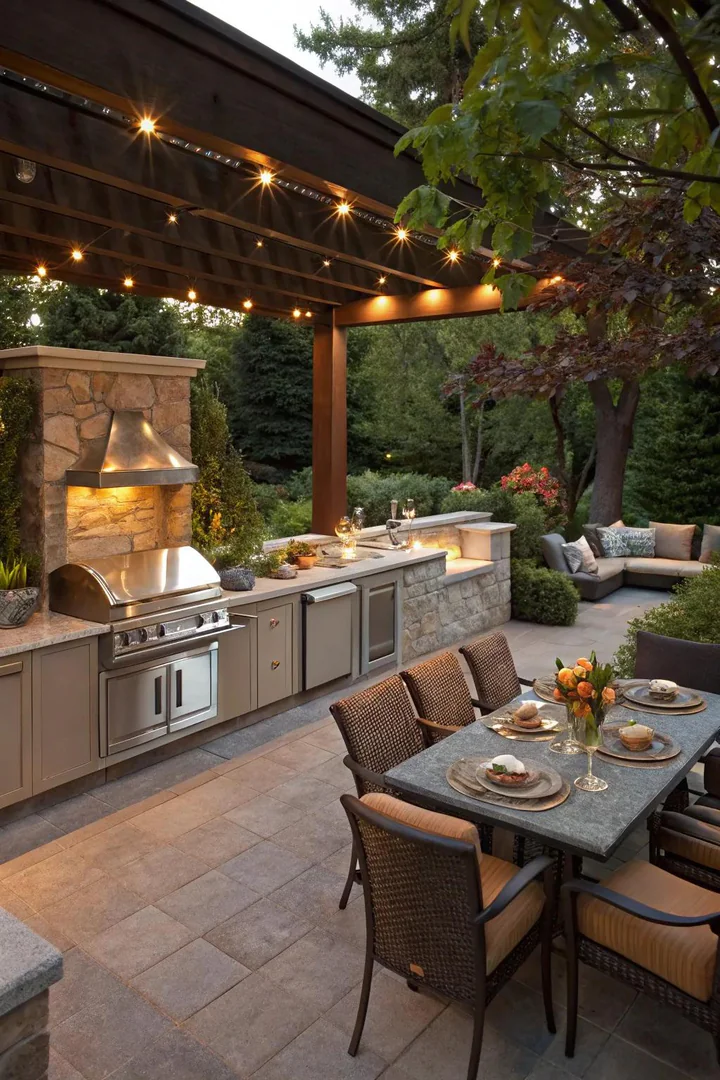
Building L-shaped or U-shaped bench seating adjacent to the outdoor kitchen creates an integrated dining zone where guests sit, eat, and socialize within arm’s reach of the cook. A bench built from pressure-treated 2×6 lumber ($6 to $10 per 8-foot board) with 4×4 posts ($8 to $12 per 8-foot post) costs $100 to $300 in materials for a 6-to-10-foot bench. Add outdoor seat cushions ($20 to $40 each from Target or Wayfair) for comfort.
A built-in bench eliminates the need for separate patio chairs (which take up more space per seat, tip on uneven surfaces, and scatter across the patio in wind). An L-shaped bench in a patio corner seats 4 to 6 people and doubles as a storage bench when built with a hinged-top lid that conceals cushion storage, firewood, or grilling supplies beneath the seat. Position the bench 36 to 42 inches from the grill to keep seated guests close enough for conversation but far enough from direct heat and grease splatter.
12. Water Feature Accent
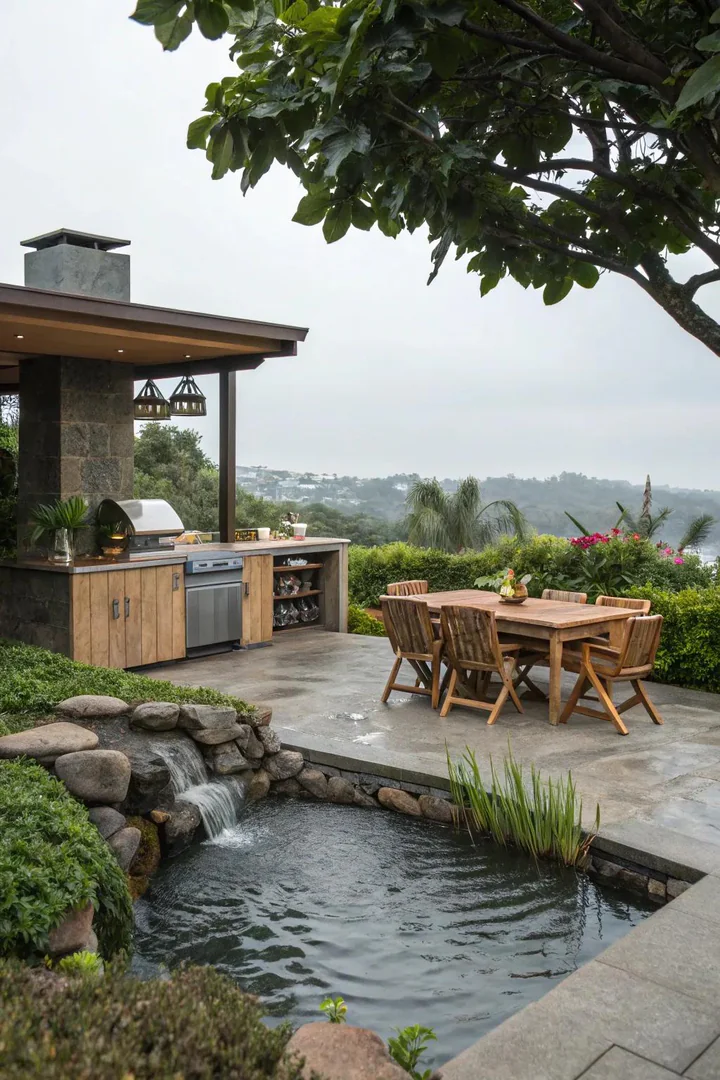
A small fountain or bubbling rock water feature ($100 to $300 from Home Depot or Lowe’s for a self-contained, pump-powered unit) positioned near the outdoor dining area adds the sound of running water that masks neighborhood noise, road traffic, and HVAC hum. A tabletop fountain ($30 to $60 from Amazon) placed on the dining table or bar counter creates a smaller-scale water accent without ground-level installation.
A water feature near the outdoor kitchen also serves a practical function: a recirculating basin fountain provides a hand-rinse station for guests and the cook between handling raw meat and touching serving utensils. A solar-powered fountain pump ($15 to $25 from Amazon) eliminates the need for an electrical outlet near the water feature; the solar panel charges during daylight and powers the pump for 4 to 8 hours. Learn how zone-based layout planning applies to outdoor stations at kitchen ergonomics and layout planning.
13. Weekend DIY Build
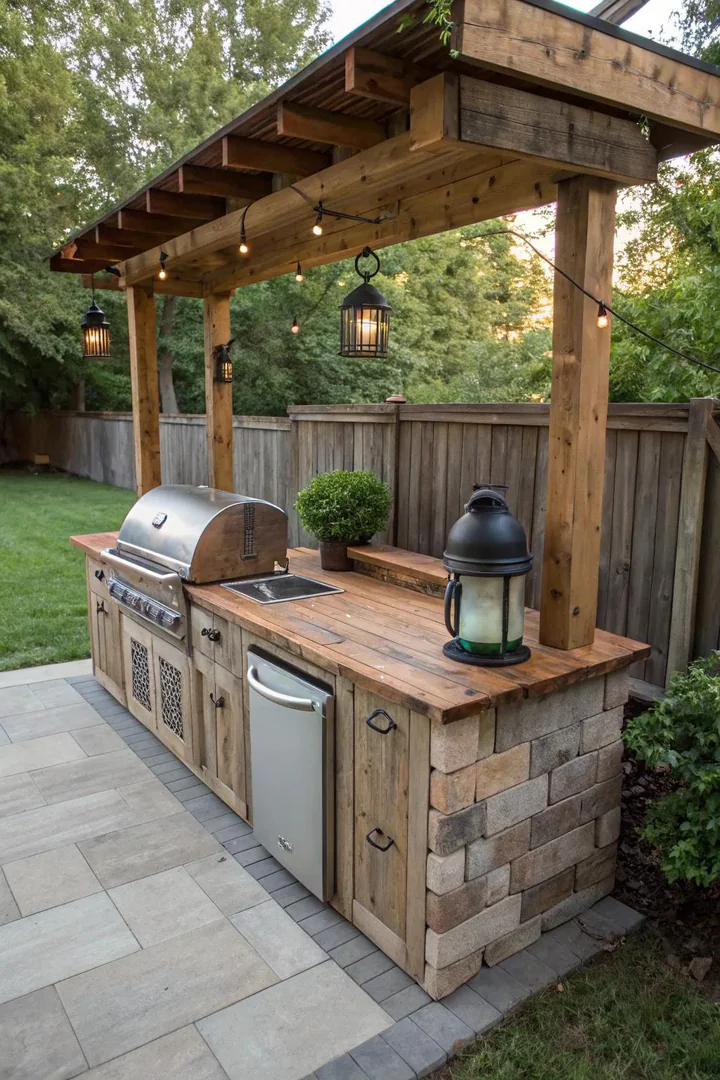
A concrete-block outdoor kitchen built from standard CMU blocks ($2 to $3 each) and concrete adhesive ($5 per tube of Loctite PL 500 Landscape Block Adhesive) stacks up without mortar, requires no masonry skills, and builds a full grill surround with countertops in a single weekend. Stack 3 courses of blocks (24 inches tall) in a U-shape or straight-line configuration, glue each course with block adhesive, and top with a poured or prefabricated concrete countertop.
A 6-foot DIY concrete-block kitchen costs $150 to $400 in blocks, adhesive, and countertop material. Drop a Weber Genesis drop-in grill ($800 to $1,200) or a Char-Broil drop-in grill head ($300 to $600) into the block surround for a built-in look. Finish the block exterior with stucco ($30 to $50 for a 50-pound bag of Quikrete Base Coat Stucco, troweled on in a 3/8-inch layer) or leave the blocks exposed for an industrial look. A finished stucco exterior on a block base reads as a custom masonry kitchen at 10% of the cost.
14. Bold Color Accents
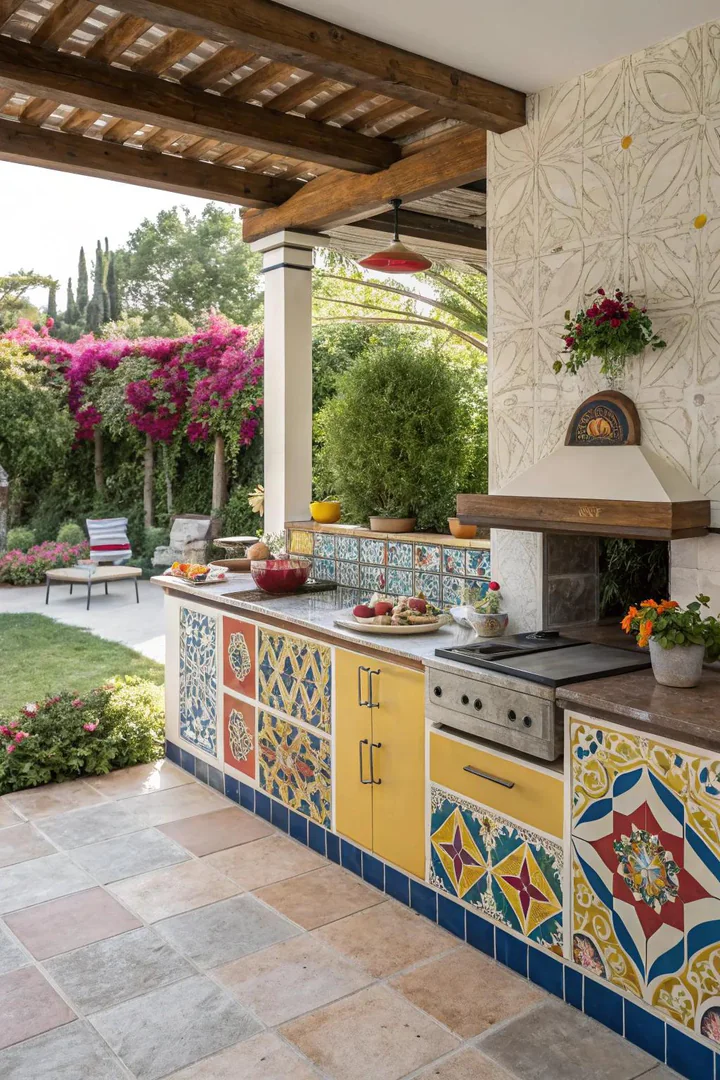
Painting the outdoor kitchen base, pergola posts, or accent wall in a bold exterior color (Benjamin Moore Caliente AF-290 red, Behr Marquee Bitter Chocolate brown, Sherwin-Williams Naval SW-6244 navy) adds personality and visual pop to an otherwise neutral stone, stucco, or wood outdoor kitchen. A single bold-colored accent wall behind the grill ($30 to $50 in exterior paint for 50 to 100 square feet) creates a backdrop that photographs well and anchors the kitchen visually against the open yard.
Pair the bold accent with neutral countertops and hardware so the color does not compete with the cooking zone for attention. A brightly colored tile backsplash ($5 to $15 per square foot for hand-painted Mexican Talavera tile from a tile shop or Etsy) behind the grill or prep area adds pattern and color in a smaller, more controlled dose. Bold outdoor kitchen colors work best on surfaces sheltered from direct sun (under a pergola, on a north-facing wall) because intense UV exposure fades exterior paint within 2 to 3 years; sheltered surfaces retain color for 5 to 7 years.
15. Weatherproof Appliance Station
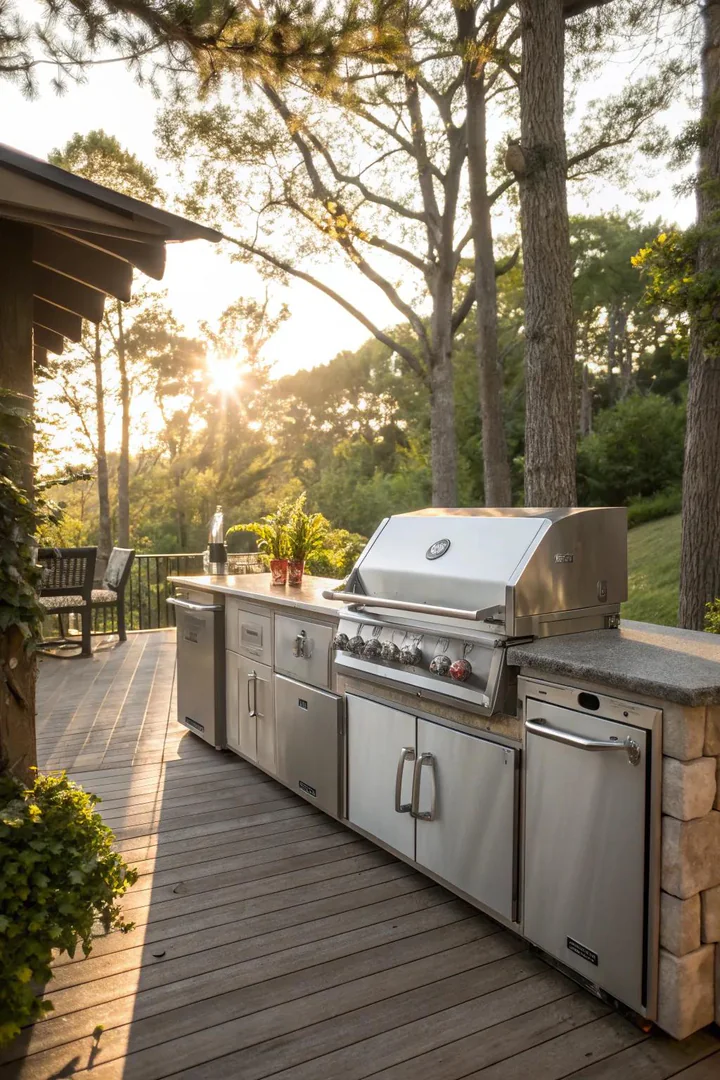
Investing in outdoor-rated appliances (stainless steel with weatherproof gaskets, marine-grade hinges, and UV-resistant control panels) ensures the outdoor kitchen survives year-round sun, rain, humidity, and freezing temperatures. An outdoor-rated refrigerator from Bull Outdoor Products ($800 to $1,500 for a 4.9 cu. ft. under-counter unit) or Blaze ($900 to $1,400) operates in ambient temperatures from 0 to 110 degrees Fahrenheit and features a sealed compressor compartment that prevents moisture intrusion.
An outdoor-rated ice maker ($400 to $700 from NewAir or EdgeStar) produces 25 to 50 pounds of ice per day and stores 25 to 35 pounds in an insulated bin. An outdoor sink ($100 to $300 for a drop-in stainless-steel bar sink) with a garden-hose connection ($15 for a hose-to-faucet adapter from Amazon) provides a wash station without running permanent plumbing. Outdoor-rated appliances cost 20% to 50% more than indoor equivalents but last 10 to 15 years in exposed conditions where indoor appliances would rust and fail within 2 to 3 years.
16. Garden-Adjacent Layout
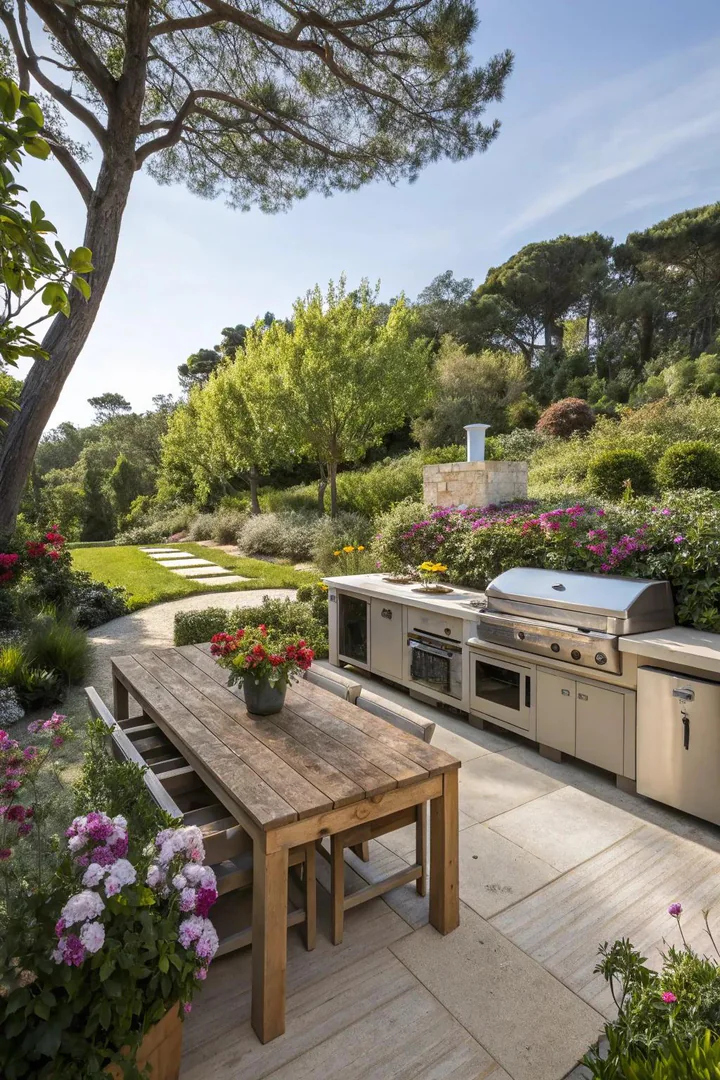
Positioning the outdoor kitchen adjacent to a vegetable garden or edible landscape creates a farm-to-grill workflow where the cook harvests tomatoes, peppers, zucchini, corn, and herbs 10 feet from the prep counter. A 4-by-8-foot raised garden bed ($50 to $100 for a cedar kit from Greenes Fence) placed beside the outdoor kitchen grows enough seasonal produce to supply 2 to 4 grilled meals per week during the growing season.
Plant the garden bed with grill-friendly crops: cherry tomatoes (Sungold, Sweet 100), bell peppers, jalapeños, zucchini, yellow squash, sweet corn, green beans, and basil. A drip irrigation kit ($25 to $40 from DIG or Raindrip) automates watering on a timer, reducing the daily maintenance to a 5-minute harvest walk. The garden-adjacent layout suits homeowners who value fresh ingredients and prefer a self-sufficient outdoor cooking experience. Explore more kitchen organization strategies at ideas for remodeling a small kitchen that apply to compact outdoor setups too.
17. Minimalist Steel-Frame Kitchen
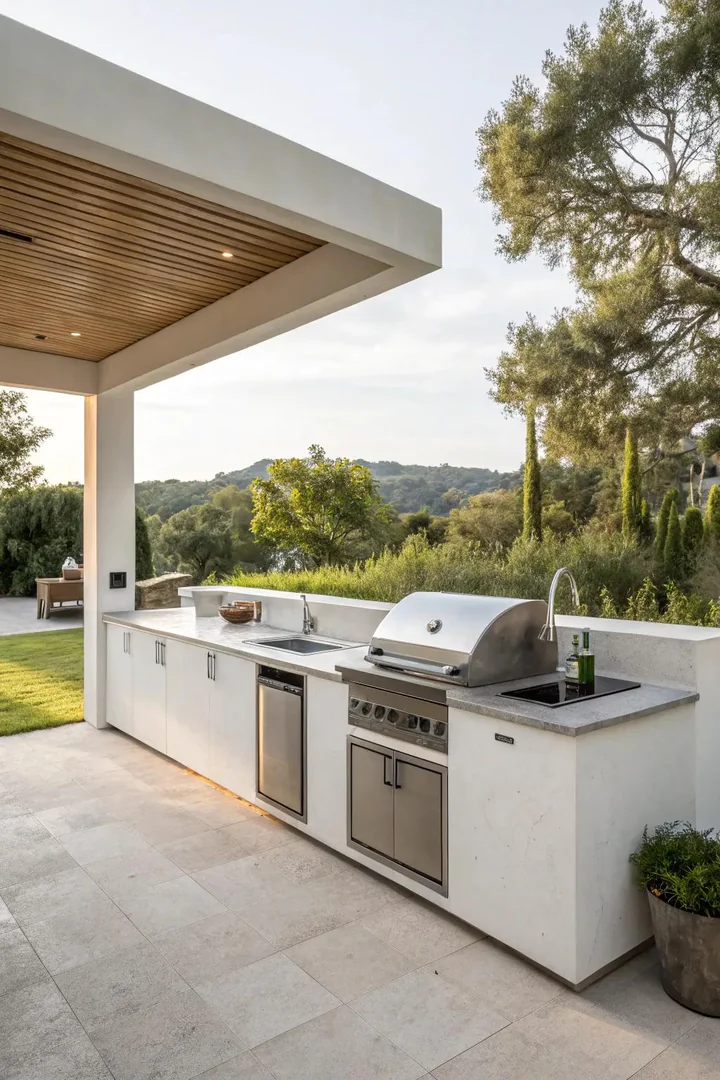
A powder-coated steel-frame outdoor kitchen from Grillscape ($1,500 to $3,000 for a modular steel-frame island) or a DIY welded steel frame ($200 to $500 in steel tubing and angle iron from a metal supplier) creates a clean, industrial, modern aesthetic with thin lines and an open-base silhouette. Steel-frame outdoor kitchens weigh 60% to 70% less than masonry or concrete-block construction, making them easier to transport, reposition, and disassemble.
A powder-coated finish (applied at a local powder-coating shop, $100 to $300 for a full frame) in matte black, charcoal gray, or olive green protects the steel from rust and UV for 10 to 15 years. Top the steel frame with a concrete countertop, butcher-block slab, or porcelain tile surface secured with construction adhesive. A minimalist steel-frame kitchen suits modern, mid-century, and industrial-style backyards and pairs with clean-lined furniture (metal chairs, concrete planters, black pendant lights).
18. Nature-Inspired Cooking Nook
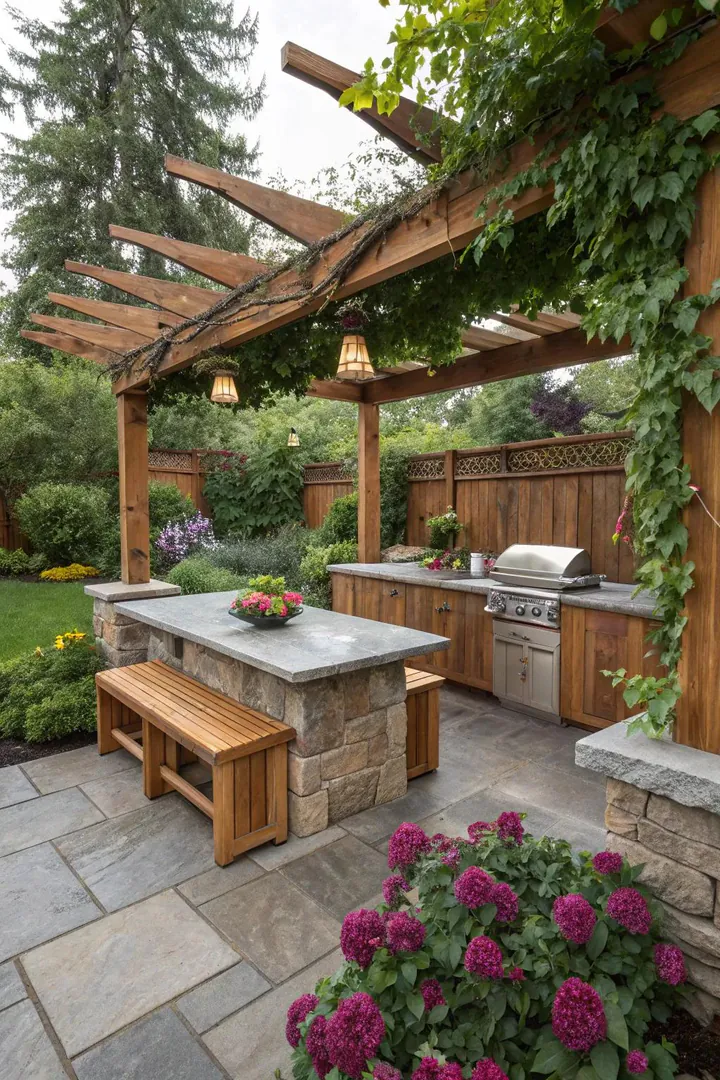
A nature-inspired cooking nook uses natural materials (fieldstone, river rock, reclaimed barn wood, live-edge slabs) and organic forms (curved countertop edges, irregular stone shapes, climbing vines on the pergola) to create an outdoor kitchen that blends with the surrounding landscape rather than imposing a geometric structure on the yard. A dry-stacked fieldstone base ($5 to $10 per square foot for locally sourced fieldstone) creates a grill surround and countertop support without mortar.
Top the fieldstone base with a live-edge wood slab countertop ($100 to $300 for a 6-foot walnut, maple, or white oak slab from a sawmill or Etsy) sealed with exterior-grade spar urethane ($15 per quart from Minwax). A live-edge slab preserves the natural bark edge of the tree trunk, creating an organic, one-of-a-kind countertop surface. Plant climbing jasmine, wisteria, or clematis at the base of the pergola posts to grow over the structure and create a living canopy that integrates the kitchen into the garden landscape.
19. Vintage Brick Cooking Station
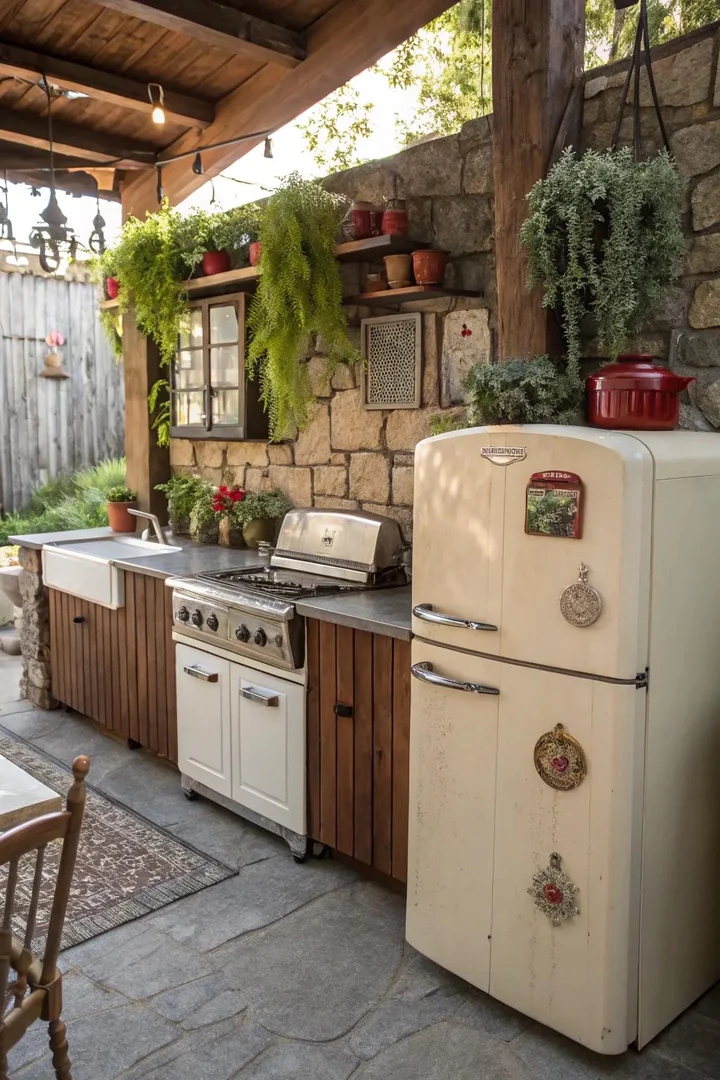
Building a brick grill surround and countertop base from reclaimed red brick ($0.50 to $1.50 per brick from a salvage yard or Craigslist) creates a vintage, old-world cooking station with character and patina that new materials cannot replicate. A single-brick-wide (4-inch) wall, 3 courses tall (24 inches), laid with Type S mortar ($8 per 60-pound bag from Home Depot) forms a sturdy grill surround and countertop base.
A 6-foot brick grill surround requires approximately 150 to 200 bricks ($75 to $300 in reclaimed brick, $15 to $25 in mortar) and takes a weekend to lay for a confident DIYer. Top the brick base with a bluestone paver countertop ($8 to $15 per square foot) or a concrete slab cast to size. Reclaimed brick with visible mortar residue, chips, and color variation reads as authentically aged; new brick laid in an overly uniform pattern reads as an imitation. A vintage brick kitchen pairs with copper accessories, lantern-style pendant lights, and terracotta planters.
20. Cozy Covered Patio Kitchen
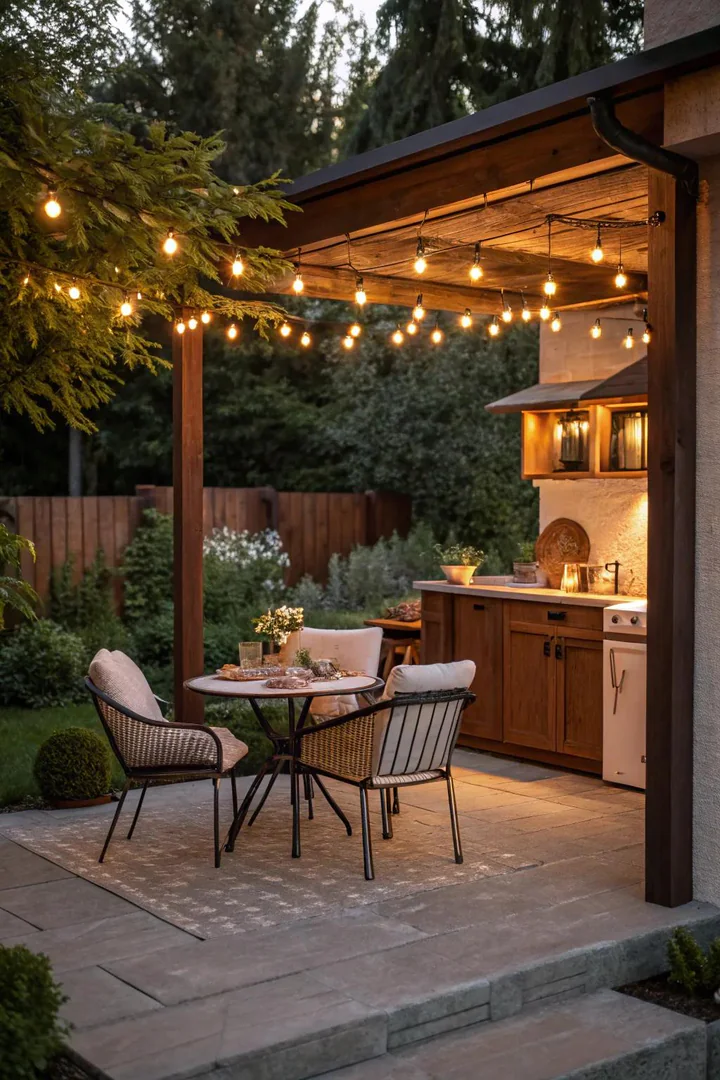
A covered patio (an existing roof overhang, a patio cover addition, or an attached pergola with a solid polycarbonate roof) protects the outdoor kitchen from rain, direct sun, and falling debris, extending the usable cooking season from fair-weather-only to nearly year-round. A 10-by-12-foot attached patio cover ($1,000 to $3,000 for a metal or wood-framed structure with polycarbonate roof panels) shelters the grill, prep area, and a 4-person dining table under a single roof.
Under a covered patio, install a ceiling fan ($100 to $200 for a Hunter Cassius 52-inch outdoor-rated fan) to circulate air and disperse grill smoke. Add an outdoor heater ($150 to $400 for a Fire Sense Patio Heater propane unit or a Dr. Infrared Heater outdoor wall-mount) for evening and shoulder-season cooking. A covered patio kitchen converts the outdoor cooking zone from a 5-month seasonal setup (May through September in northern climates) to a 9-to-12-month functional space.
21. Artistic Mosaic Details
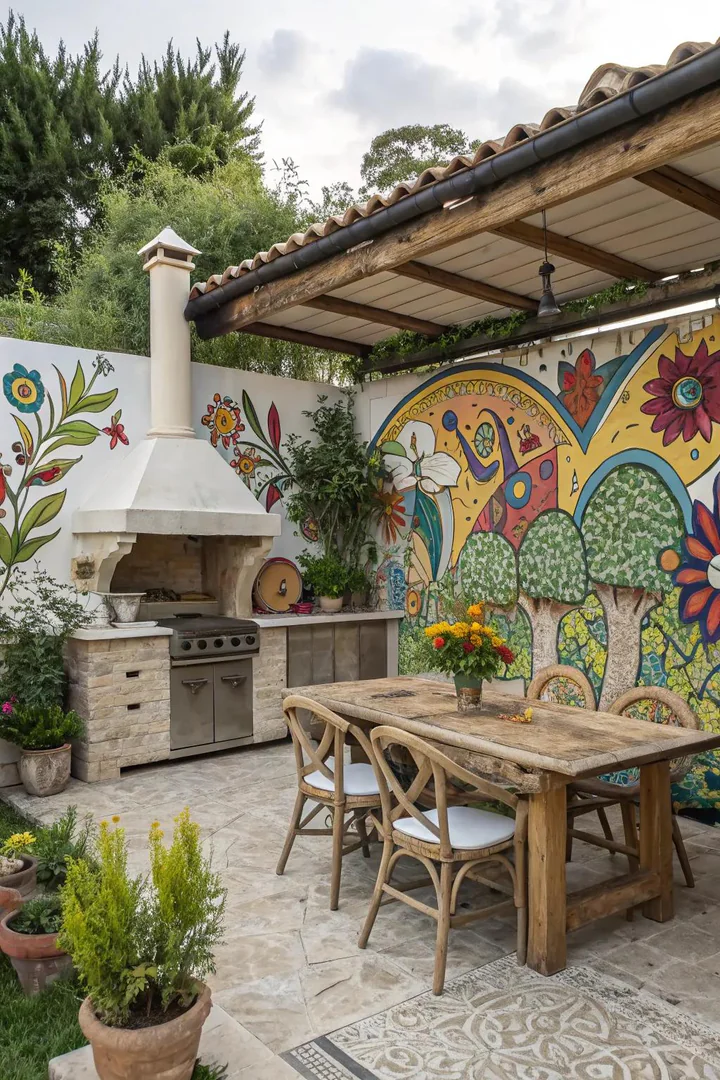
Adding a mosaic tile accent to the outdoor kitchen’s countertop edge, bar face, or backsplash introduces handcrafted artistic detail that elevates a simple block-and-stucco kitchen into a custom showpiece. Mexican Talavera tiles ($3 to $8 per 4-by-4-inch tile from Etsy or a specialty tile shop), hand-painted Moroccan zellige tiles ($10 to $25 per square foot), or broken-tile mosaic (free, using leftover tile pieces from other projects) create colorful, patterned accents on an otherwise neutral surface.
Apply mosaic tiles to the vertical face of the countertop overhang, the front panel of the grill surround, or a 6-by-18-inch backsplash strip behind the prep area. Use outdoor-rated thinset mortar ($12 per 25-pound bag from Mapei or Custom Building Products) and sanded grout ($10 per 10-pound bag) rated for exterior and freeze-thaw exposure. Seal the grout with Miracle Sealants 511 Impregnator ($15 per pint) to prevent moisture absorption and staining.
22. Warm Wood-Tone Finishes
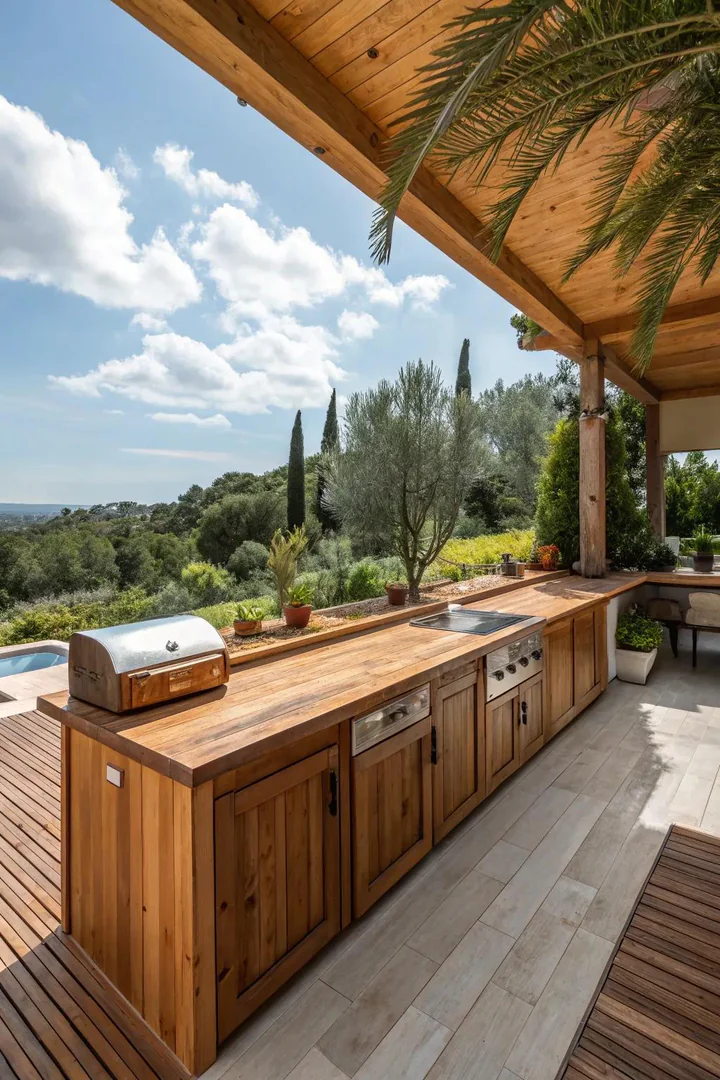
Wrapping the outdoor kitchen’s countertop, bar face, or cabinet doors in warm wood tones (teak, ipe, cedar, or composite wood planks) creates a spa-like, natural aesthetic that softens the industrial feel of stainless-steel appliances and concrete surfaces. Teak planks ($15 to $30 per square foot) resist rot, insects, and moisture without chemical treatment and weather to a silver-gray patina over 2 to 3 years if left unsealed.
Ipe (Brazilian walnut) planks ($10 to $20 per square foot) are the hardest and most durable exterior wood available, lasting 25 to 50 years in outdoor applications without rotting. Composite wood planks ($5 to $10 per square foot from Trex or TimberTech) mimic the look of natural wood with zero maintenance (no sealing, no staining, no sanding) and never rot, warp, or splinter. Attach wood planks to the outdoor kitchen base with stainless-steel screws ($10 per box) or hidden fastener clips ($20 per 50-clip bag) for a clean, screw-free surface.
23. Flow-Optimized Station Layout

Arranging the outdoor kitchen in a work-flow sequence (refrigerator/cooler on one end, prep counter in the middle, grill on the other end, with serving/dining adjacent to the grill) mirrors the indoor kitchen work triangle and reduces the cook’s walking distance during meal preparation. A linear 8-to-12-foot outdoor kitchen arranged in refrigerator-prep-grill order allows the cook to move ingredients from cold storage to prep surface to grill in a straight-line flow without backtracking.
An L-shaped outdoor kitchen (one arm for prep and storage, the other arm for the grill and serving) fits a patio corner and creates a natural social boundary: guests gather on the open side of the L while the cook works on the inside of the L with grill and prep surfaces within arm’s reach. Position the serving counter or bar top on the side of the kitchen facing the dining table or lounge area so plated food passes directly from the grill to the diners without the cook carrying plates around the kitchen. Visit polymer clay kitchen wall art ideas for decorative accents that add personality to outdoor kitchen walls, or browse the full library at The Designers Company.
How to Plan a Simple Outdoor Kitchen
1. Choose the Location Based on Wind, Sun, and Access
Position the grill downwind from the dining and seating area so smoke blows away from guests. Avoid placing the grill directly under low-hanging tree branches (fire hazard) or against a vinyl-sided wall (heat damage risk). Place the kitchen within 15 to 20 feet of the house for easy access to the indoor kitchen (carrying plates, utensils, and ingredients back and forth). A location near an outdoor electrical outlet powers lights, a refrigerator, and an electric grill without running extension cords.
2. Set a Budget and Material Plan
A starter outdoor kitchen (portable grill + rolling prep cart + string lights) costs $300 to $800. A mid-range outdoor kitchen (built grill surround + countertop + undercounter storage + pergola) costs $1,500 to $5,000. A high-end simple outdoor kitchen (prefab island + outdoor-rated refrigerator + sink + pergola + built-in seating) costs $5,000 to $10,000. Define the budget before selecting materials and appliances to prevent scope creep from turning a simple project into a $20,000 renovation.
3. Build in Phases Over Multiple Weekends
Start with the grill and a prep surface (weekend 1). Add a countertop surround and storage (weekend 2). Add a pergola or shade structure (weekend 3). Add lighting, seating, and decorative details (weekend 4). Building in phases spreads the cost over weeks or months and allows the cook to use the kitchen at each stage rather than waiting for a complete build before the first cookout.
Outdoor Kitchen Setup Cost Comparison
| Setup Type | Cost | Build Time | Permanence | Best For |
|---|---|---|---|---|
| Portable grill + cart | $300–$600 | 30 min | Fully portable | Renters, balconies |
| Modular cart system | $400–$2,400 | 1–2 hours | Movable | Flexibility seekers |
| DIY block surround | $400–$1,000 | 1 weekend | Semi-permanent | DIY homeowners |
| Prefab island | $2,500–$4,500 | 2–4 hours | Semi-permanent | Quick setup |
| Brick/stone custom build | $1,000–$5,000 | 2–3 weekends | Permanent | Long-term homeowners |
| Full covered patio kitchen | $3,000–$10,000 | 3–4 weekends | Permanent | Year-round cooking |
Frequently Asked Questions
Do you need a permit for a simple outdoor kitchen?
A portable or freestanding outdoor kitchen (rolling grill, modular cart system, freestanding island on a patio) typically requires no permit because no permanent structures are built and no utility connections are modified. A built outdoor kitchen with permanent gas plumbing, electrical wiring, or a new roof structure (pergola, patio cover) may require a building permit depending on local codes. Check with the local building department before running a new gas line, adding an electrical circuit, or building any roofed structure. A simple outdoor kitchen using a portable propane grill, extension cords for lights, and a garden-hose sink connection avoids all permit triggers.
How do you protect outdoor kitchen countertops from weather?
Granite, porcelain, and sintered stone countertops resist all weather conditions without covers or treatment. Concrete countertops require annual sealing with a penetrating concrete sealer to prevent water absorption and freeze-thaw cracking. Wood countertops (butcher block, live-edge slabs) require a marine-grade exterior sealant (spar urethane, $15 per quart) applied annually. A fitted countertop cover ($30 to $60 for a custom-cut vinyl or canvas cover from CoverMates) protects any countertop material from prolonged rain, snow, tree sap, and bird droppings when the kitchen is not in use.
What is the cheapest way to build an outdoor kitchen?
A concrete-block grill surround ($100 to $200 in blocks and adhesive) with a concrete-paver countertop ($20 to $40 in pavers) and a portable gas grill ($120 to $550 depending on size) creates a built-in-look outdoor kitchen for $240 to $800. Skip the stucco or stone veneer finish to save $100 to $300; painted or bare concrete blocks function identically and can be veneered later when budget allows. A pallet-wood prep table ($0 to $50 in pallets plus $20 in sealant) adds a prep surface for under $70.
Can you build an outdoor kitchen on a wooden deck?
A lightweight outdoor kitchen (rolling cart, portable grill, modular system) can sit on a standard residential deck without structural modifications. A heavy built outdoor kitchen (concrete-block surround with stone countertop, 500 to 1,500 pounds total) requires verifying that the deck framing (joists, beams, posts, footings) supports the concentrated load. Consult a structural engineer ($200 to $400 for a deck load assessment) before placing heavy masonry on a wood-framed deck. Place a grill mat ($20 to $40 for a 36-by-48-inch fireproof mat from GrillBee) under any grill on a wood deck to protect the decking from grease drips and ember sparks.
What outdoor kitchen appliances are worth the investment?
A quality gas grill ($450 to $1,200 from Weber, Napoleon, or Bull) is the single most-used and most-important outdoor kitchen appliance. An outdoor-rated refrigerator ($800 to $1,500) eliminates the back-and-forth trips to the indoor kitchen for cold ingredients and beverages. An outdoor sink with a garden-hose connection ($100 to $300) provides a hand-wash and food-rinse station that improves food safety and convenience. A side burner ($100 to $300 built-in or $50 to $100 portable) heats sauces, boils corn, and simmers beans while the grill handles the main course.

